


Back up and restore container applications in a vSphere Kubernetes Service cluster using NetApp Console

 Suggest changes

 PDFs
PDFs
Back up and restore container applications in a vSphere Kubernetes Service (VKS) cluster using NetApp Console. This procedure covers creating and managing backup and restore operations through the NetApp Backup and Recovery Service in NetApp Console.
The examples cover the following two backup and restore scenarios:
-
Backup and restore using ONTAP S3 object storage as the backup target (disk-to-object workflow).
-
Backup and restore using ONTAP as the backup target (disk-to-disk workflow).

|
Backup and restore using a 3-2-1 fanout policy (disk-to-disk and disk-to-object workflows) is not currently supported for VKS workloads. |
NetApp Console provides centralized management of storage and data services across on-premises and cloud environments. It delivers unified control, operational simplicity, and secure management. Several data services and management features can be accessed from the user interface at console.netapp.com. For complete details about NetApp Console, see NetApp Console documentation.
This section focuses on the NetApp Backup and Recovery data service for Kubernetes workloads, specifically container applications on vSphere Kubernetes Service clusters. The NetApp Backup and Recovery Service enables you to discover, manage, create, and associate protection policies with your Kubernetes applications using a single interface. For a complete guide, see NetApp Backup and Recovery documentation.
|
|
This procedure assumes that you have already deployed a Console agent in the environment where your VKS cluster is running. Ensure that the agent is properly registered and visible in NetApp Console before proceeding with backup and restore operations. |
Backup and Recovery workflow
-
Ensure you have a Console agent
Ensure you have a Console agent deployed in the environment where your VKS cluster is running. For details about installing a Console agent, see the NetApp Console Setup documentation.
Show example
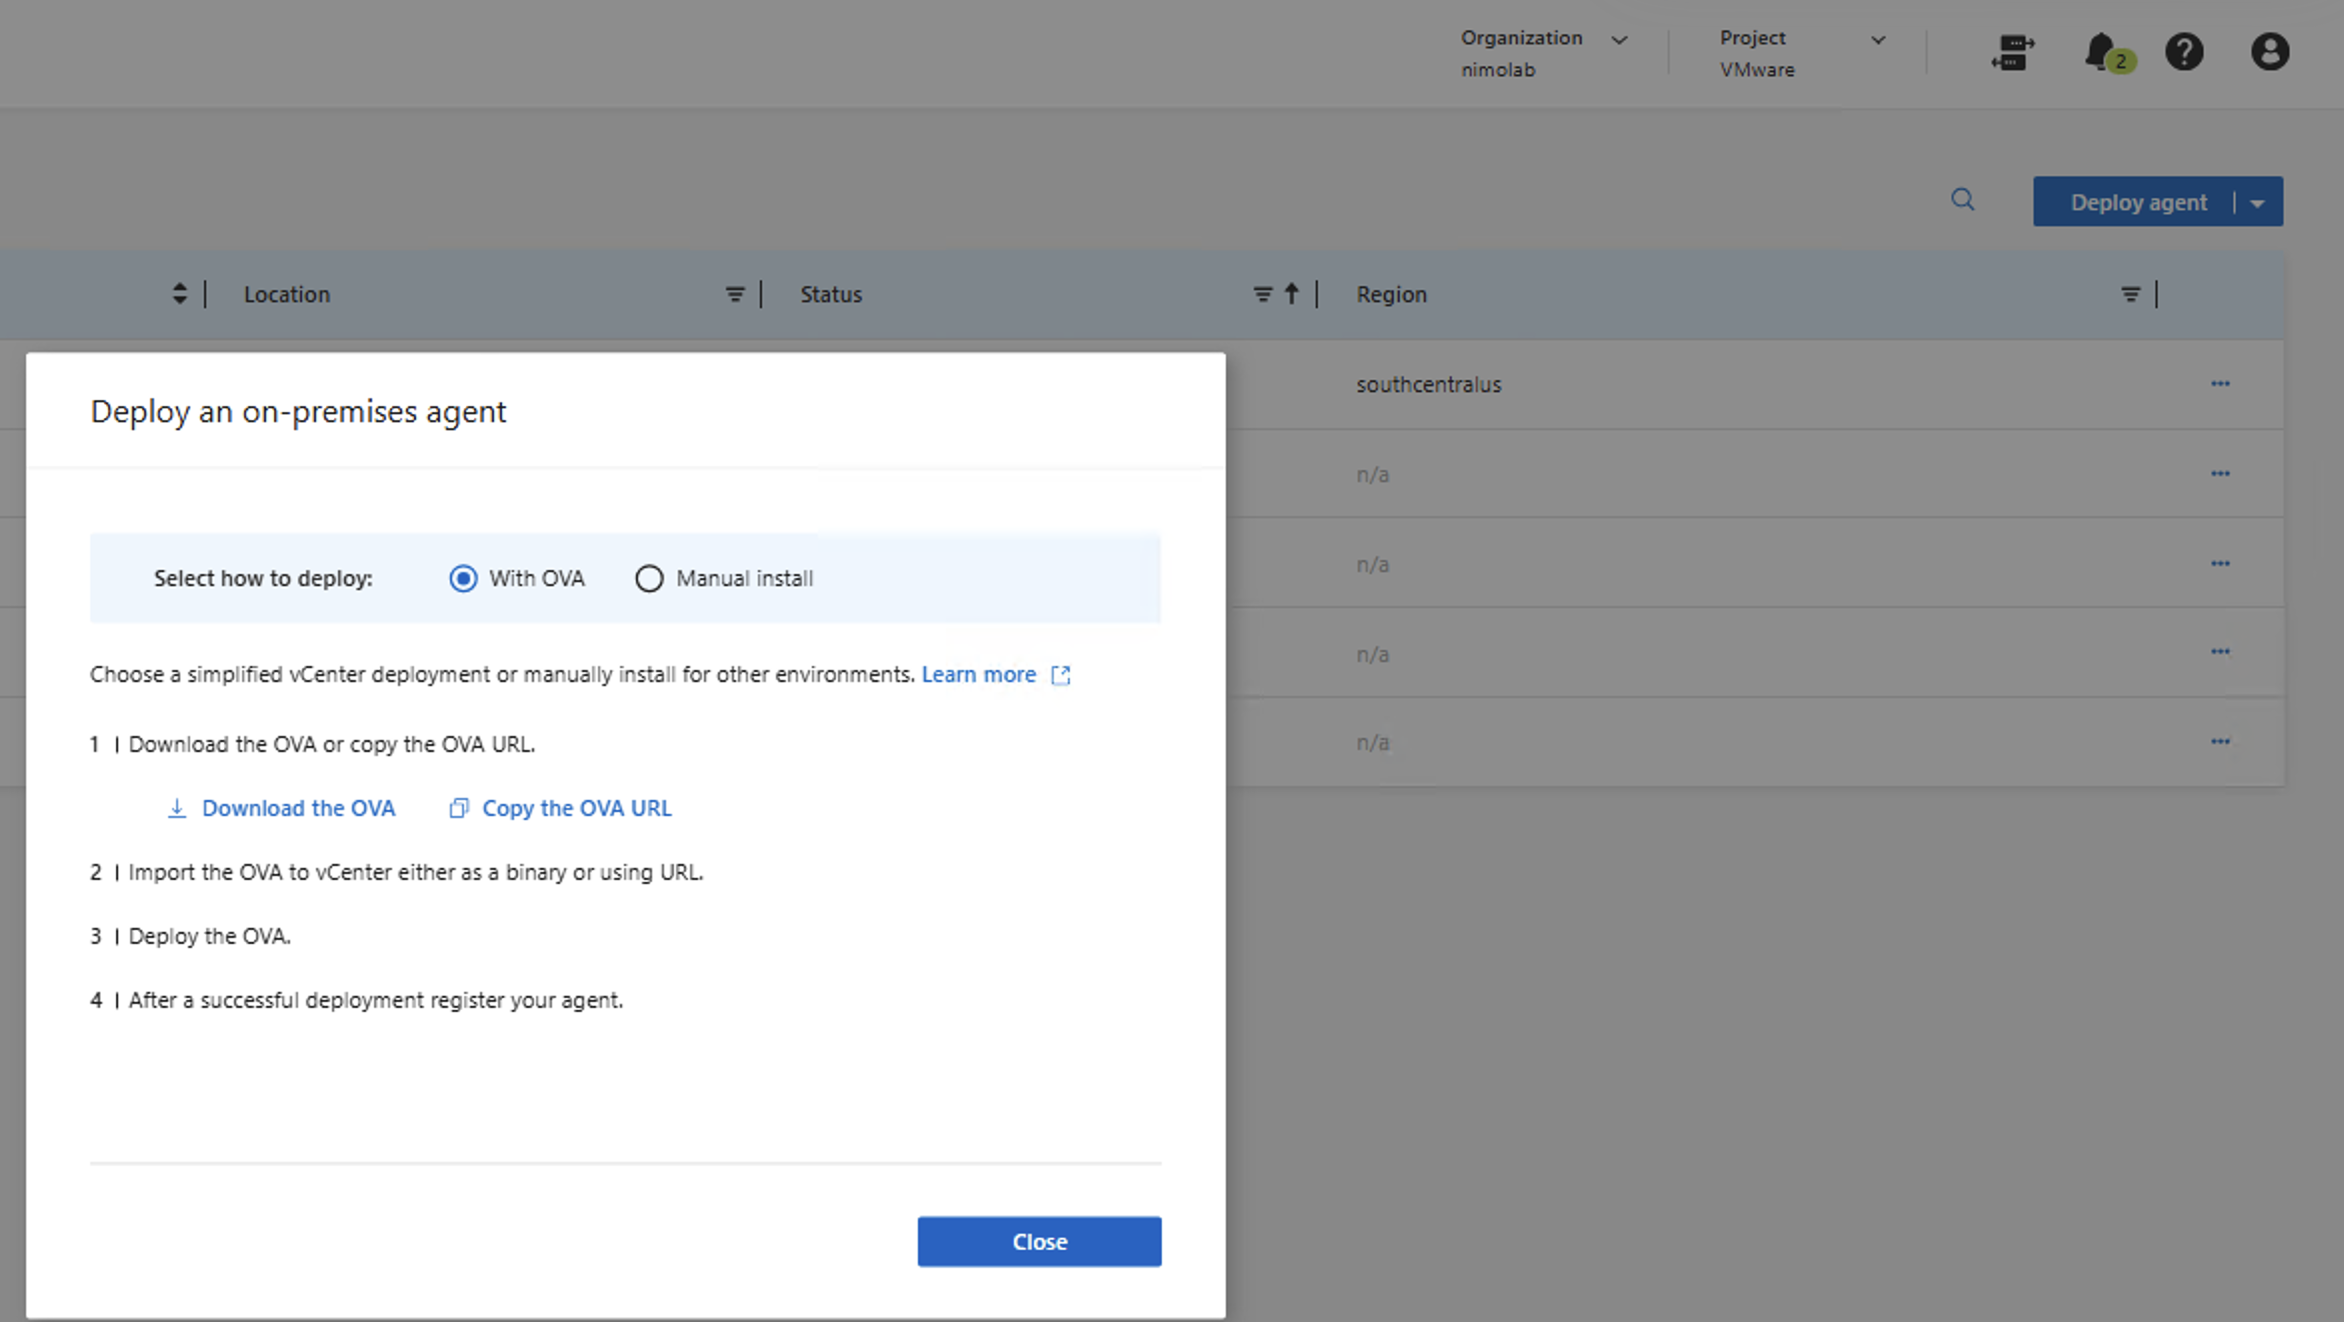
In NetApp Console, click Deploy Agent as shown in the screenshot, and deploy the agent in the environment where the VKS cluster is running.
In this example, select On-Premises > With OVA, copy the OVA URL, and use that URL in vCenter to deploy the Console agent.
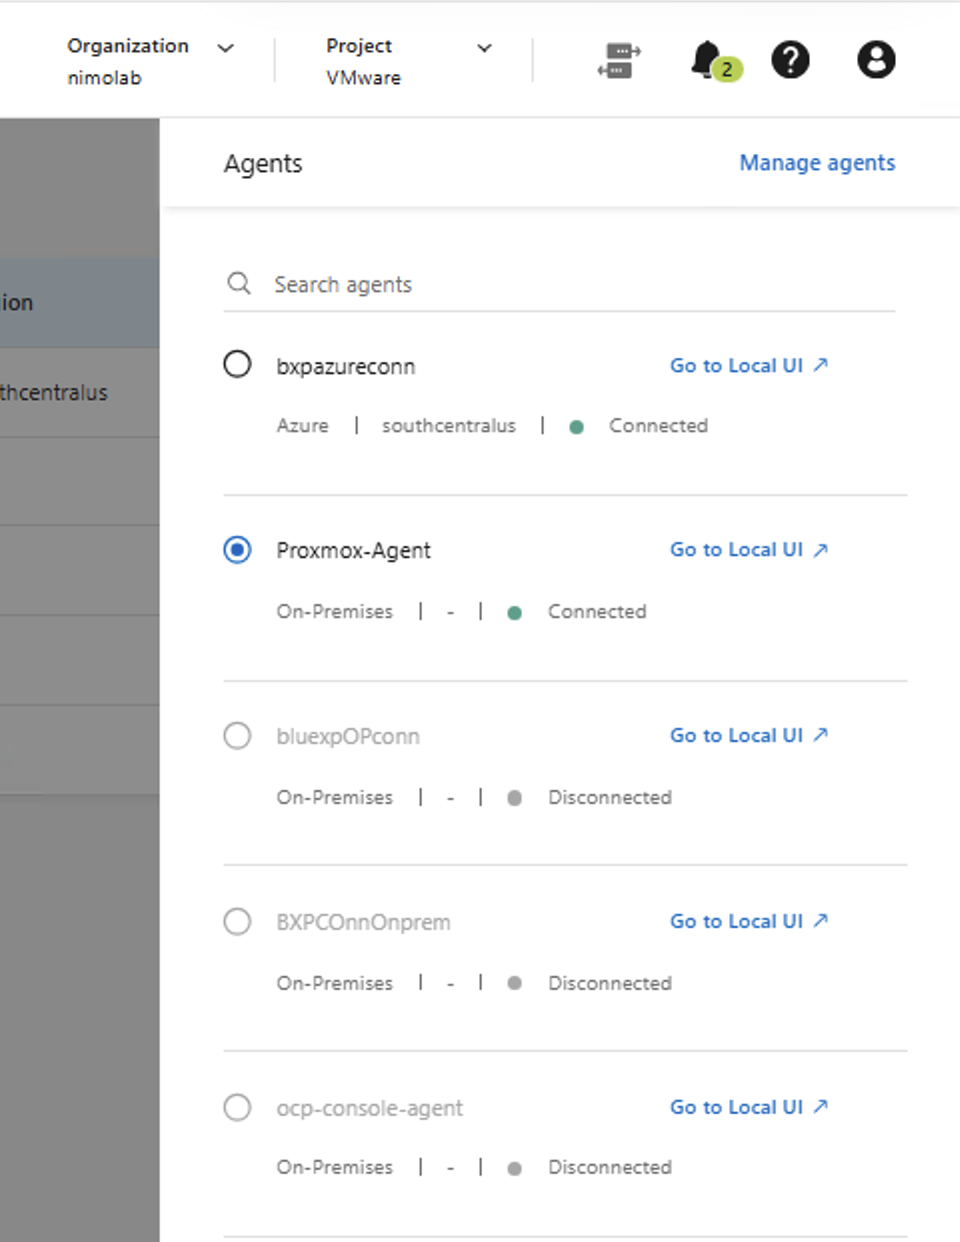
Register it using the IP address of the agent in the URL. See the documentation for detailed instructions. After the agent is registered, you can see it in NetApp Console as shown in the screenshot below.
-
Add the ONTAP cluster to NetApp Console and enable Backup and Recovery
The primary ONTAP cluster must be added to NetApp Console and the Backup and Recovery service enabled on it before workloads can be protected. For instructions, see Set up NetApp Backup and Recovery.
-
In NetApp Console, discover the vSphere Kubernetes cluster
Show example
This step requires the vSphere Kubernetes cluster to be running and the Console agent to be deployed in the same environment.
Follow these steps to discover the vSphere Kubernetes cluster in NetApp Console.
-
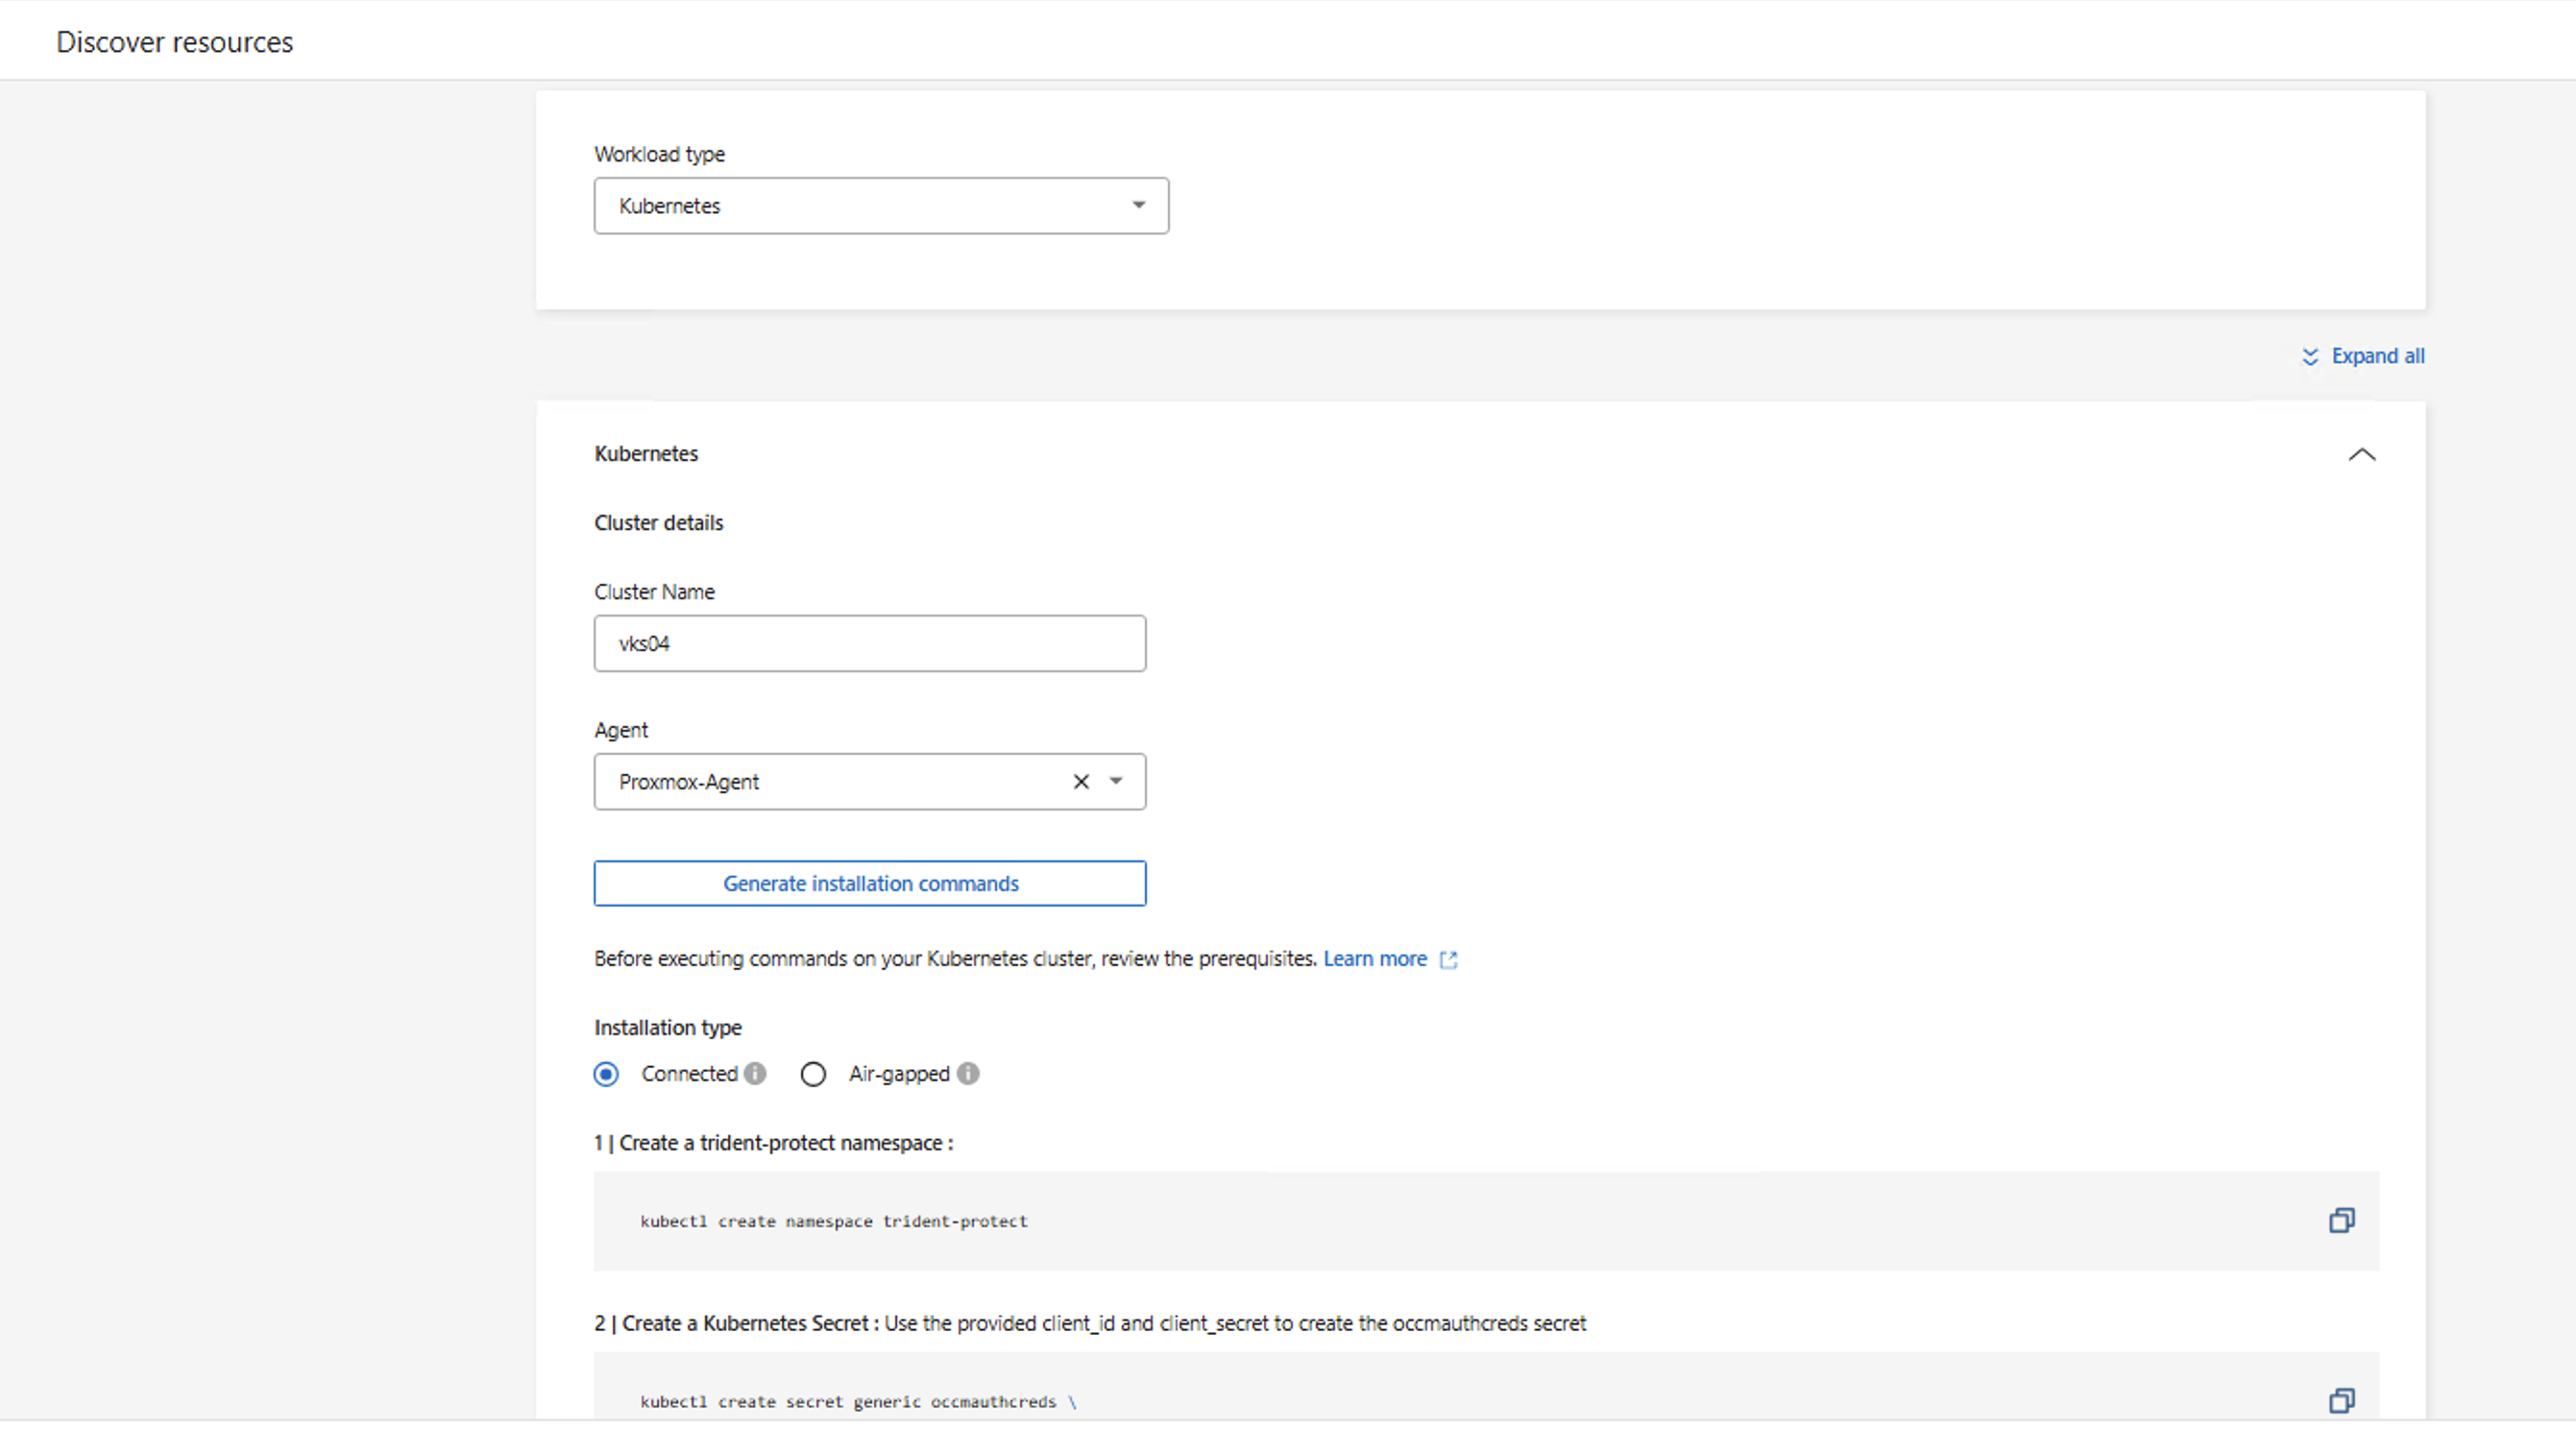
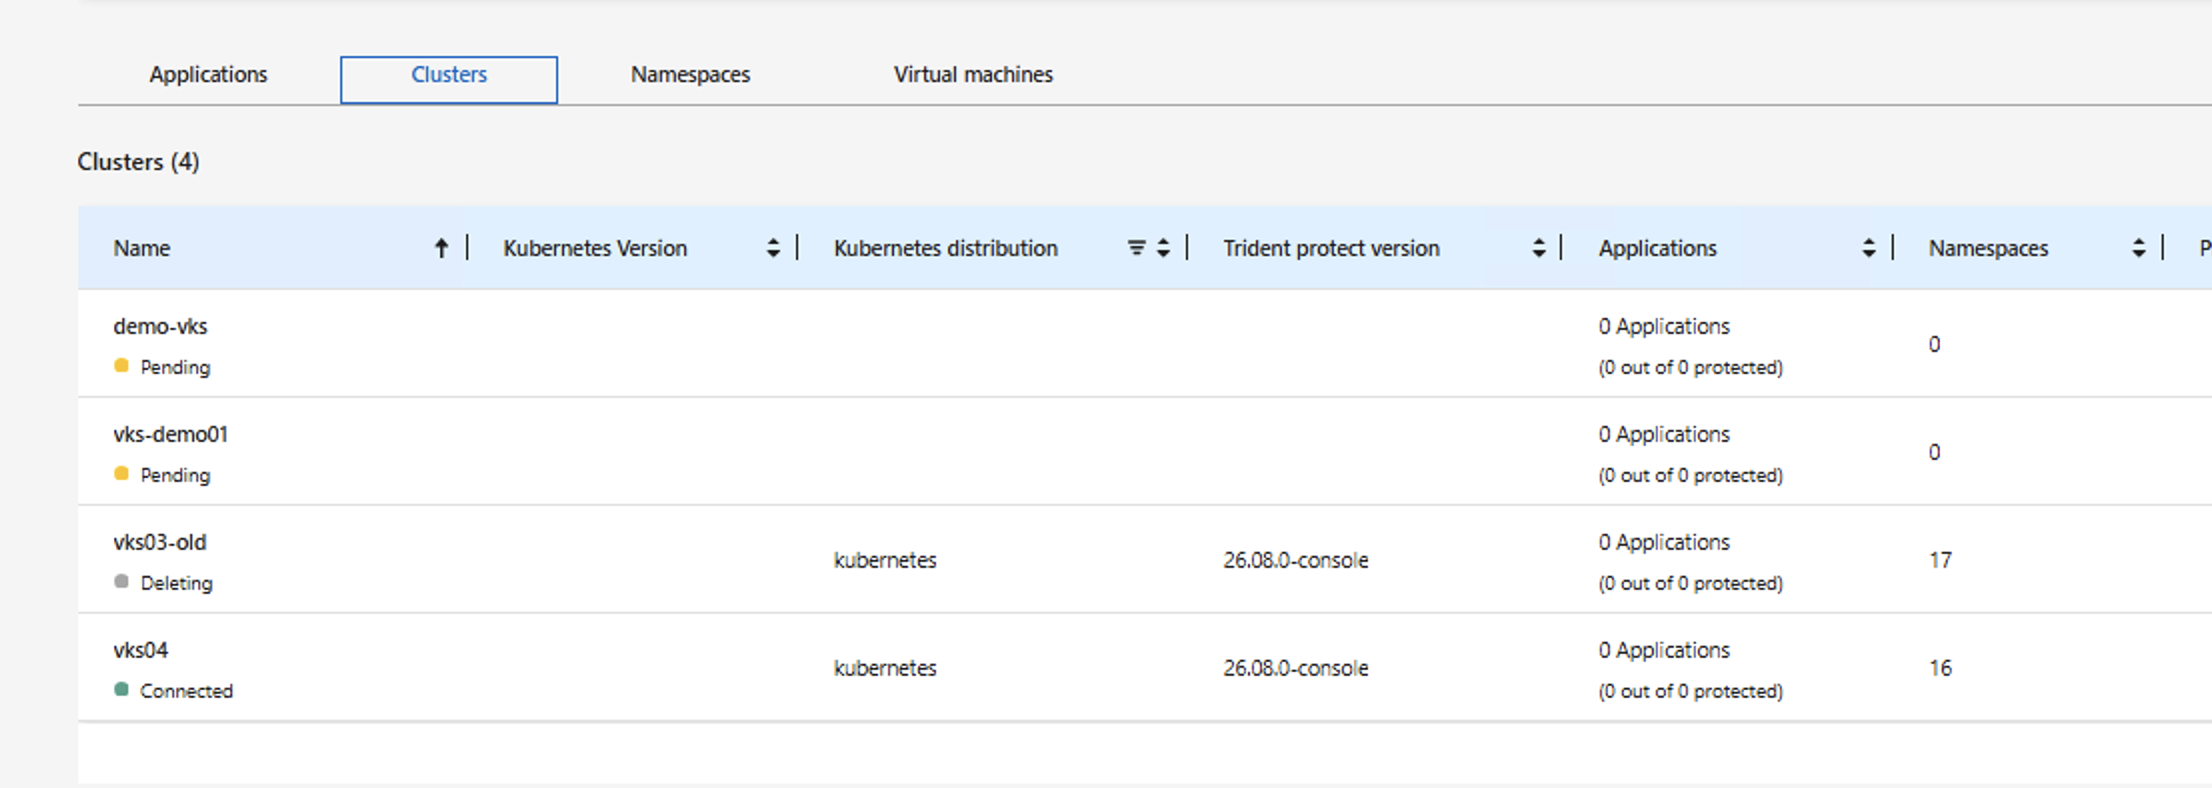
In NetApp Console, select Inventory > Kubernetes and provide the details of the vSphere Kubernetes cluster.
-
Select the agent deployed in the same environment where the vSphere Kubernetes cluster is located.
-
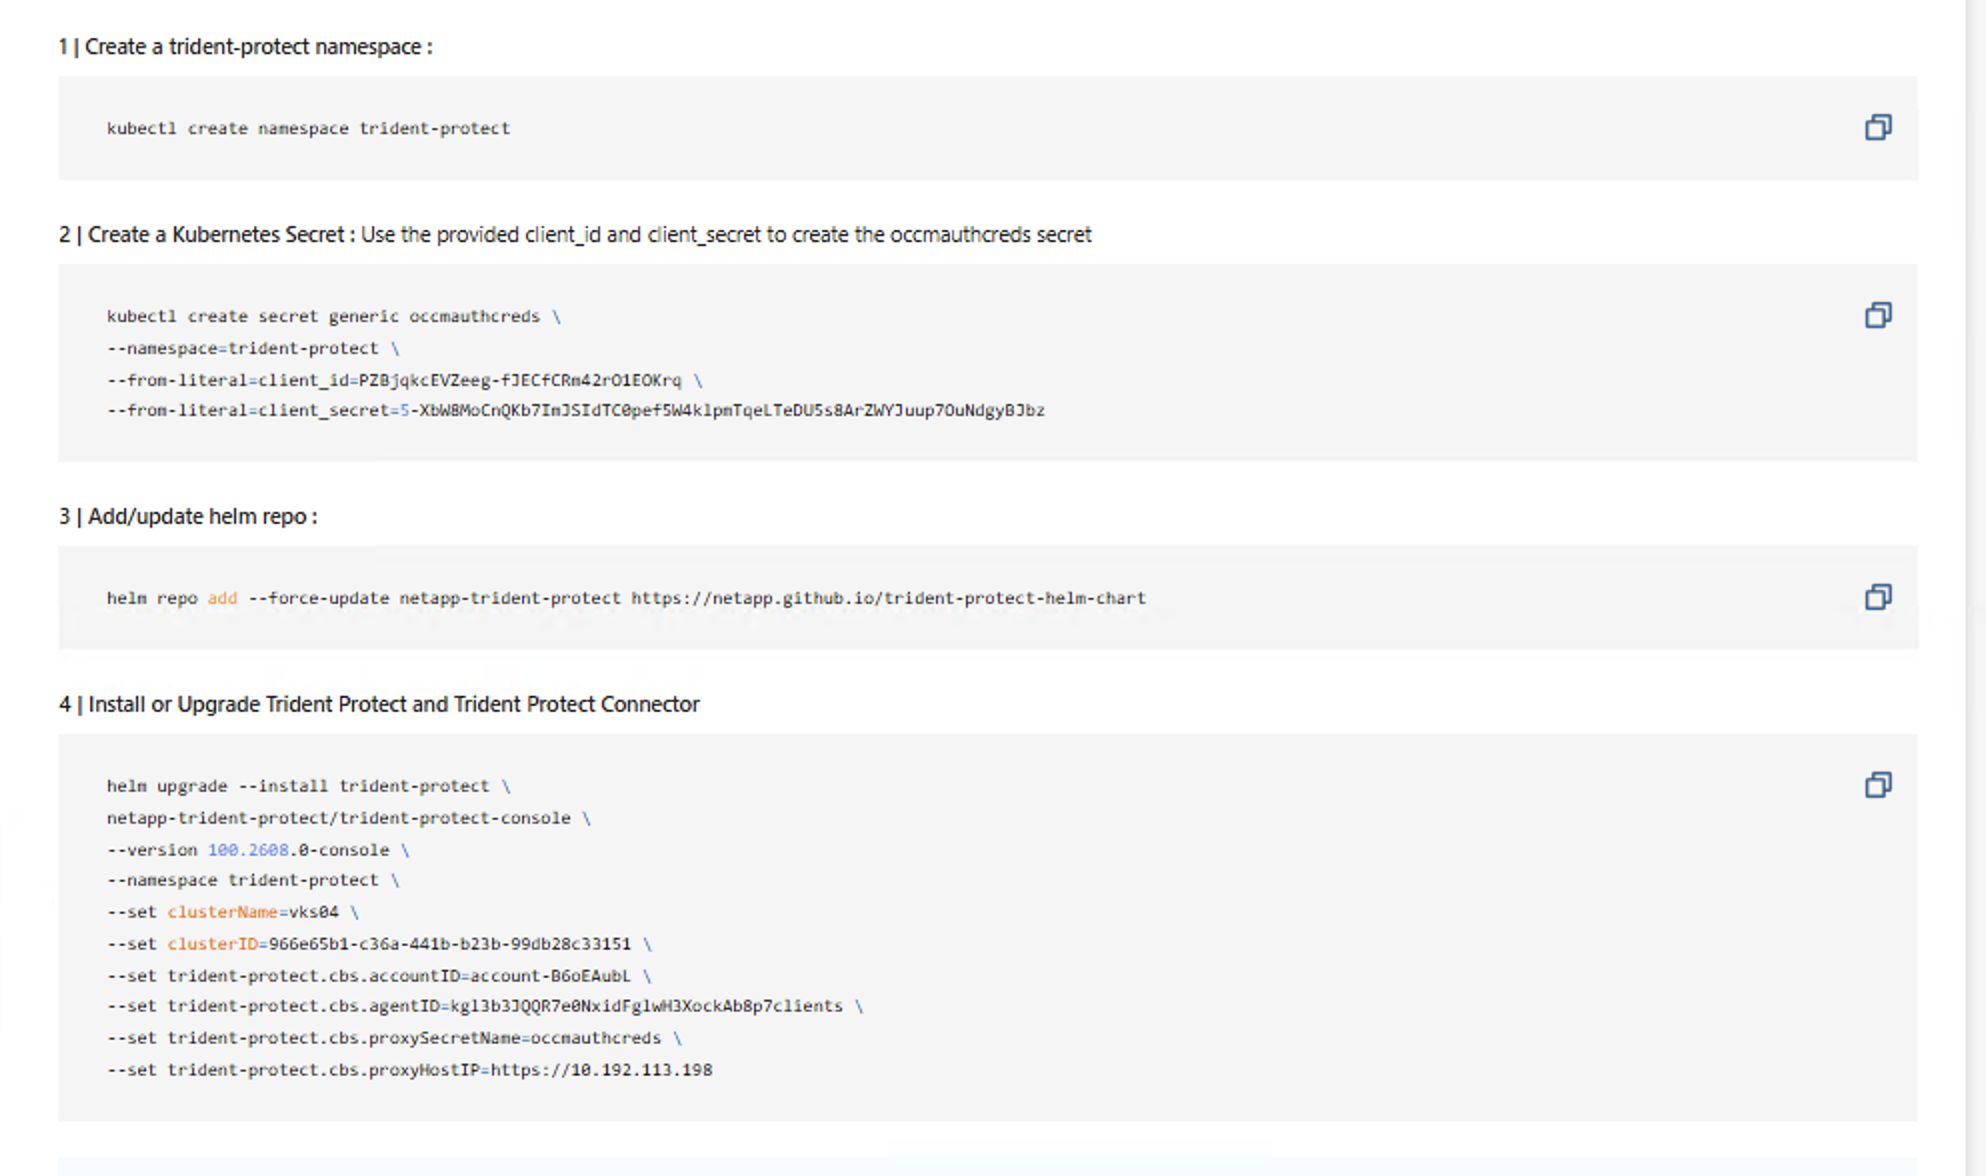
Copy the provided commands to install Trident Protect and run them from a machine that is connected to your vSphere Kubernetes cluster.
-
After Trident Protect is successfully installed, click Discover. NetApp Console discovers the vSphere Kubernetes cluster and all its resources through the agent and populates them in the UI.

-
-
Set up ONTAP S3 as a backup target
In this example, ONTAP S3 object storage is used as the backup target. You can also use AWS S3, Azure Blob, Google Cloud Storage, or StorageGRID as backup targets.
For additional details, review NetApp Console documentation.
To add ONTAP S3 as a backup target in NetApp Console, you need the following information from your ONTAP cluster.
S3 Endpoint:
Access Key:
Secret Key:
Bucket Name:
To get these values, do the following in your ONTAP cluster using System Manager.
-
Create an S3-enabled SVM in the ONTAP cluster to store the backup data. Note the S3 endpoint URL for this SVM.
-
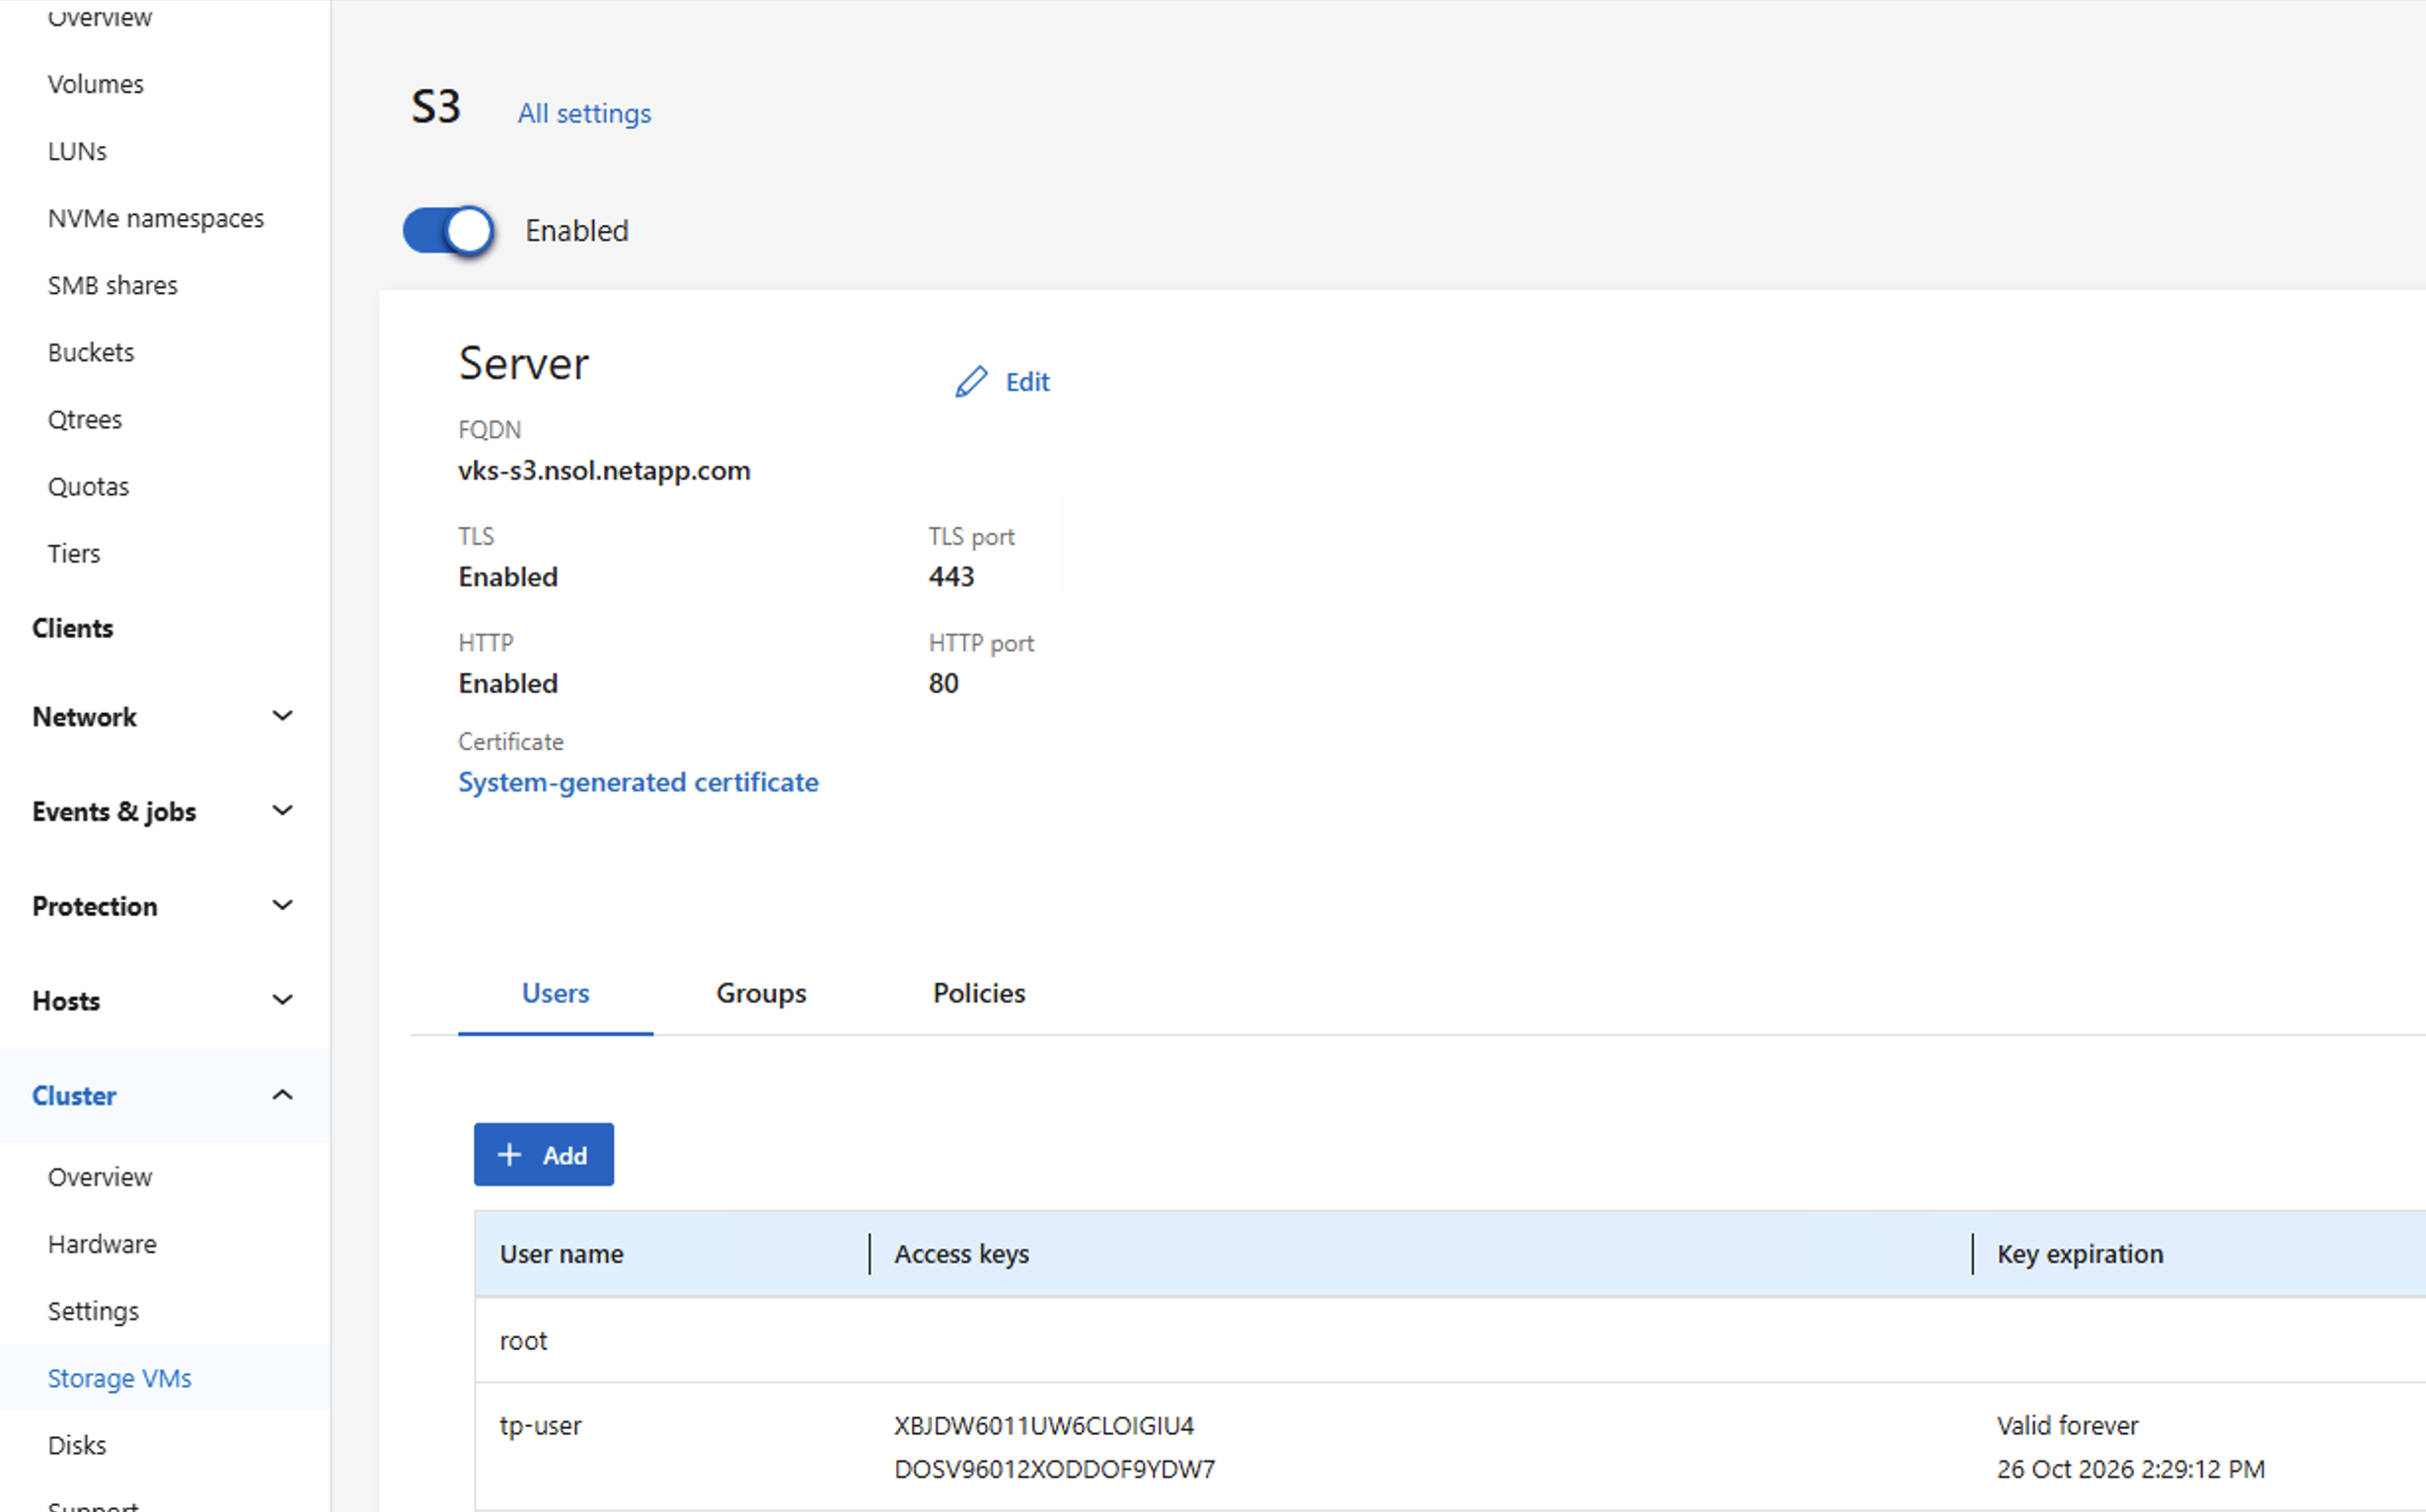
In the S3 settings of the SVM, create a user and assign the required access. Note the access key and secret key for this user.
Trident Protect requires the S3 user to have at least PutObject,GetObject,ListBucket, andDeleteObjectpermissions. Without these permissions, AppVault backup and restore operations fail with access-denied errors. For details, see Trident Protect AppVault documentation.Show example
-
Create an S3 user and download the access key and secret key
-
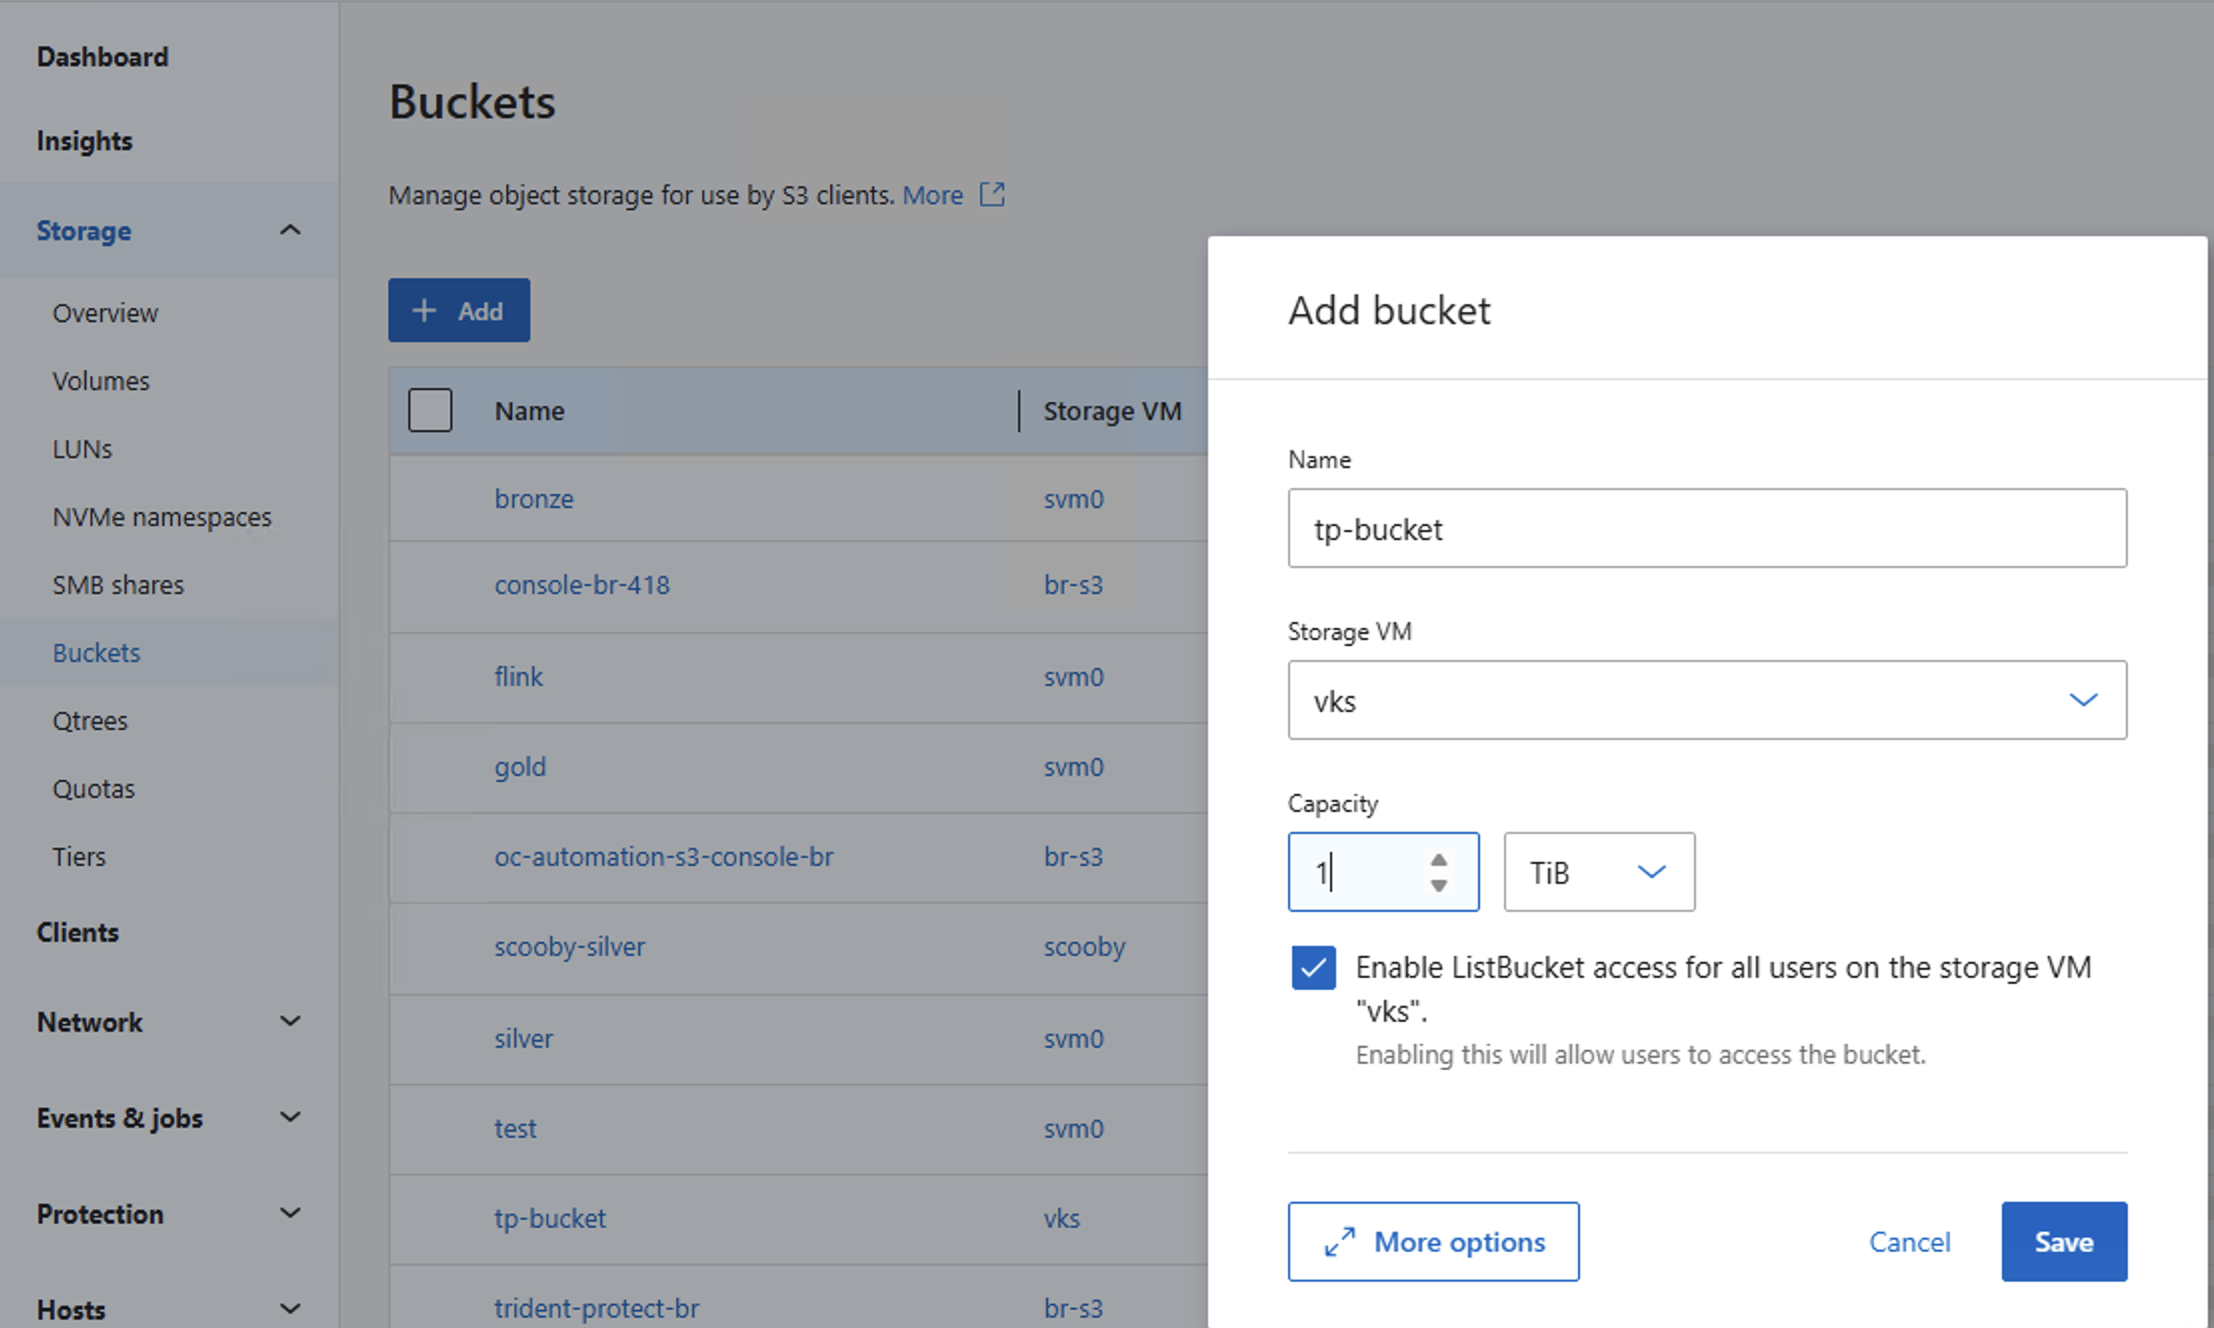
Create a bucket in the S3-enabled SVM. Note the bucket name to use when adding the ONTAP S3 object storage as a backup target in NetApp Console.
-
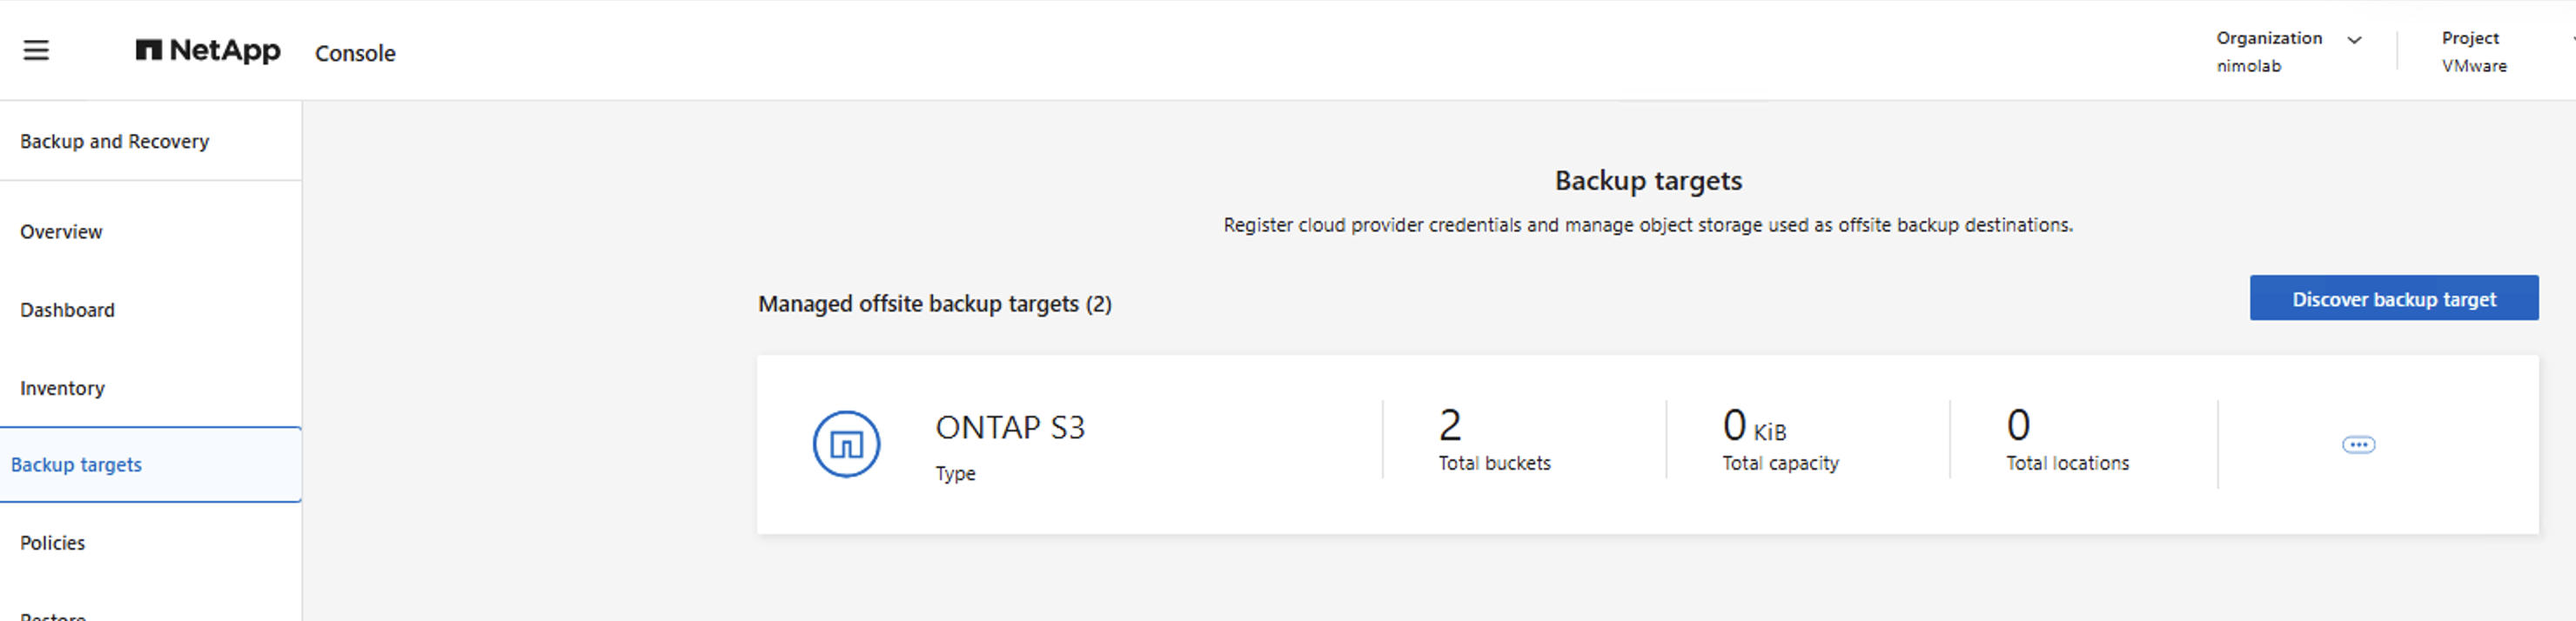
Add the ONTAP S3 object storage as a backup target in NetApp Console using the S3 endpoint, access key, secret key, and bucket name.
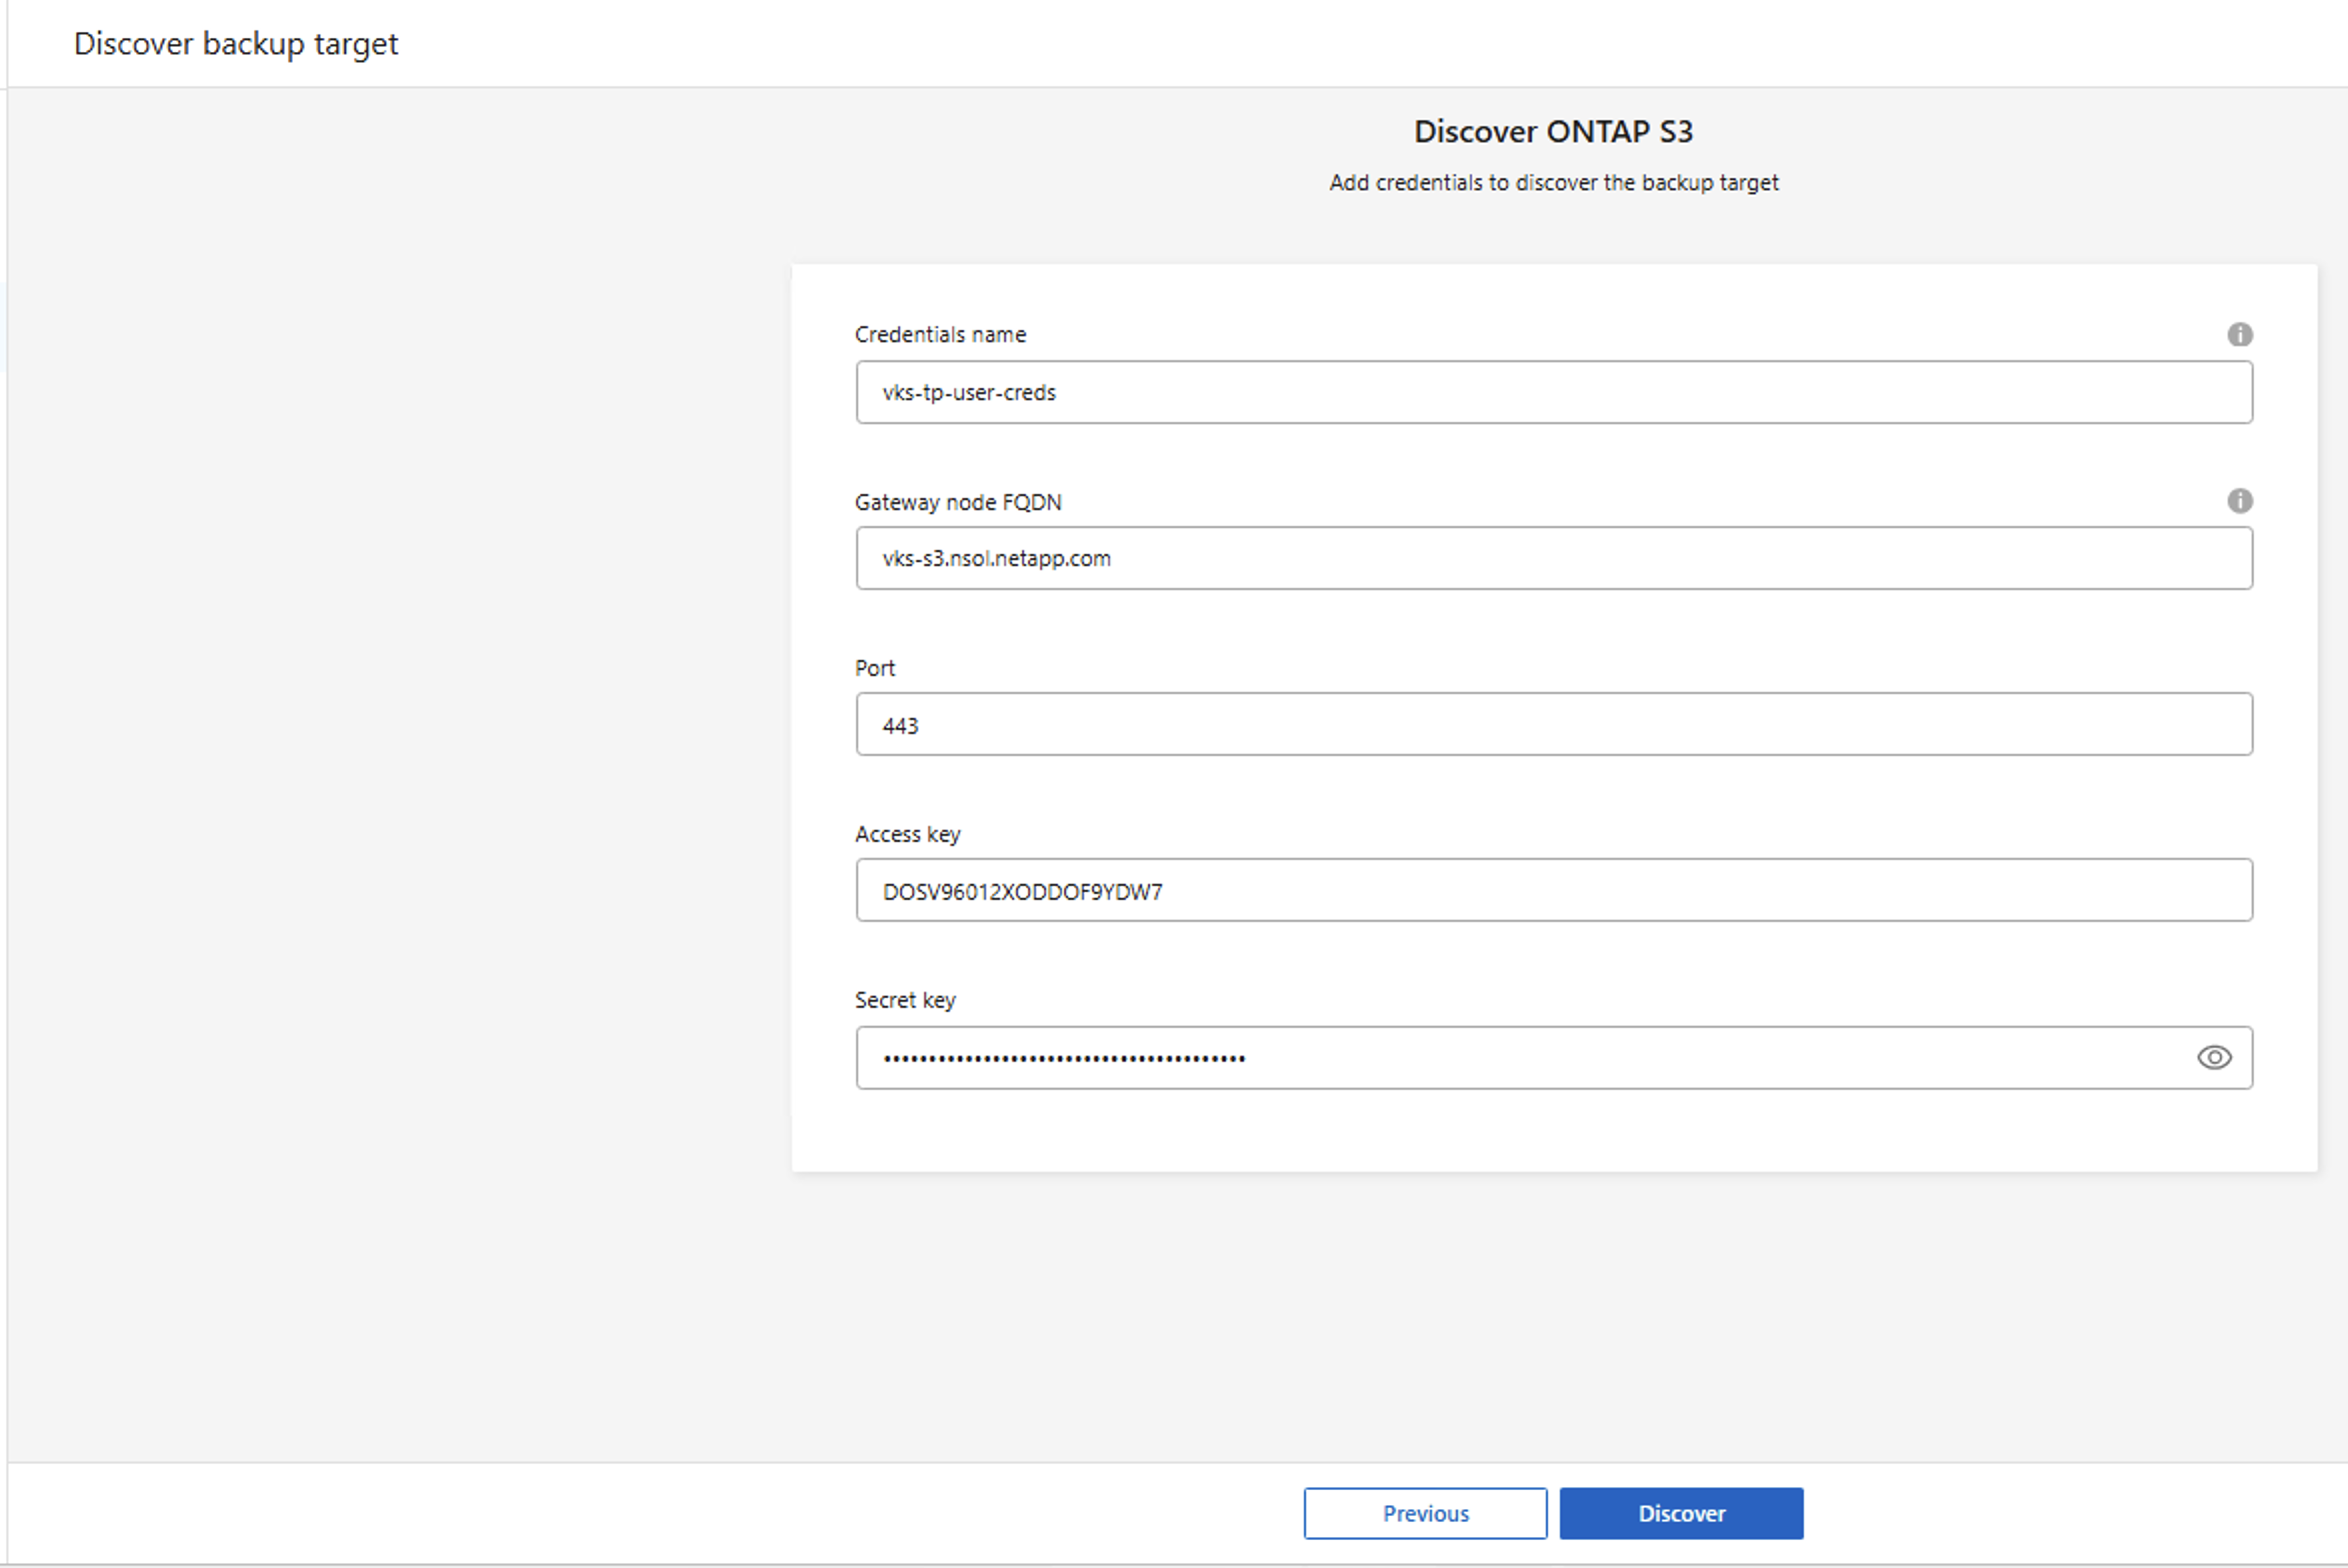
-
-
-
In NetApp Console, create an application for the container workloads and protect it using backups
You need the Backup and Recovery super admin or Backup and Recovery backup admin role to create and protect a Kubernetes application. To restore a Kubernetes application, you need the Backup and Recovery super admin or Backup and Recovery restore admin role. Show example: Create an application for container workloads
In this step, create an application in NetApp Console for the container applications in your vSphere Kubernetes cluster that need to be protected. You can use namespaces to create an application to protect all the container applications in a namespace in the vSphere Kubernetes cluster.
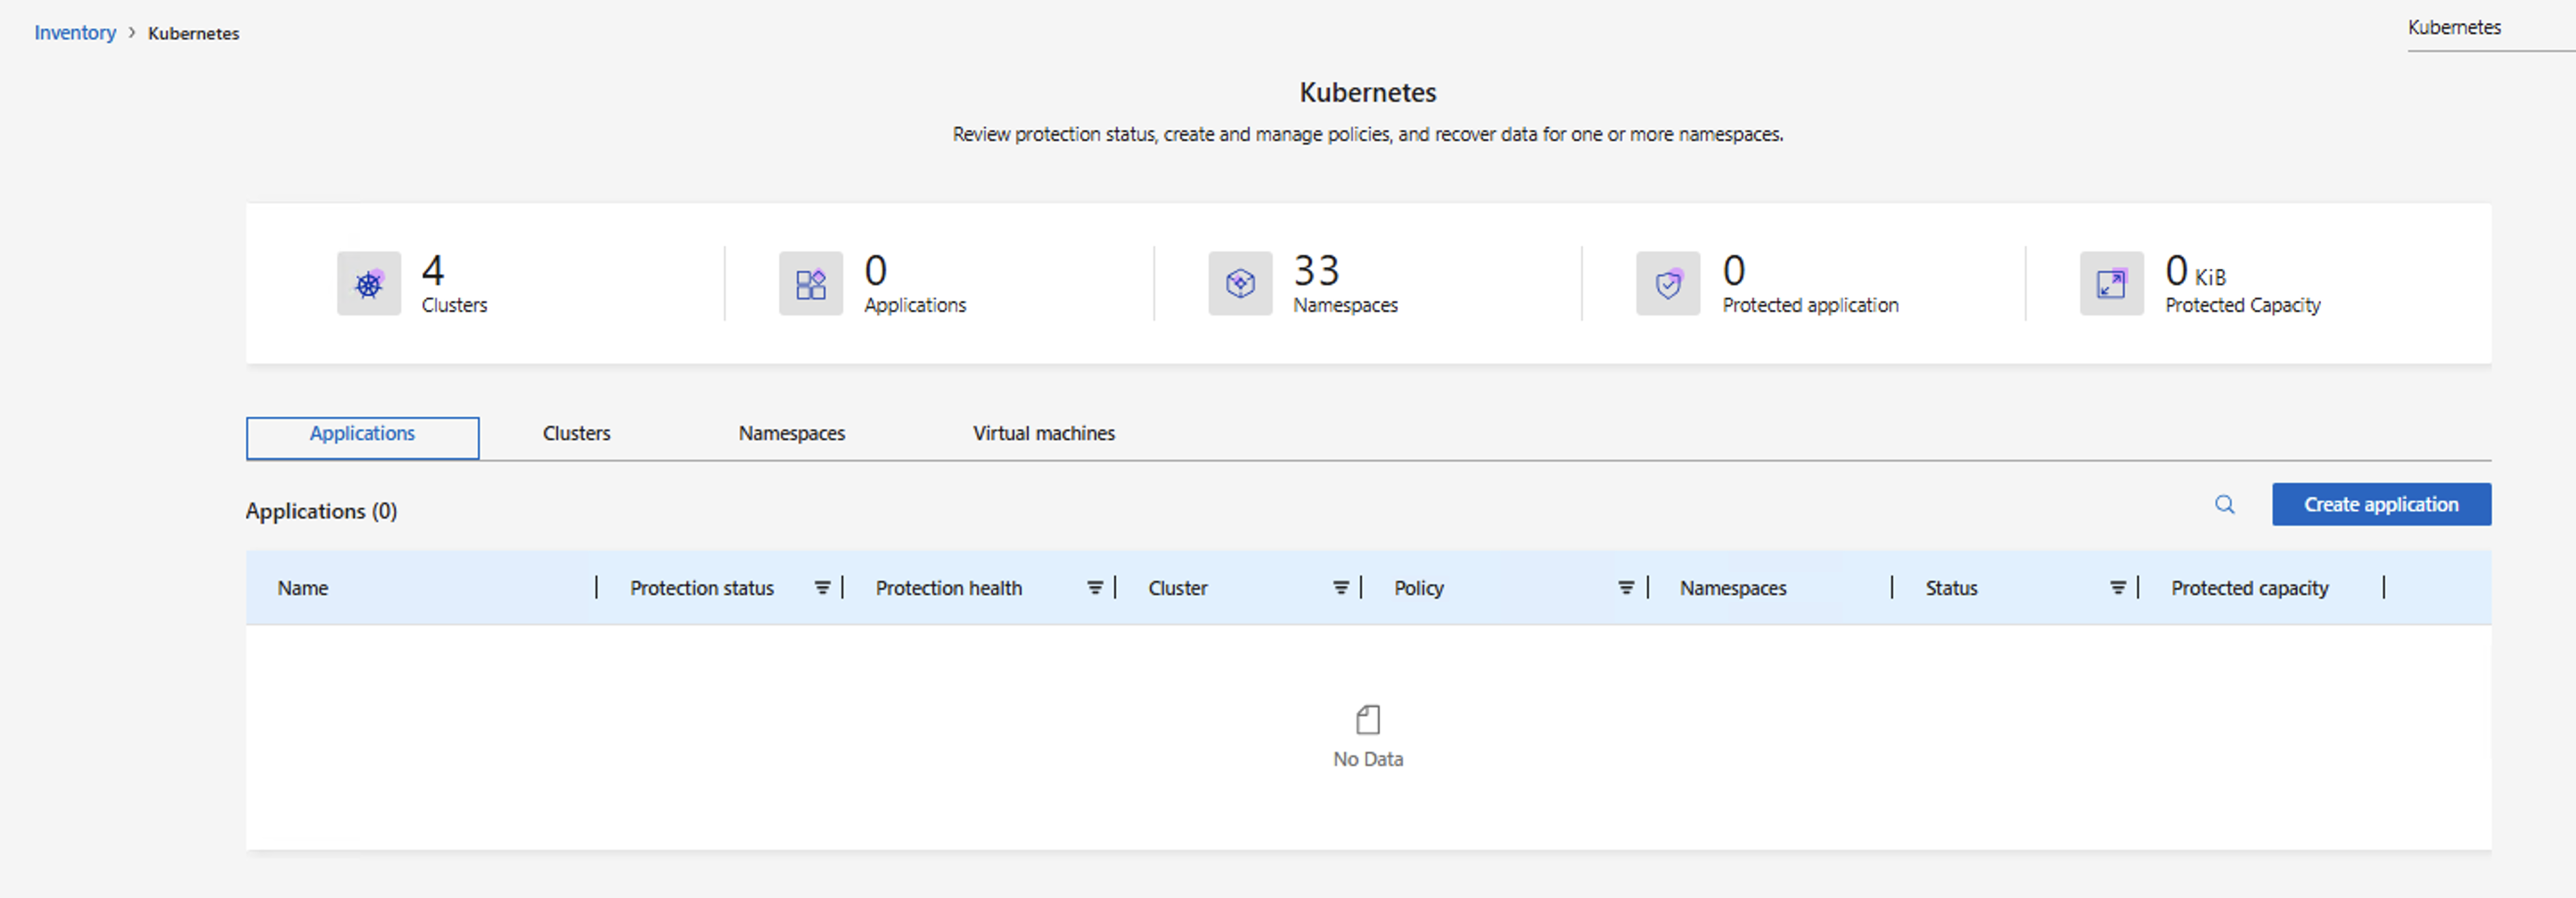
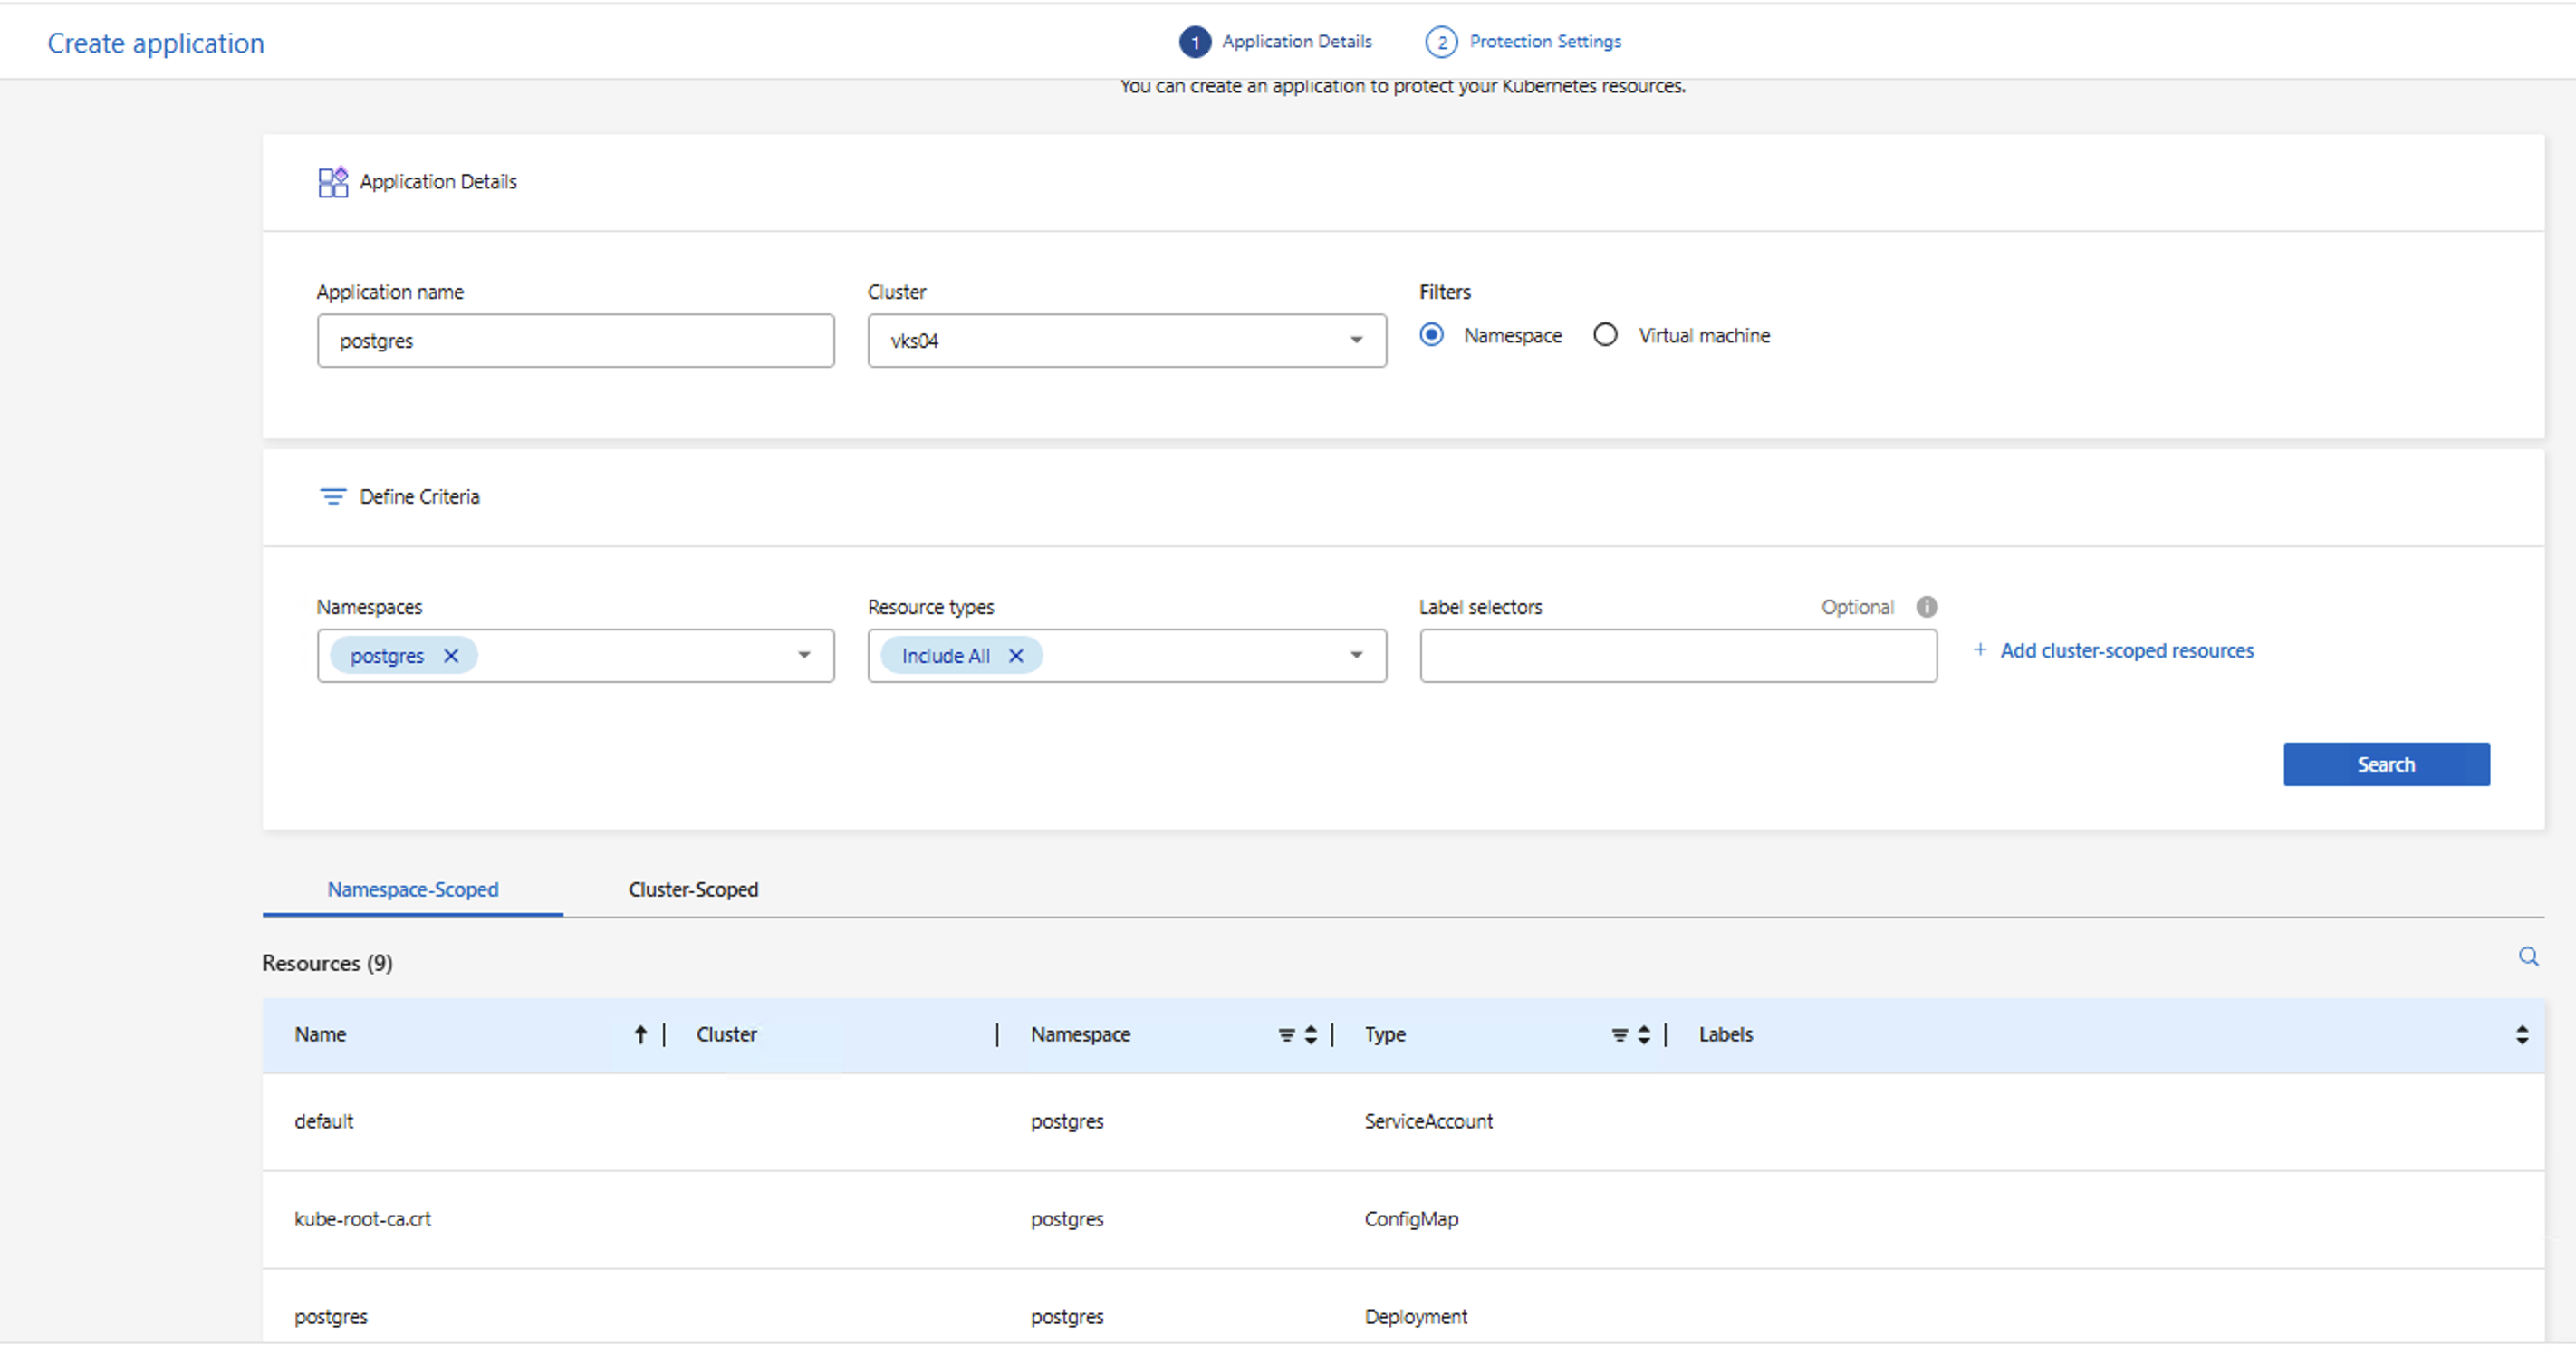
Provide application details and define criteria for the application. In this example, the application is created for all container applications in a namespace in the vSphere Kubernetes cluster. Click Search to see the list of namespace-scoped resources that are part of the application. Click Next to proceed.
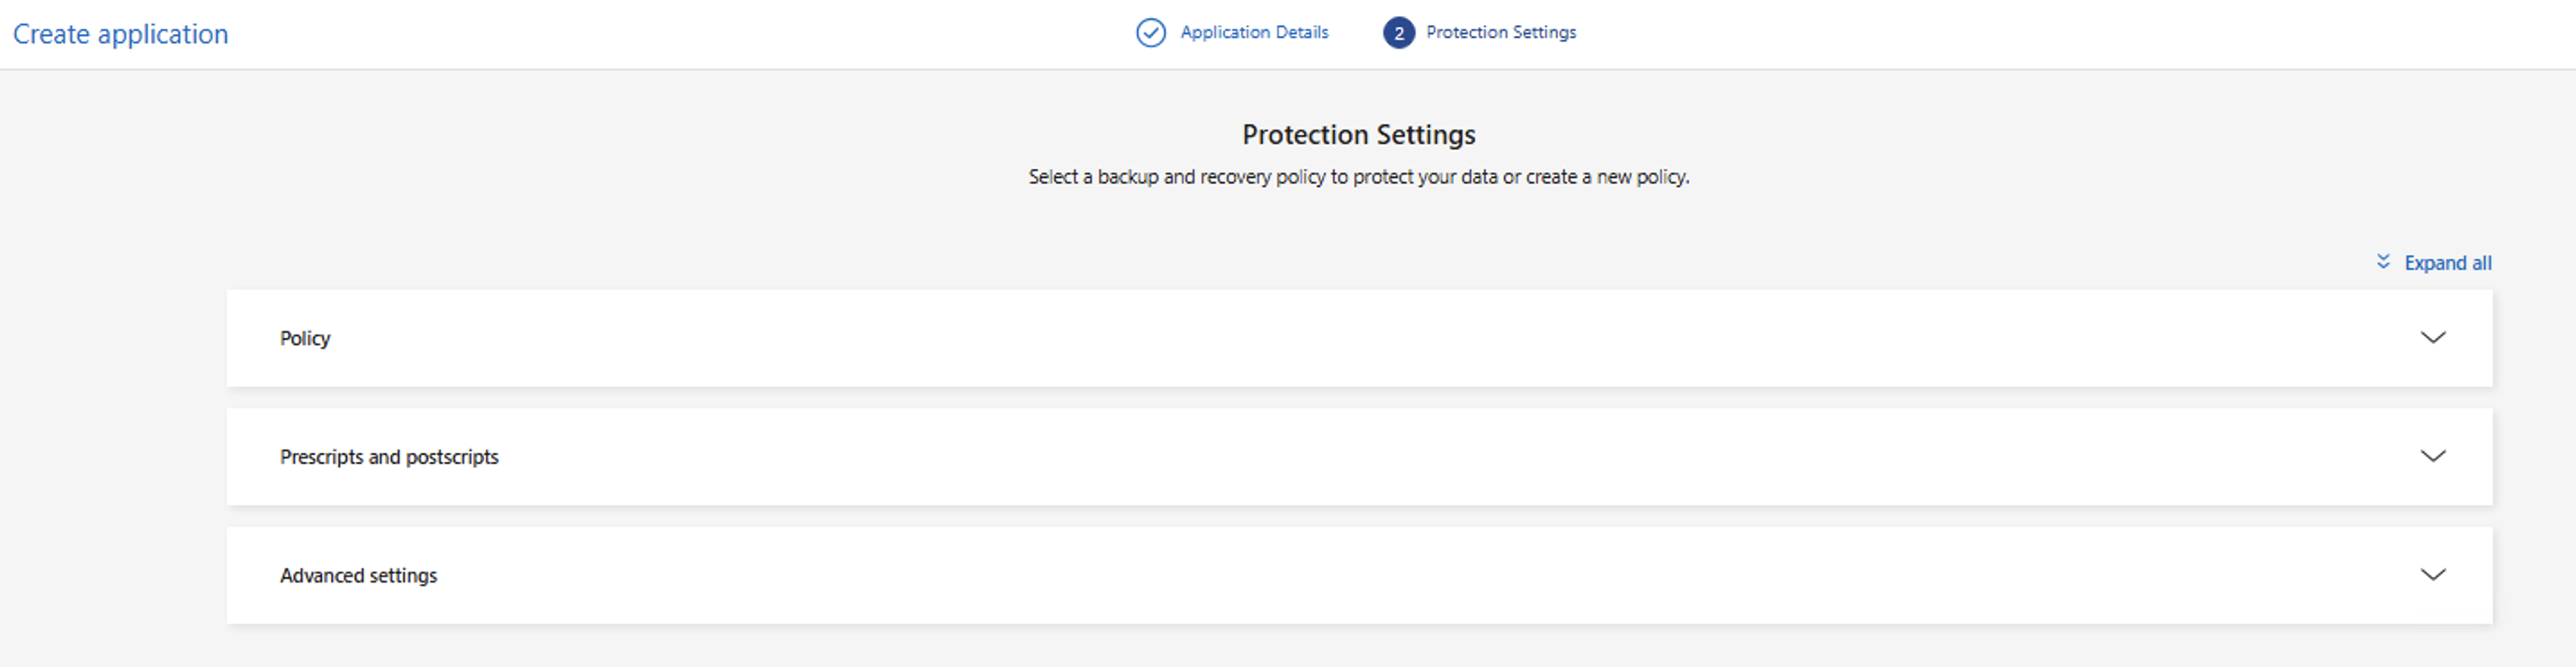
Next, you need to provide the protection settings for the application. You can create a new protection policy or use an existing one. In this example, a new protection policy is created for the application and associated with it. Expand Policy and click Create new policy.
Show example: Create a protection policy using the Disk to Object Storage architecture
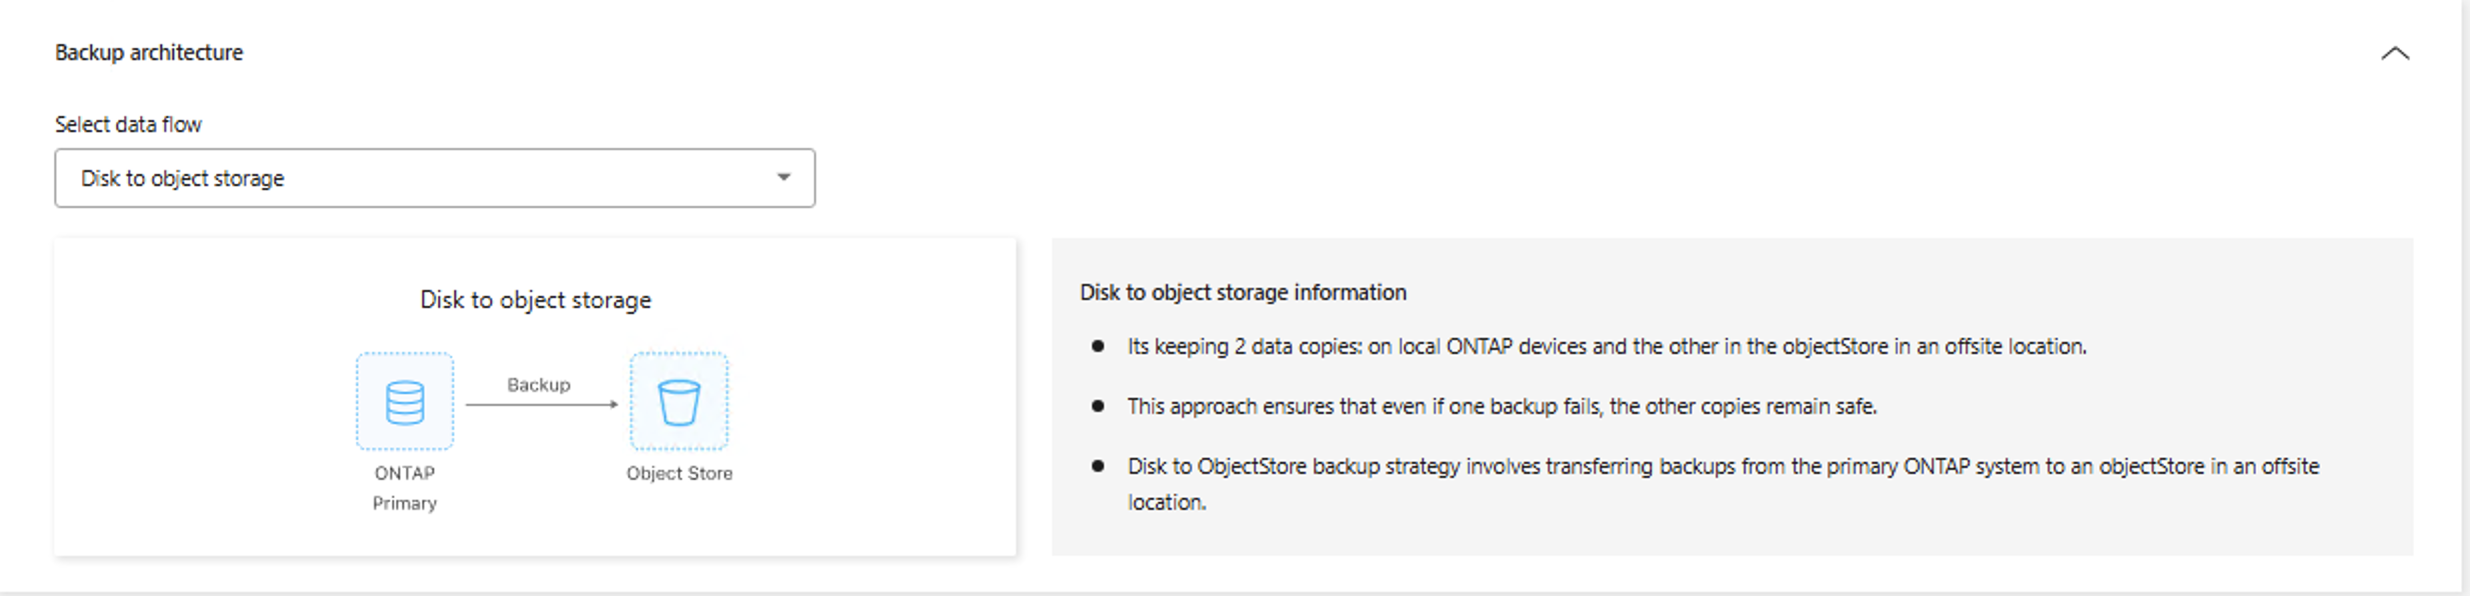
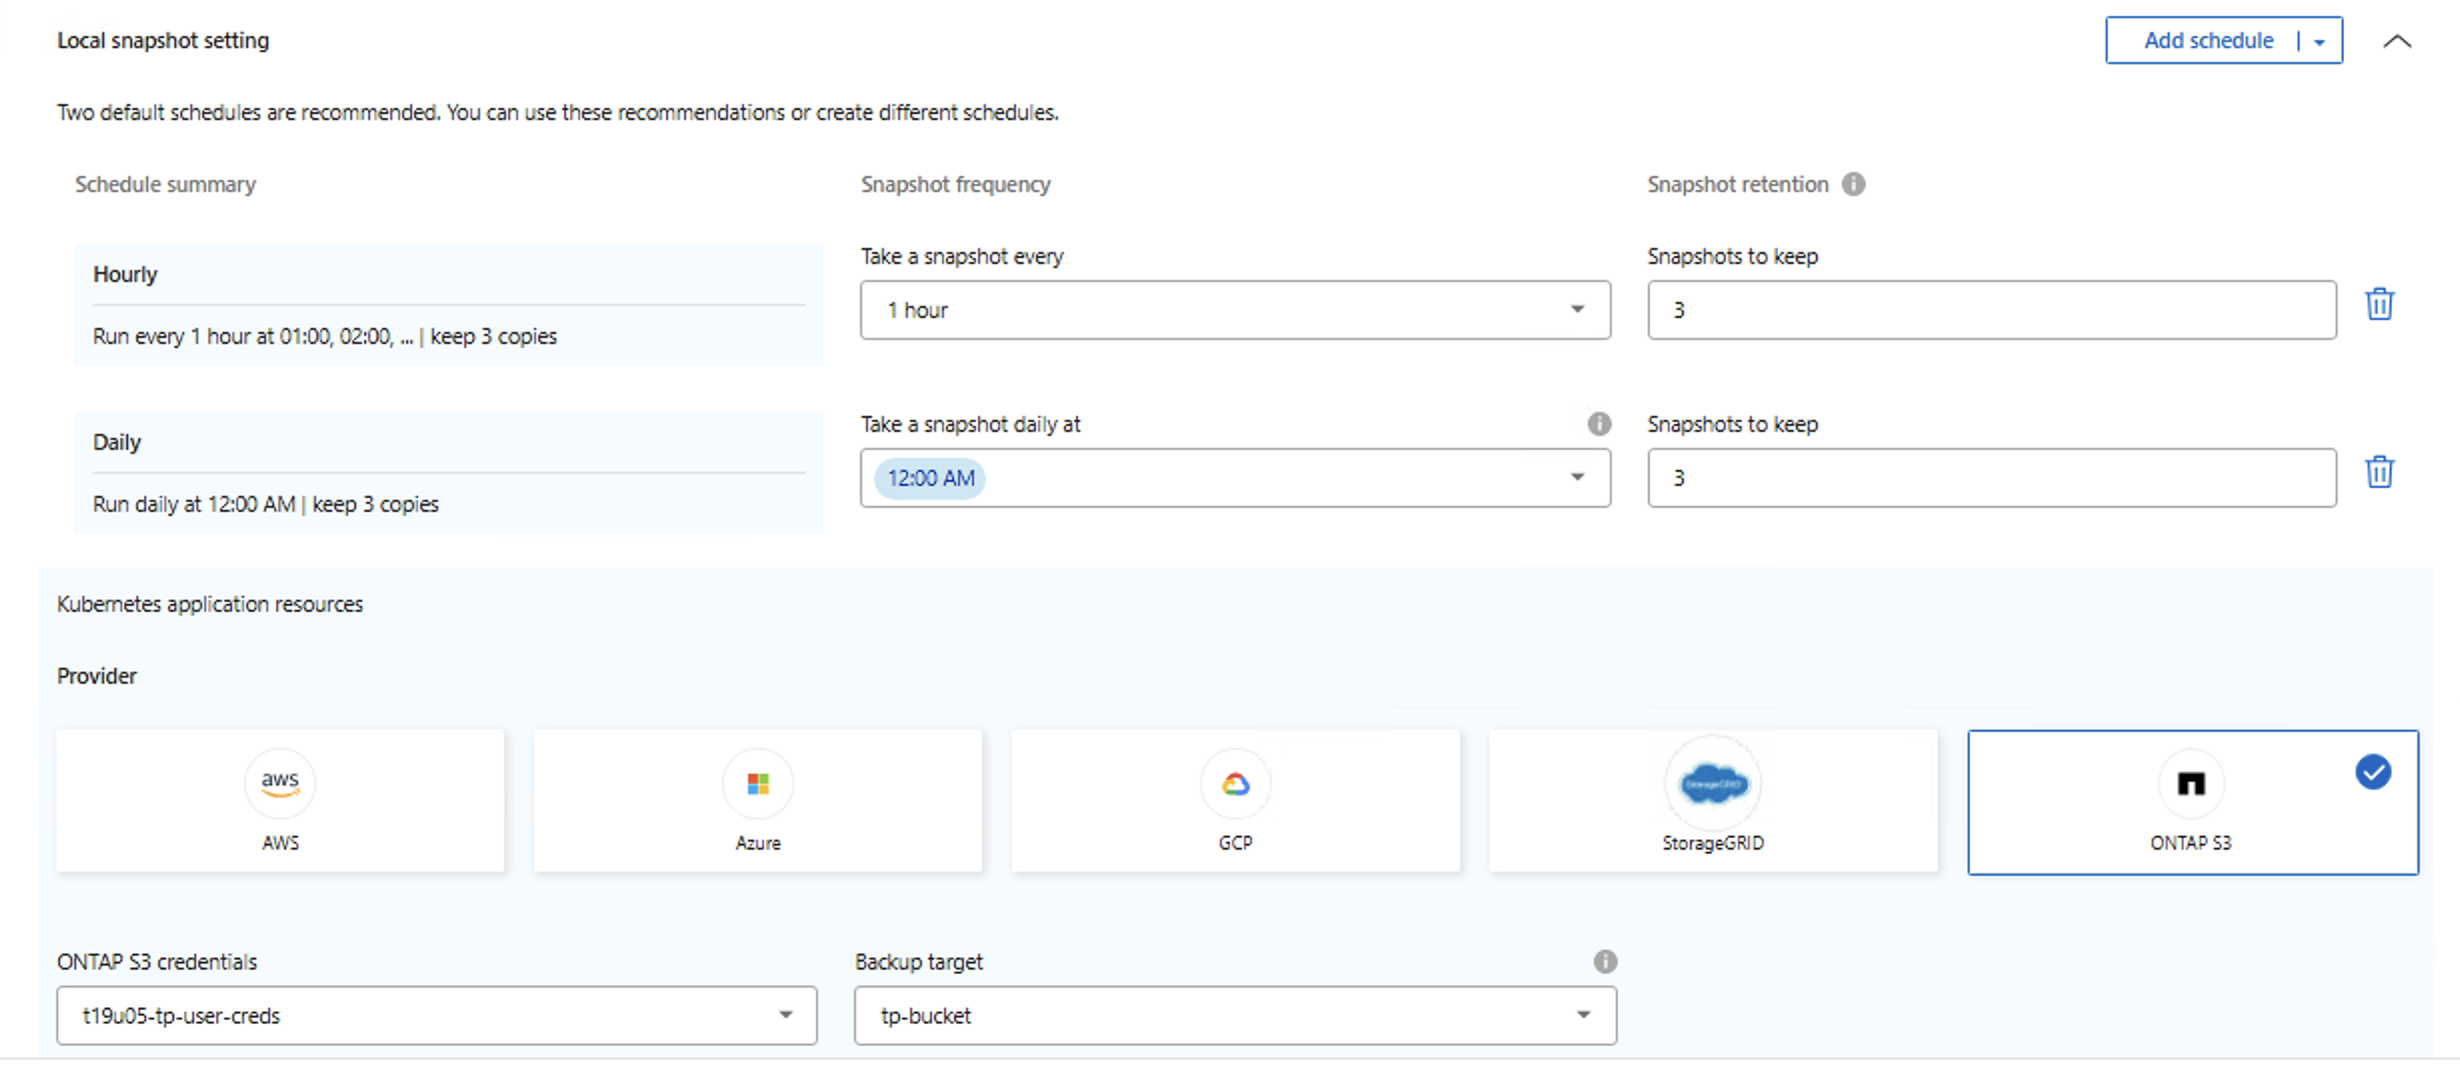
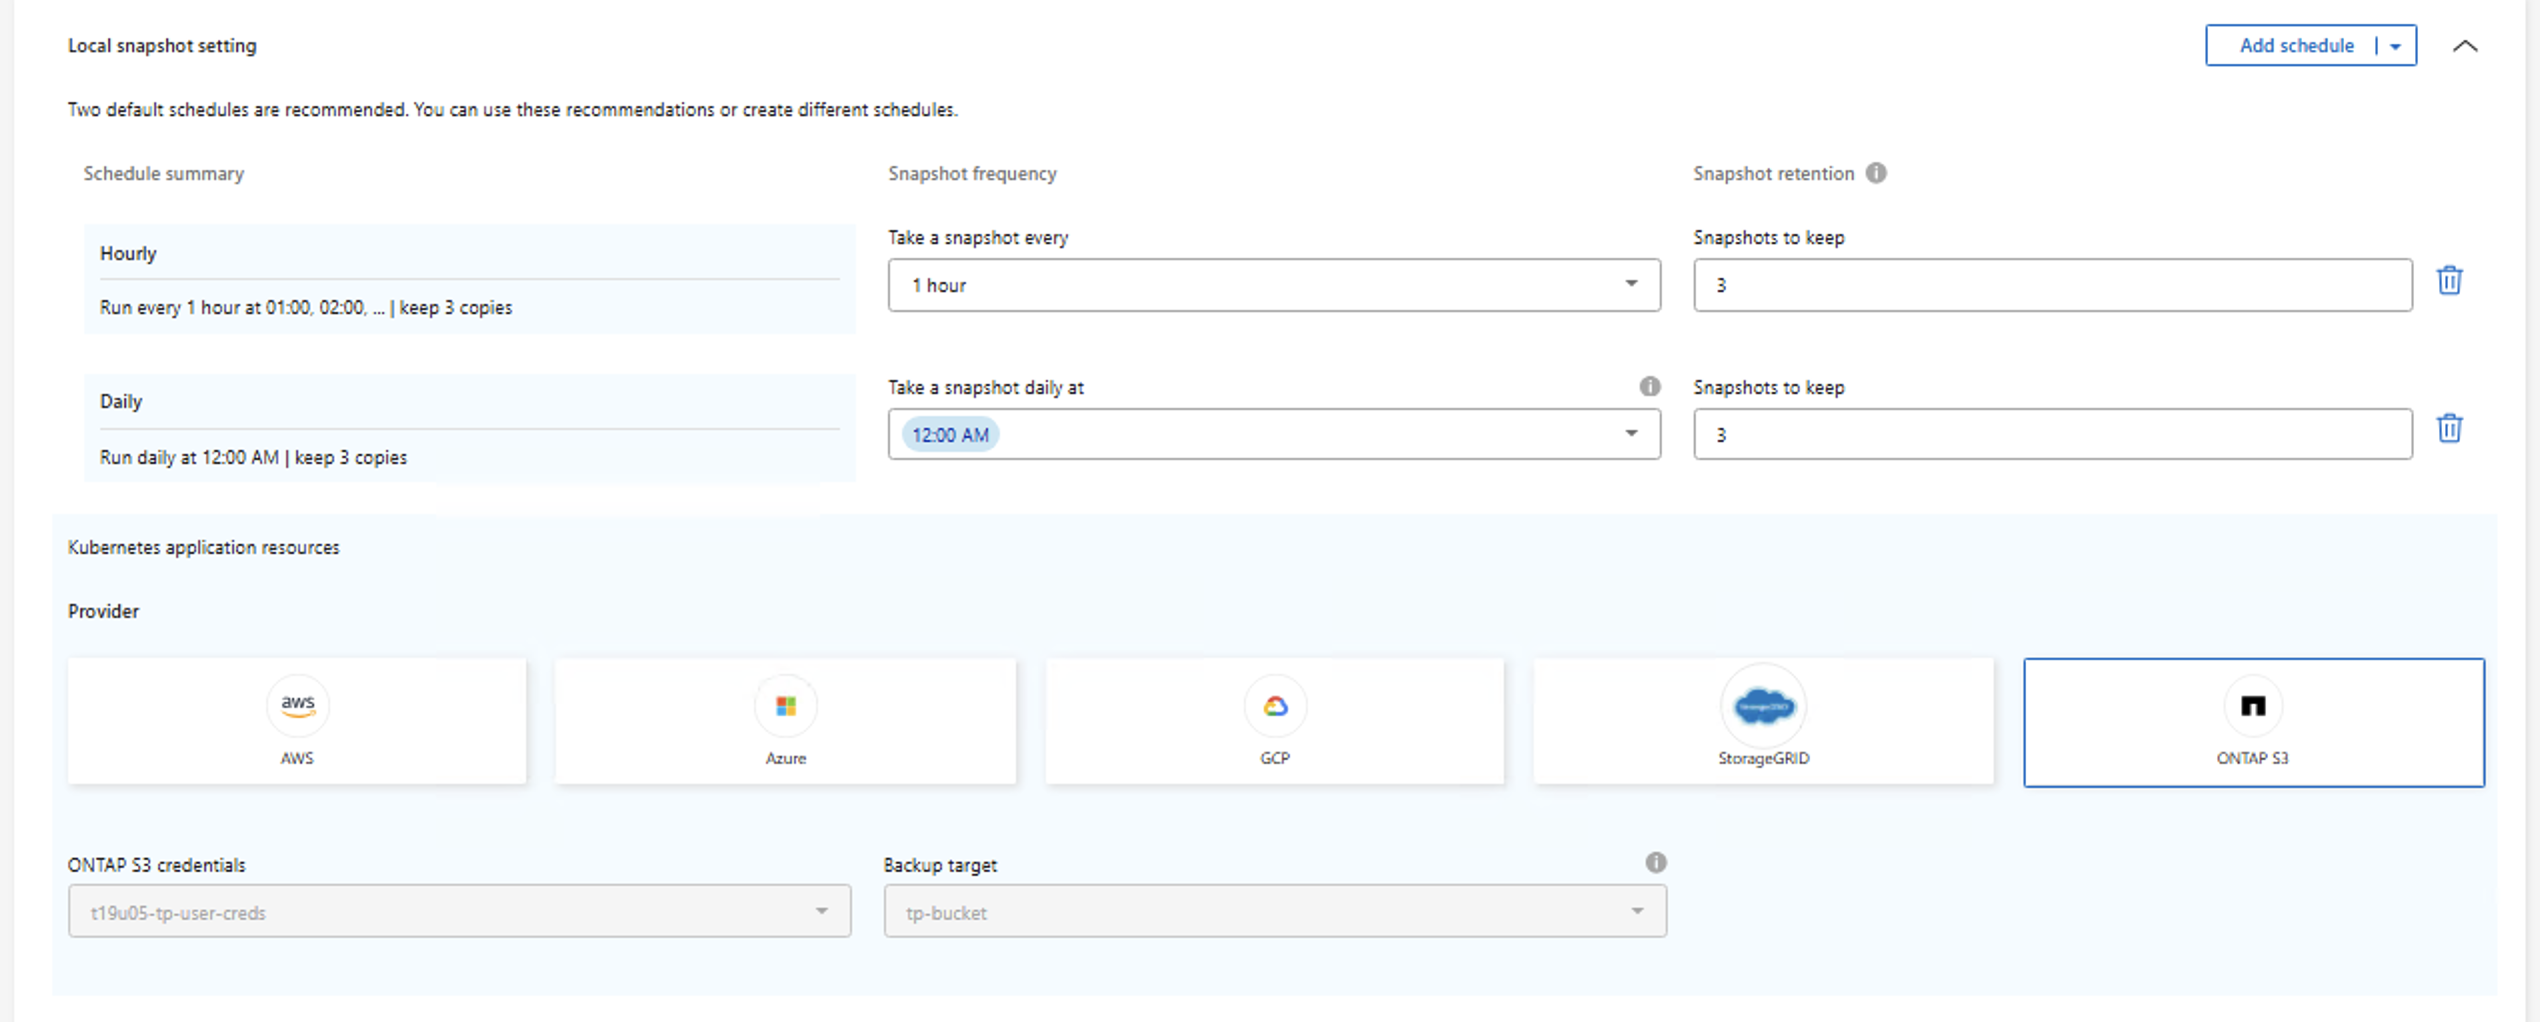
Provide a name for the policy and choose the backup architecture. In this example, Disk to Object Storage is chosen. Define the local snapshot schedule, which controls how often snapshots are taken on the primary storage. Then choose the object storage target for the Kubernetes application metadata used for snapshots.
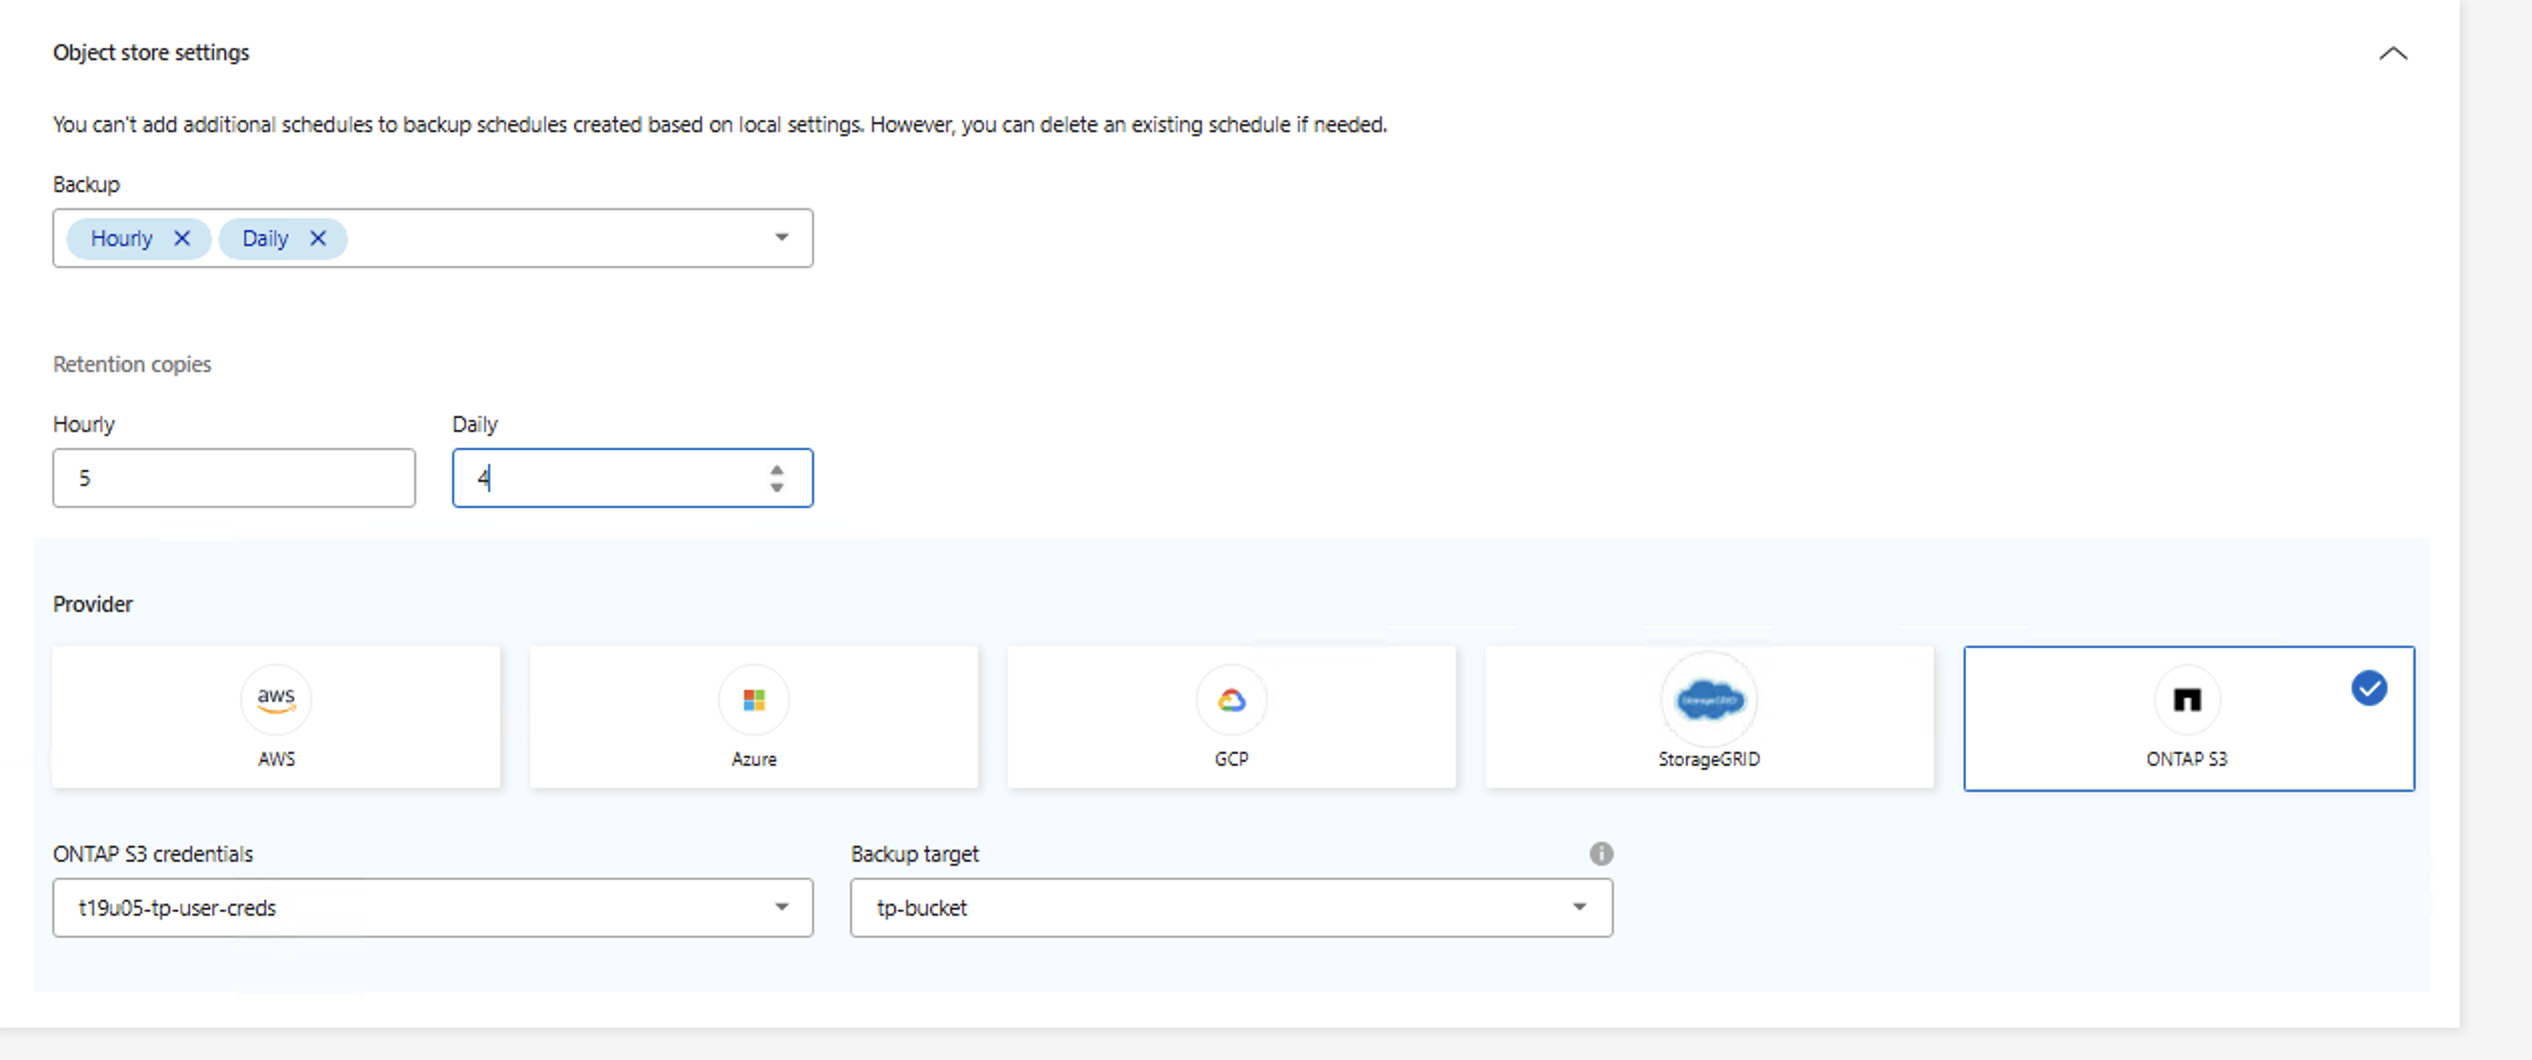
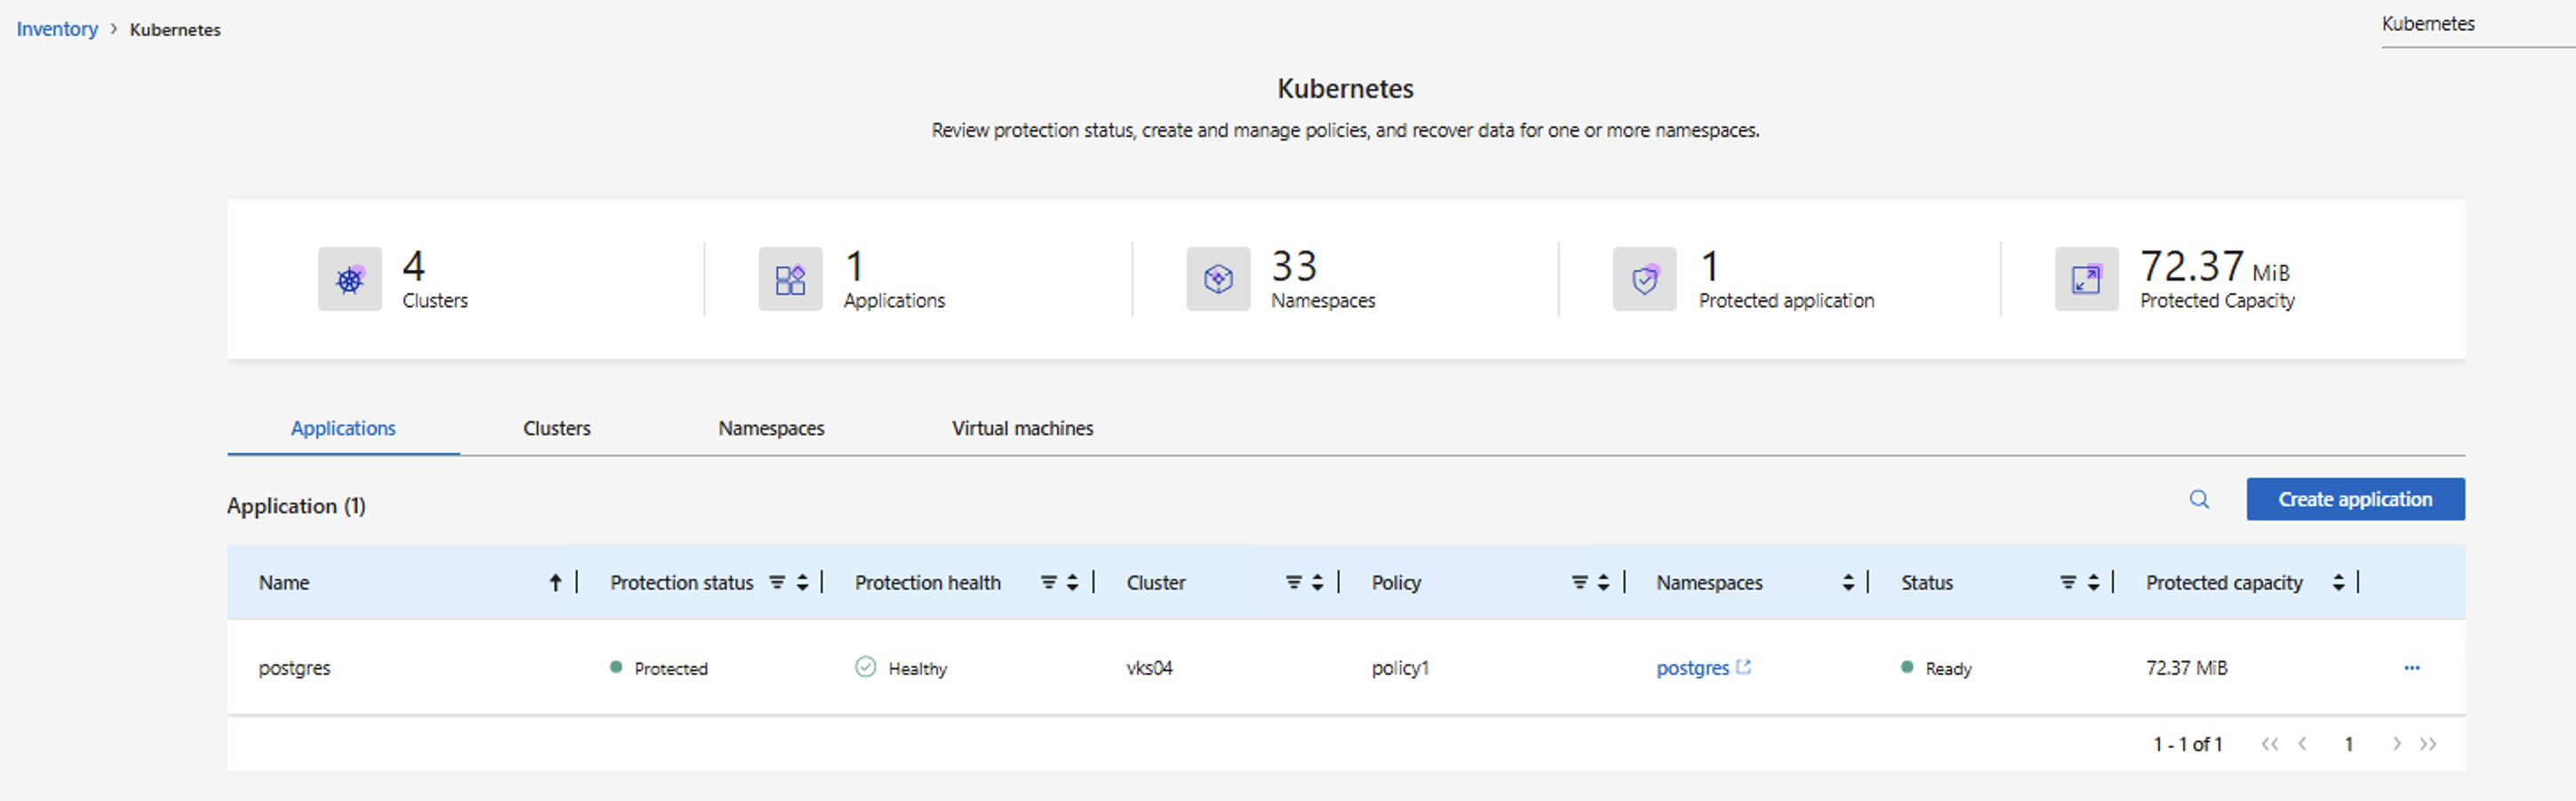
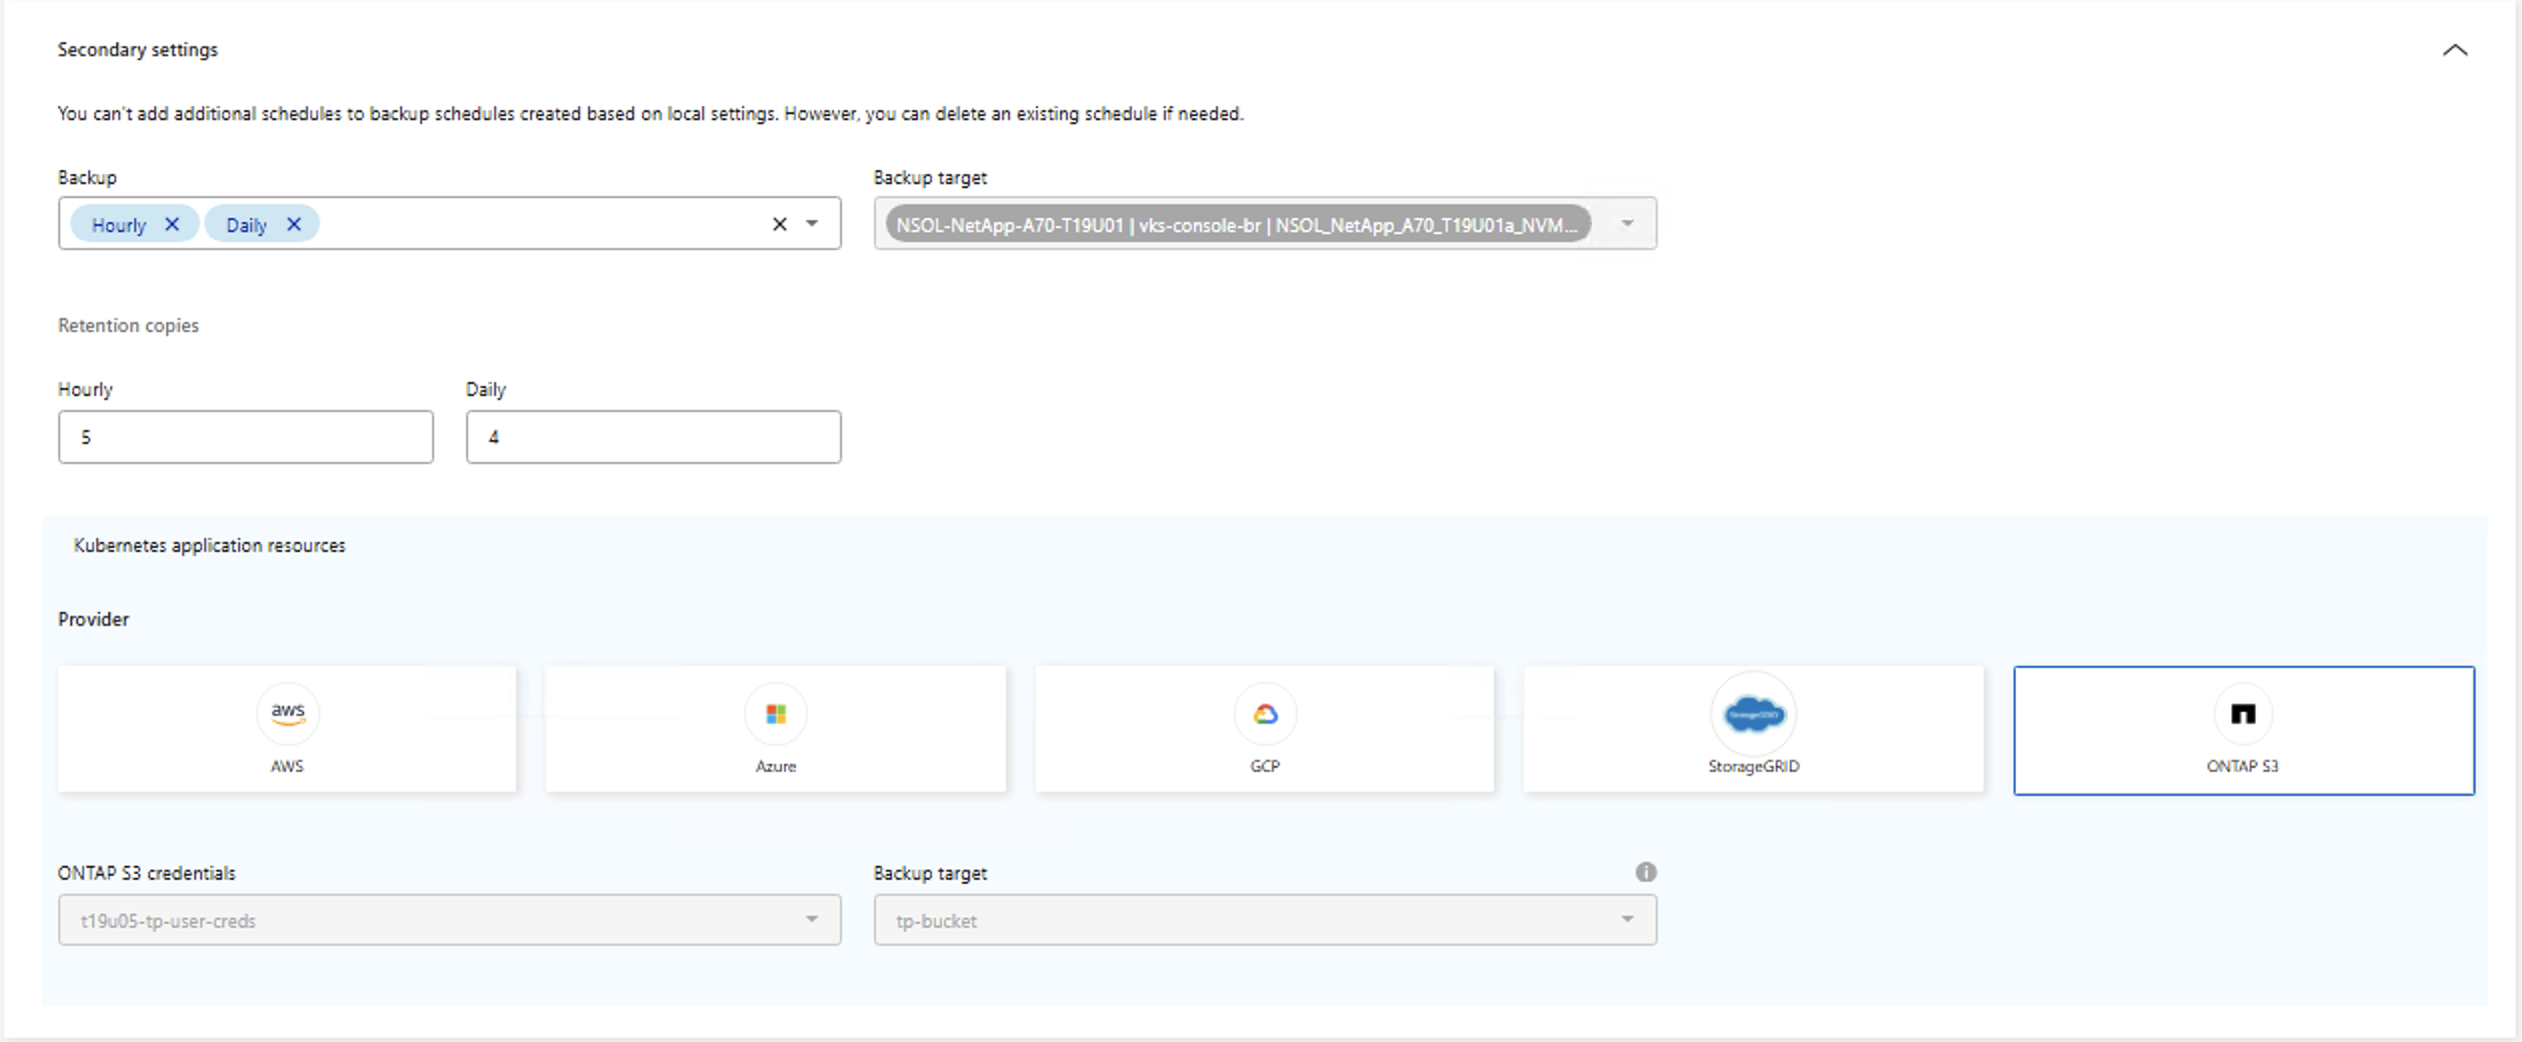
Next, configure the object storage backup settings separately: choose the backup target (in this example, ONTAP S3), set the transfer schedule that controls when snapshot data is copied to object storage, and specify the number of retention copies. The transfer schedule is independent of the snapshot schedule, so resources are copied to object storage according to the transfer schedule, not immediately when each snapshot is taken. You can also modify the maximum retries and retry interval if needed. Click Create to proceed. The application will be discovered and the protection policy will be associated with it.

Show example: Create a protection policy using the Disk to Disk architecture
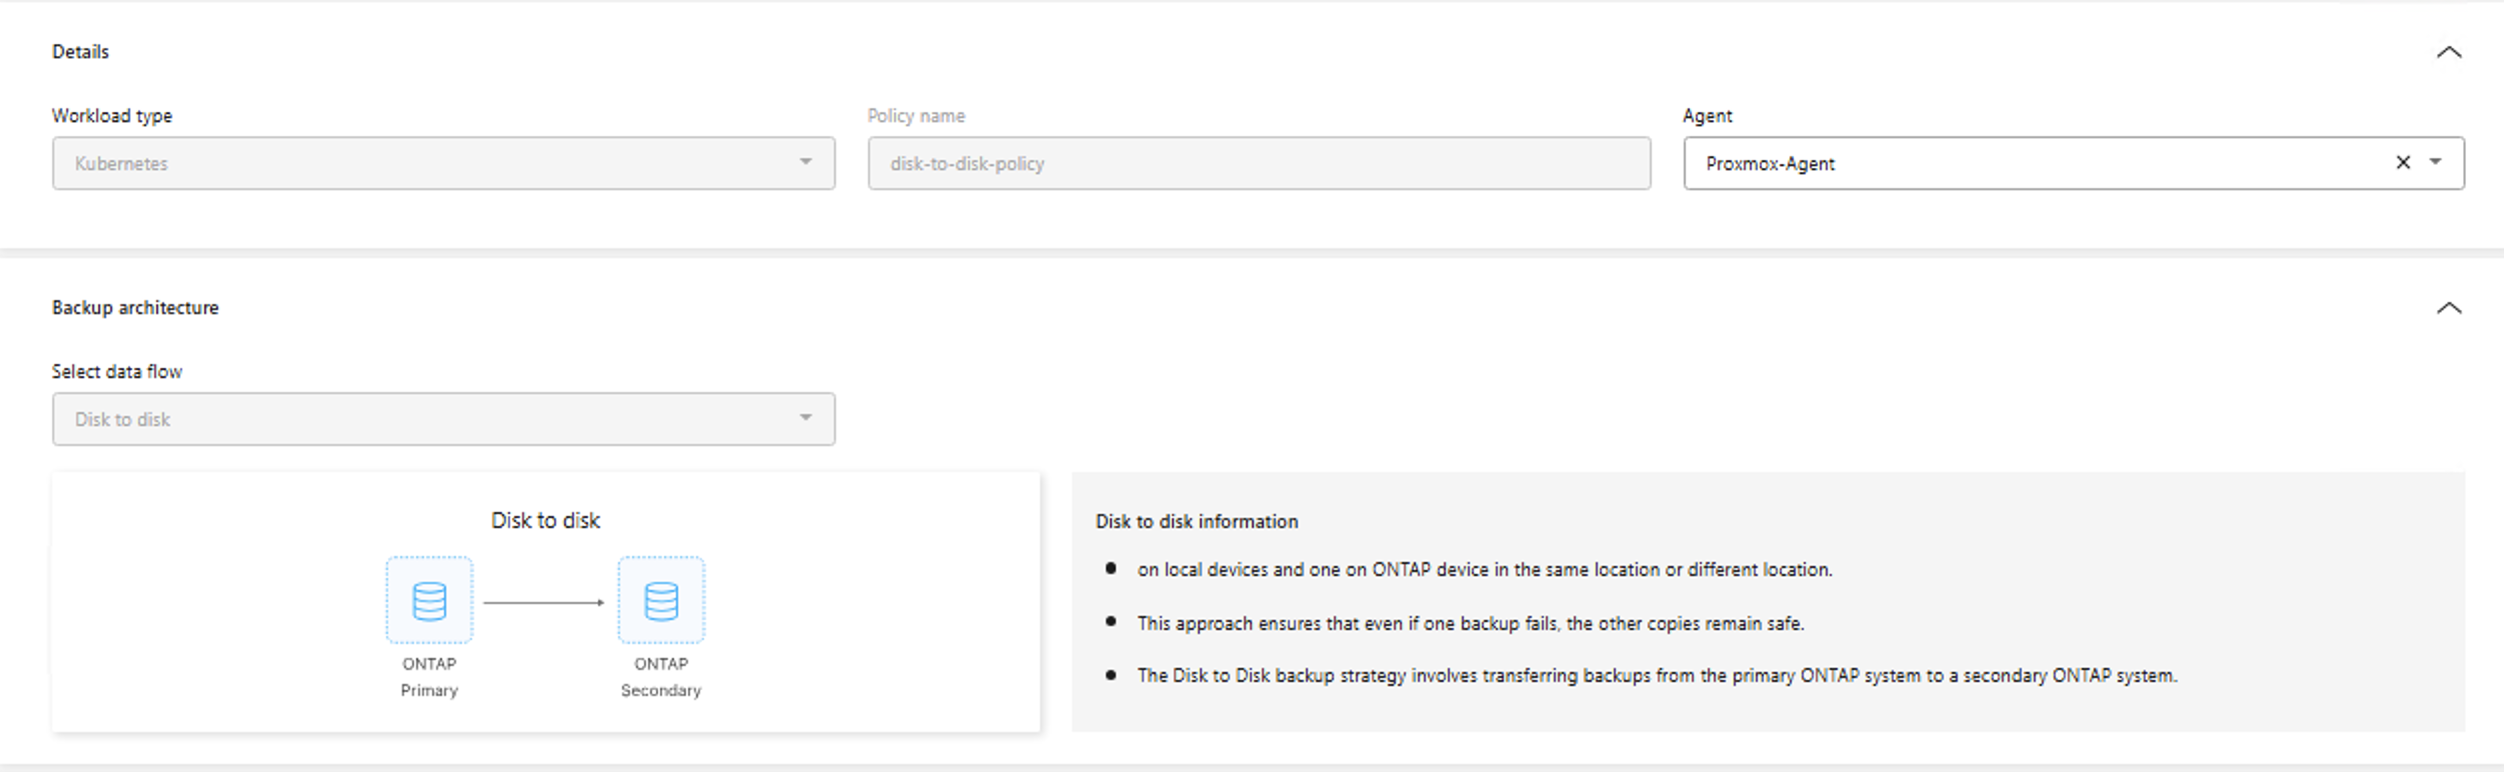
To choose the Disk to Disk architecture, ensure that you have configured the secondary storage target with cluster peering and SVM peering and have the necessary credentials and permissions. Provide a name for the policy and choose the backup architecture. In this example, Disk to Disk is chosen. Define the local snapshot schedule, which controls how often snapshots are taken on the primary storage. Then select the object storage location for the Kubernetes application metadata for the snapshots.
Configure the secondary storage backup settings separately: choose the backup target, the ONTAP cluster and SVM configured for backup, and the aggregate where the backup volume will be created from the drop-down list. Set the transfer schedule that controls when snapshot data is copied to the secondary storage, and specify the number of retention copies. The transfer schedule is independent of the snapshot schedule, so resources are copied to the secondary target according to the transfer schedule, not immediately when each snapshot is taken. Also configure the object storage target where the application metadata of the SnapMirror copies is stored.
You can also modify the maximum retries and retry interval if needed. Click Create to proceed. The application will be discovered and the protection policy will be associated with it.
-
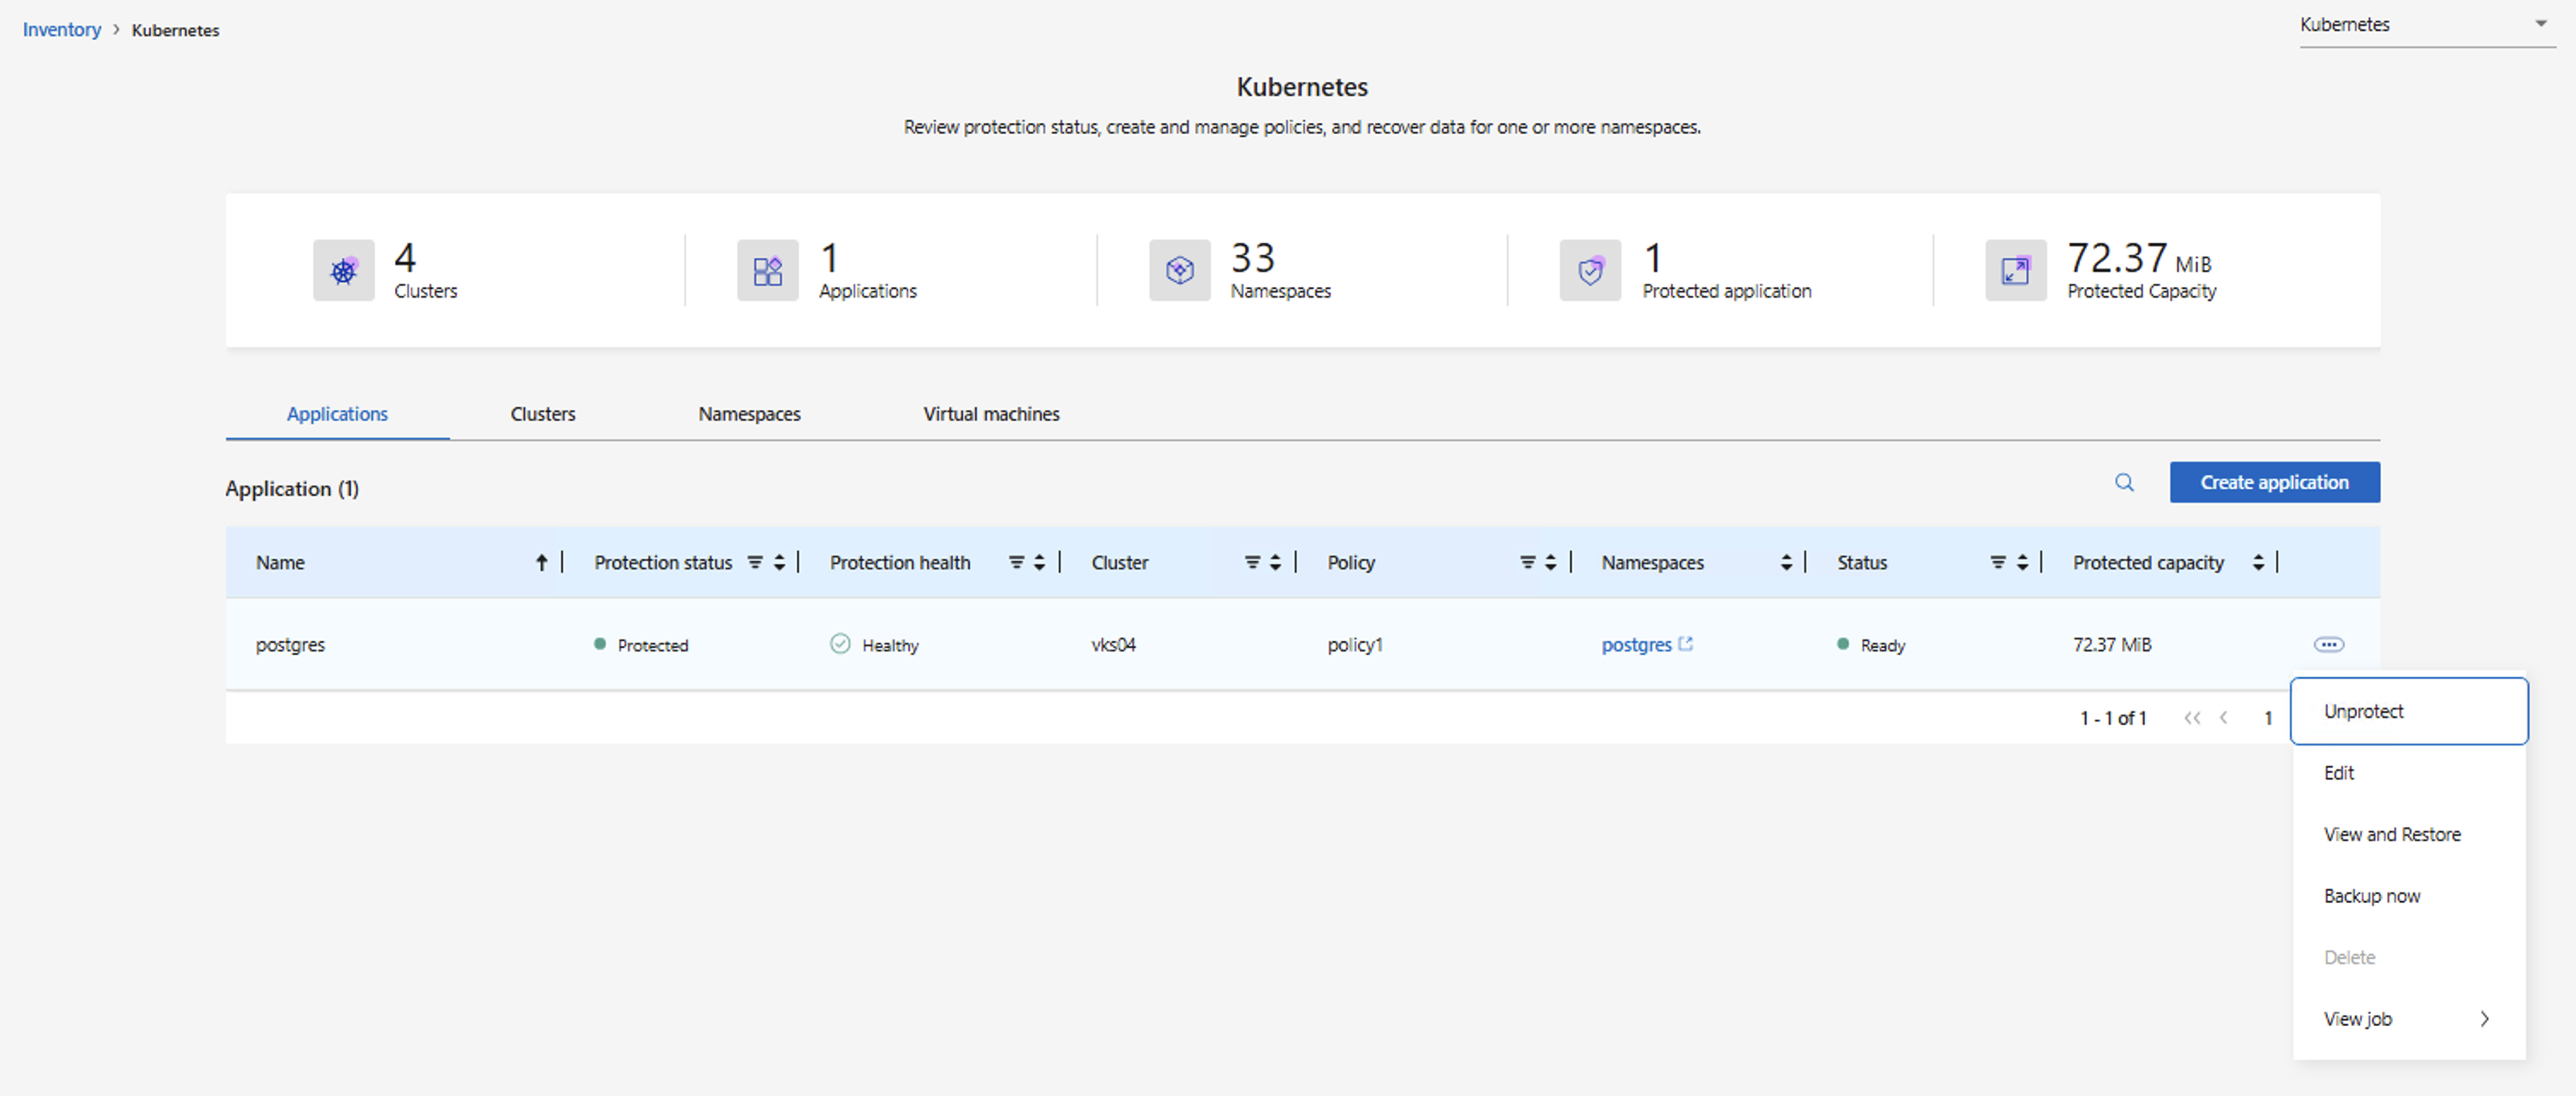
Restore the application from a backup
You need the Backup and Recovery super admin or Backup and Recovery restore admin role to restore a Kubernetes application. -
You can choose any available restore point—a local snapshot, an object storage backup, or a backup from a secondary target—to restore the application.
-
You can restore the application to its original namespace or to a different namespace.
-
You can select which resources to include in the restore.
-
You can choose the storage class to use for the restored application resources.
Show example: Restore from the Object Storage to a different namespace
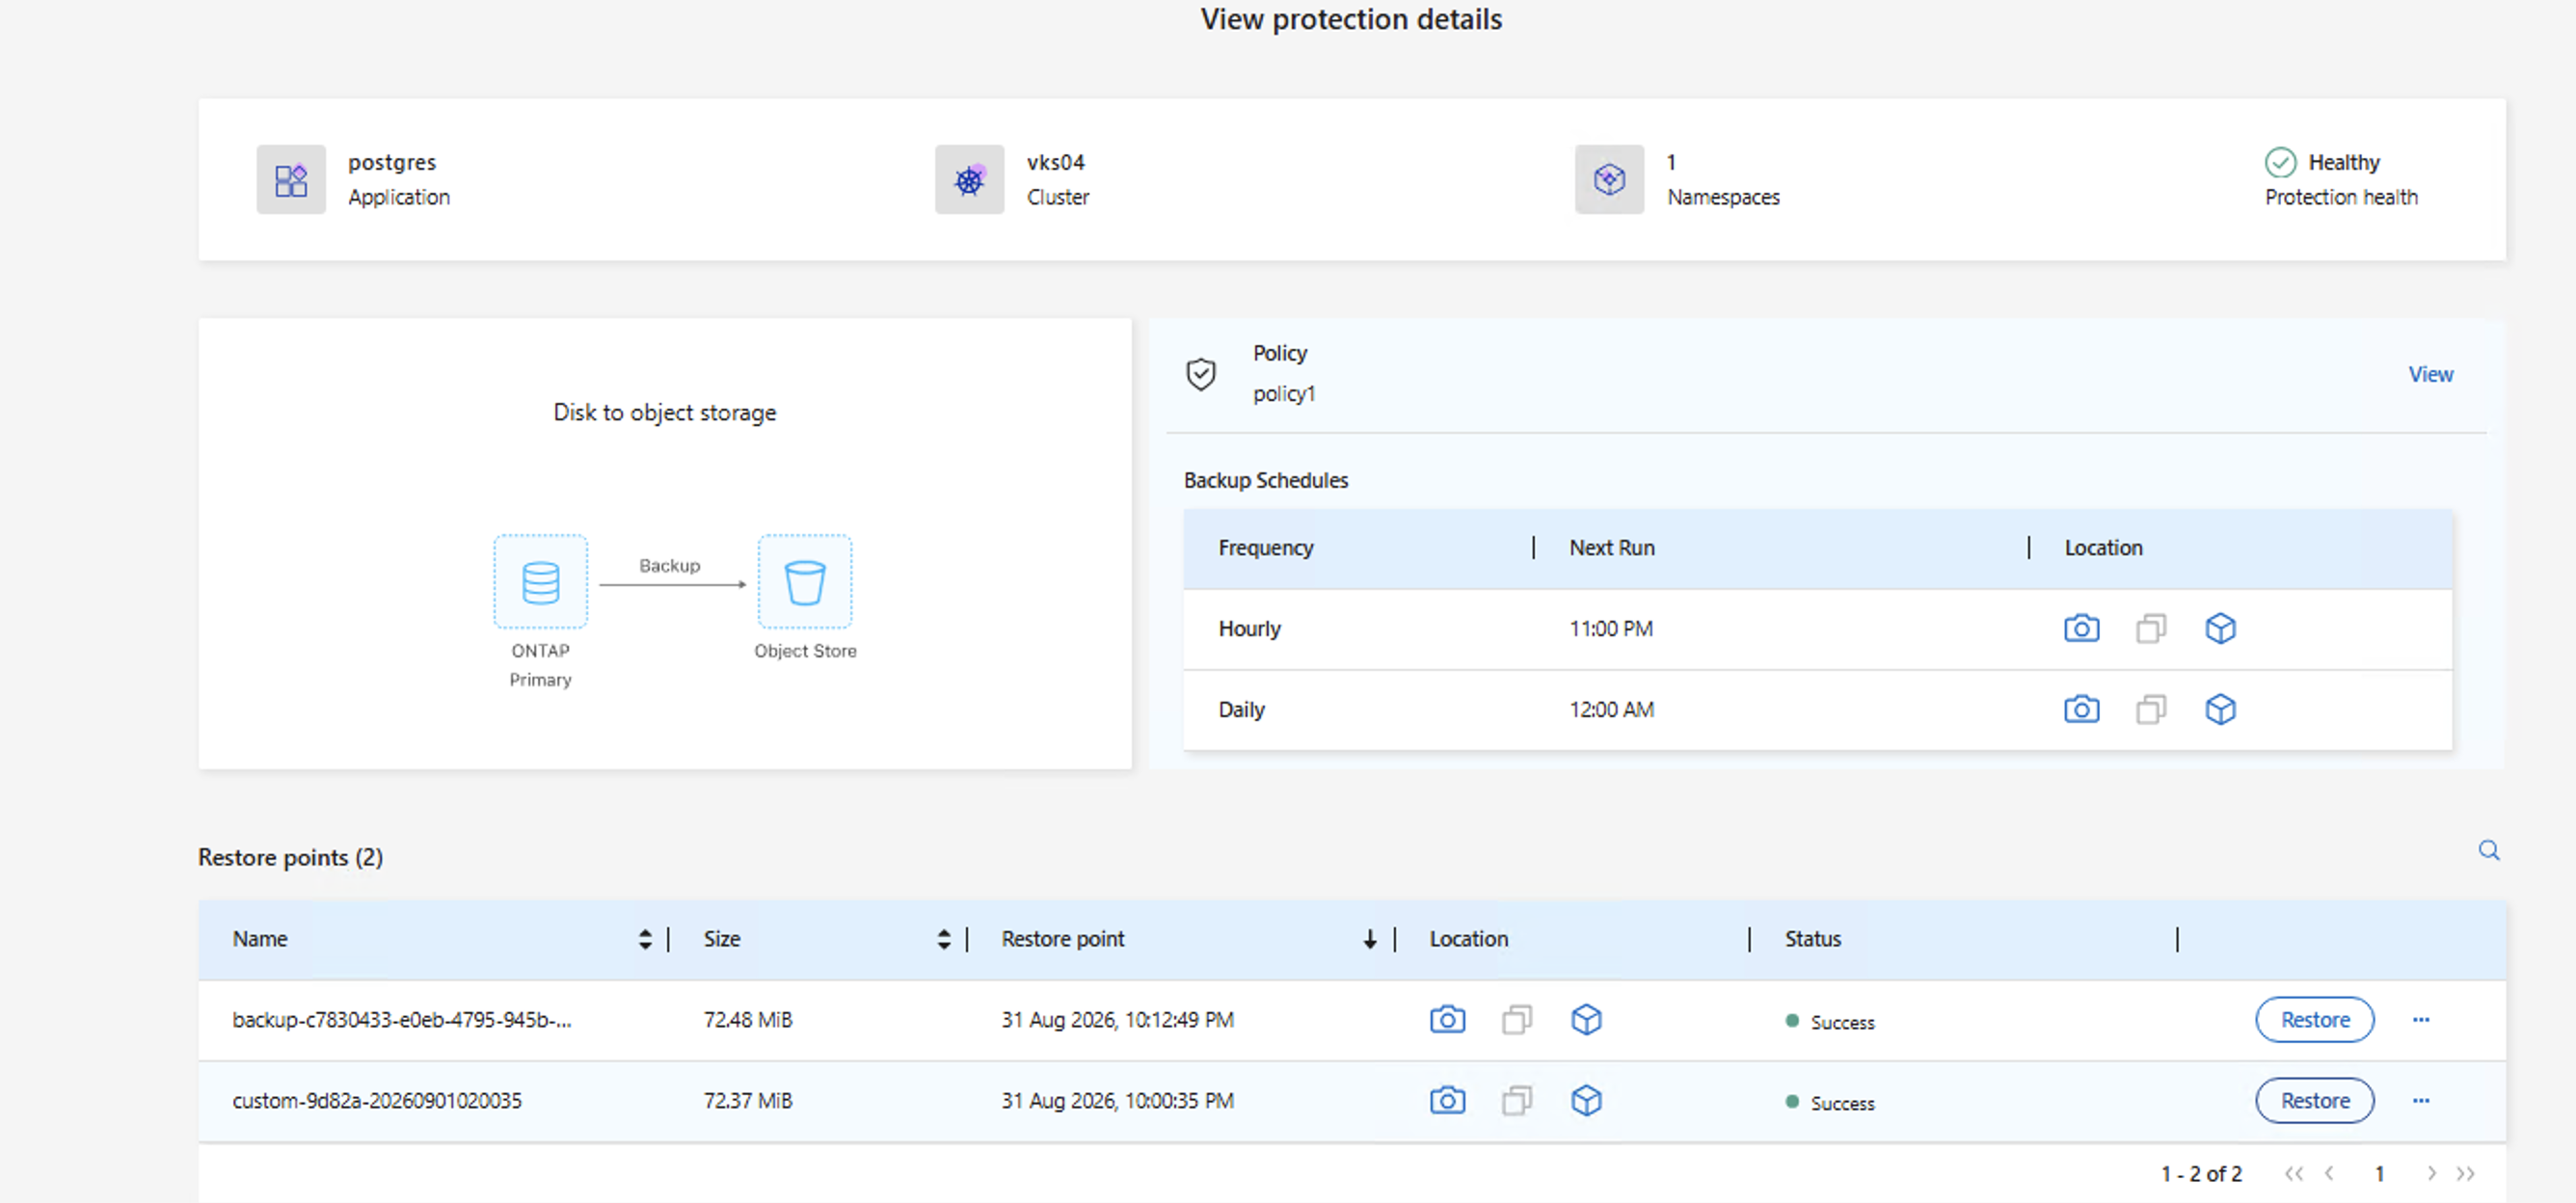
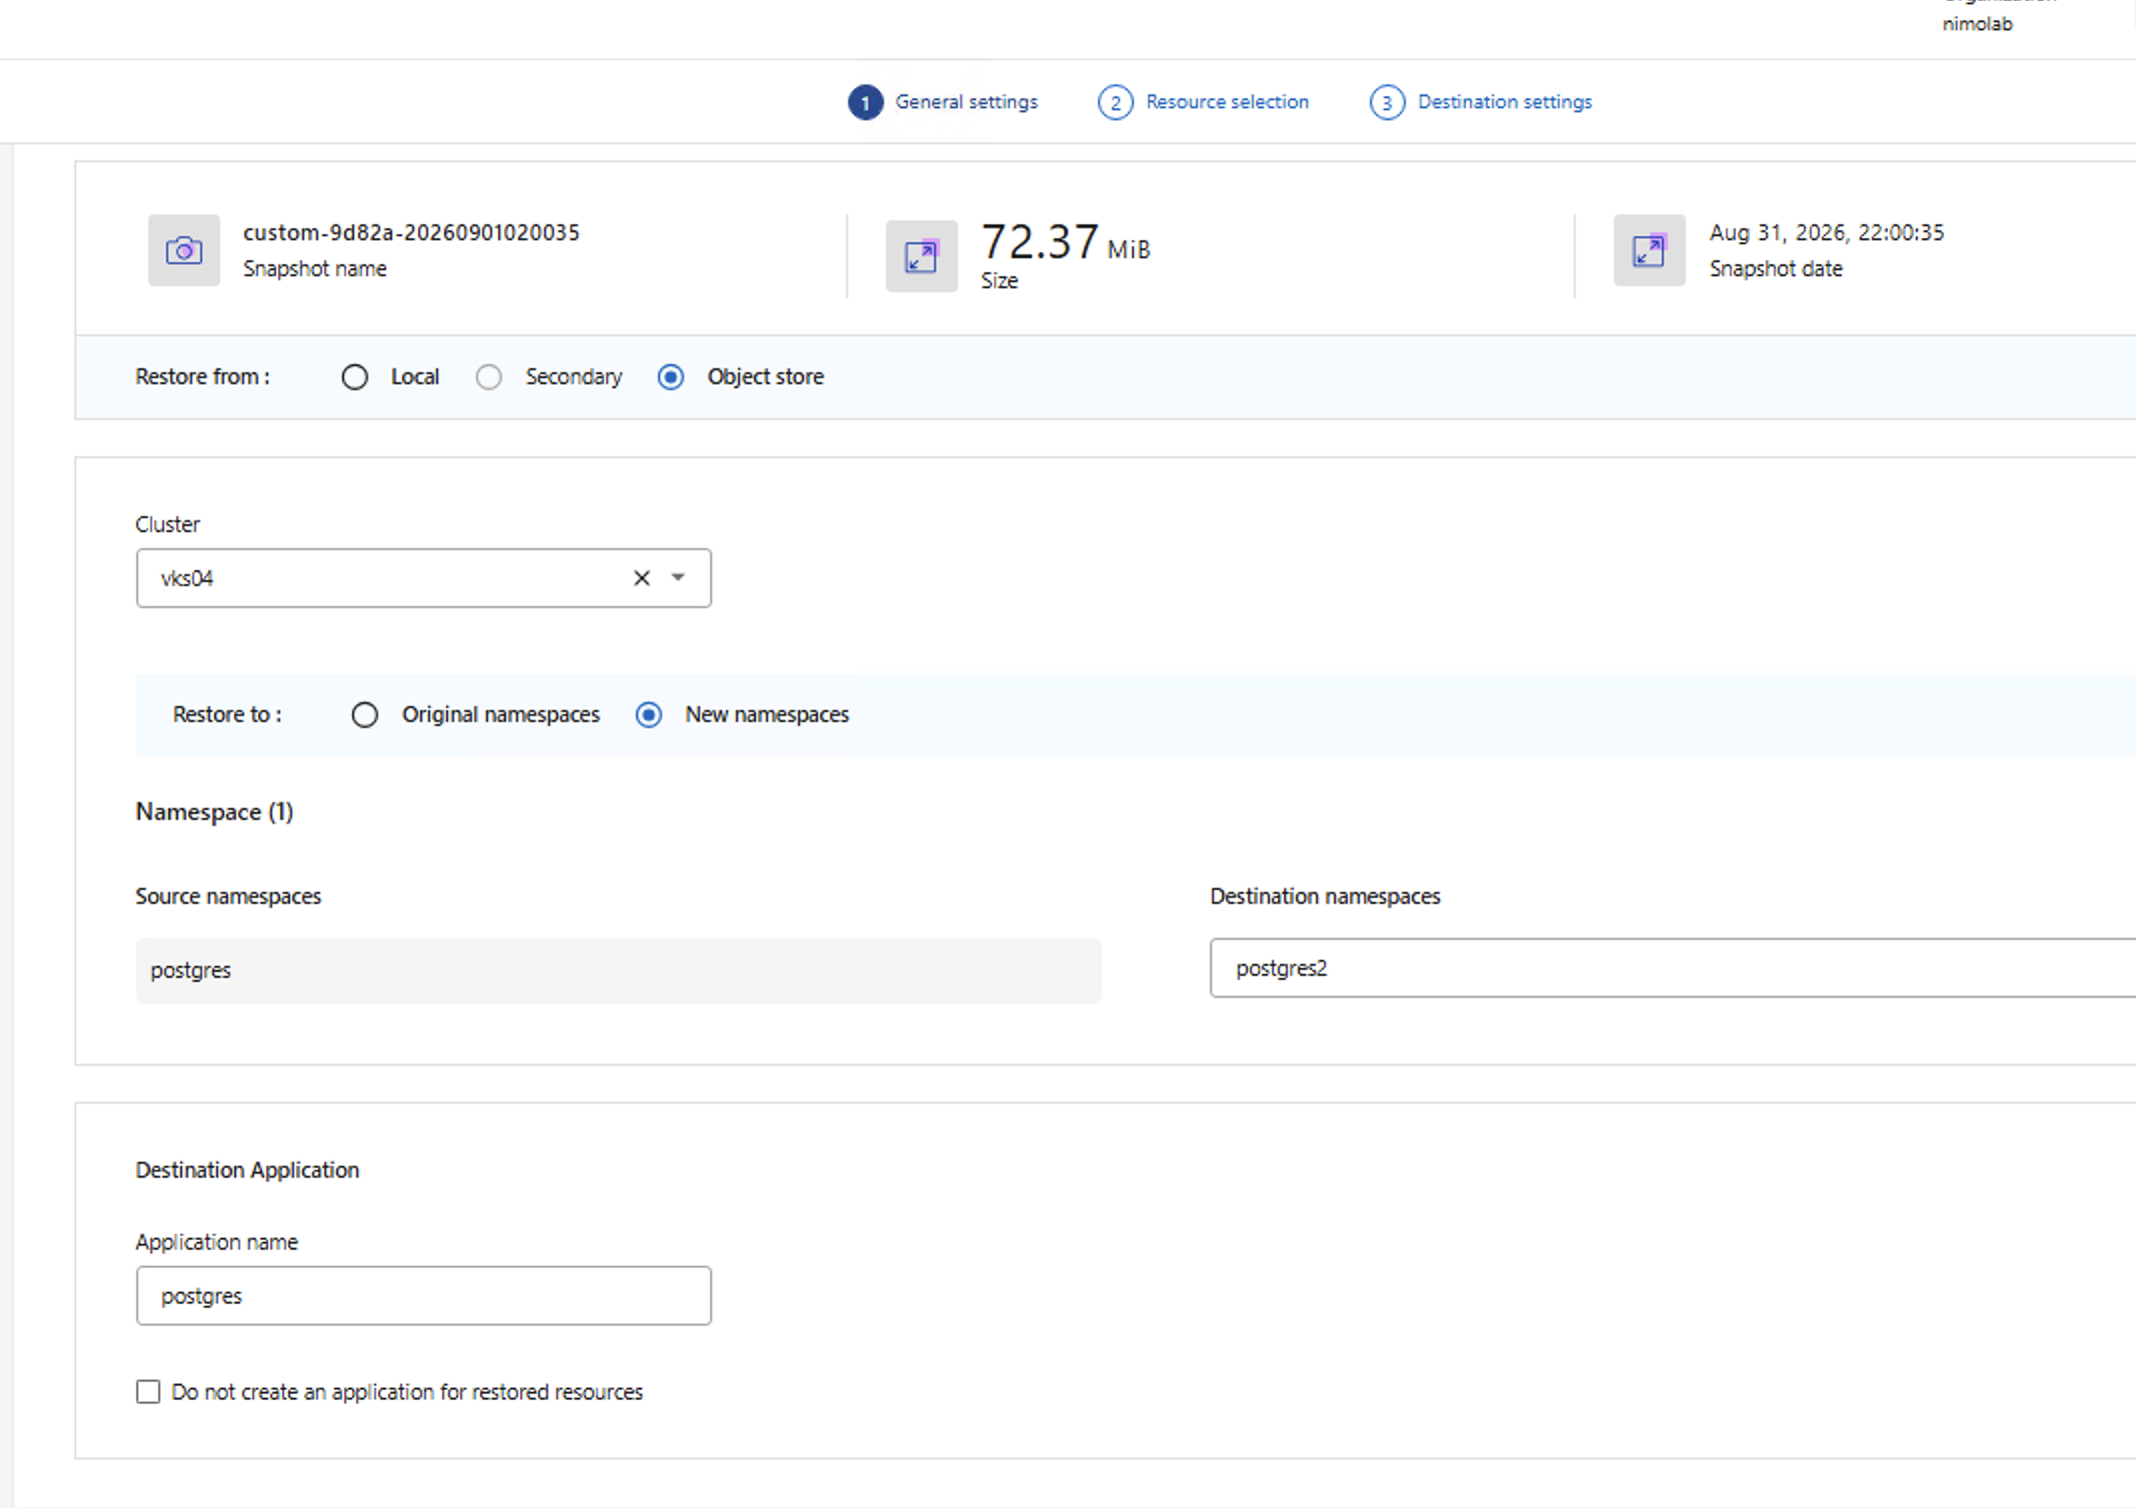
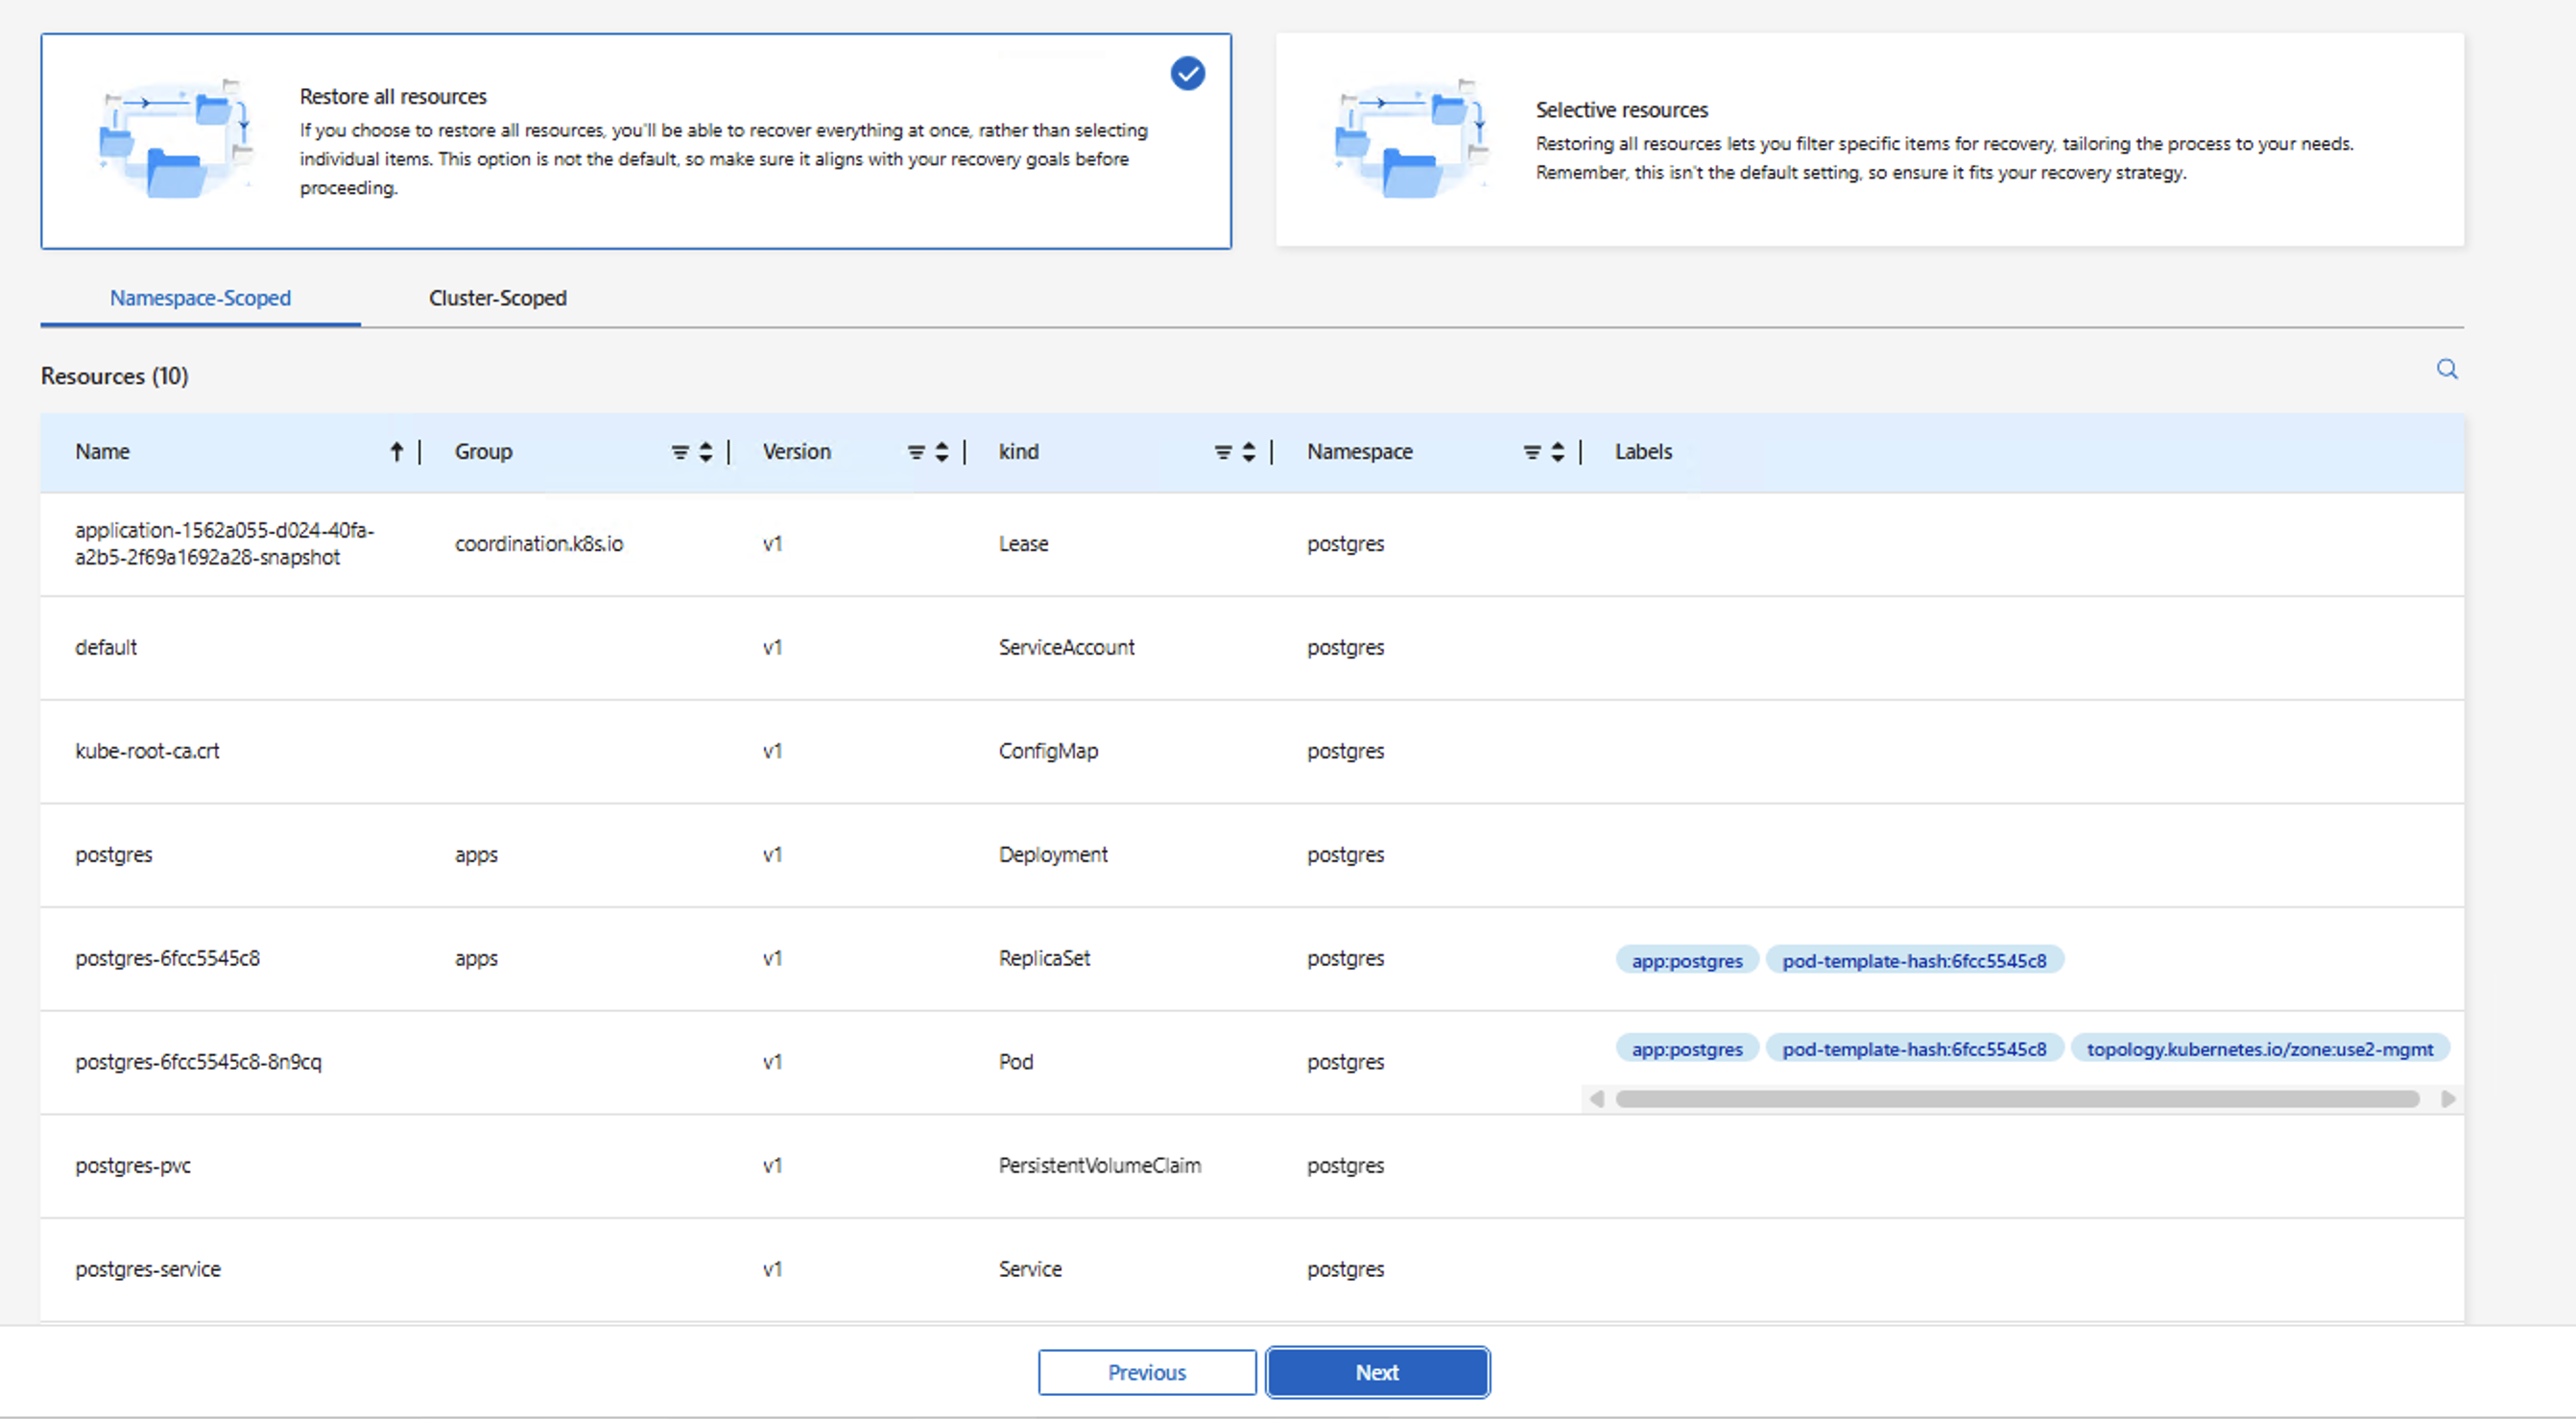
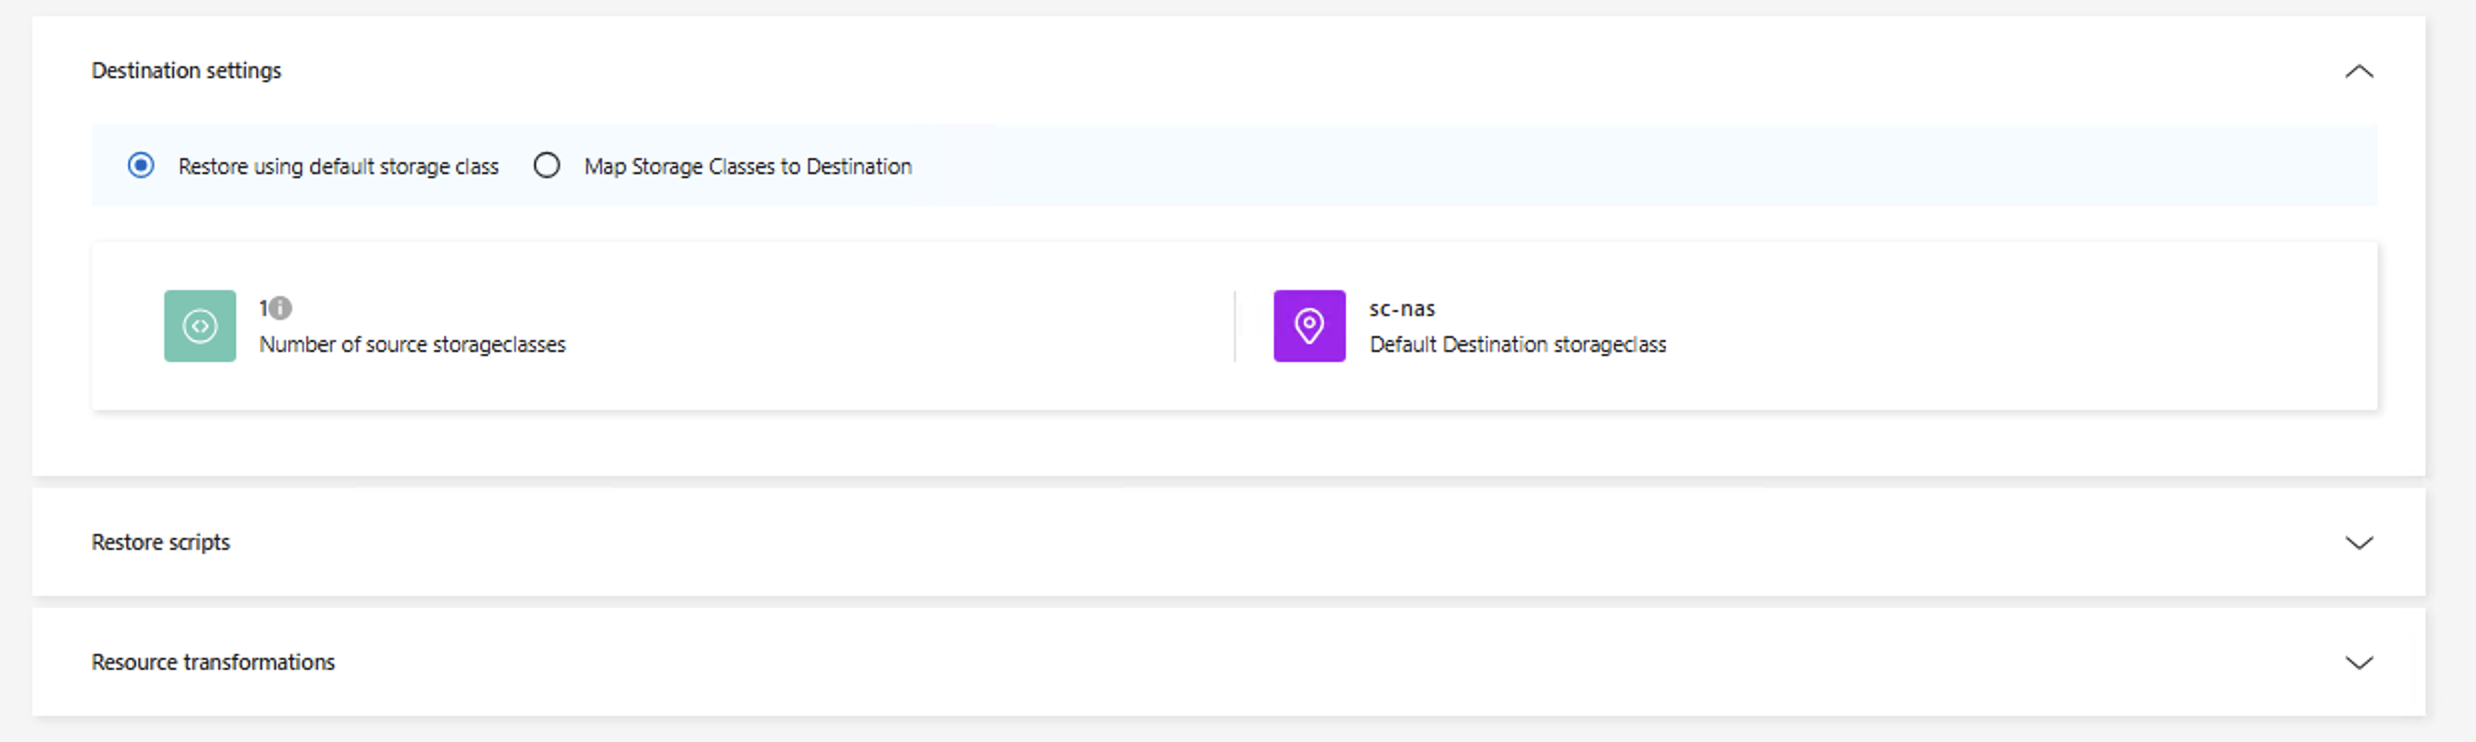
Show example: Restore from disk storage to the same namespace
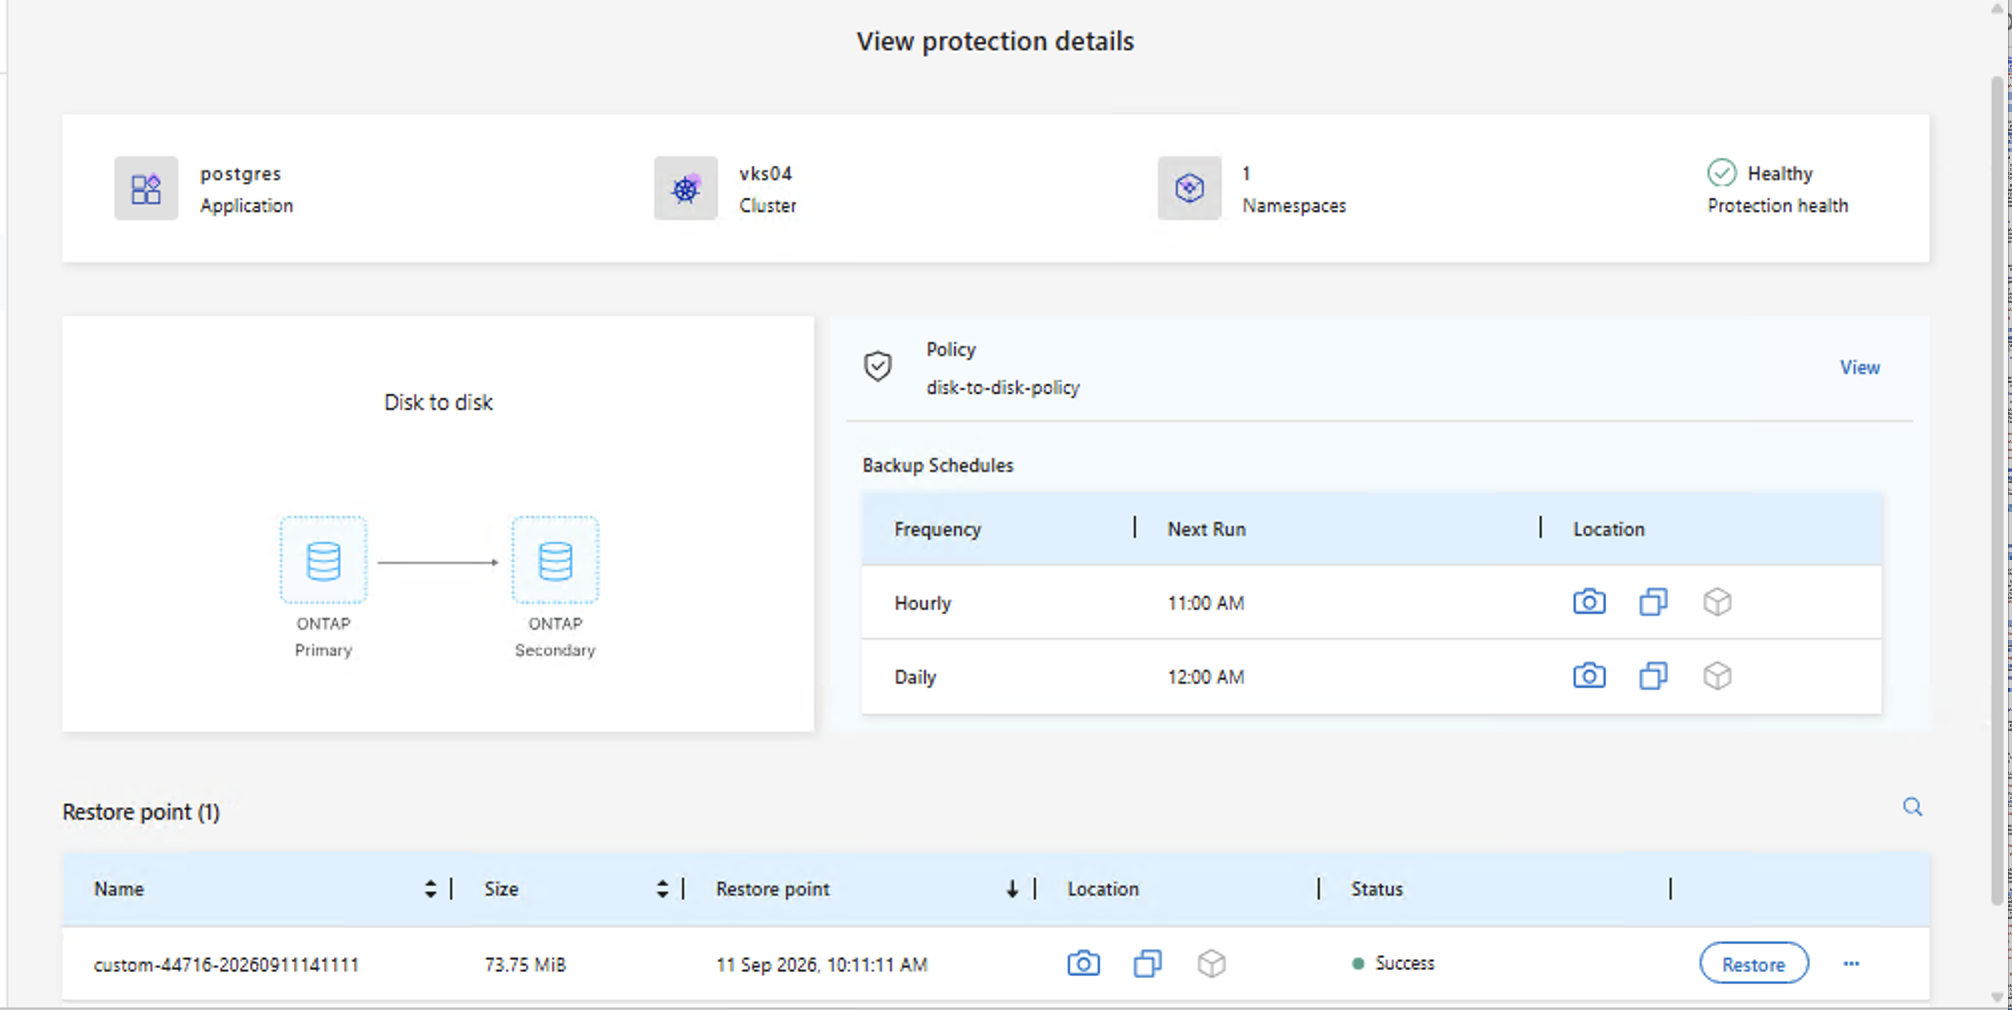
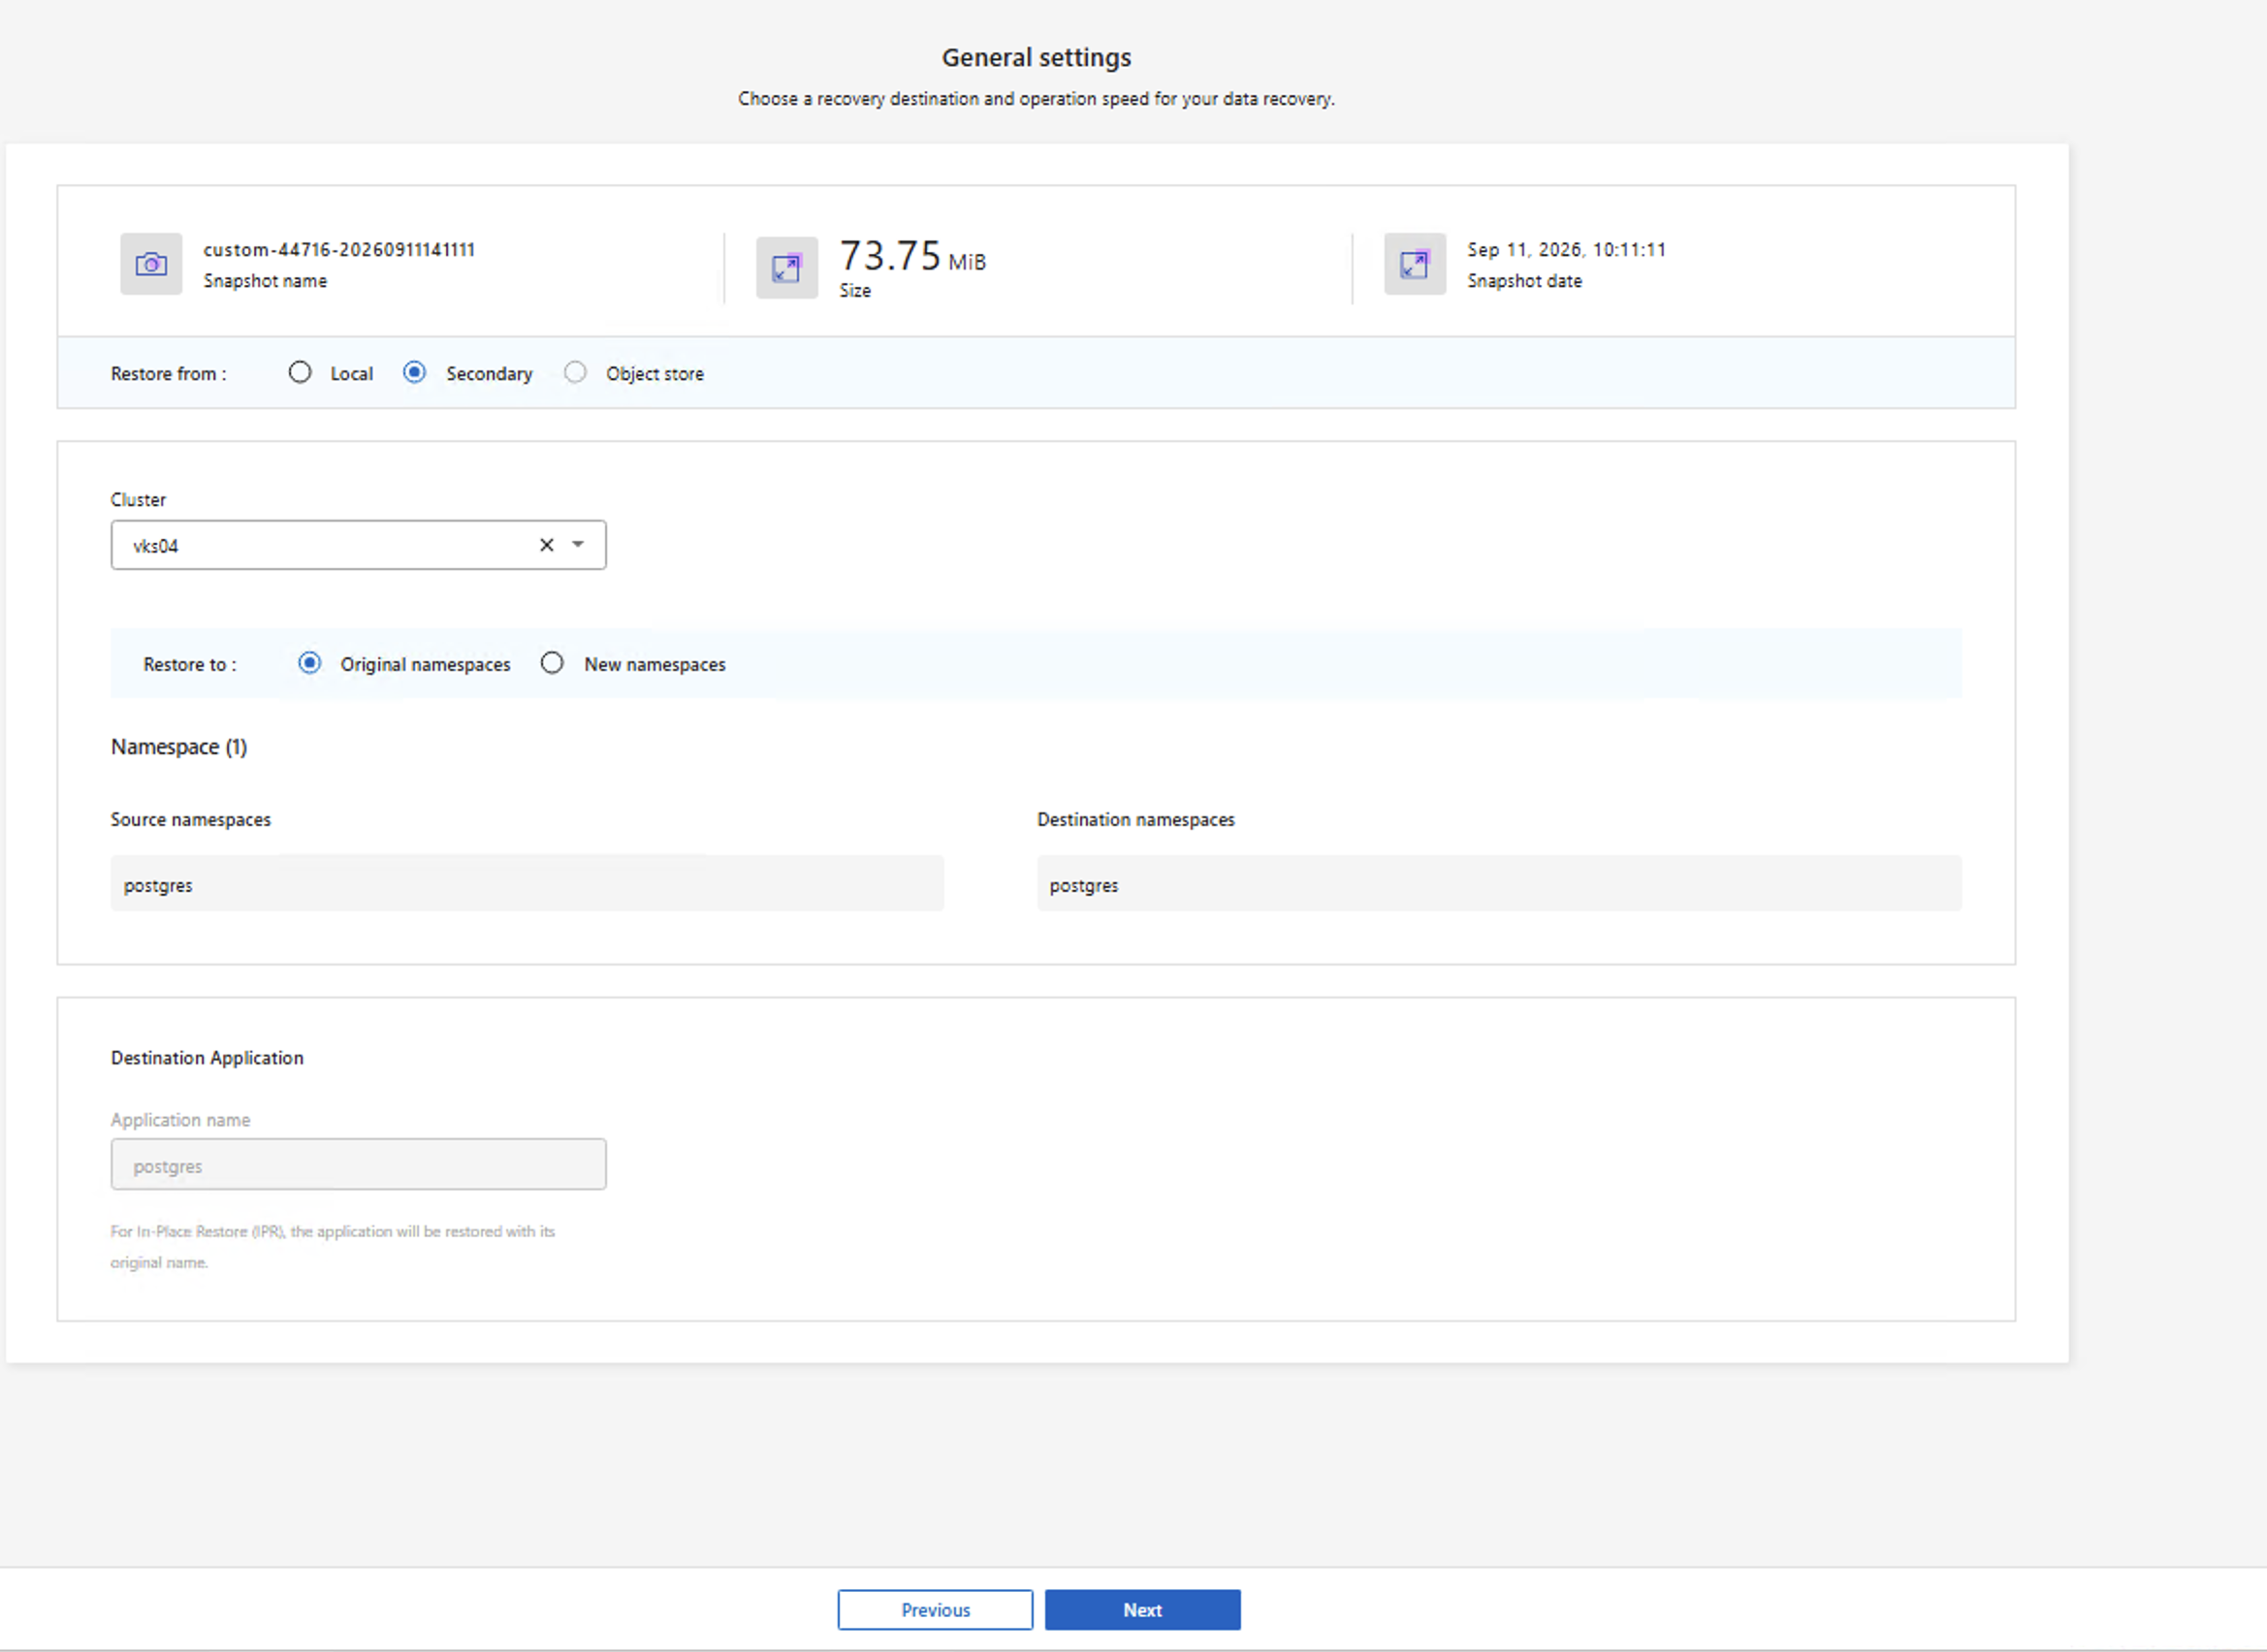
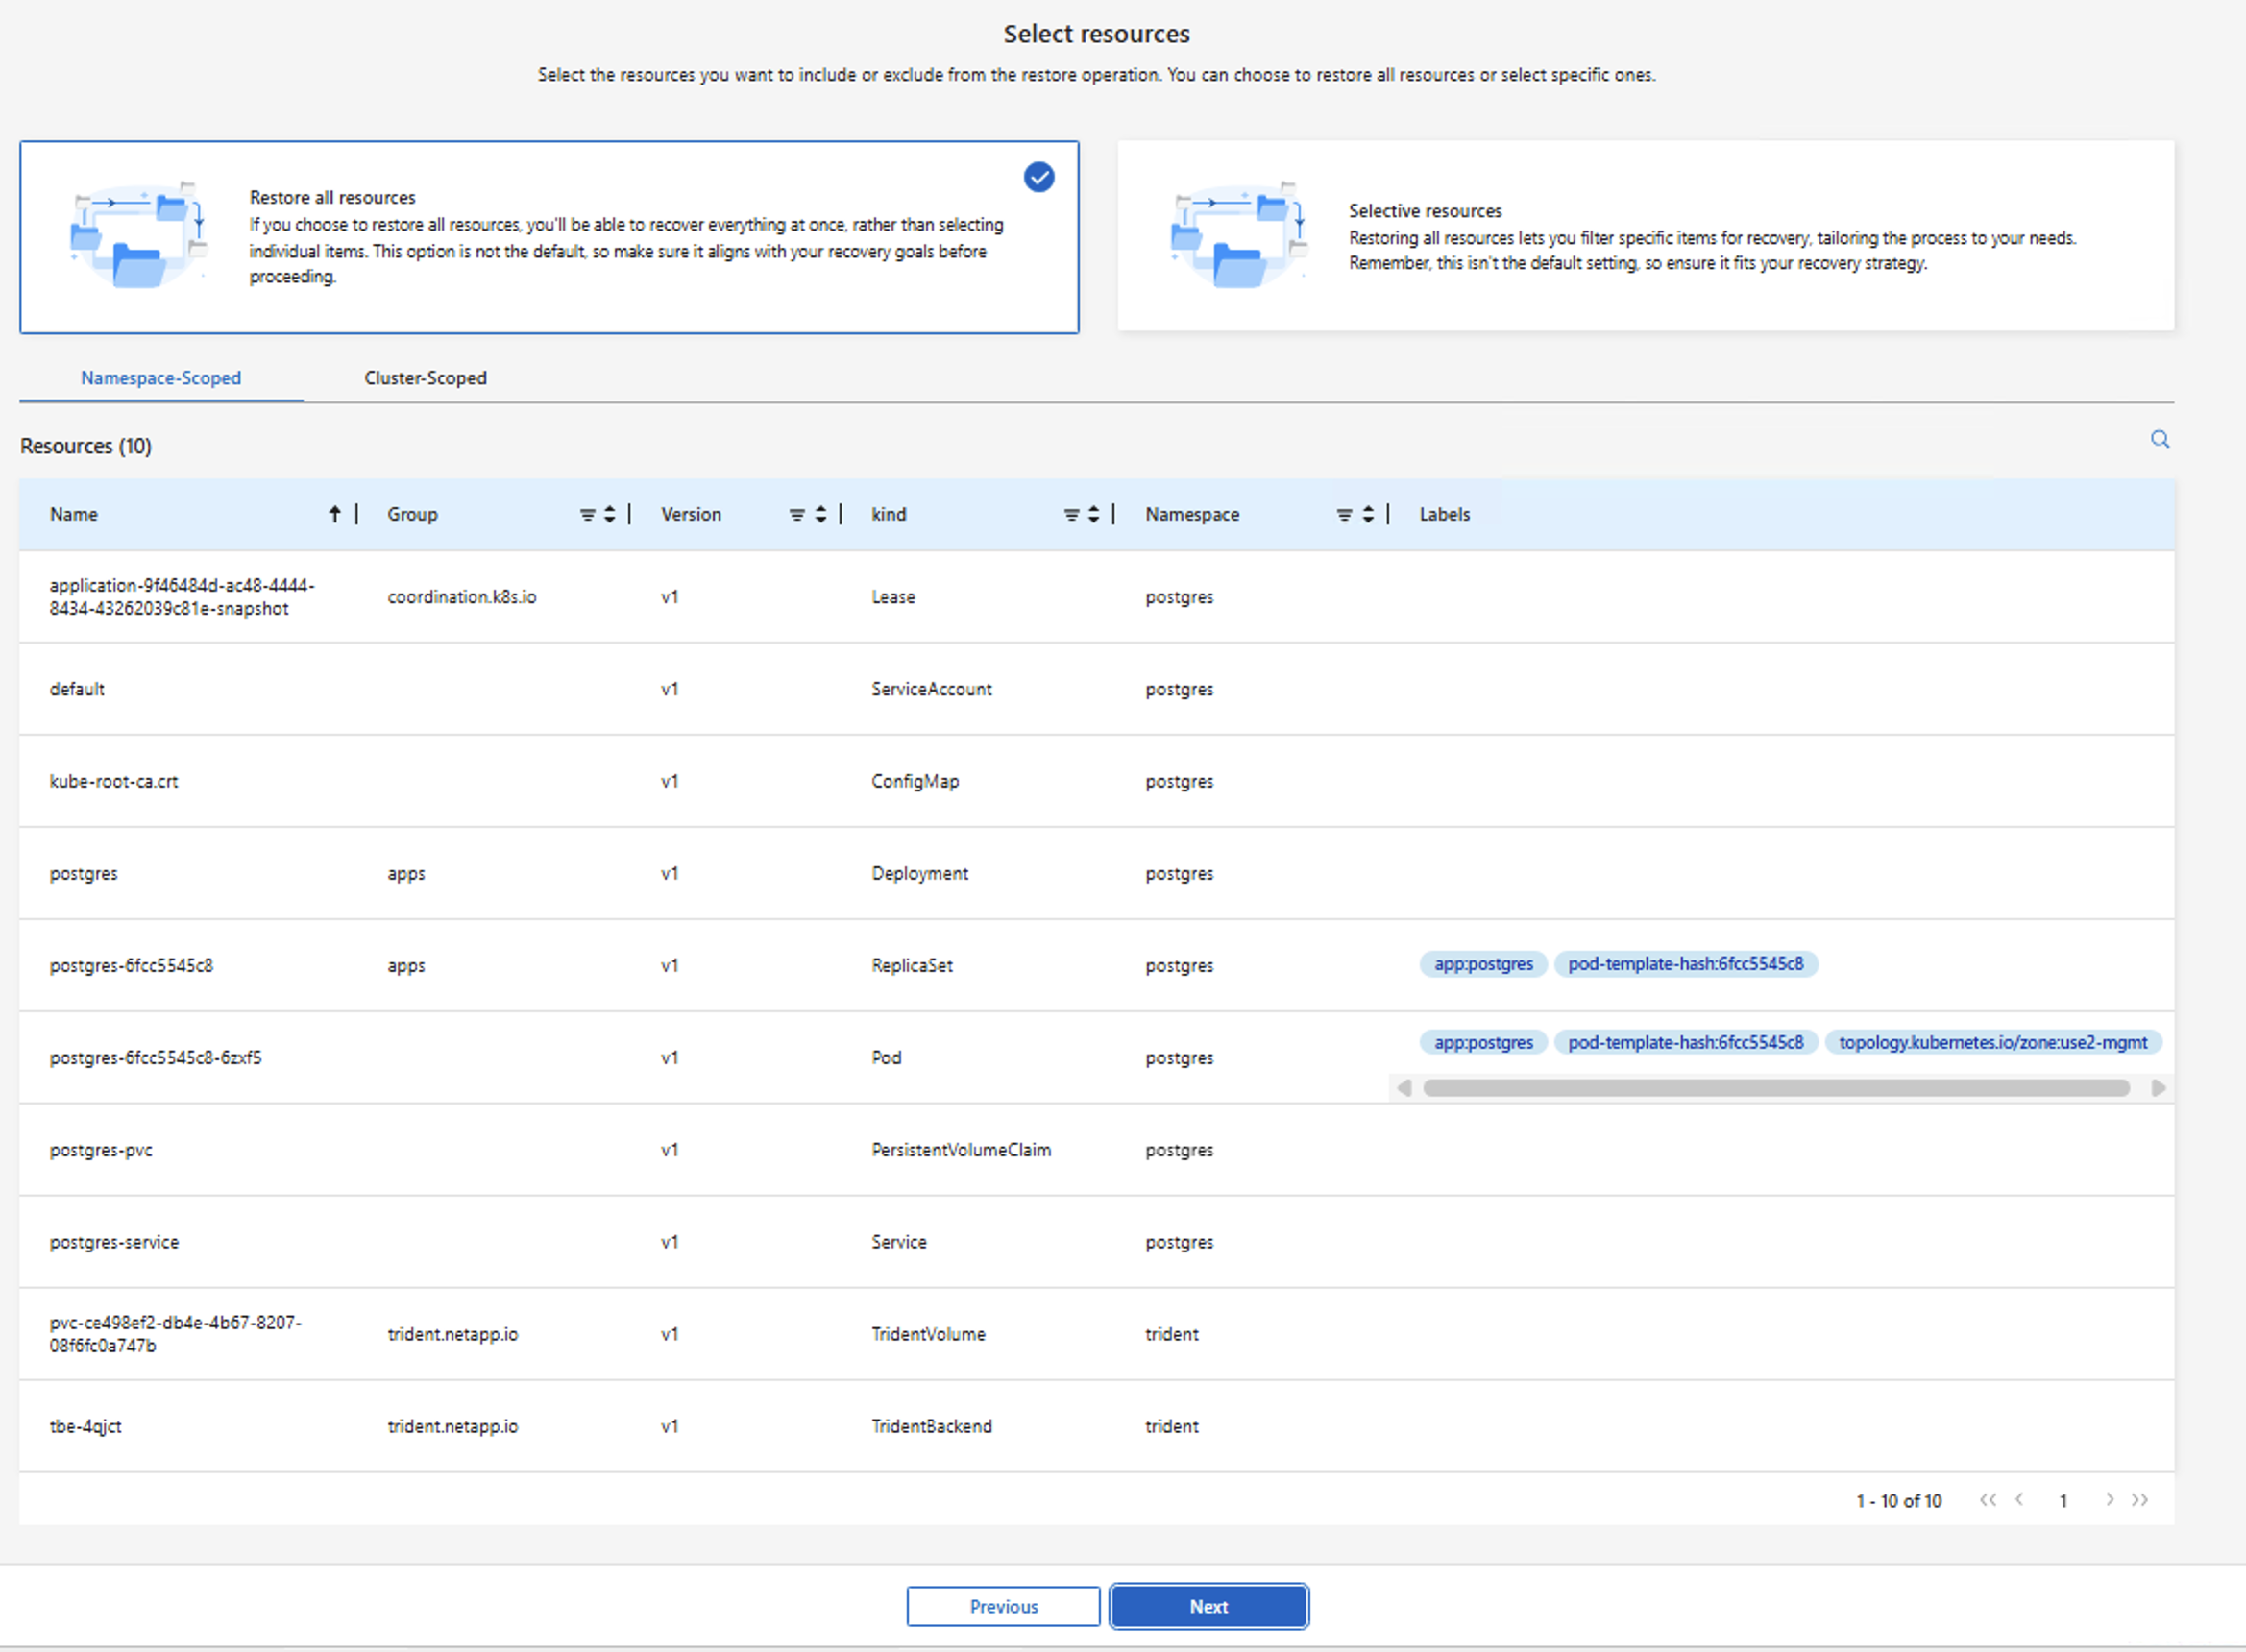
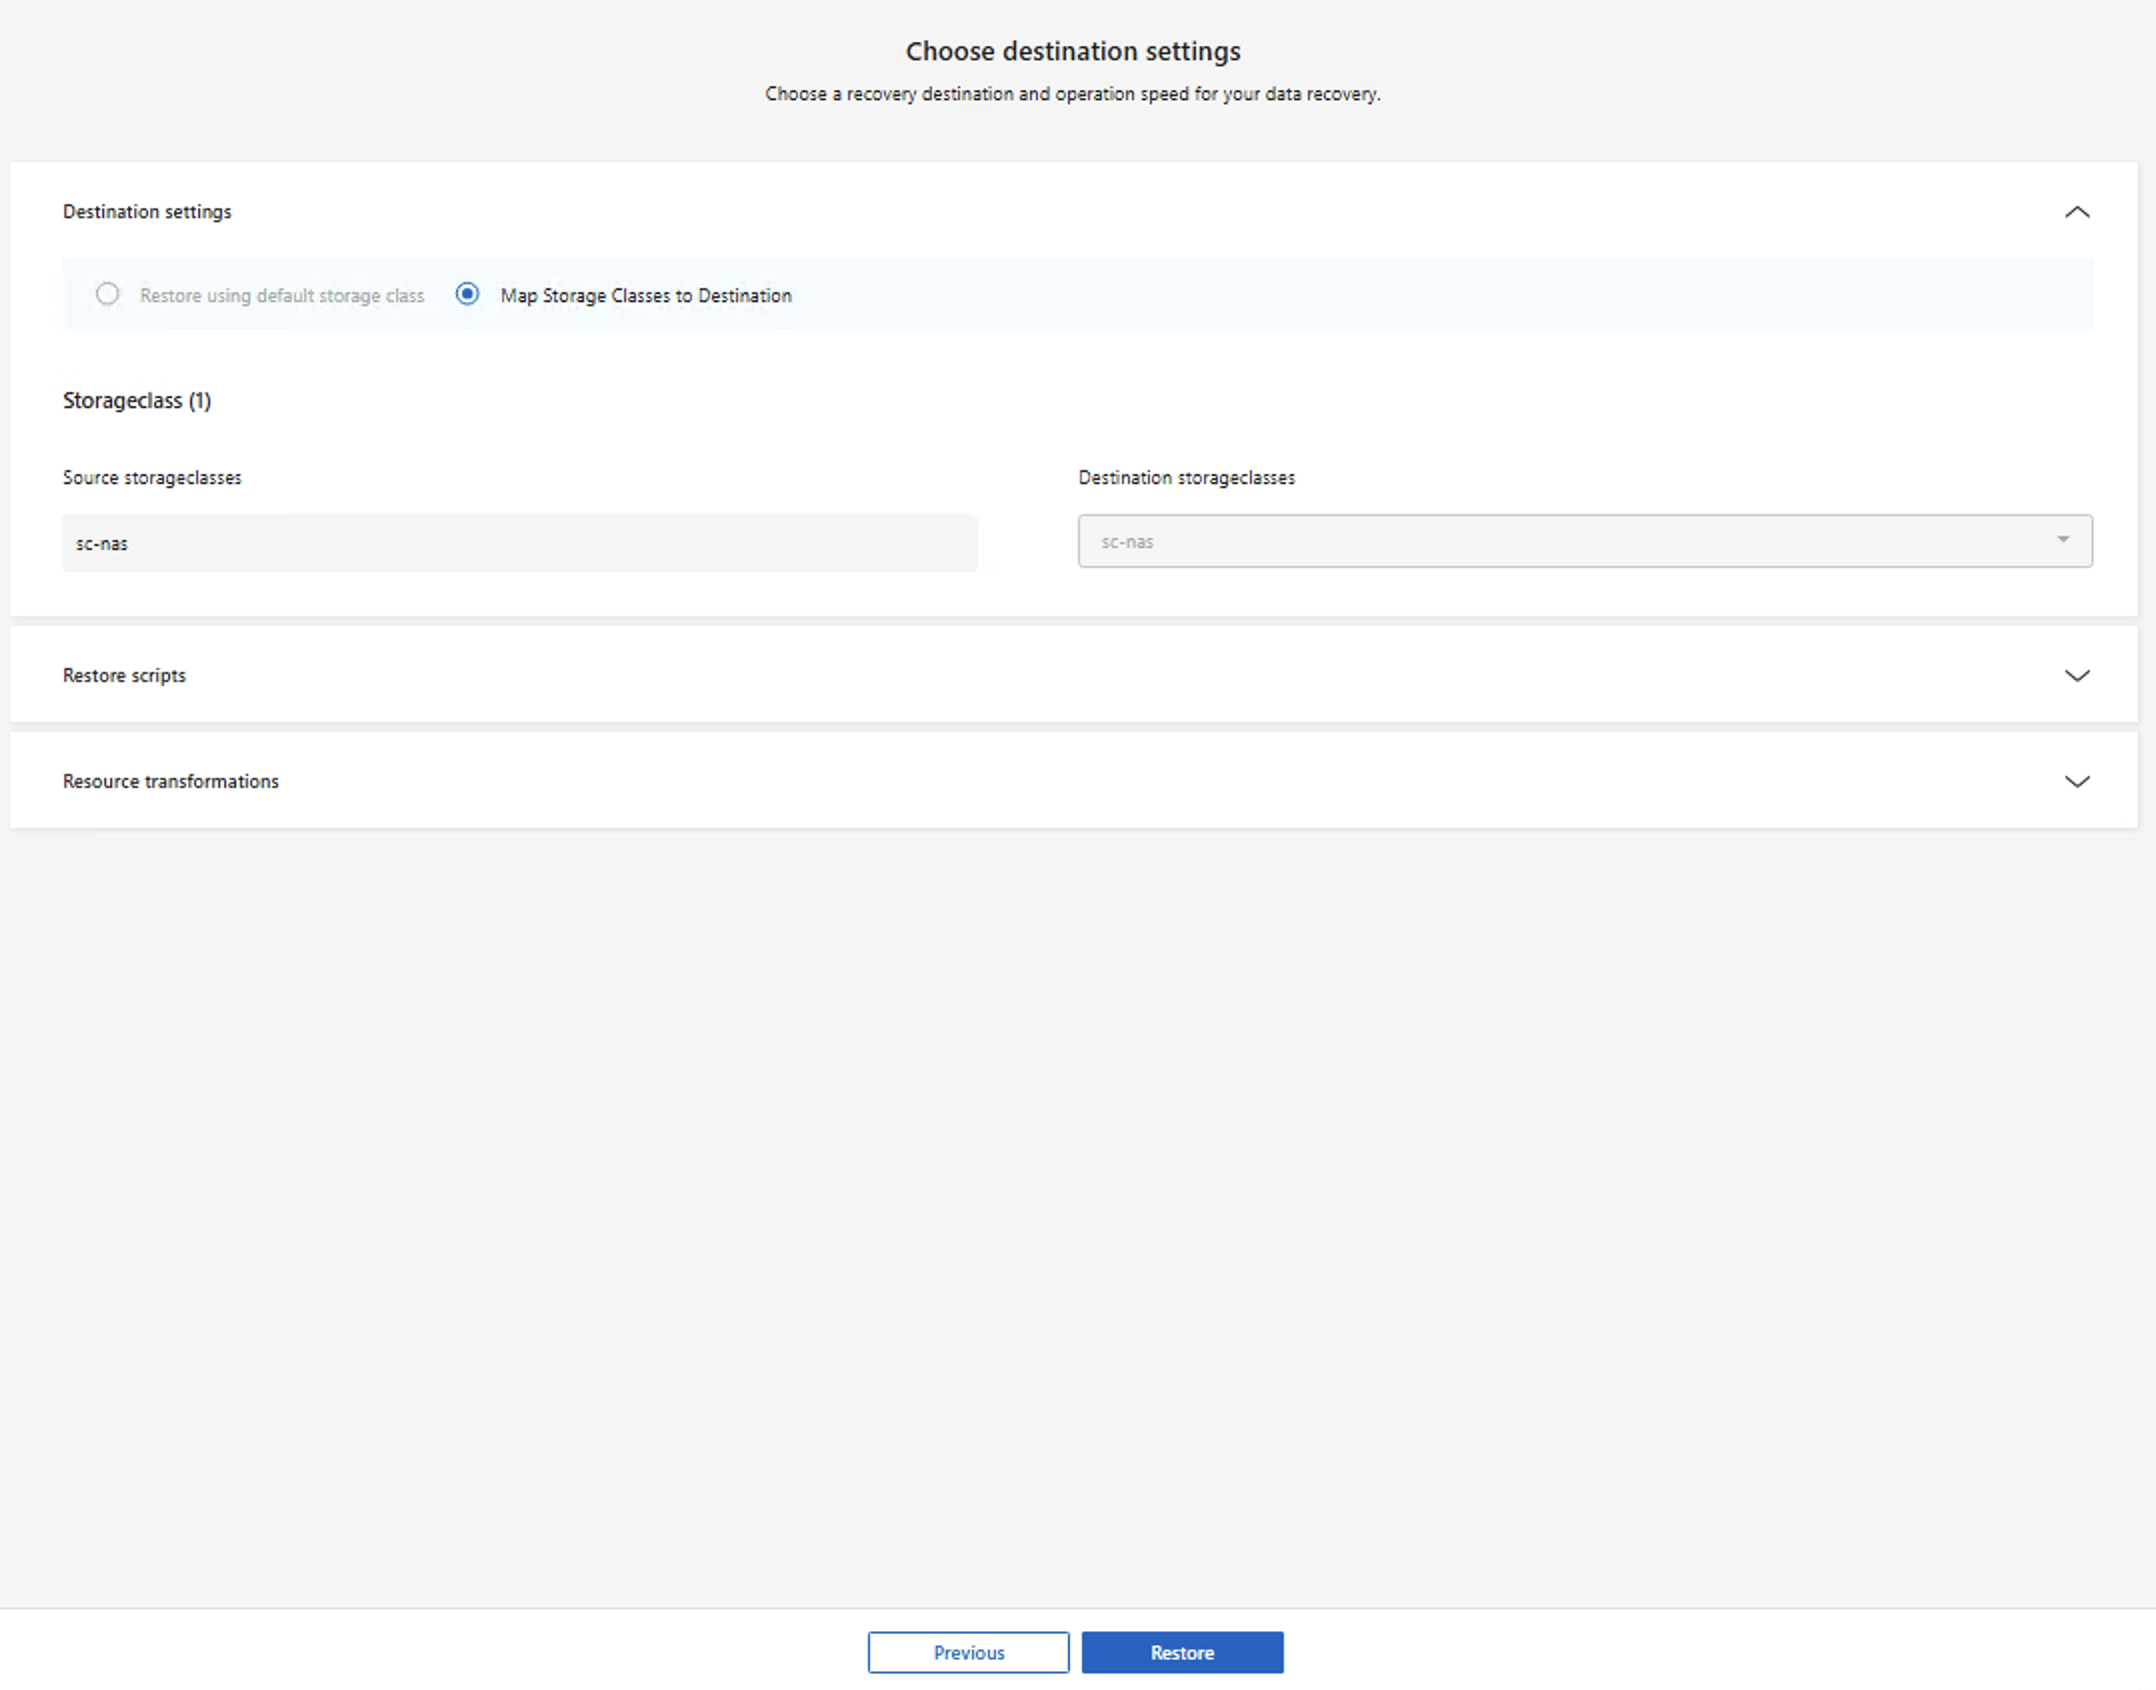
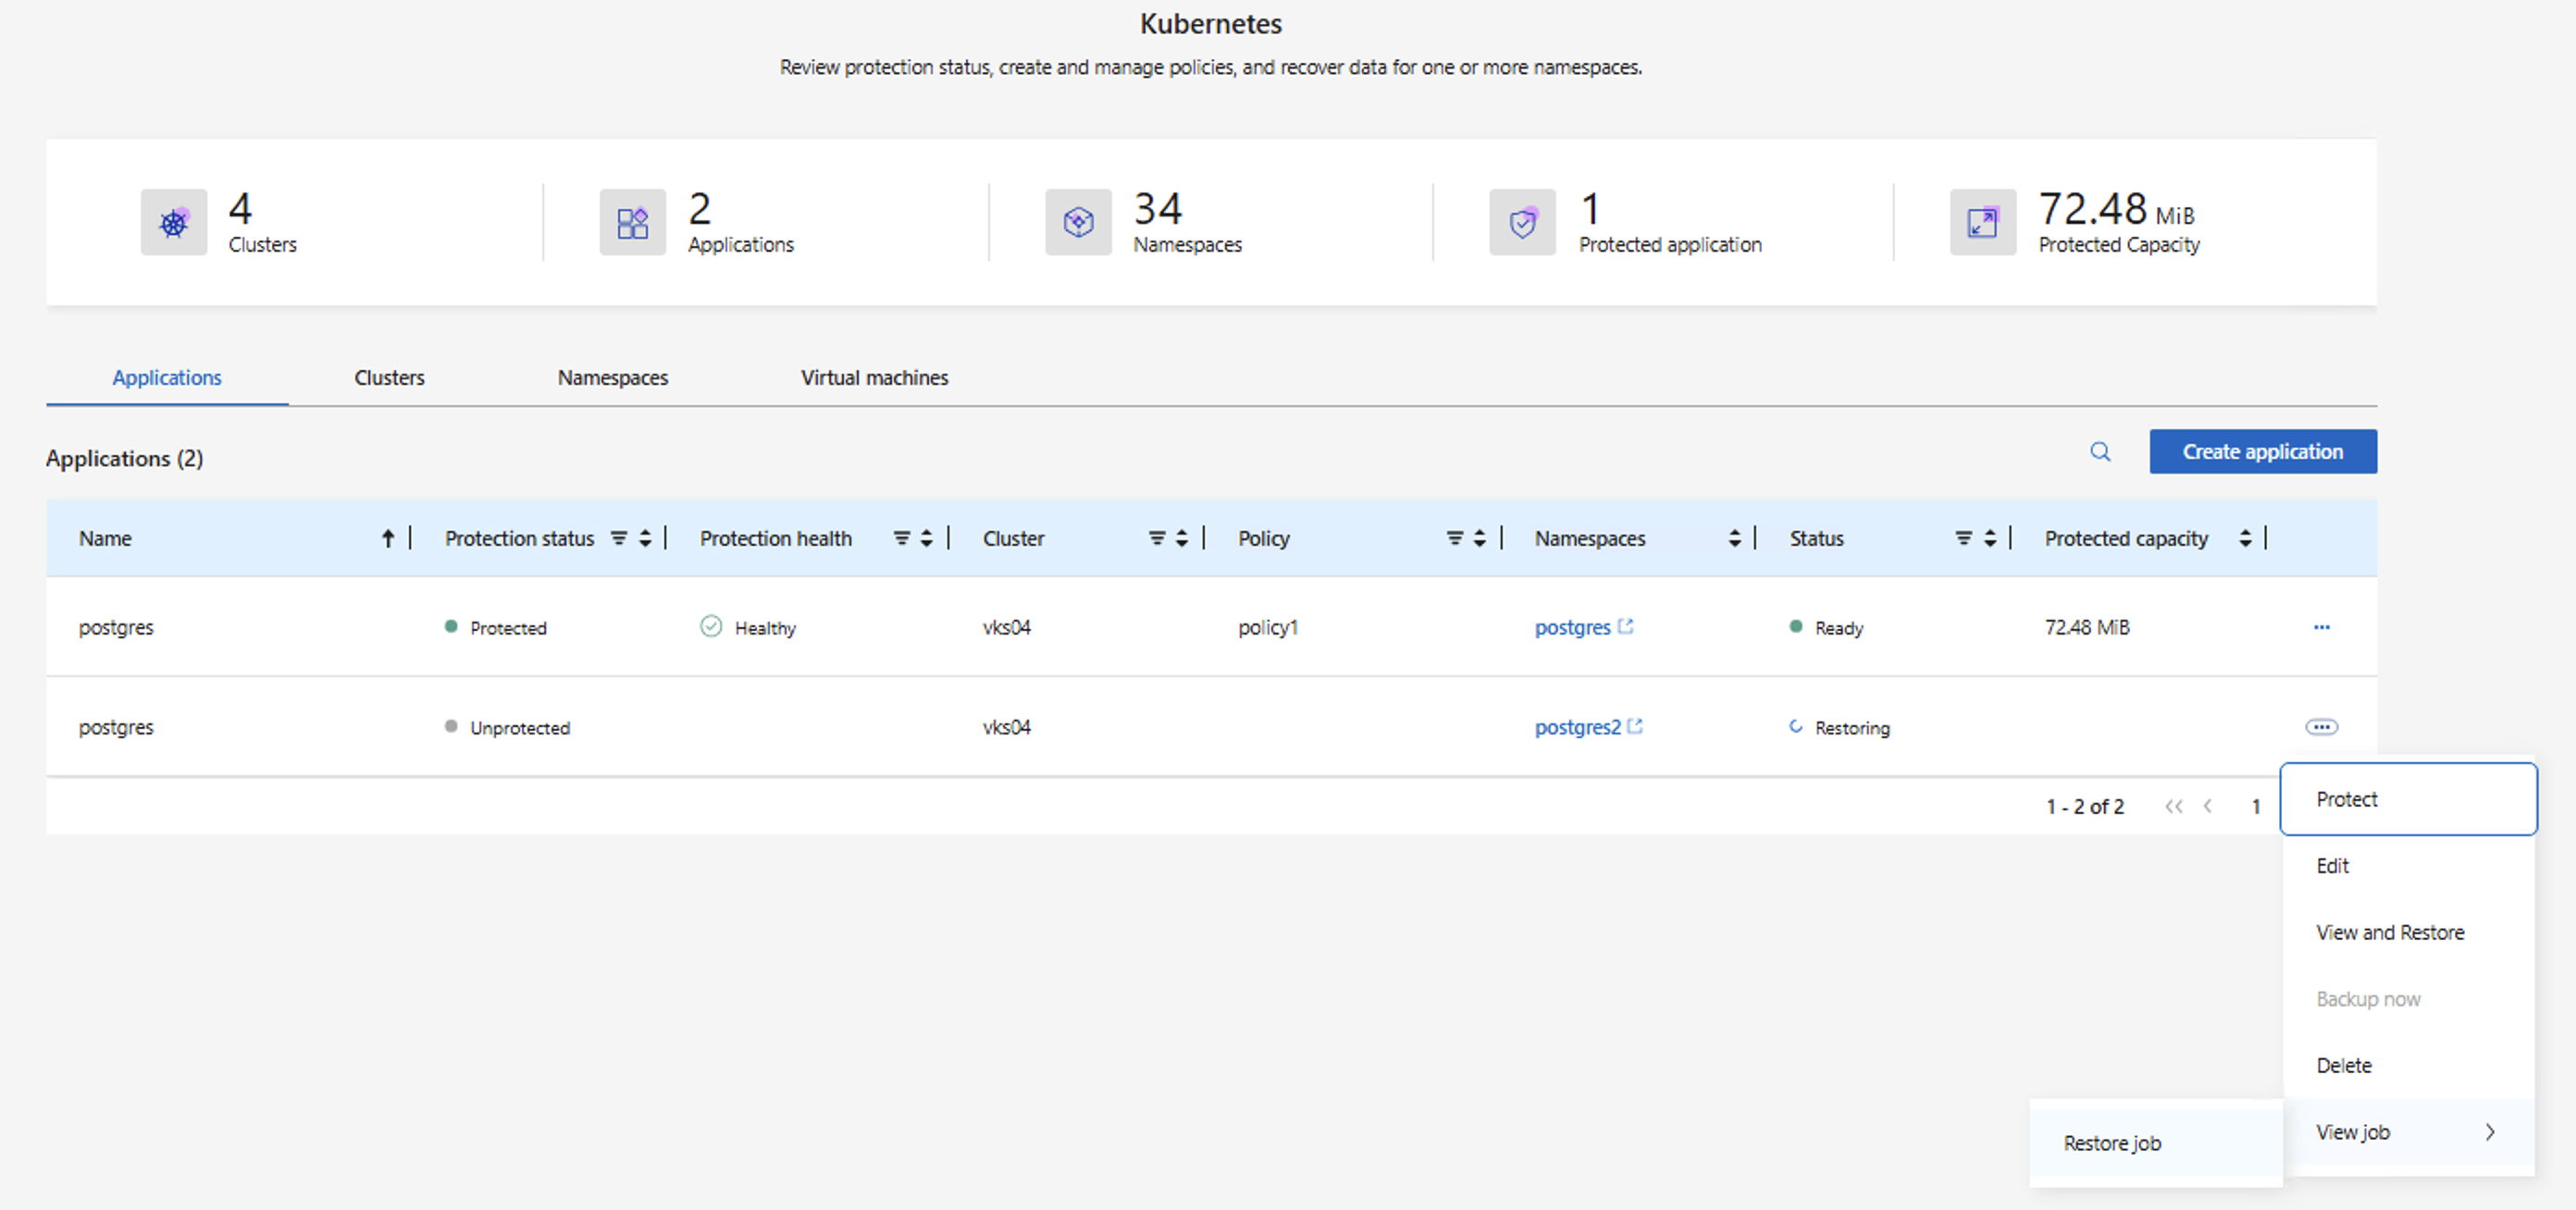
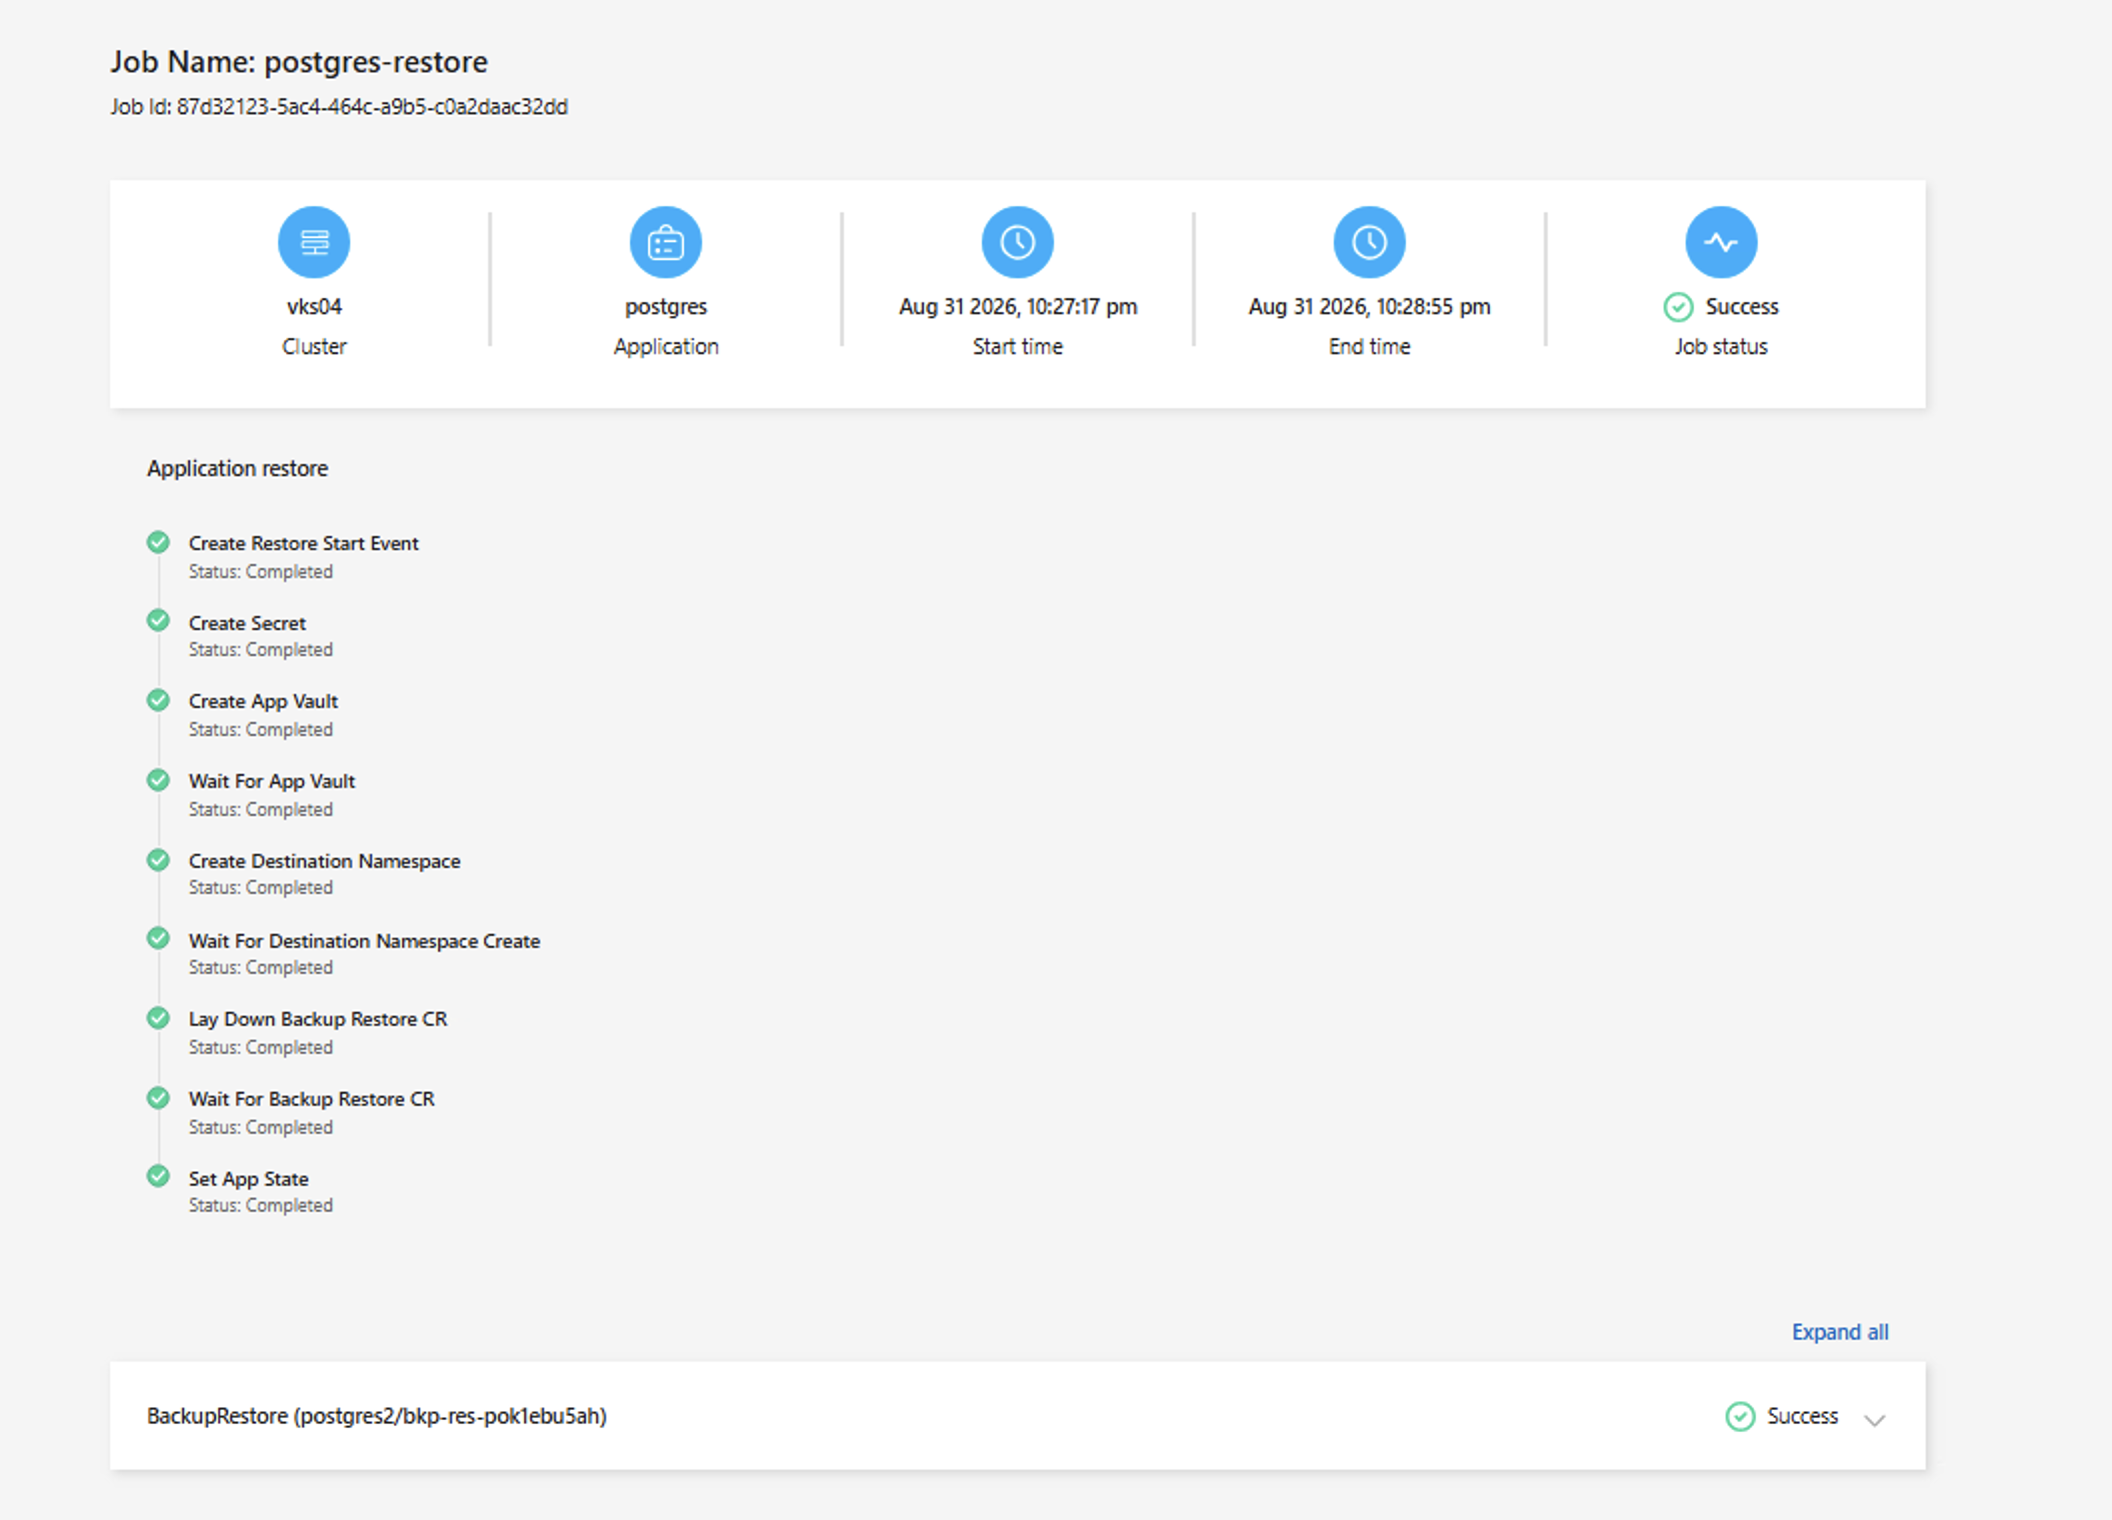
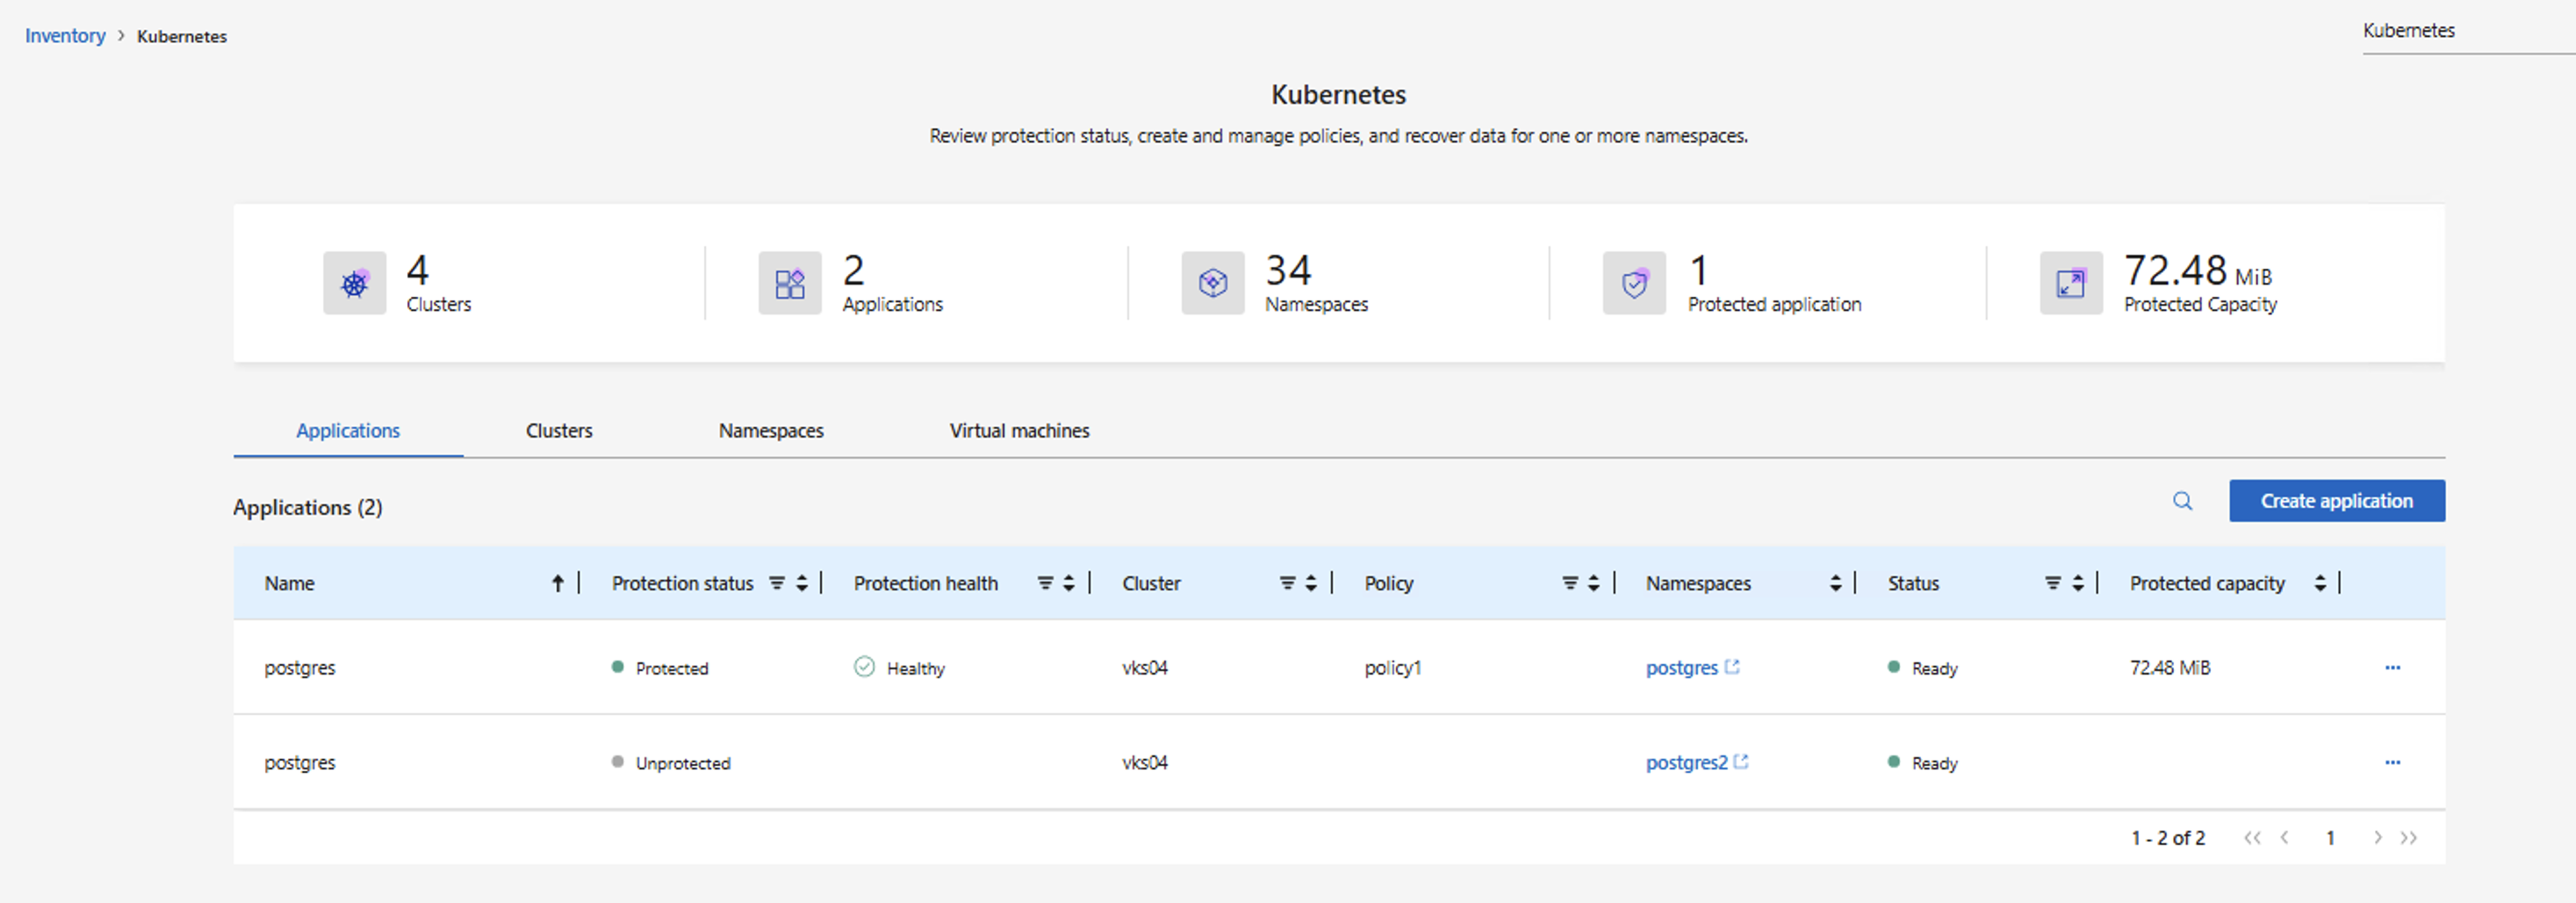
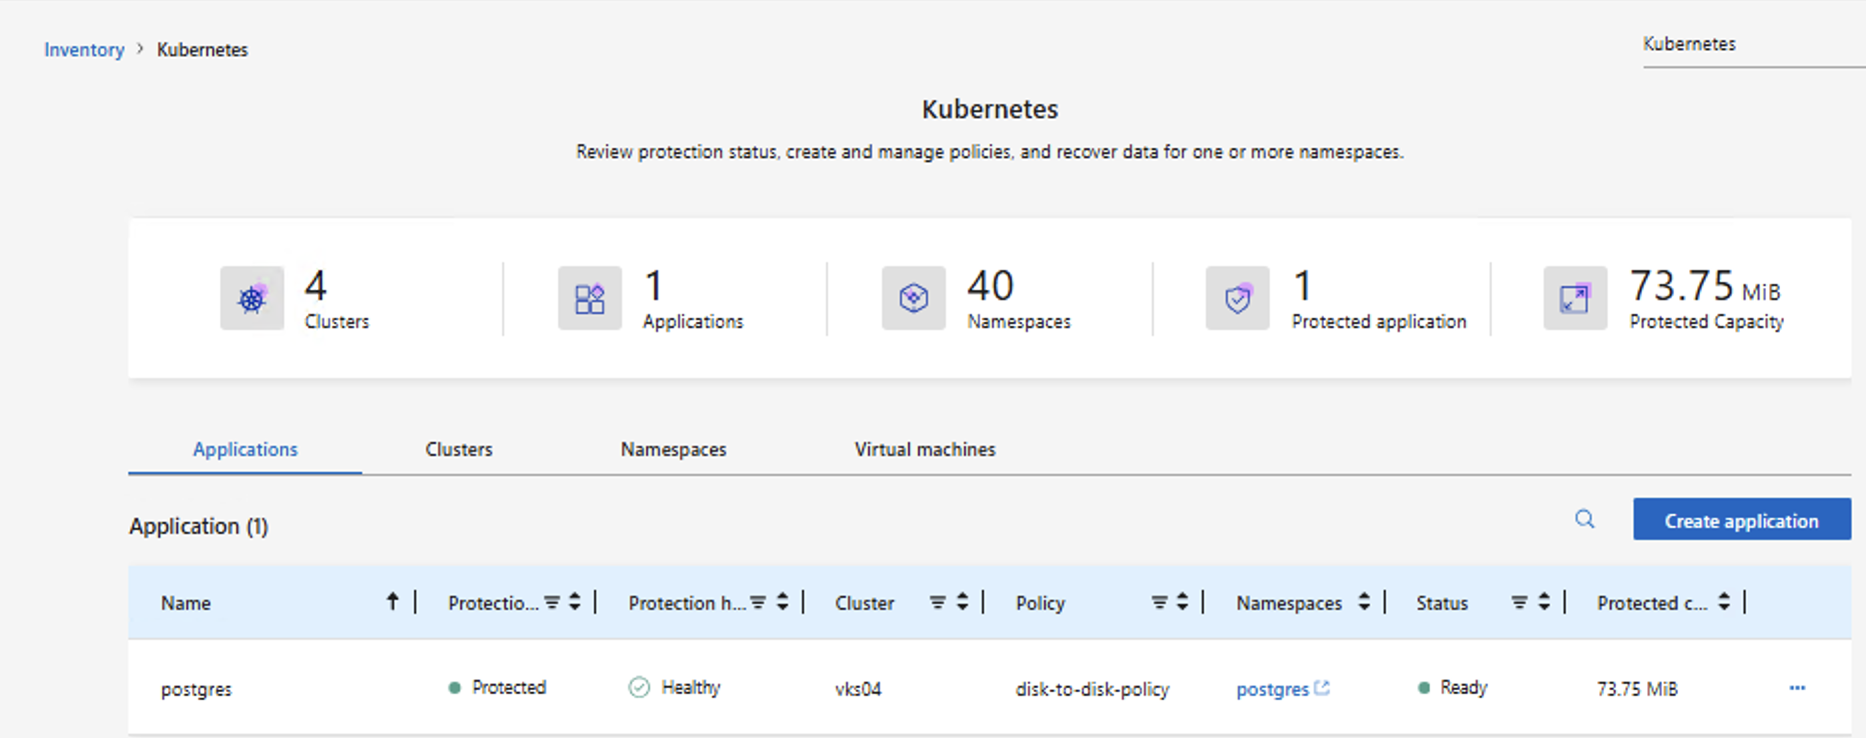
You can watch the progress of the restore job in the Monitor section of NetApp Console. After the restore job is completed, you can see the restored resources in the vSphere Kubernetes cluster.
Show example: Restored application to the same or different namespace
-
Video demonstration
The following video demonstrates how to back up workloads on a VKS cluster to ONTAP S3 object storage using NetApp Console and restore them to the vSphere Kubernetes cluster.
The following video shows an overview of NetApp Console Local features.