Back up and restore container applications in a vSphere Kubernetes Service cluster using Trident Protect

 Suggest changes

 PDFs
PDFs
Back up and restore container applications in a vSphere Kubernetes Service (VKS) cluster using Trident Protect snapshots and backups. This procedure includes creating an AppVault using ONTAP S3 object storage, configuring Trident Protect to capture application data including Kubernetes resource objects and persistent volumes, and restoring the data when necessary.
Container applications running in a VKS cluster are managed as Kubernetes workloads in worker node namespaces. It is important to protect both the application metadata and the persistent volumes so that, if they are lost or corrupted, you can recover them.
The persistent volumes of VKS applications can be backed by ONTAP storage integrated with the VKS cluster using Trident CSI. This procedure uses Trident Protect to create application snapshots, whose metadata is stored in ONTAP object storage while volume snapshot data remains on the storage backend, and backups, whose data is copied to ONTAP object storage. You can restore from either a snapshot or a backup when needed.
Trident Protect enables snapshots, backups, restoration, and disaster recovery of applications on a Kubernetes cluster. Data that can be protected with Trident Protect includes Kubernetes resource objects associated with the applications and their persistent volumes.
The following are the versions of the various components used for the examples in this section
-
VMware Cloud Foundation (VCF) 9.1 with vSphere Kubernetes Service
Install Trident Protect on the vSphere Kubernetes cluster
Install Trident Protect
Use Helm to install Trident Protect on the vSphere Kubernetes Service cluster. The examples in this section use tridentctl-protect, the Trident Protect CLI. Install it by following the instructions in the Trident Protect CLI documentation.
Additional methods of installing Trident Protect are documented in the Trident Protect documentation.
First, create and label the trident-protect namespace. The enforce=privileged label is required because Trident Protect runs privileged workloads. Without it, the Kubernetes pod security admission controller will block Trident Protect pods from starting.
kubectl create namespace trident-protect
kubectl label namespace trident-protect pod-security.kubernetes.io/enforce=privileged
Then add the Helm repository and install Trident Protect into the namespace.
helm repo add netapp-trident-protect https://netapp.github.io/trident-protect-helm-chart
helm install trident-protect netapp-trident-protect/trident-protect --set clusterName=<name-of-cluster> --version 100.2606.0 --namespace trident-protect

|
If Trident Protect pods fail to start with a PodSecurity admission error, the pod security labels may not have been applied to the trident-protect namespace before installation. Use --overwrite to reapply them, then verify the pods start.
|
kubectl label namespace trident-protect pod-security.kubernetes.io/enforce=privileged --overwritekubectl get pods -n trident-protect

Create App Vault for Object Storage
Create AppVault
Before creating snapshots and backups for an application, you must configure object storage in Trident Protect. This is done by creating an AppVault CR. Only administrators can create and configure an AppVault CR.
AppVault objects are the Kubernetes custom resource representation of a storage bucket. An AppVault CR contains the configurations necessary for a bucket to be used in protection operations, such as backups, snapshots, restore operations, and SnapMirror replication.
The following steps create an AppVault CR configured for ONTAP S3:
. Create an S3 object store server in the SVM in the ONTAP cluster.
. Create a bucket in the object store server.
. Create an S3 user in the SVM. Keep the access key and the secret key in a safe location.
+
NOTE: Trident Protect requires the S3 user to have at least PutObject, GetObject, ListBucket, and DeleteObject permissions. Without these permissions, AppVault backup and restore operations fail with access-denied errors. For details, see Trident Protect AppVault documentation.
. In the VKS cluster, create a secret to store the ONTAP S3 credentials.
. Create an AppVault object for ONTAP S3.
Configure Trident Protect AppVault for ONTAP S3

|
The manifest below uses HTTPS with certificate validation enabled, which is required for production. If your ONTAP S3 endpoint uses a certificate signed by a public CA already trusted by the cluster, no additional certificate configuration is needed. If it uses a self-signed or internal CA certificate, provide the custom root CA certificate using the rootCA field as shown in the manifest. See the lab-only variant at the end of this section if you need an HTTP configuration for isolated non-production testing.
|
# alias tp='tridentctl-protect'

# cat appvault-secret.yaml
apiVersion: v1
data:
  accessKeyID: <base64 encoded access key>
  secretAccessKey: <base64 encoded secret access key>
# Alternatively, remove the data section above and use:
# stringData:
#   accessKeyID: "<access key of S3>"
#   secretAccessKey: "<secret access key of S3>"
kind: Secret
metadata:
  name: ontap-s3-appvault-secret1
  namespace: trident-protect
type: Opaque

# cat appvault.yaml
apiVersion: protect.trident.netapp.io/v1
kind: AppVault
metadata:
  name: ontap-s3-appvault1
  namespace: trident-protect
spec:
  providerConfig:
    azure:
      accountName: ""
      bucketName: ""
      endpoint: ""
    gcp:
      bucketName: ""
      projectID: ""
    s3:
      bucketName: trident-protect
      endpoint: <lif for S3 access>
      secure: "true"
      skipCertValidation: "false"
      # If your ONTAP S3 endpoint uses a certificate signed by a public CA
      # already trusted by the cluster, no additional certificate config is needed.
      # If it uses a self-signed or internal CA certificate, provide the
      # root CA certificate:
      # rootCA: <root CA certificate>
  providerCredentials:
    accessKeyID:
      valueFromSecret:
        key: accessKeyID
        name: ontap-s3-appvault-secret1
    secretAccessKey:
      valueFromSecret:
        key: secretAccessKey
        name: ontap-s3-appvault-secret1
  providerType: OntapS3

# kubectl create -f appvault-secret.yaml -n trident-protect
# kubectl create -f appvault.yaml -n trident-protect
Lab-only variant (HTTP, no certificate validation)
Only use the following s3 settings in an isolated lab environment where no sensitive data is present. Do not use these settings in production.
    s3:
      bucketName: trident-protect
      endpoint: <lif for S3 access>
      secure: "false"
      skipCertValidation: "true"
Create a Trident Protect Application
Create a Trident Protect Application
This example covers data protection for the sample PostgreSQL application, which is installed in the postgres namespace. For details about installation, see Deploy VKS workloads using NetApp Storage.
|
|
The sample PostgreSQL PVCs request RWO access mode. The access mode must be explicitly specified in the PVC manifest; Trident does not automatically select an access mode based on the storage protocol. RWX is supported for NAS-backed PVCs, and SAN-backed PVCs can support RWX with additional configuration. For more information, refer to the Trident Protect documentation. |
In the example, the postgres namespace has one application and all resources of the namespace are included when creating the Trident Protect Application.
# alias tp='tridentctl-protect'
# tp create app postgres-app --namespaces postgres -n postgres --dry-run > postgres-app.yaml

# cat postgres-app.yaml
apiVersion: protect.trident.netapp.io/v1
kind: Application
metadata:
  name: postgres-app
spec:
  includedNamespaces:
  - namespace: postgres
  resourceFilter: {}
# kubectl create -f postgres-app.yaml -n postgres
Protect the app by creating a backup
Create Backups
Create an On-demand Backup
Create a backup for the postgres-app created previously that includes all resources in the postgres namespace. Provide the appvault name where the backups will be stored.
# cat postgres-backup-on-demand.yaml
apiVersion: protect.trident.netapp.io/v1
kind: Backup
metadata:
  name: postgres-backup-on-demand
spec:
  appVaultRef: ontap-s3-appvault1
  applicationRef: postgres-app
  cleanupSnapshot: true
  replicateSnapshot: false
kubectl create -f postgres-backup-on-demand.yaml -n postgres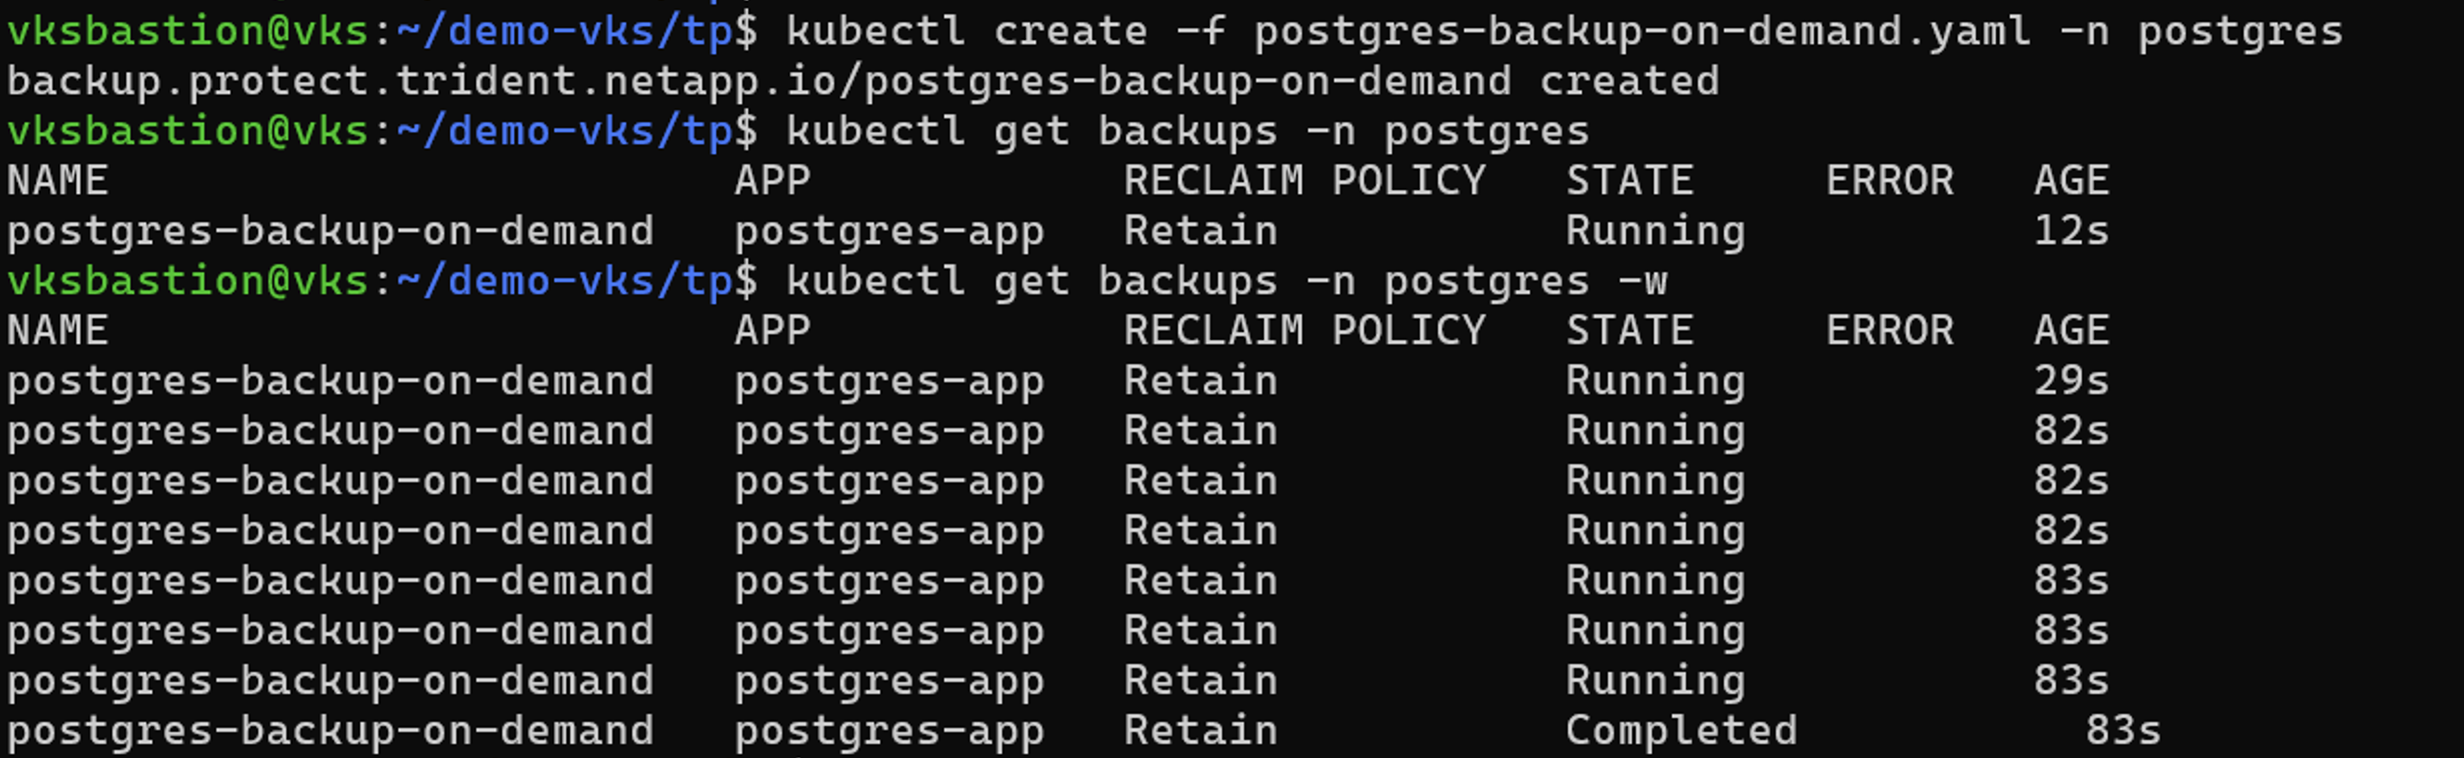

Create Backups on a Schedule
Create a schedule for the backups specifying the granularity and the number of backups to retain.
# tp create schedule backup-schedule1 --app postgres-app --appvault ontap-s3-appvault1 --granularity Hourly --minute 45 --backup-retention 1 -n postgres --dry-run>postgres-backup-schedule1.yaml

#cat postgres-backup-schedule1.yaml
apiVersion: protect.trident.netapp.io/v1
kind: Schedule
metadata:
  name: backup-schedule1
  namespace: postgres
spec:
  appVaultRef: ontap-s3-appvault1
  applicationRef: postgres-app
  backupRetention: "1"
  dayOfMonth: ""
  dayOfWeek: ""
  enabled: true
  granularity: Hourly
  hour: ""
  minute: "45"
  recurrenceRule: ""
  replicationRetention: "0"
  runImmediately: false
  snapshotRetention: "0"
# kubectl create -f postgres-backup-schedule1.yaml -n postgres

Restore from Backup
Restore from Backups
Restore the application to the same namespace
In this example, the backup postgres-backup-on-demand contains the backup for the postgres-app.
Before deleting the application, verify that the backup you plan to restore from is in the Completed state. An in-progress or failed backup cannot be used to restore the application.
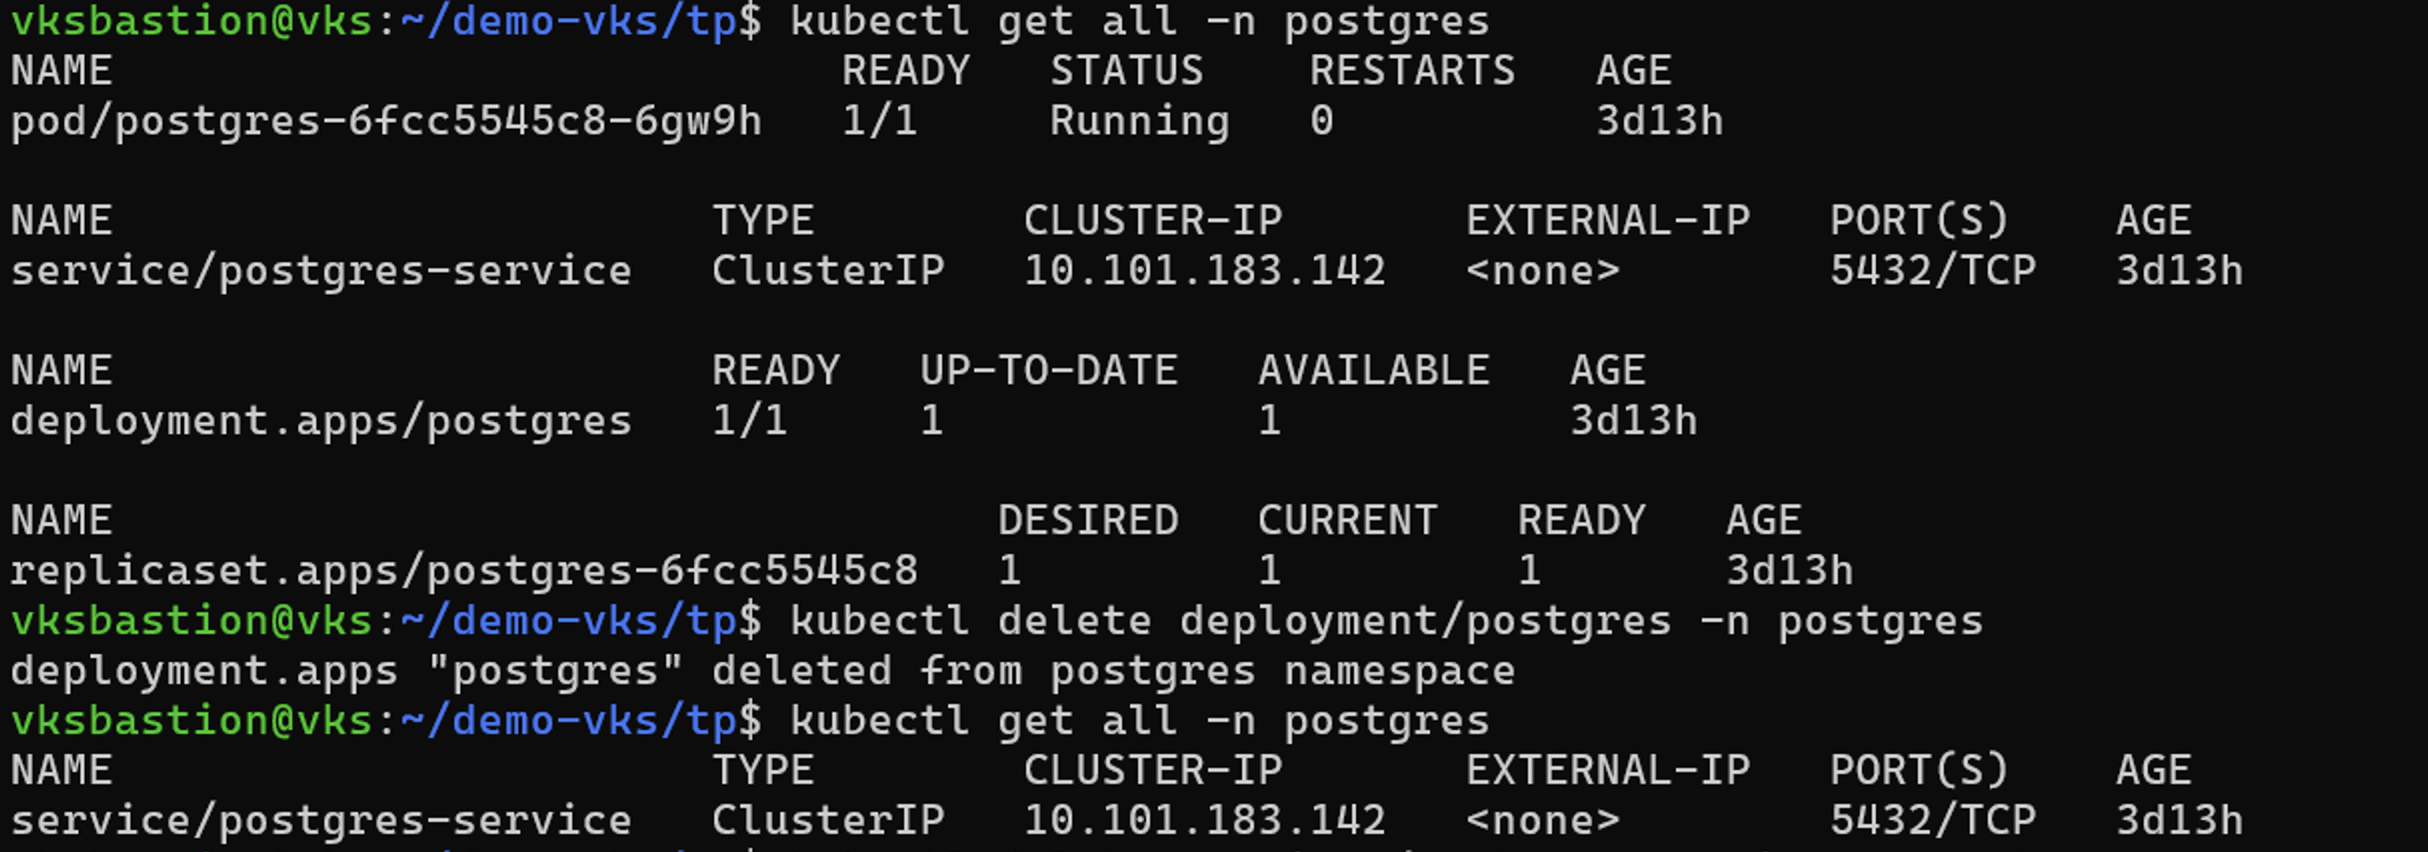
kubectl get backup -n postgresAfter confirming that the backup state is Completed, delete the postgres application and ensure that the PVCs and pod objects are deleted from the namespace "postgres".


Now, create a backup-in-place restore object.
# tp create bir postgres-app-restore --backup postgres/postgres-backup-on-demand -n postgres --dry-run>postgres-app-bir.yaml

# cat postgres-app-bir.yaml
apiVersion: protect.trident.netapp.io/v1
kind: BackupInplaceRestore
metadata:
  annotations:
    protect.trident.netapp.io/max-parallel-restore-jobs: "25"
  name: postgres-app-restore
  namespace: postgres
spec:
  appArchivePath: postgres-app_314bbaf6-2ce3-4065-b3c1-ab85c7bb7c7c/backups/postgres-backup-on-demand_63efc9d1-92d7-45ce-84fe-846ce7db7b29
  appVaultRef: ontap-s3-appvault1
  cleanUpAdditionalExecHooks: true
  cleanUpArchivedExecHooks: false
  resourceFilter: {}
  runArchivedExecHooks: true

# kubectl create -f postgres-app-bir.yaml -n postgres
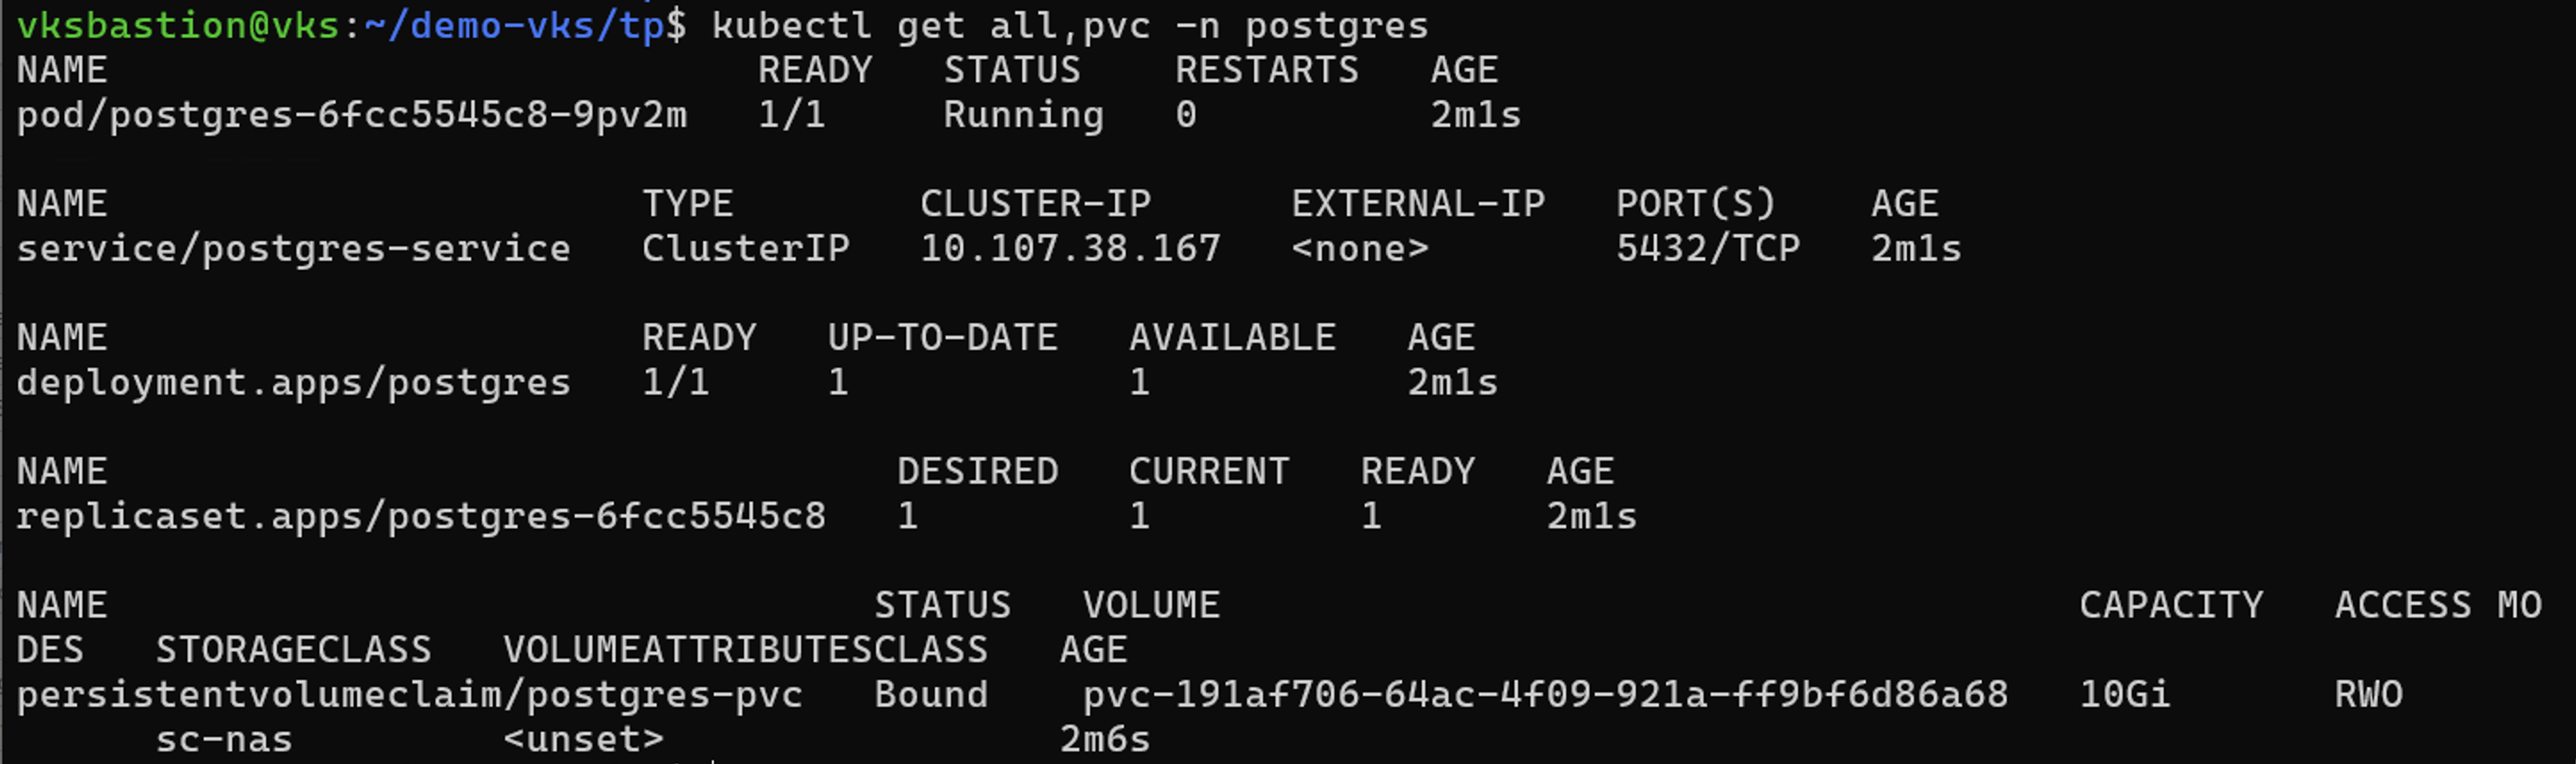
Verify that the postgres application deployment, service, pod, and PVCs are restored.
Restore the application to a different namespace
First, create a new namespace to which you want to restore the app, in this example postgres2.
An hourly backup created by the schedule is now available for the postgres-app. Use this backup to restore the application to the new namespace postgres2.

# tp create backuprestore --appvault ontap-s3-appvault1 --path postgres-app_314bbaf6-2ce3-4065-b3c1-ab85c7bb7c7c/backups/hourly-cbd11-20260831124500_2b57bda9-5cb0-4c8f-ae7a-20f94c23c3b9 --namespace-mapping postgres:postgres2 -n postgres2 --dry-run>postgres-app-postgres2-br.yaml|
|
To get the path for the backup, use the command kubectl get backups <backup-name> -n postgres -o jsonpath='{.status.appArchivePath}'.
|

apiVersion: protect.trident.netapp.io/v1
kind: BackupRestore
metadata:
  annotations:
    protect.trident.netapp.io/max-parallel-restore-jobs: "25"
  name: postgres-app-z2woek
  namespace: postgres2
spec:
  appArchivePath: postgres-app_314bbaf6-2ce3-4065-b3c1-ab85c7bb7c7c/backups/hourly-cbd11-20260831124500_2b57bda9-5cb0-4c8f-ae7a-20f94c23c3b9
  appVaultRef: ontap-s3-appvault1
  cleanUpAdditionalExecHooks: true
  cleanUpArchivedExecHooks: false
  namespaceMapping:
  - destination: postgres2
    source: postgres
  resourceFilter: {}
  runArchivedExecHooks: true
  skipApplicationCreation: false

# kubectl create -f postgres-app-postgres2-br.yaml -n postgres2
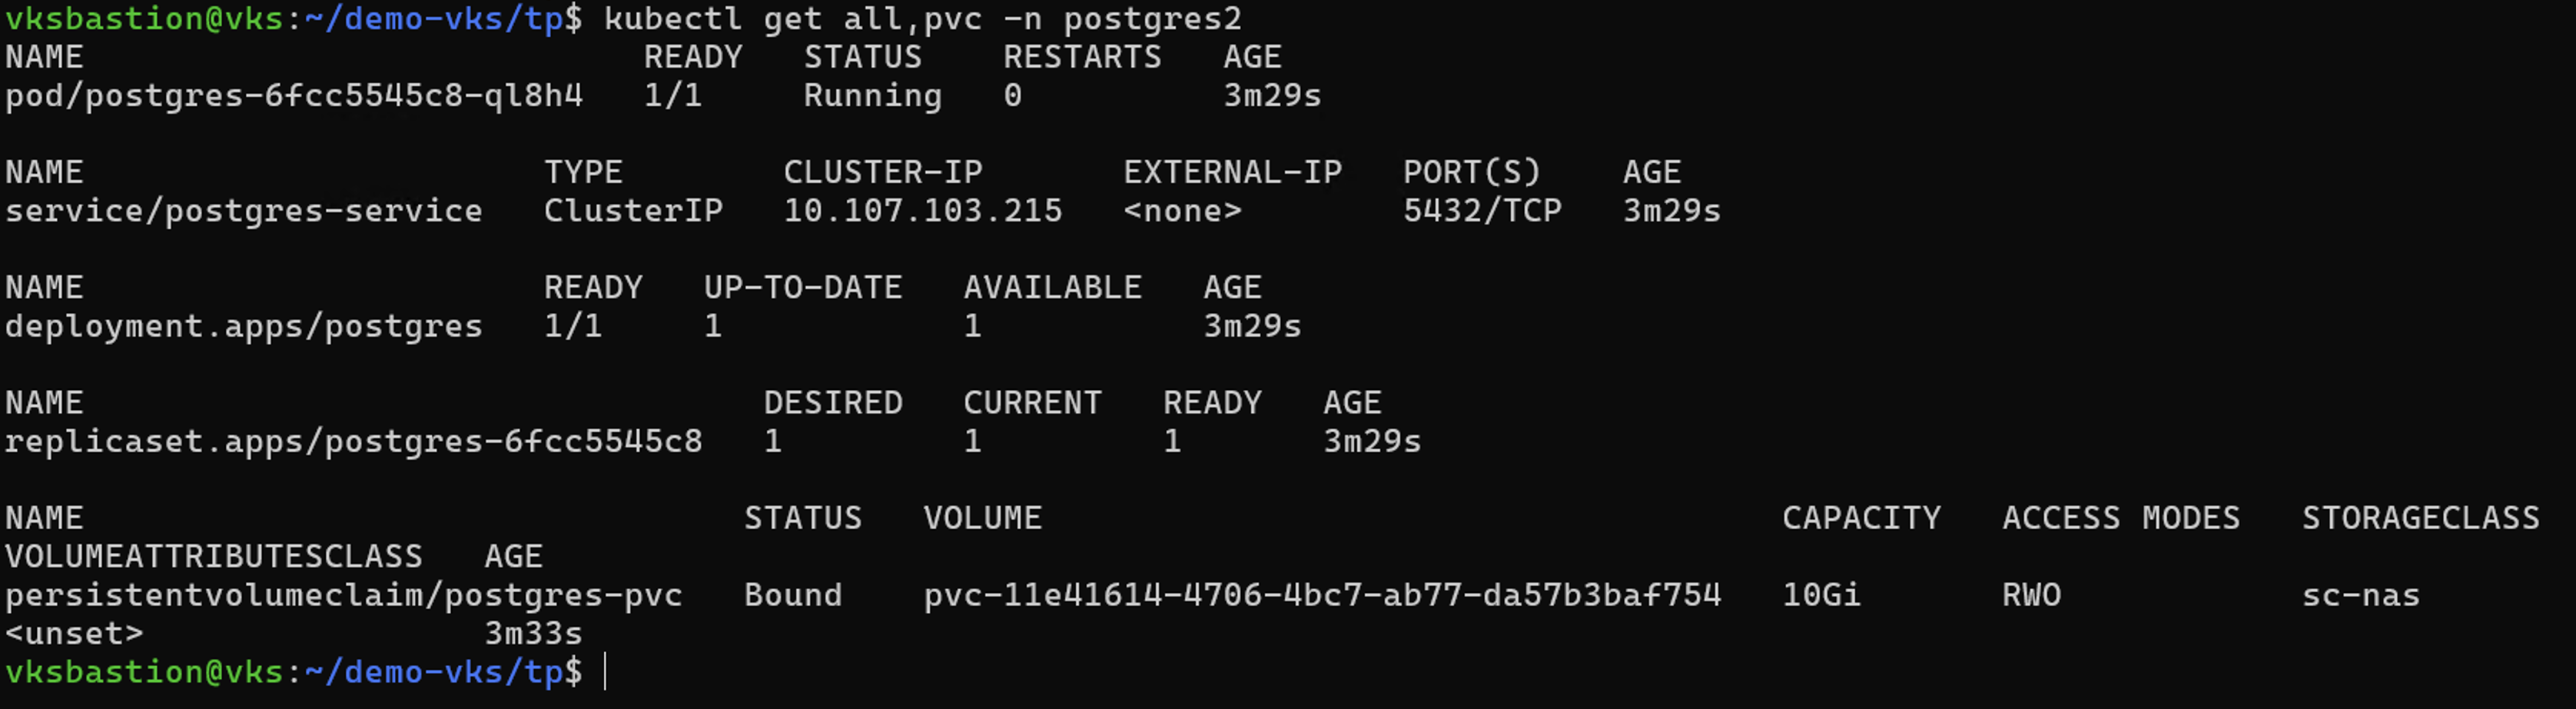
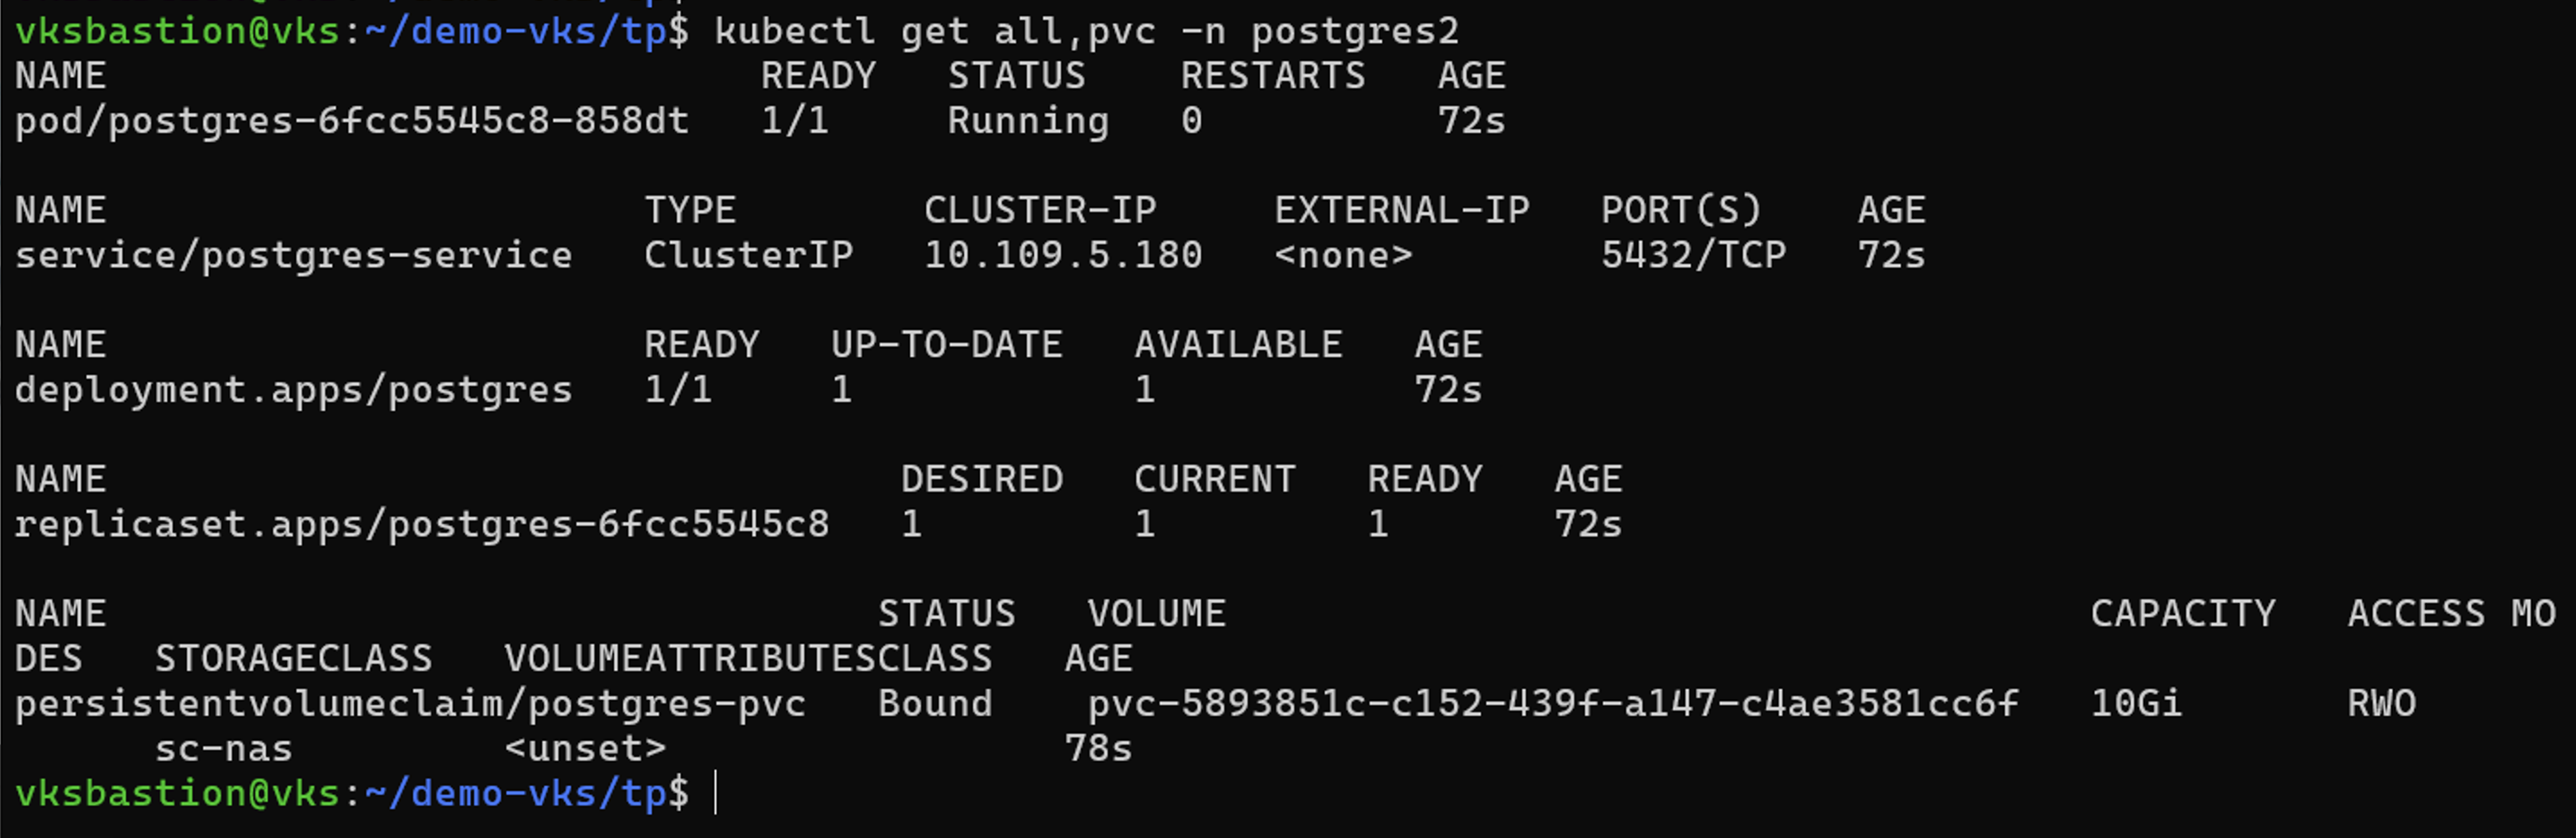
Verify that the postgres application objects and PVCs are created in the new namespace postgres2.
Protect the app using Snapshots
Create Snapshots
Create an on-demand snapshot
Create a snapshot for the app and specify the AppVault where the snapshot metadata will be stored. The volume snapshot data itself is not copied to object storage — it remains on the storage backend.
# tp create snapshot postgres-app-snapshot-ondemand --app postgres-app --appvault ontap-s3-appvault1 -n postgres --dry-run>postgres-app-snapshot-ondemand.yaml

# cat postgres-app-snapshot-ondemand.yaml
apiVersion: protect.trident.netapp.io/v1
kind: Snapshot
metadata:
  name: postgres-app-snapshot-ondemand
  namespace: postgres
spec:
  appVaultRef: ontap-s3-appvault1
  applicationRef: postgres-app
  cleanupSnapshot: false
  completionTimeout: 0s
  volumeSnapshotsCreatedTimeout: 0s
  volumeSnapshotsReadyToUseTimeout: 0s

# kubectl create -f postgres-app-snapshot-ondemand.yaml
snapshot.protect.trident.netapp.io/postgres-app-snapshot-ondemand created
Create a schedule for snapshots
Create a schedule for the snapshots. Specify the granularity and the number of snapshots to be retained.
# tp create schedule snapshot-schedule1 --app postgres-app --appvault ontap-s3-appvault1 --granularity Hourly --minute 55 --snapshot-retention 1 -n postgres --dry-run>postgres-app-snapshot-schedule1.yaml

# cat postgres-app-snapshot-schedule1.yaml
apiVersion: protect.trident.netapp.io/v1
kind: Schedule
metadata:
  name: snapshot-schedule1
  namespace: postgres
spec:
  appVaultRef: ontap-s3-appvault1
  applicationRef: postgres-app
  backupRetention: "0"
  dayOfMonth: ""
  dayOfWeek: ""
  enabled: true
  granularity: Hourly
  hour: ""
  minute: "55"
  recurrenceRule: ""
  replicationRetention: "0"
  runImmediately: false
  snapshotRetention: "1"

# kubectl create -f postgres-app-snapshot-schedule1.yaml
schedule.protect.trident.netapp.io/snapshot-schedule1 created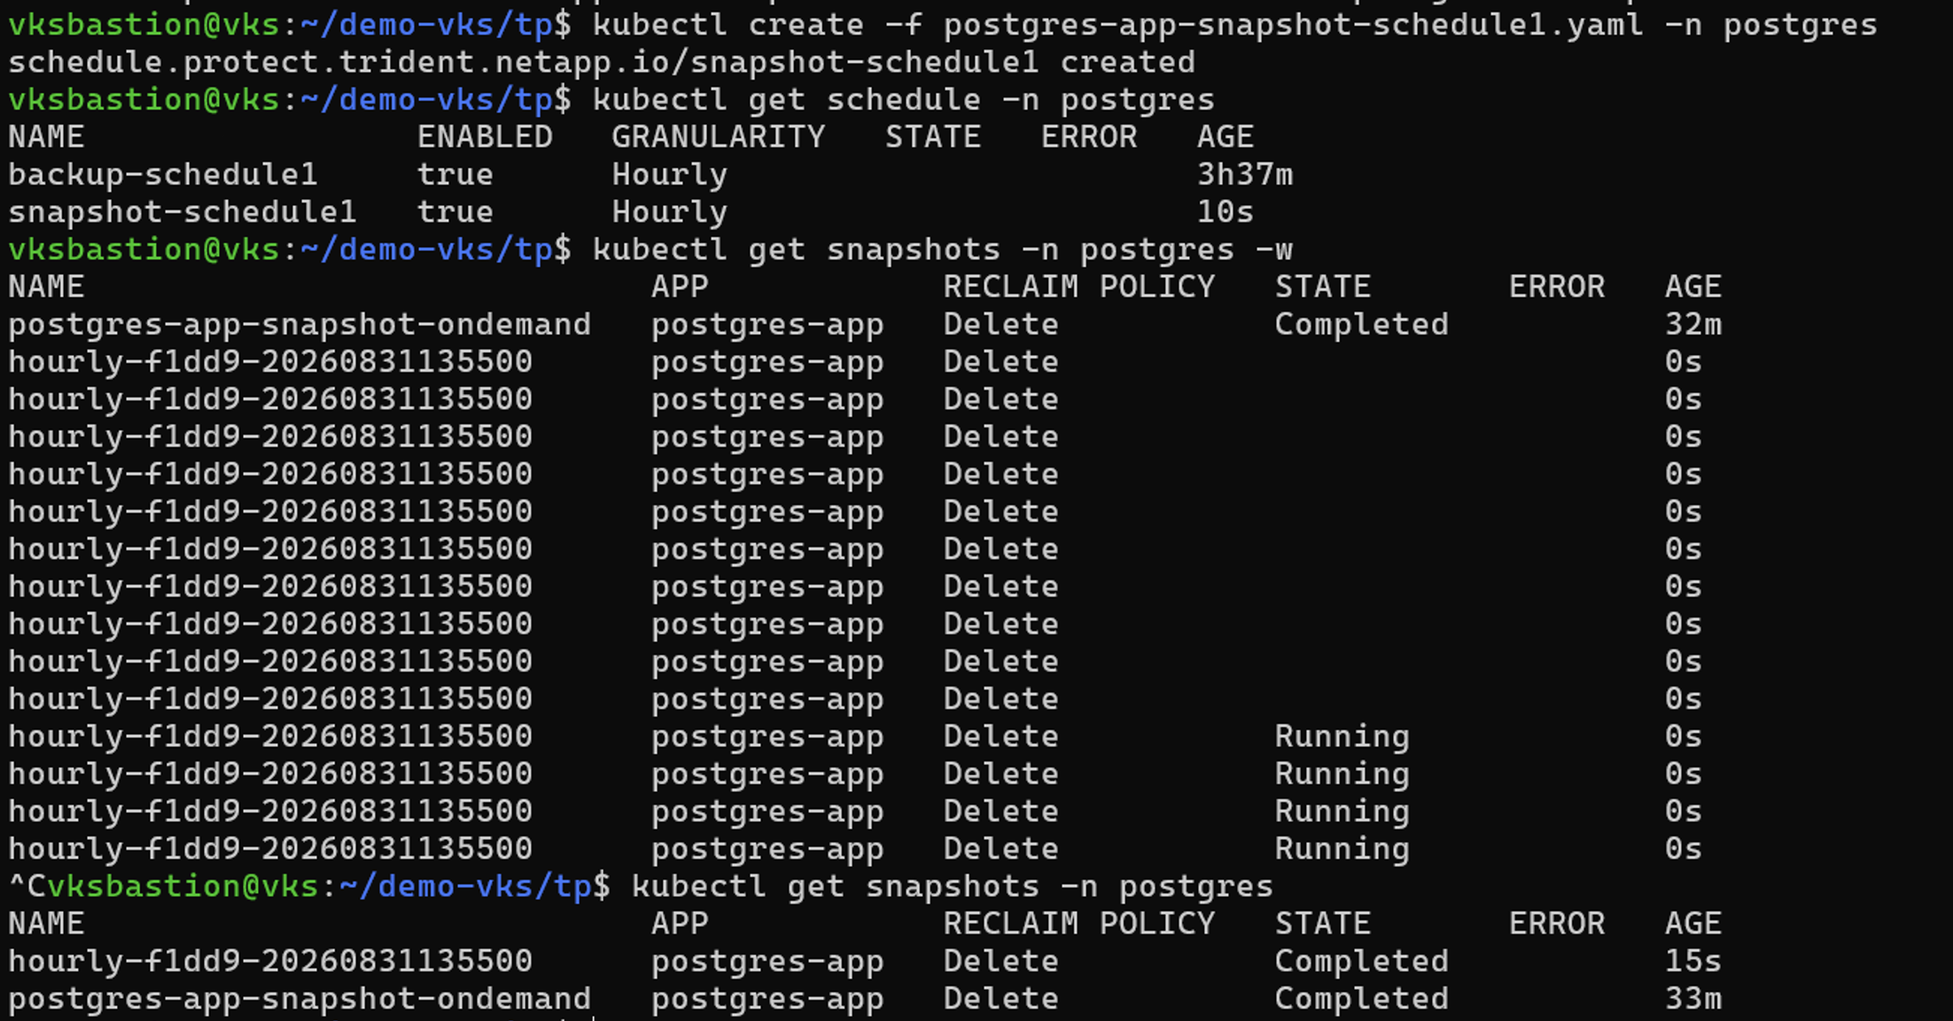
Restore from Snapshot
Restore from Snapshot
Restore the application from a snapshot to the same namespace
Before deleting the application, verify that the snapshot you plan to restore from is in the Completed state. An in-progress or failed snapshot cannot be used to restore the application.
kubectl get snapshot -n postgresAfter confirming that the snapshot state is Completed, delete the application objects and the PVCs for postgres from the postgres namespace.
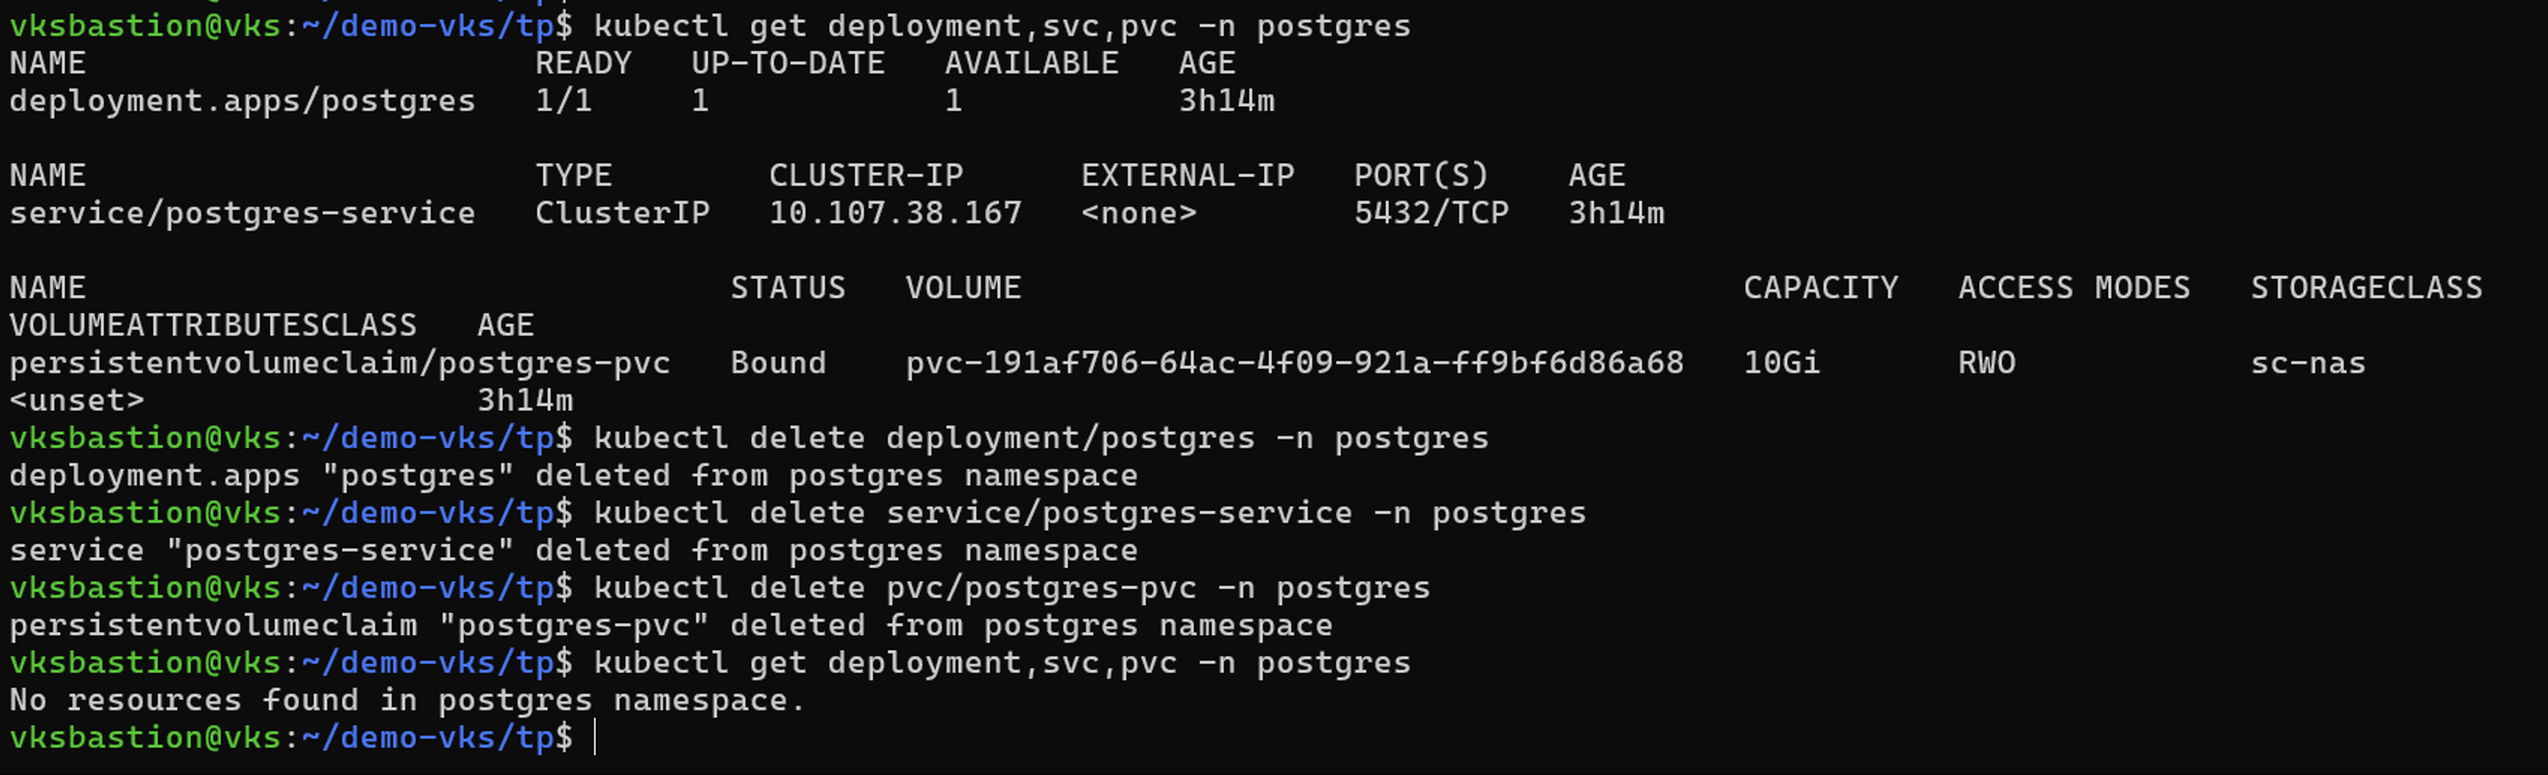
Create a snapshot-in-place-restore object from the snapshot.
# tp create sir postgres-restore-from-snapshot --snapshot postgres/hourly-f1dd9-20260831135500 -n postgres --dry-run > postgres-sir.yaml

# cat postgres-sir.yaml
apiVersion: protect.trident.netapp.io/v1
kind: SnapshotInplaceRestore
metadata:
  name: postgres-restore-from-snapshot
  namespace: postgres
spec:
  appArchivePath: postgres-app_314bbaf6-2ce3-4065-b3c1-ab85c7bb7c7c/snapshots/20260831135500_hourly-f1dd9-20260831135500_36c2bd2a-9405-4424-88a7-75e6bbc5b315
  appVaultRef: ontap-s3-appvault1
  cleanUpAdditionalExecHooks: true
  cleanUpArchivedExecHooks: false
  resourceFilter: {}
  runArchivedExecHooks: true

# kubectl create -f postgres-sir.yaml
snapshotinplacerestore.protect.trident.netapp.io/postgres-restore-from-snapshot created
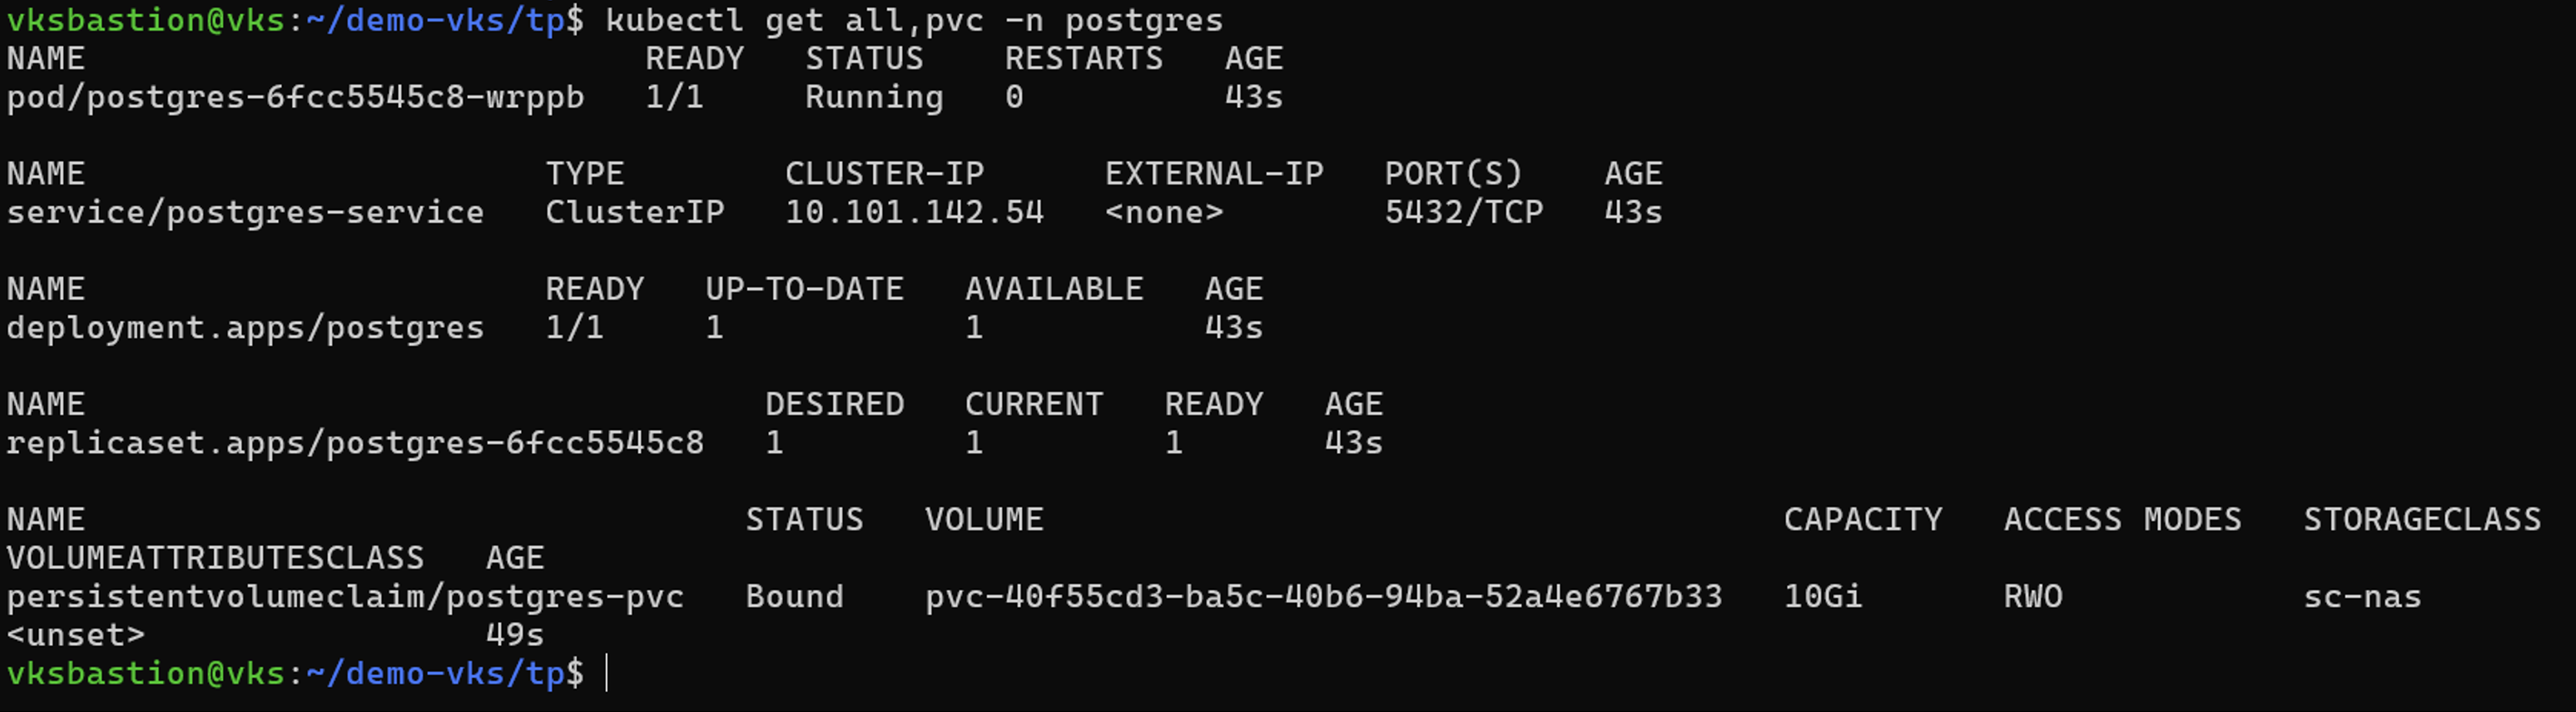
Verify that the application's objects and PVCs are created in the postgres namespace.
Restore the application from a snapshot to a different namespace
Delete the application in the postgres2 namespace previously restored from the backup.
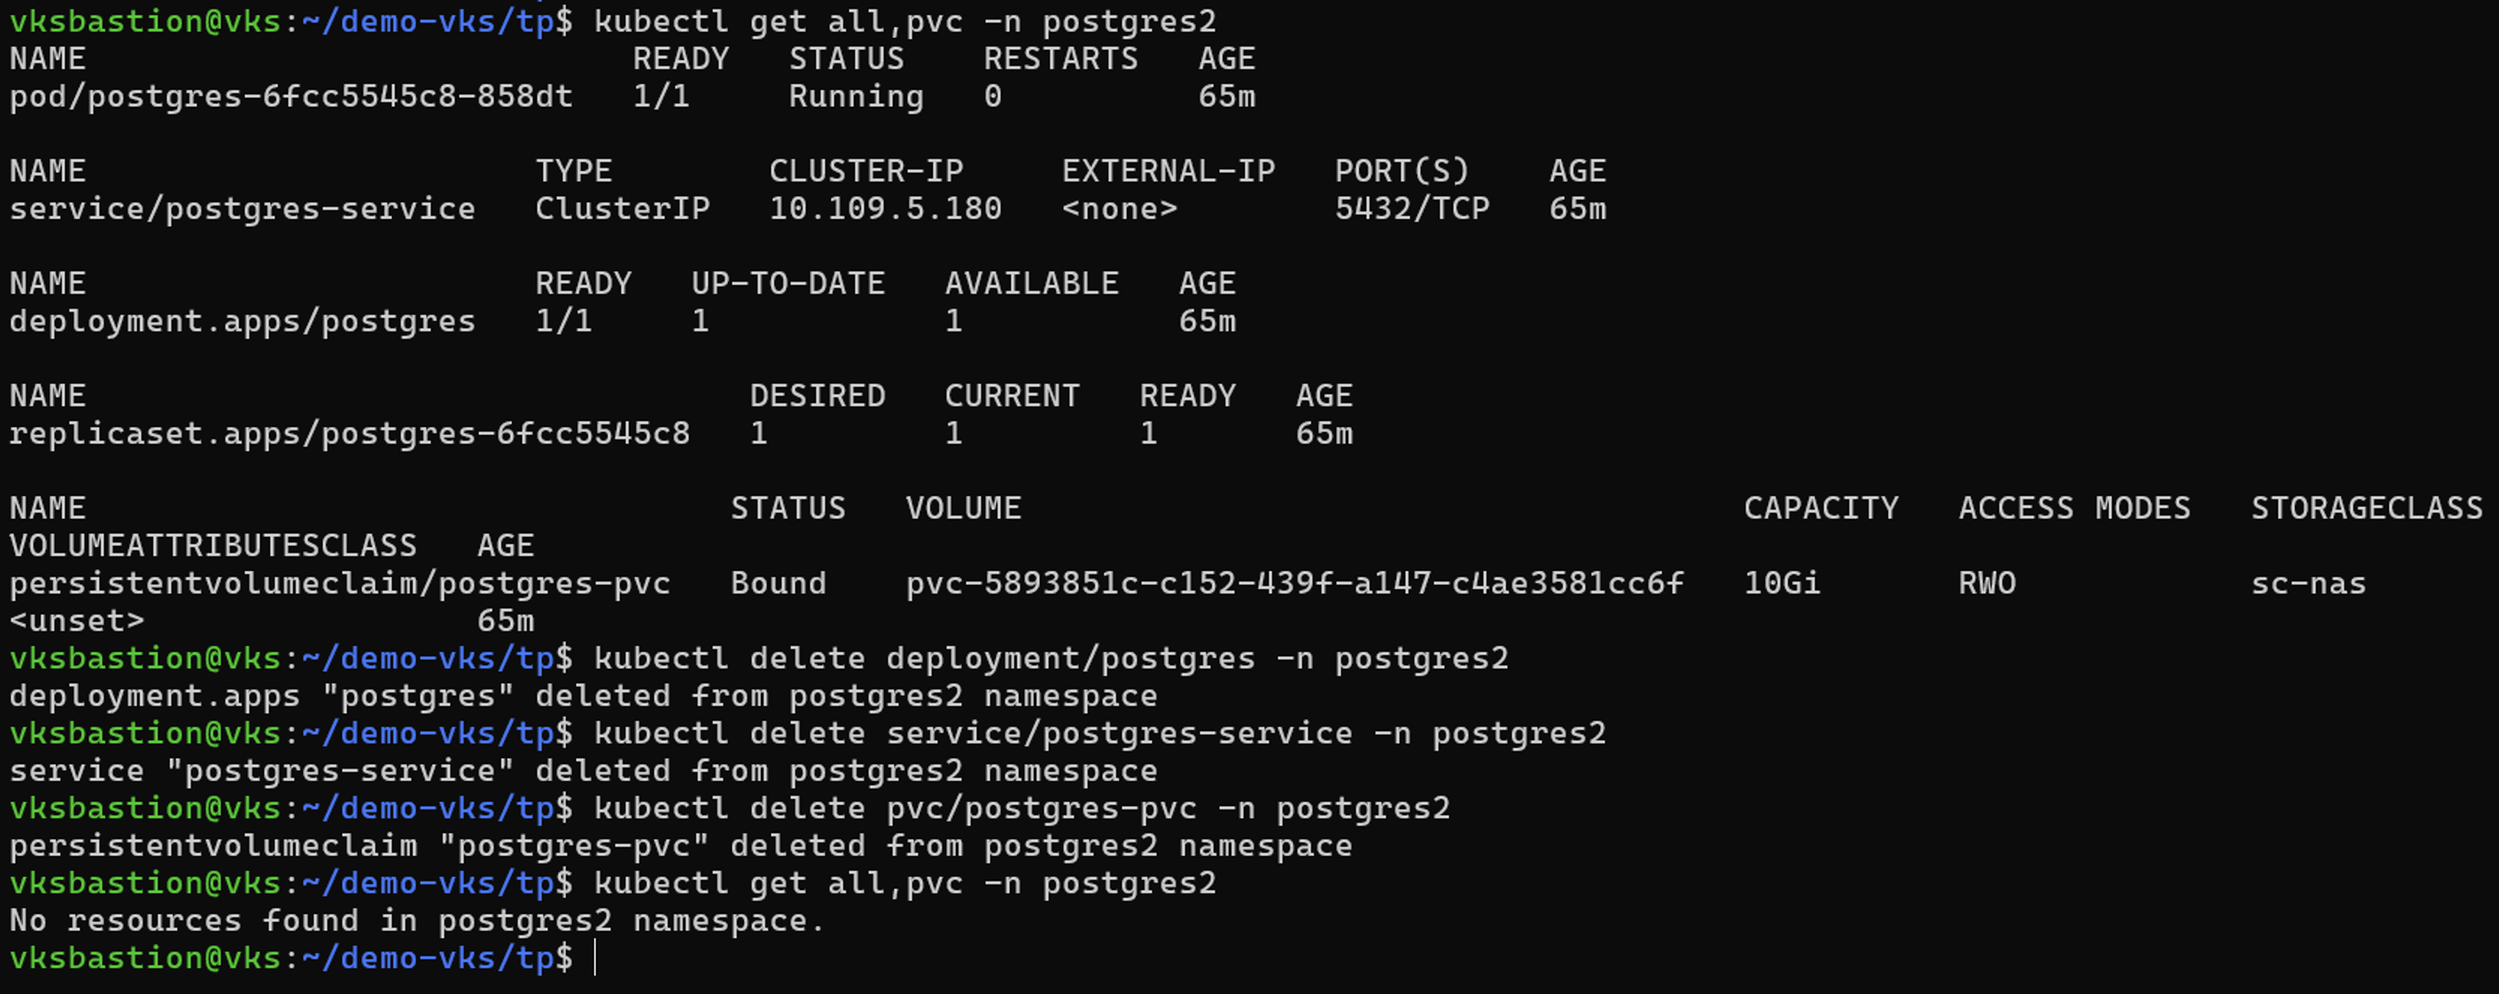
Create the snapshot restore object from the snapshot and provide the namespace mapping.
# tp create sr postgres-sr --snapshot postgres/hourly-f1dd9-20260831135500 --namespace-mapping postgres:postgres2 -n postgres2 --dry-run>postgres-sr.yaml

# cat postgres-sr.yaml
apiVersion: protect.trident.netapp.io/v1
kind: SnapshotRestore
metadata:
  name: postgres-sr
  namespace: postgres2
spec:
  appArchivePath: postgres-app_314bbaf6-2ce3-4065-b3c1-ab85c7bb7c7c/snapshots/20260831135500_hourly-f1dd9-20260831135500_36c2bd2a-9405-4424-88a7-75e6bbc5b315
  appVaultRef: ontap-s3-appvault1
  cleanUpAdditionalExecHooks: true
  cleanUpArchivedExecHooks: false
  namespaceMapping:
  - destination: postgres2
    source: postgres
  resourceFilter: {}
  runArchivedExecHooks: true
  skipApplicationCreation: false

# kubectl create -f postgres-sr.yaml
snapshotrestore.protect.trident.netapp.io/postgres-sr created
Verify that the application's objects and PVCs are restored in the namespace postgres2.