

SAP System Refresh
 Suggest changes
Detailed information on SAP System Refresh operations using SnapCenter can be found at Automating SAP HANA System Copy and Clone Operations with SnapCenter.
The second HANA system QFS has been provisioned in the same way as described in chapter “HANA system provisioning and installation”.
Prerequisites
For SnapCenter releases < 6.2 there are limitations which need to be considered.
-
It is required to restart the spl process after each “clone create” and “clone delete” workflows using the command “systemctl restart spl” at the target HANA host.
-
The HANA VMs used as source and target of the SAP system refresh operation must run on the same ESX host.
Workflow summary
Before the first SAP System Refresh operation can be executed, the target HANA system must be installed, and the host must be added to SnapCenter. Then the HANA system must be shut down and the HANA data disk must be unmounted from host.
SnapCenter clone create workflow
-
Create storage clone
-
Configure host mapping for storage clone
-
Attach storage clone (datastore) to ESX host
-
Add new disk from datastore to target HANA VM
-
Mount disk to HANA VM OS
-
Recover HANA system using post-script
Runtime: 12 minutes

|
Compared to the restore operation, the runtime of the clone operation is independent from the size of the HANA database. The runtime of step 1 – 5 will be similar also for very large databases. Recovery will of course take longer for larger HANA systems. |
SnapCenter clone delete workflow
-
Shutdown HANA system using pre-script
-
Unmount disk from HANA VM OS
-
Remove disk from HANA VM
-
Remove datastore from ESX host
-
Delete storge clone
Runtime: 11 minutes
SnapCenter clone create workflow
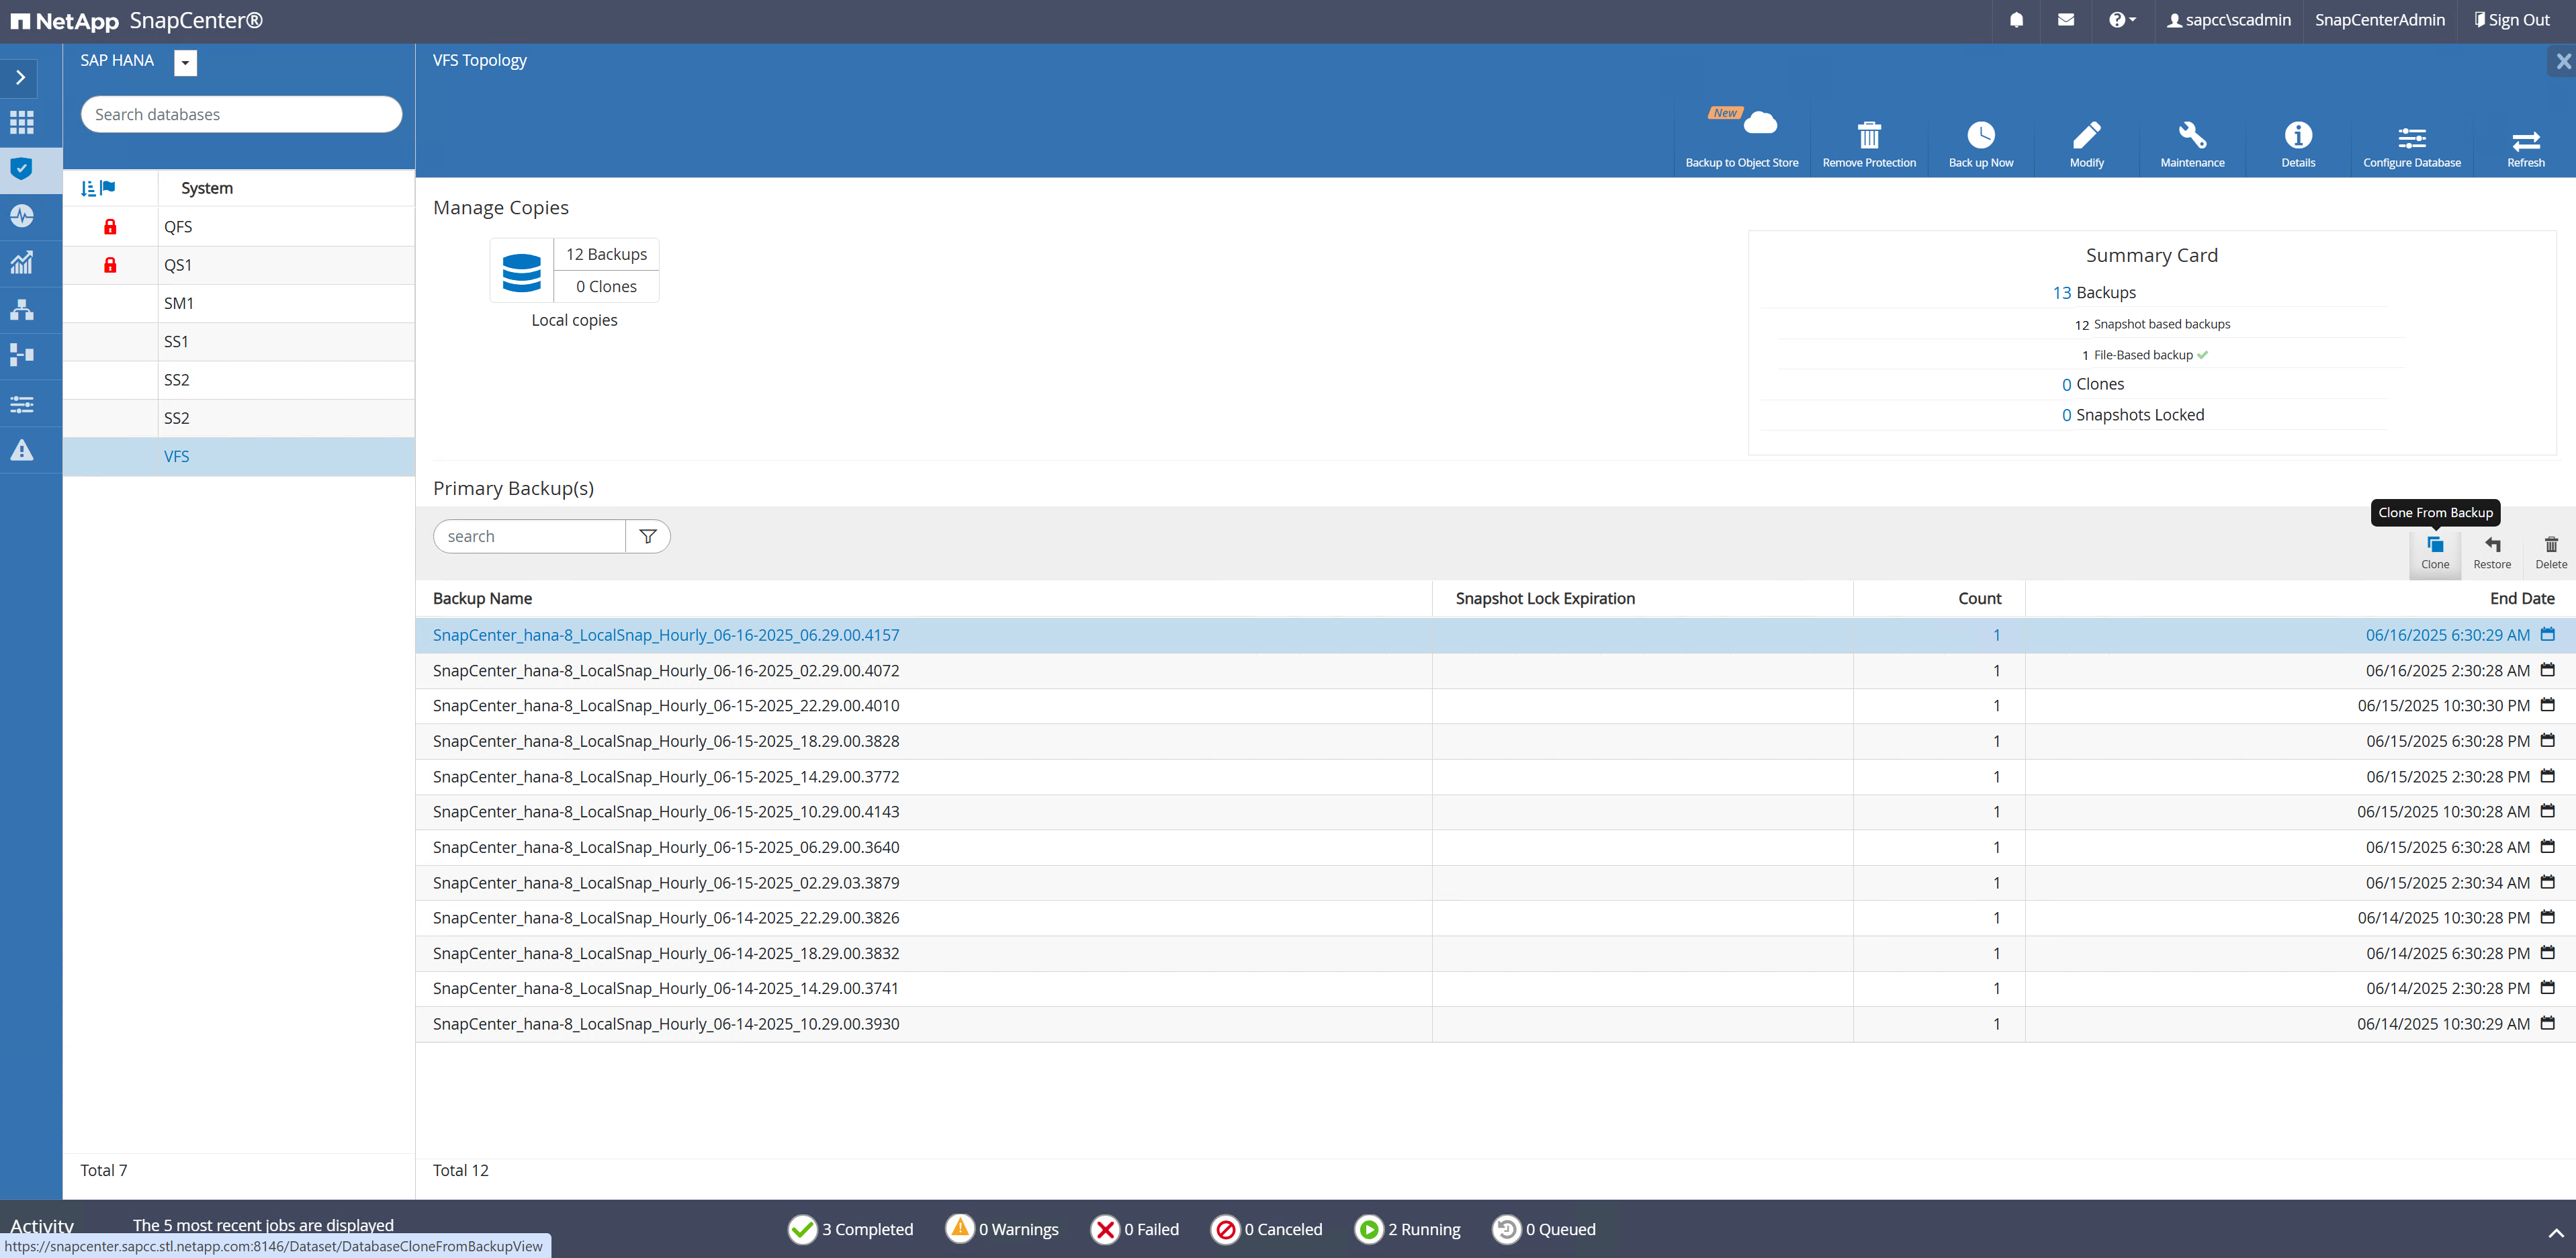
The clone create workflow is started by selecting the desired Snapshot and by clicking on the clone button.
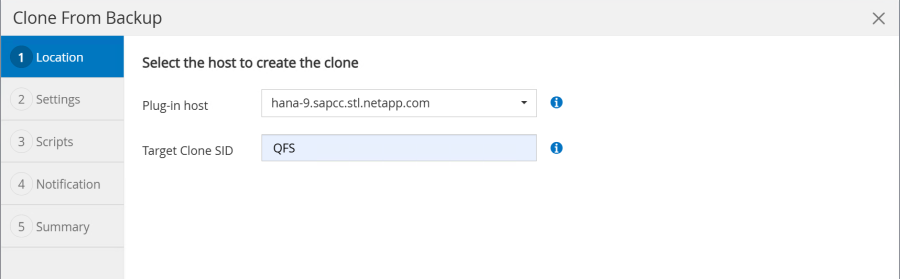
The target host and SID must be provided.
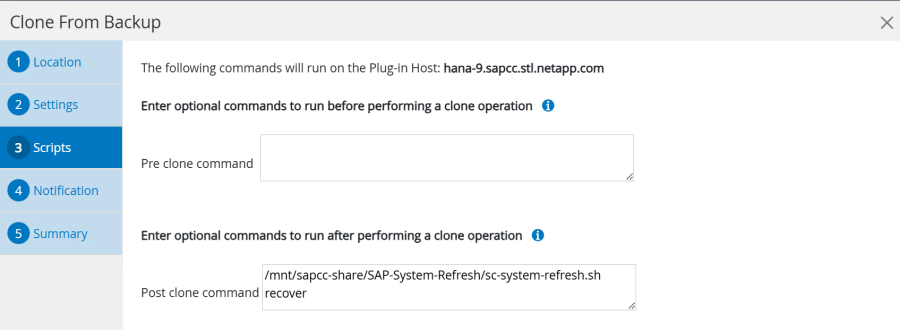
In our example we are using a post-script to execute the recovery at the target host.
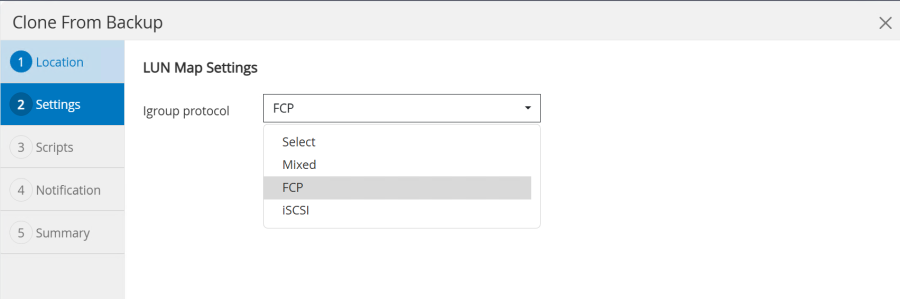
When the workflow is started SnapCenter creates a cloned storage unit based on the selected Snapshot.

SnapCenter then attaches the LUN (datastore) to the ESX host, on which the target HANA VM is running.
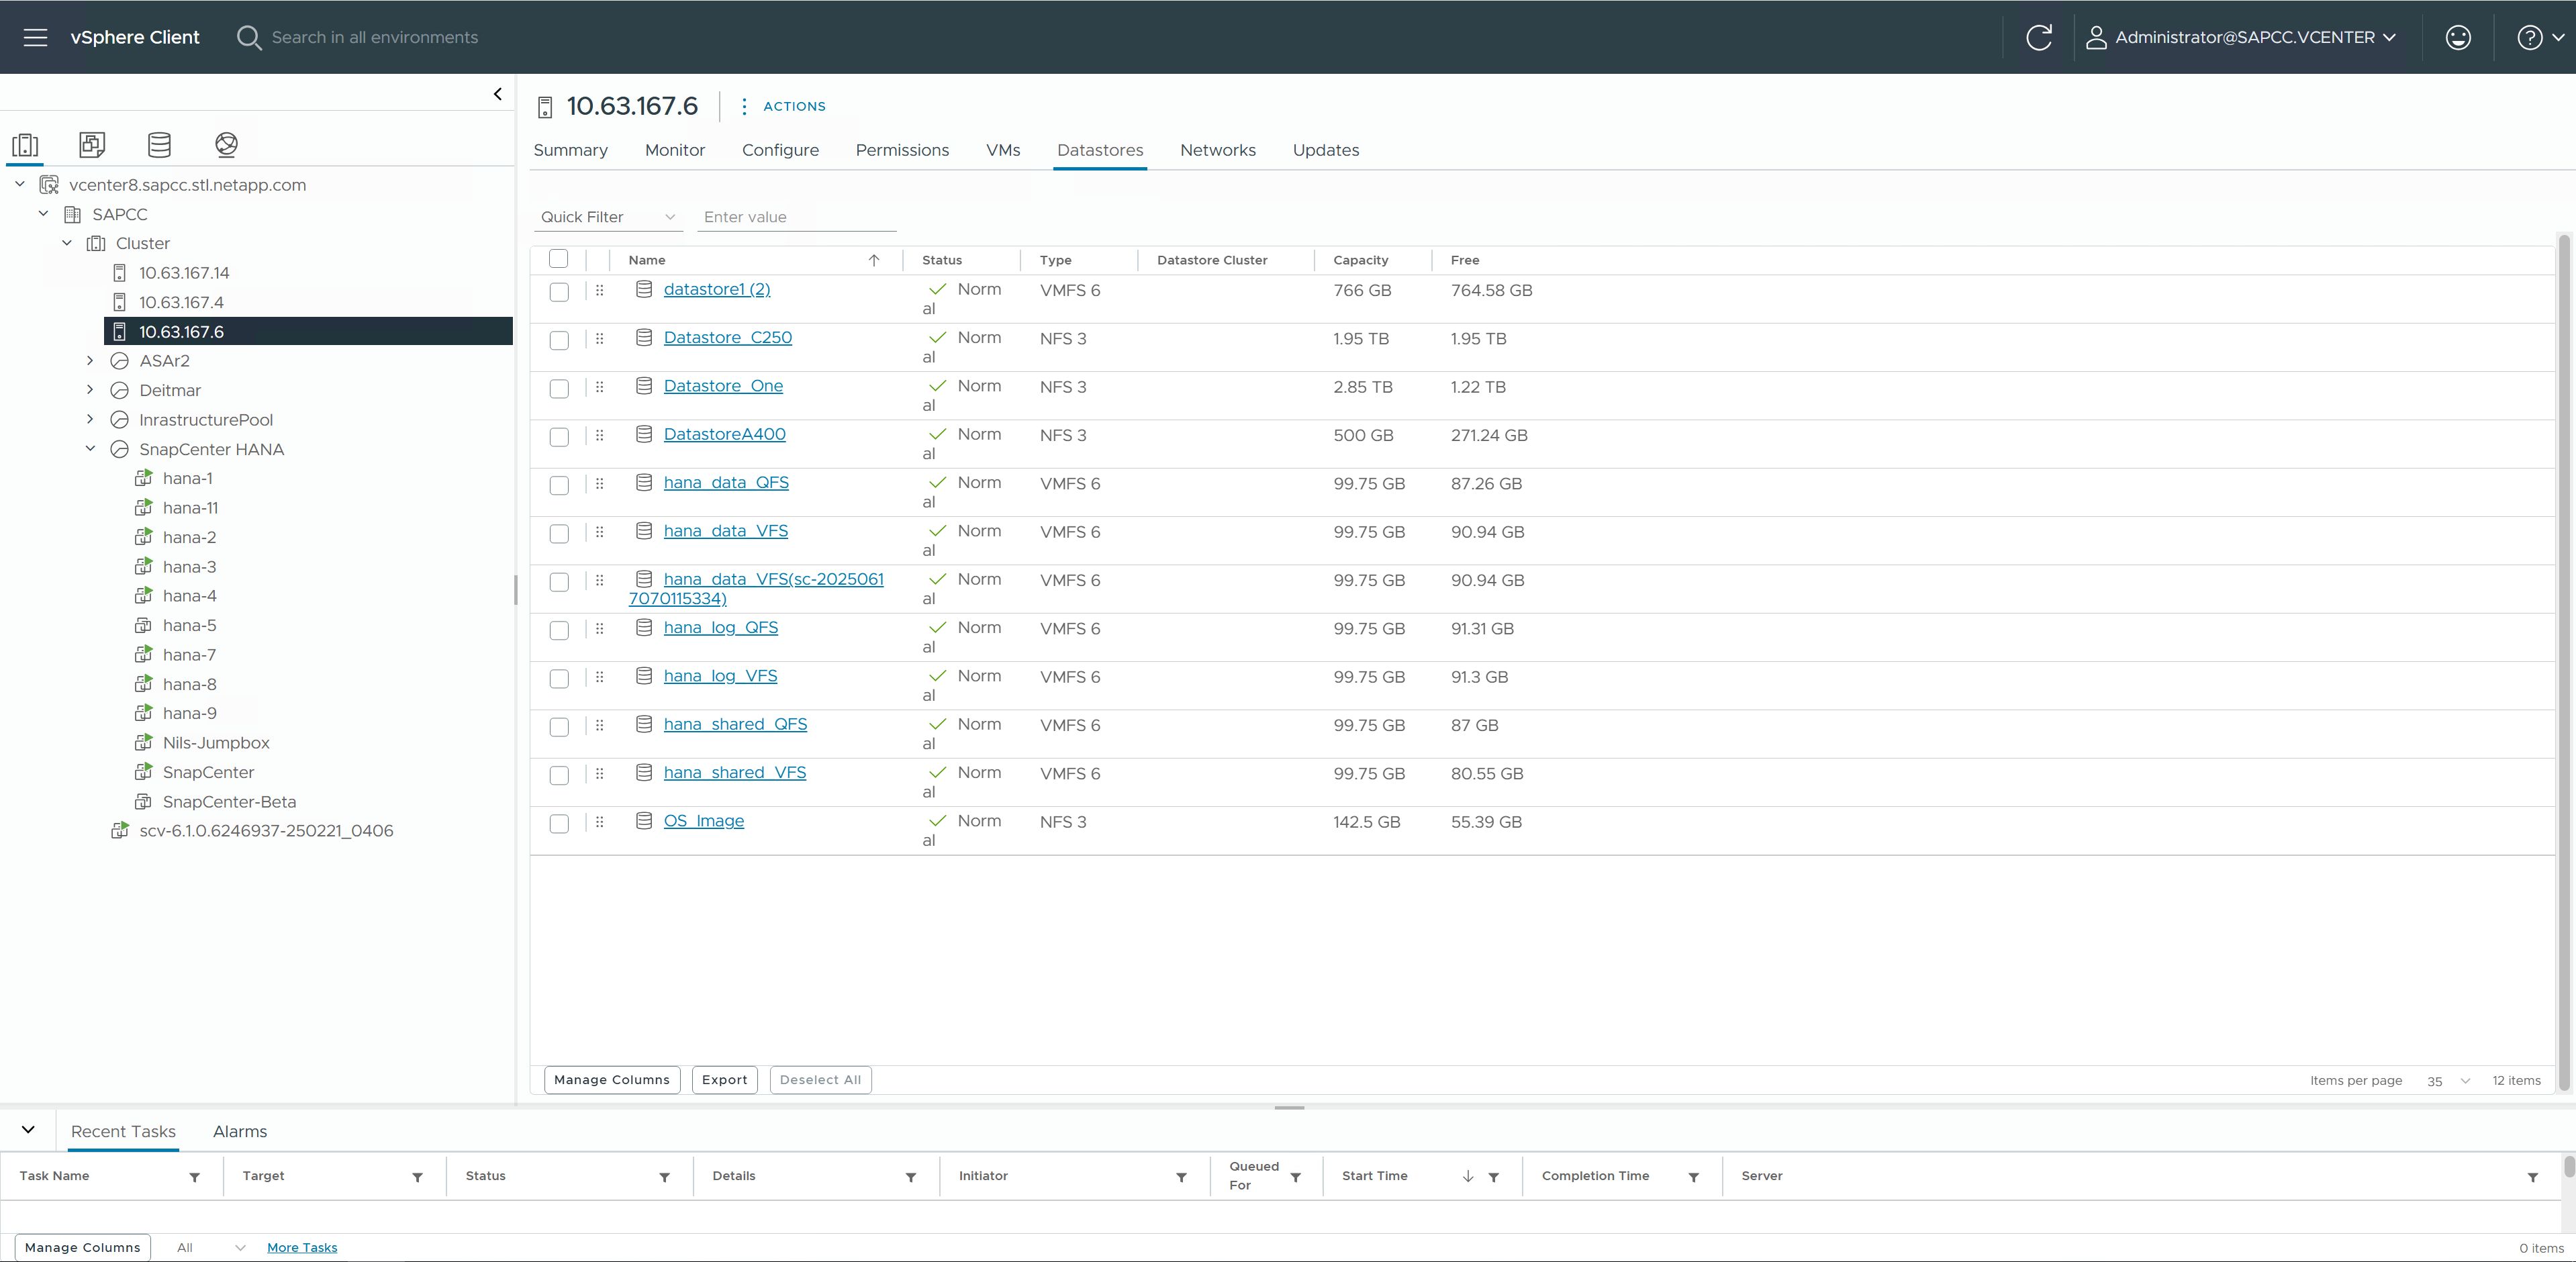
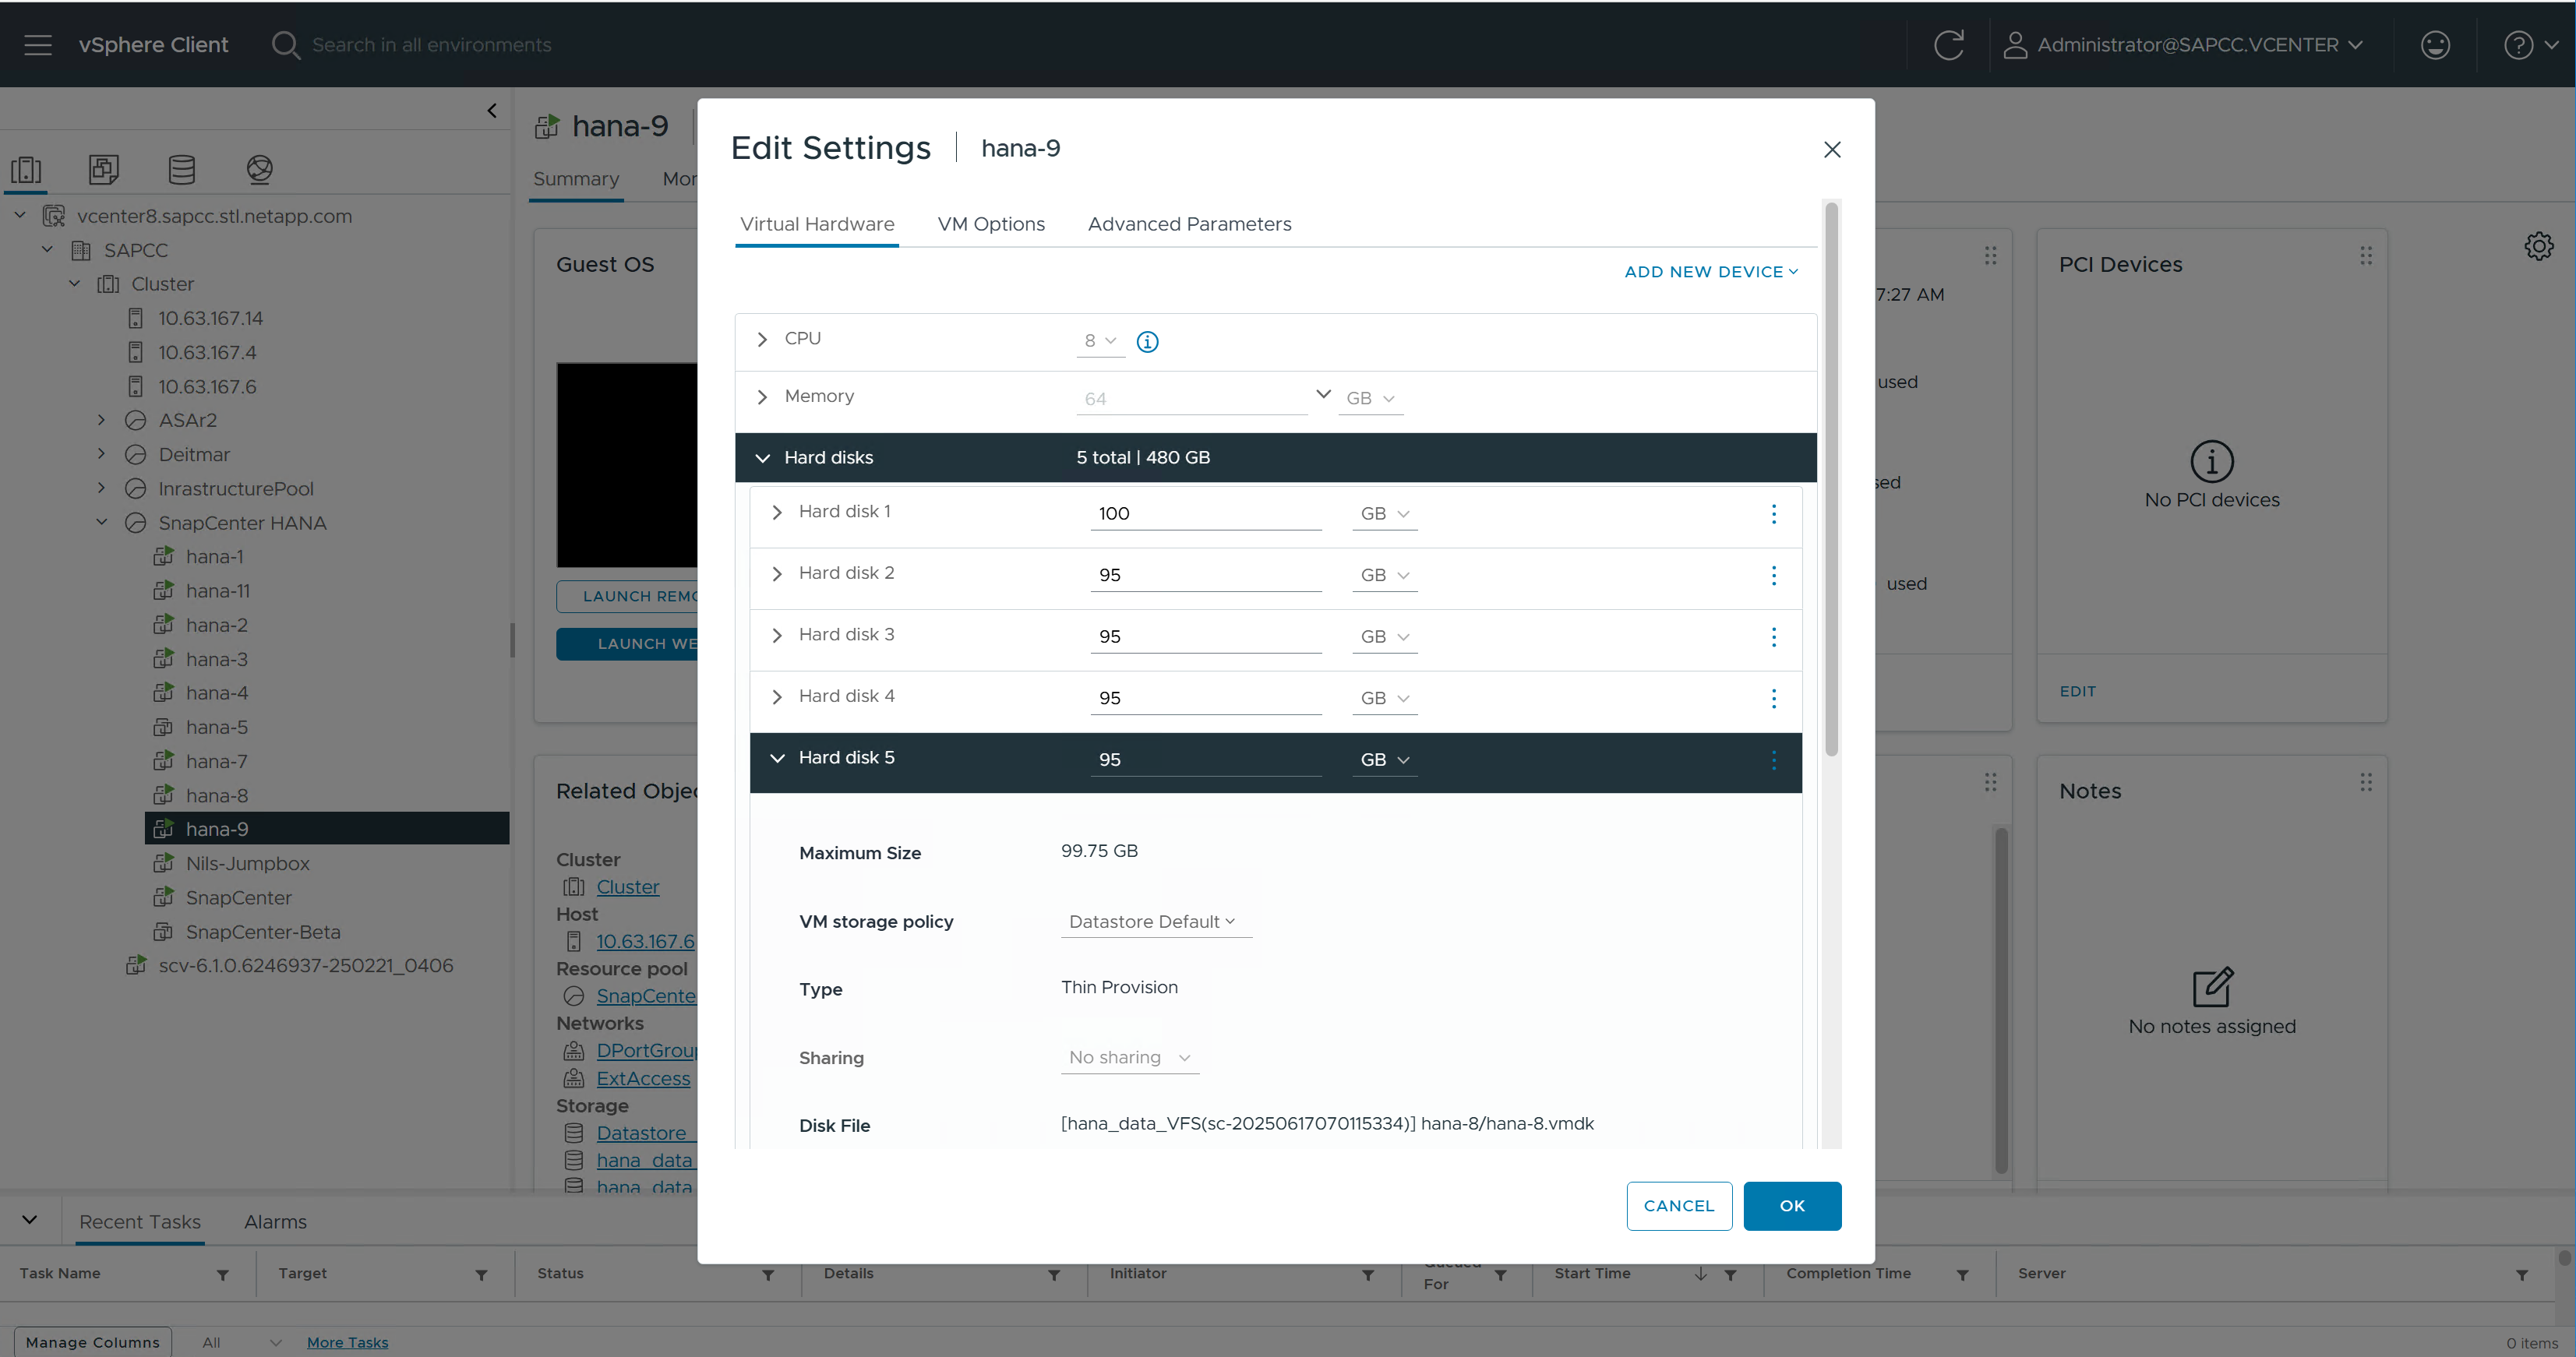
The VMDK within the new datastore is then added to the HANA VM.
SnapCenter then configures and mounts the new disk at the HANA Linux system.
hana-9:/mnt/sapcc-share/SAP-System-Refresh # df -h

Filesystem Size Used Avail Use% Mounted on
/dev/mapper/system-root 60G 5.2G 52G 10% /
devtmpfs 4.0M 4.0K 4.0M 1% /dev
tmpfs 49G 0 49G 0% /dev/shm
efivarfs 256K 57K 195K 23% /sys/firmware/efi/efivars
tmpfs 13G 26M 13G 1% /run
tmpfs 1.0M 0 1.0M 0% /run/credentials/systemd-tmpfiles-setup-dev-early.service
tmpfs 1.0M 0 1.0M 0% /run/credentials/systemd-sysctl.service
tmpfs 1.0M 0 1.0M 0% /run/credentials/systemd-sysusers.service
tmpfs 1.0M 0 1.0M 0% /run/credentials/systemd-tmpfiles-setup-dev.service
/dev/mapper/system-root 60G 5.2G 52G 10% /.snapshots
/dev/mapper/system-root 60G 5.2G 52G 10% /boot/grub2/i386-pc
/dev/mapper/system-root 60G 5.2G 52G 10% /boot/grub2/x86++_++64-efi
/dev/mapper/system-root 60G 5.2G 52G 10% /home
/dev/mapper/system-root 60G 5.2G 52G 10% /opt
/dev/mapper/system-root 60G 5.2G 52G 10% /srv
/dev/mapper/system-root 60G 5.2G 52G 10% /root
/dev/mapper/system-root 60G 5.2G 52G 10% /tmp
/dev/mapper/system-root 60G 5.2G 52G 10% /usr/local
/dev/mapper/system-root 60G 5.2G 52G 10% /var
tmpfs 1.0M 0 1.0M 0% /run/credentials/systemd-vconsole-setup.service
/dev/sdc 95G 8.9G 87G 10% /hana/log/QFS/mnt00001
/dev/sdd 95G 14G 82G 14% /hana/shared
/dev/sda1 253M 5.9M 247M 3% /boot/efi
tmpfs 1.0M 0 1.0M 0% /run/credentials/systemd-tmpfiles-setup.service
192.168.175.86:/sapcc++_++share 1.4T 858G 568G 61% /mnt/sapcc-share
tmpfs 6.3G 72K 6.3G 1% /run/user/464
tmpfs 1.0M 0 1.0M 0% /run/credentials/getty@tty1.service
tmpfs 6.3G 52K 6.3G 1% /run/user/0
/dev/sde 95G 9.2G 86G 10% /hana/data/QFS/mnt00001
tmpfs 6.3G 56K 6.3G 1% /run/user/1001
hana-9:/mnt/sapcc-share/SAP-System-Refresh #

hana-9:/mnt/sapcc-share/SAP-System-Refresh # cat /etc/fstab
/dev/system/root / btrfs defaults 0 0
/dev/system/root /var btrfs subvol=/@/var 0 0
/dev/system/root /usr/local btrfs subvol=/@/usr/local 0 0
/dev/system/root /tmp btrfs subvol=/@/tmp 0 0
/dev/system/root /srv btrfs subvol=/@/srv 0 0
/dev/system/root /root btrfs subvol=/@/root 0 0
/dev/system/root /opt btrfs subvol=/@/opt 0 0
/dev/system/root /home btrfs subvol=/@/home 0 0
/dev/system/root /boot/grub2/x86++_++64-efi btrfs subvol=/@/boot/grub2/x86++_++64-efi 0 0
/dev/system/root /boot/grub2/i386-pc btrfs subvol=/@/boot/grub2/i386-pc 0 0
/dev/system/swap swap swap defaults 0 0
/dev/system/root /.snapshots btrfs subvol=/@/.snapshots 0 0
UUID=FB79-24DC /boot/efi vfat utf8 0 2
192.168.175.86:/sapcc++_++share /mnt/sapcc-share nfs rw,vers=3,hard,timeo=600,rsize=1048576,wsize=1048576,intr,noatime,nolock 0 0
#/dev/sdb /hana/data/QFS/mnt00001 xfs relatime,inode64 0 0
/dev/sdc /hana/log/QFS/mnt00001 xfs relatime,inode64 0 0
/dev/sdd /hana/shared xfs defaults 0 0
# The following entry has been added by NetApp (SnapCenter Plug-in for UNIX)
/dev/sde /hana/data/QFS/mnt00001 xfs rw,relatime,attr2,inode64,logbufs=8,logbsize=32k,noquota 0 0
hana-9:/mnt/sapcc-share/SAP-System-Refresh #
The following screenshot shows the job steps executed by SnapCenter.
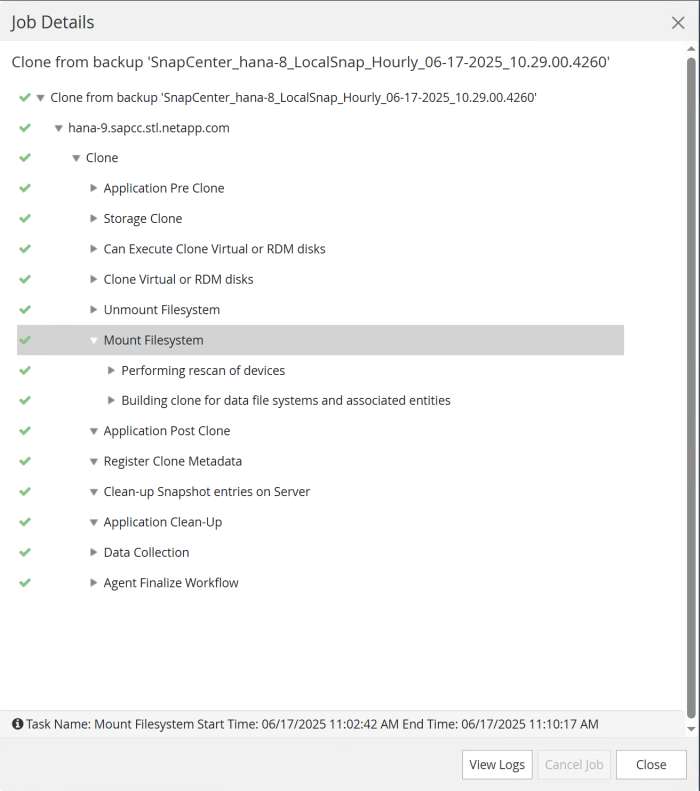
As mentioned in the “Pre-requisites” section, the SnapCenter spl service at the HANA host must be restarted using the command “systemctl restart spl” to initiate proper cleanup. This must be done when the job has finished.
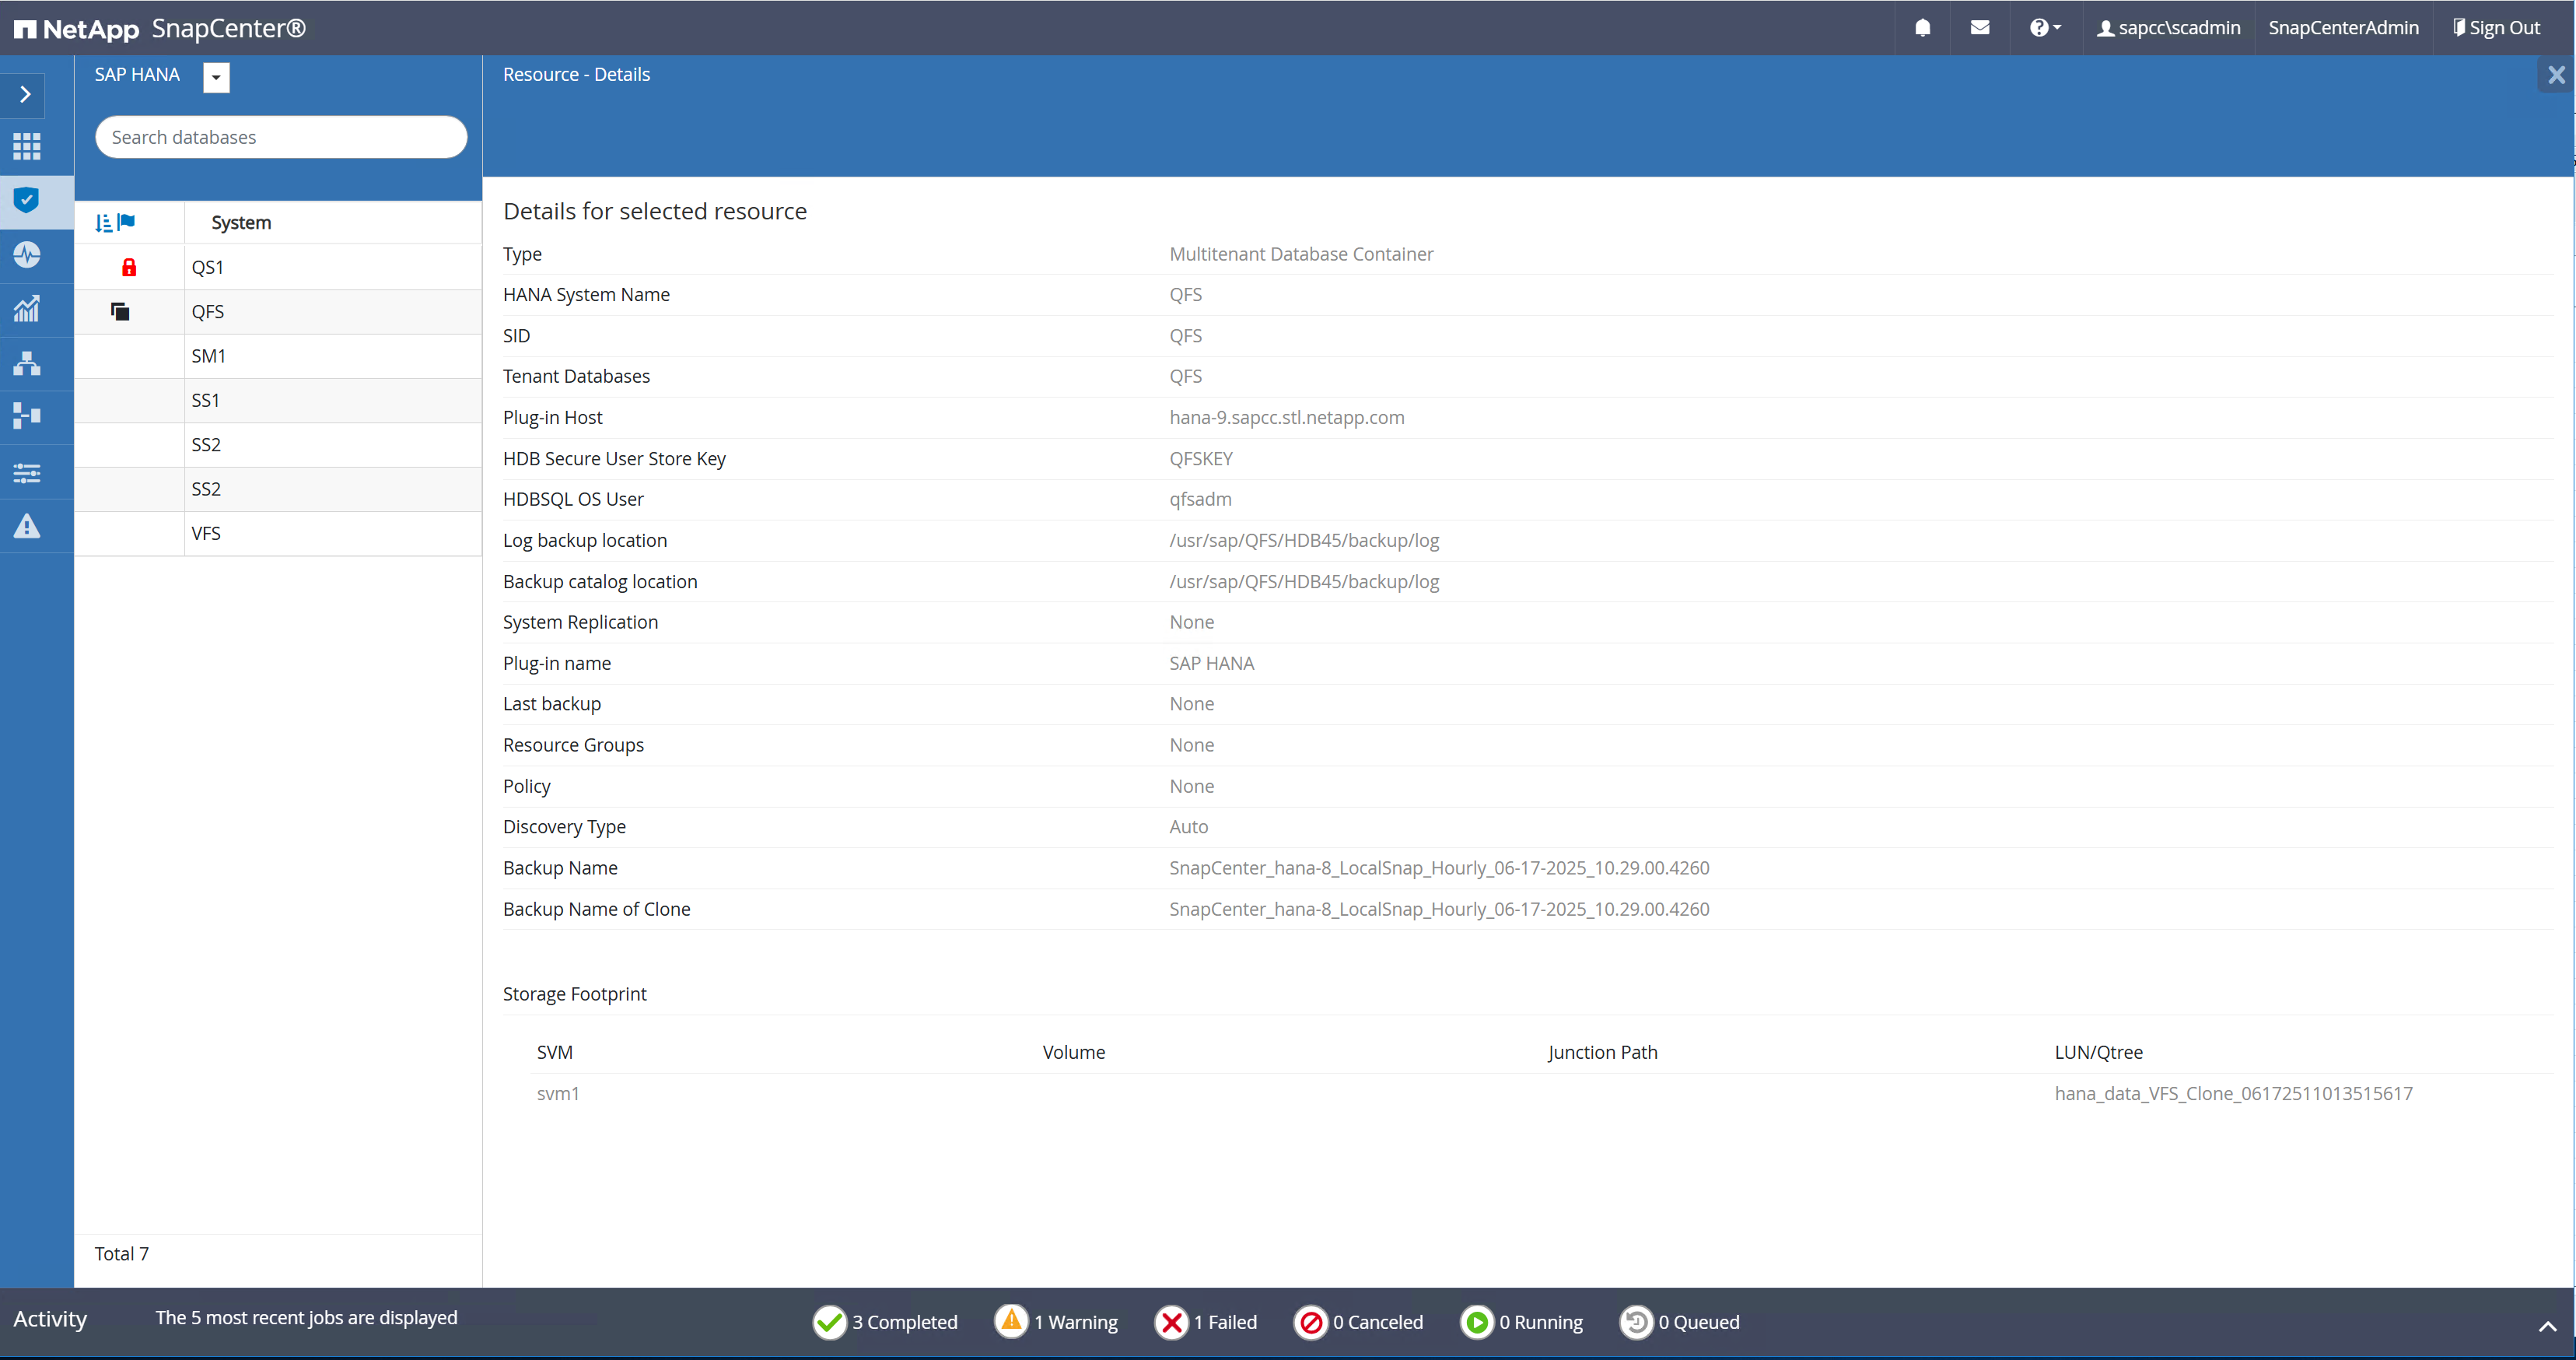
When the clone workflow is finished, the auto discovery can be started by clicking on the resource QFS. When the auto discovery process is finished the new storage footprint is listed in the details view of the resource.
SnapCenter clone delete workflow
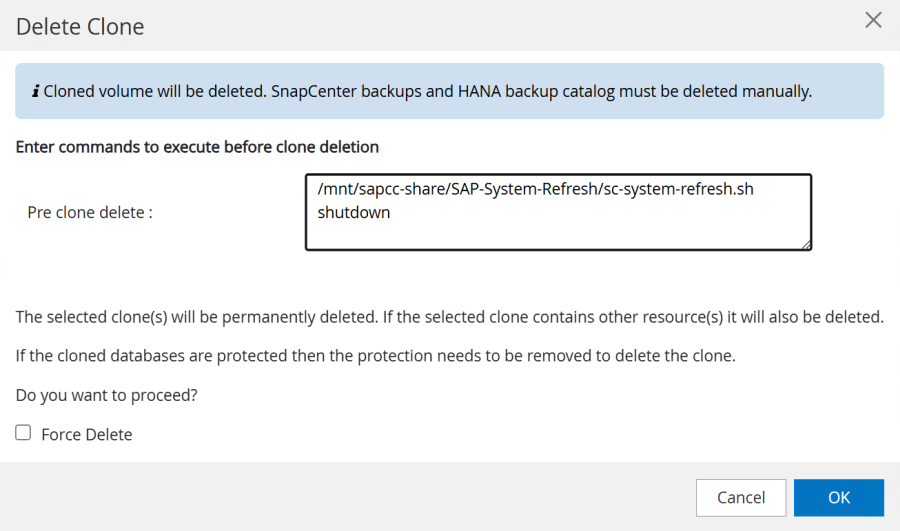
The clone delete workflow is started by selecting the clone at the source HANA resource and by clicking on the delete button.
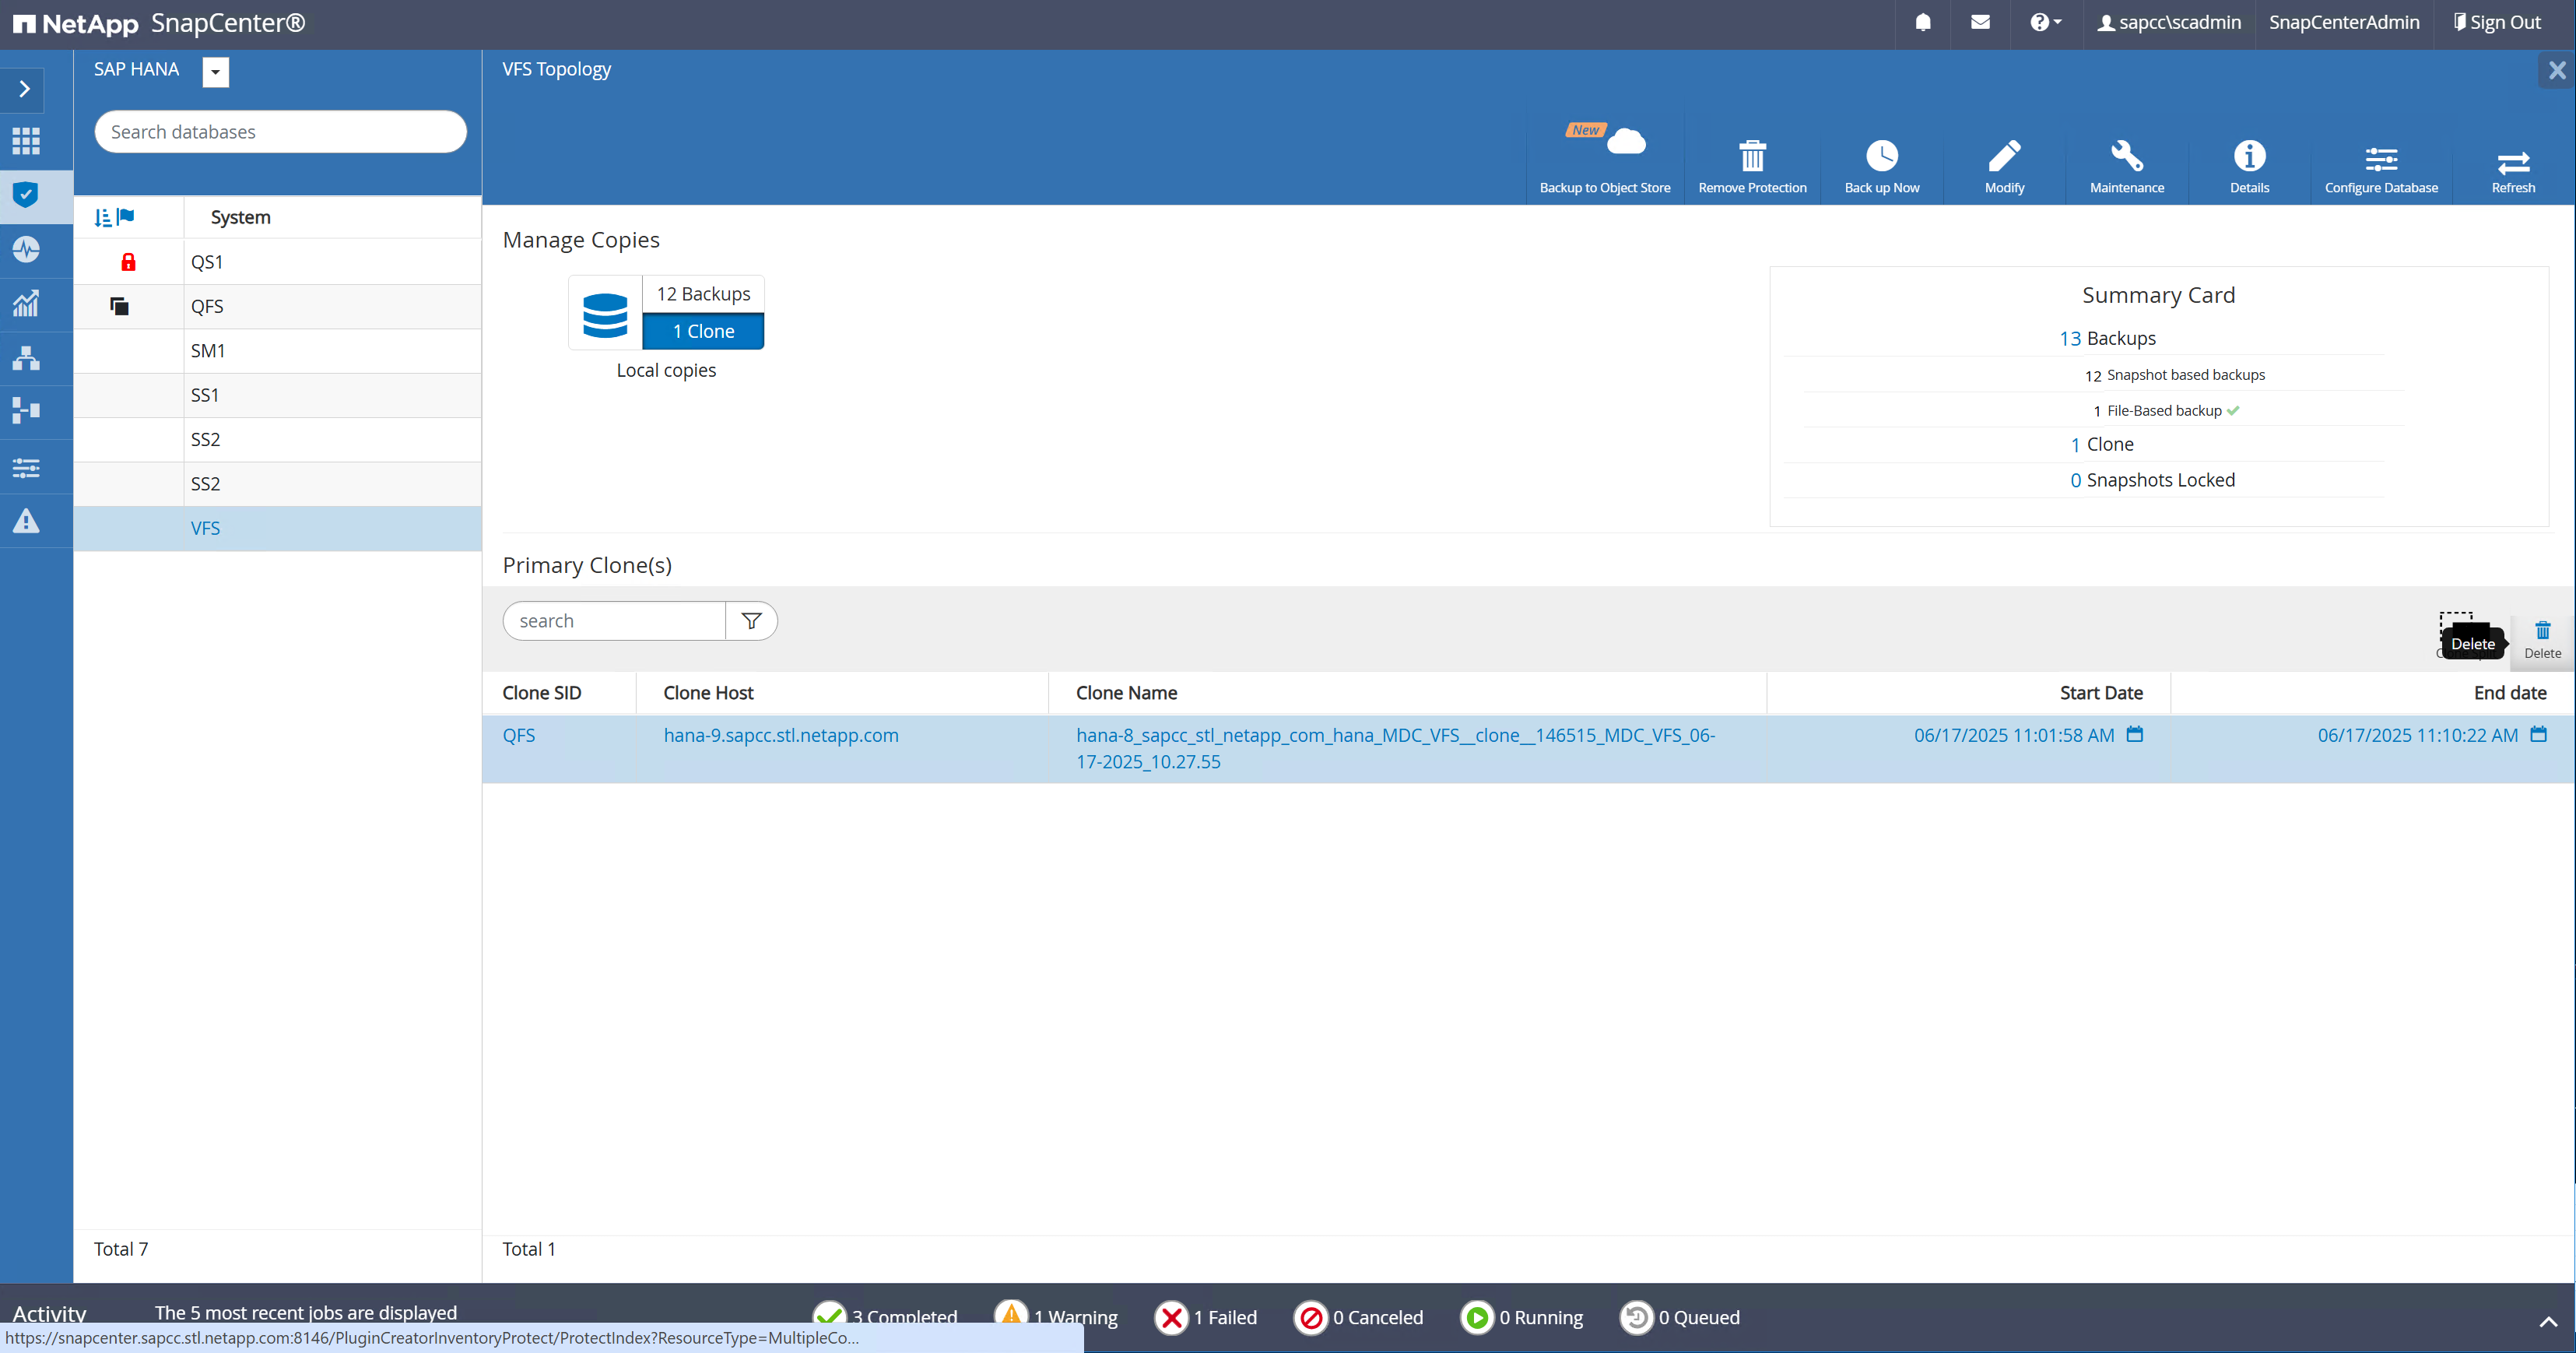
In our example we are using a pre-script to shutdown the target HANA database.
The following screenshot shows the job steps executed by SnapCenter.
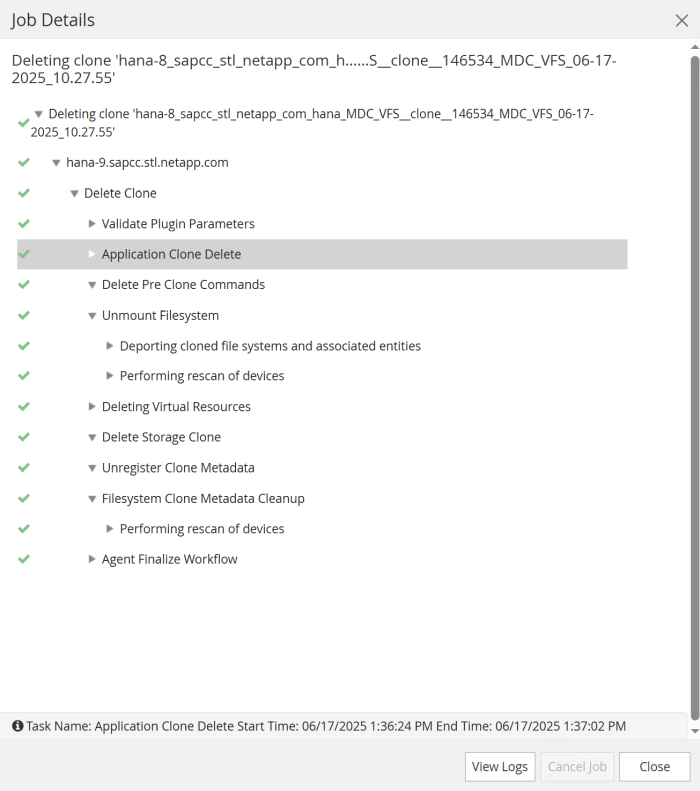
As mentioned in the “Pre-requisites” section, for SnapCenter releases < 6.2 the SnapCenter spl service at the HANA host must be restarted using the command “systemctl restart spl” to initiate proper cleanup.