

Migrate VMs from VMware ESXi to Red Hat OpenShift Virtualization using Shift toolkit and Migration Toolkit for Virtualization
 Suggest changes
This section covers how Migration toolkit for virtualization (MTV) and NetApp Shift Toolkit brings seamless migration experience to Red Hat OpenShift Virtualization and provides a step-by-step guide on transitioning to OpenShift Virtualization using Migration toolkit for virtualization and Shift Toolkit’s conversion capabilities.
Before you begin
Verify that the following prerequisites are met before starting the migration.
-
OpenShift cluster is network reachable
-
OpenShift Cluster endpoint with the following operators installed:
-
OpenShift Virtualization operator
-
NetApp Trident operator
-
-
NetApp Trident CSI configured with appropriate backends and storage classes
-
NodeNetworkConfigurationPolicy and NetworkAttachmentDefinitions (NAD) configured with proper VLANs
-
MTV 2.9.4 or later (which includes the conversion mode)
-
Service account token with cluster-admin privileges
-
Account with minimal permissions. Refer to this section for the minimum privileges needed
-
VMDKs can be configured in multiple ways: all VMDKs can reside on a single volume (eliminating the need for Storage vMotion), each VMDK can be placed on its own individual volume, or multiple VMDKs can be organized within a qtree inside a volume.

The Shift toolkit automatically detects the layout and selects the appropriate cloning method and NAS storage drivers.
When VMDKs are placed within a qtree, Shift Toolkit utilizes the ONTAP-NAS-economy driver. -
VMware tools are running on guest VMs
-
The operating system of each VM is certified and supported as a guest operating system for conversions
-
IP addresses, VLANs, and other network configuration settings must not be changed before or during migration. The MAC addresses of the virtual machines are preserved during migration.
Step 1: Create migration plans using Migration Toolkit for Virtualization
-
To leverage the lighting fast conversion of VMs, the first step is to create a migration plan for the VMs using MTV via web console or the command line.
The plan should be created beforehand to ensure the preserve IP settings are configured by MTV. Procedure-
Log in to the MTV web console.
-
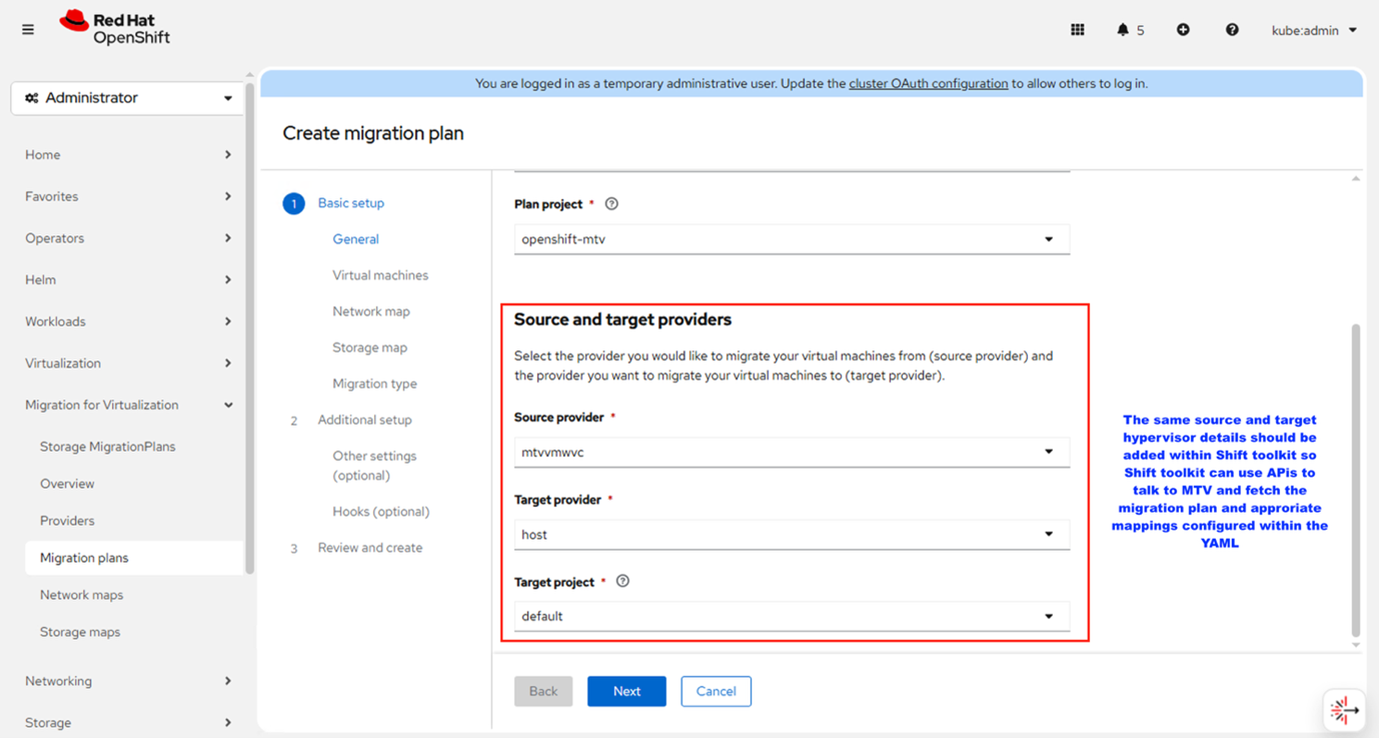
Add Source and Destination Providers
-
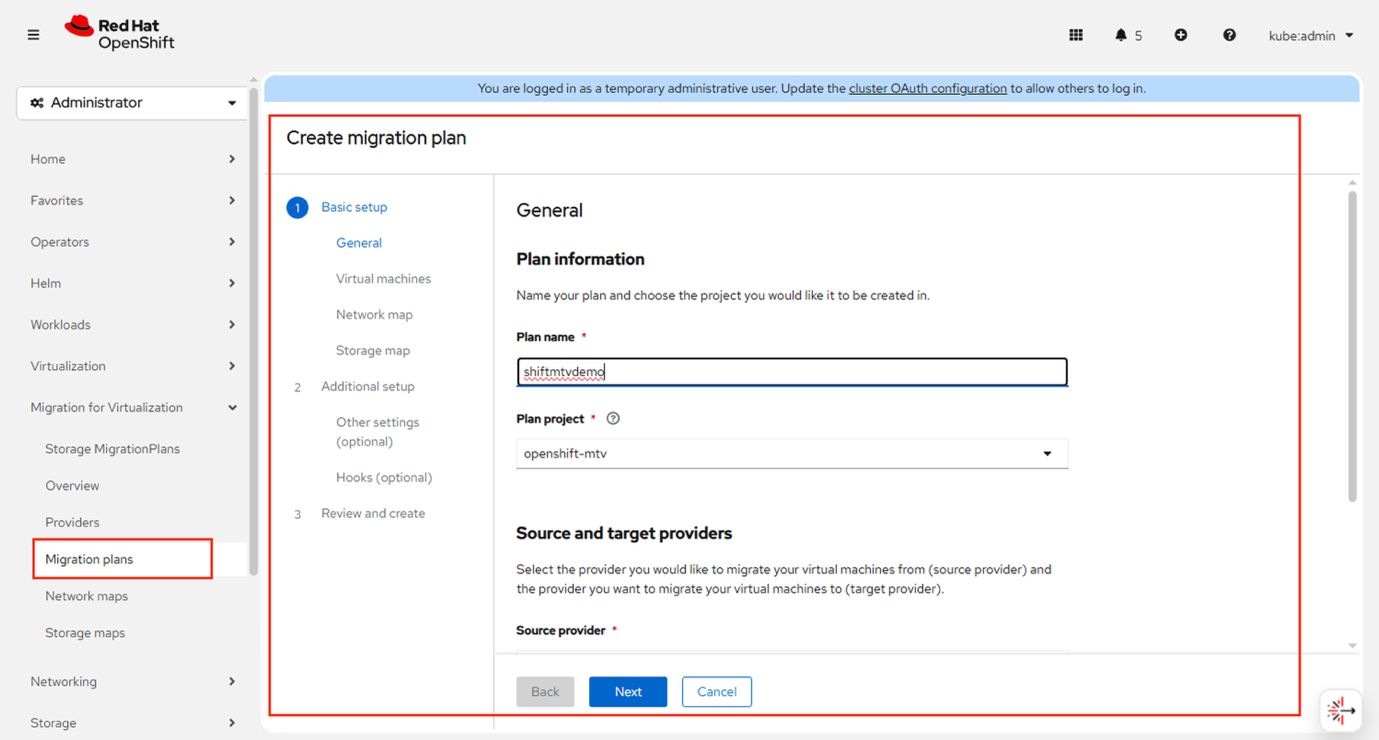
Create a Migration Plan in the Target Namespace
-
After providers are configured, create a migration plan and select the appropriate source and destination providers within the target namespace
Show example
Show example
-
-
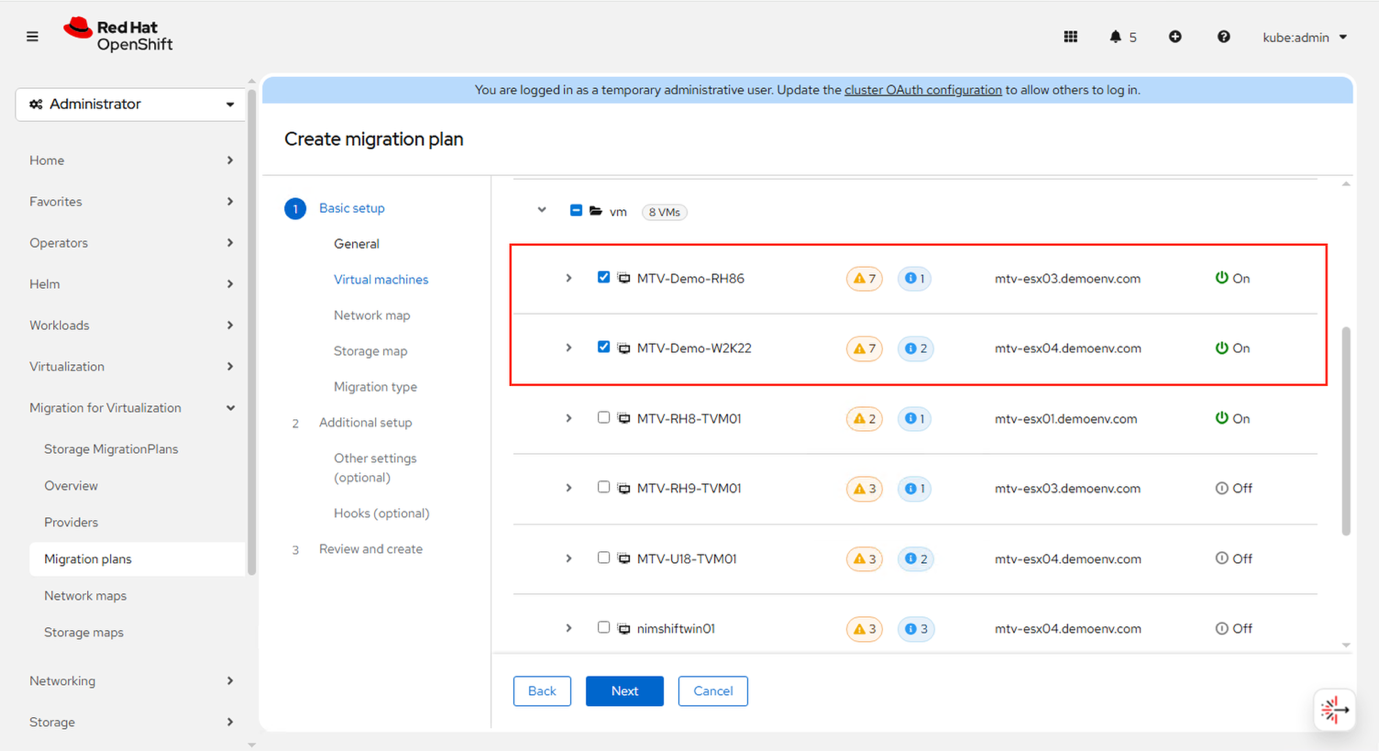
Select the VMs to Migrate
-
Identify and choose the virtual machines that will be included in the migration.
Show example
-
-
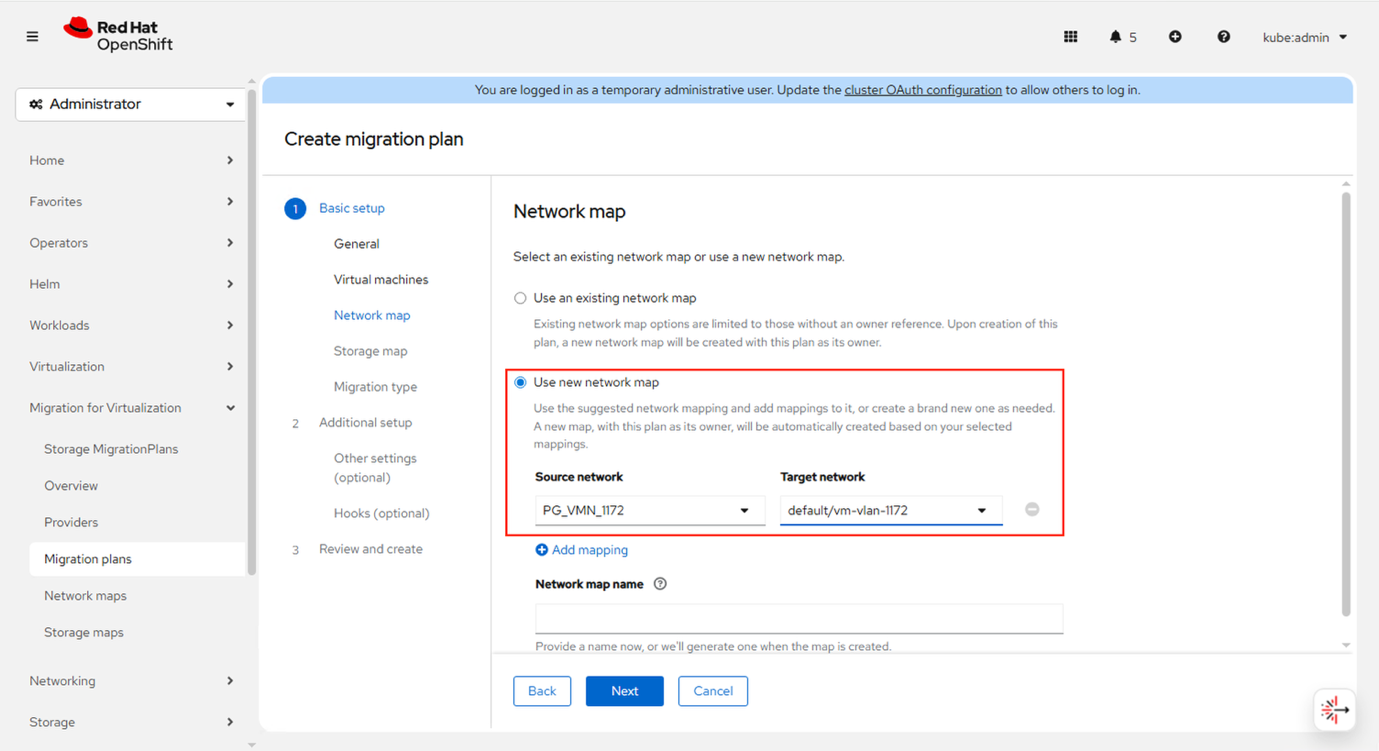
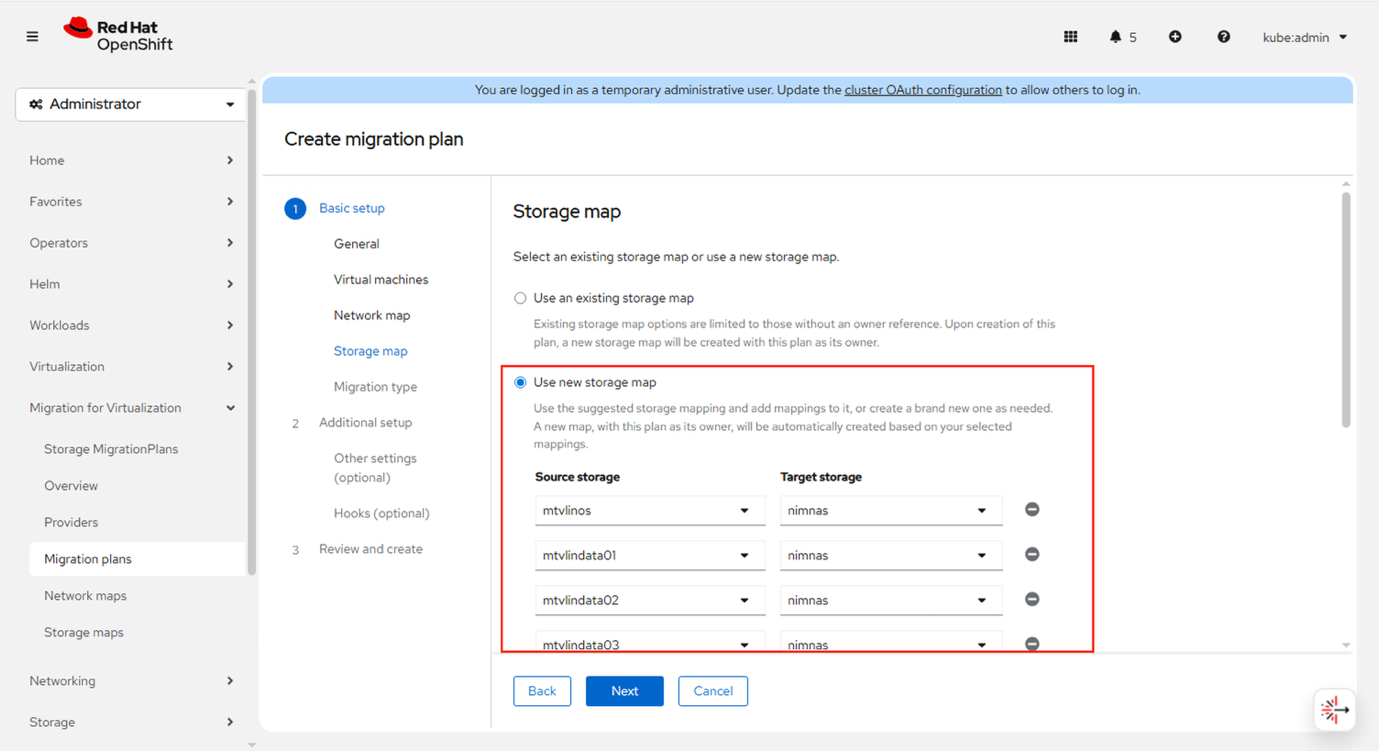
Configure Network and Storage Mappings
-
Either select existing mappings or create new ones to align source networks and storage with the destination environment.
Show example
Show example
-
-
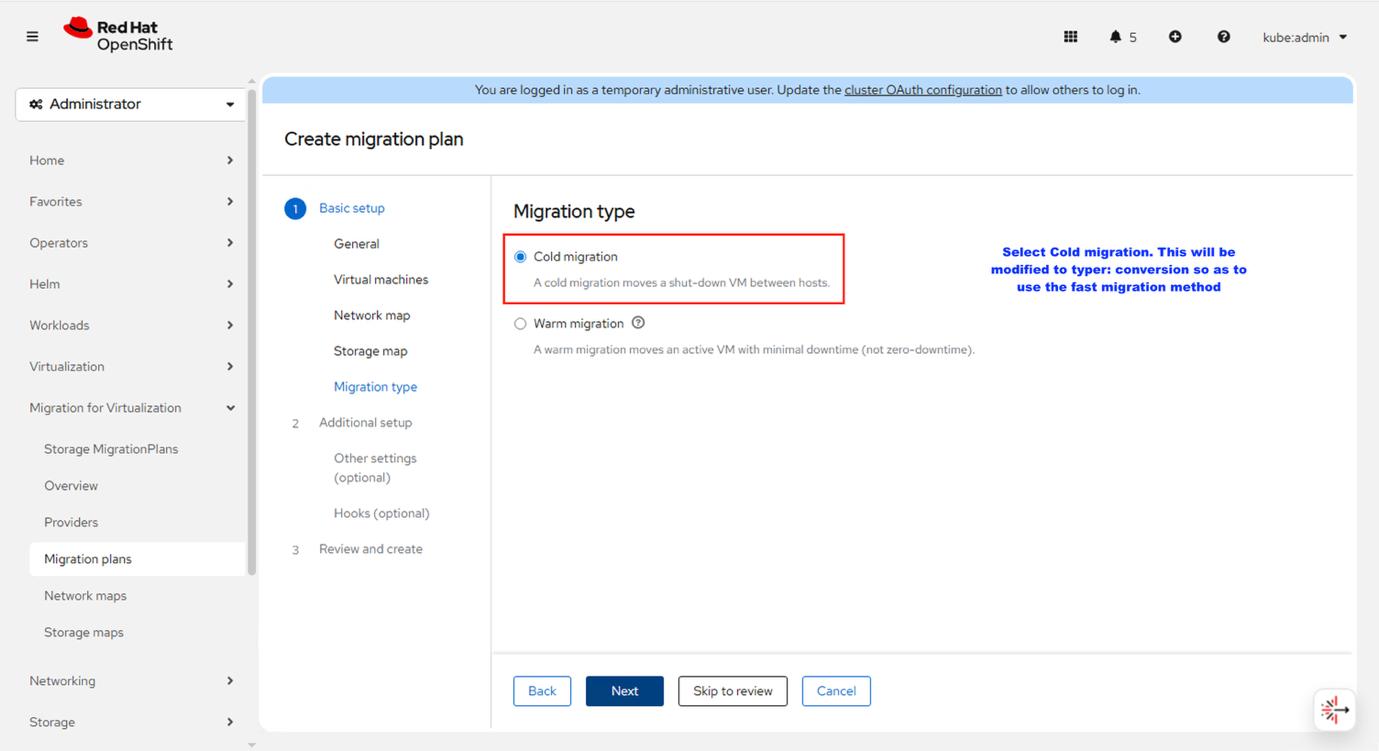
Choose Migration Type
-
Keep the default migration type initially; this will be updated during the migration process to reflect the conversion type.
Show example
-
-
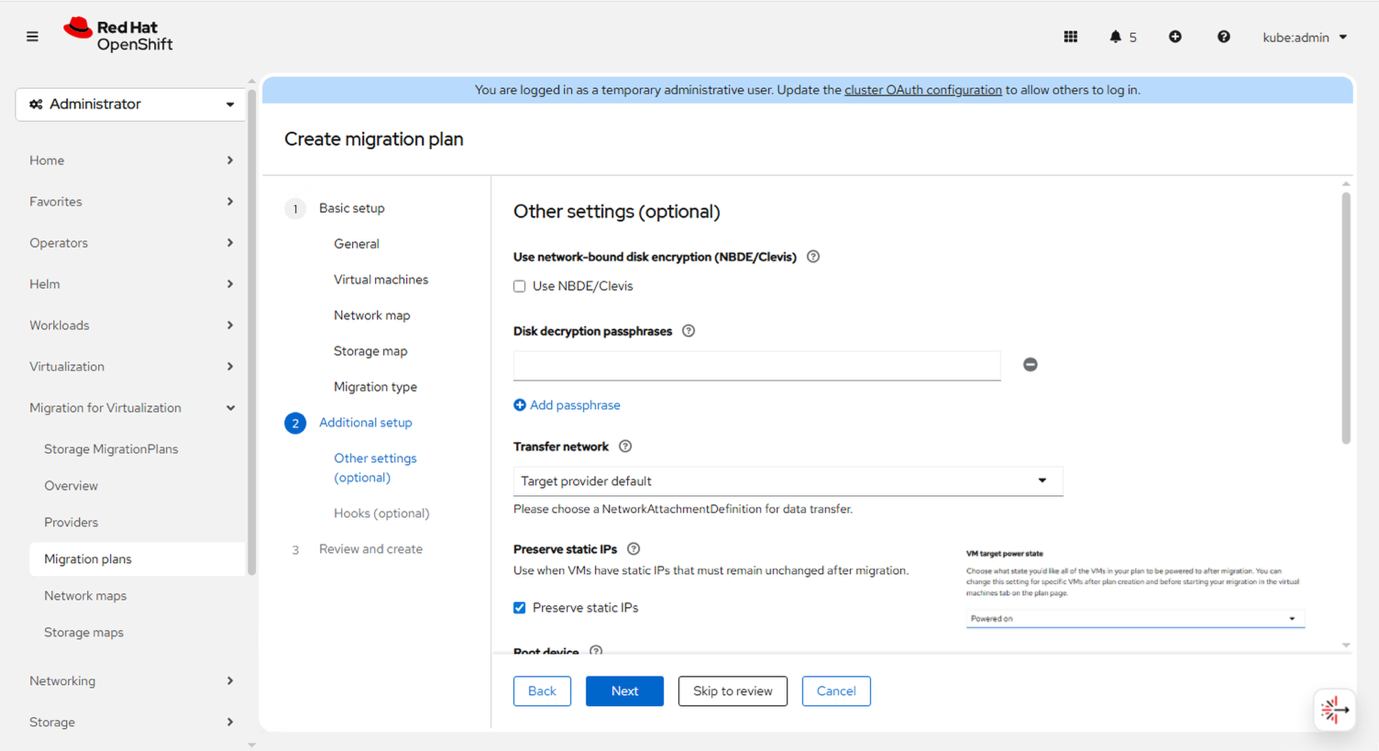
Keep default options
-
Retain the default settings. Additionally, select the option to preserve static IP and specify the desired state of the VM after migration.
Show example
-
-
Review and Finalize
-
Review all settings carefully, then click Finish to create the migration plan.
Show example

-
-
-
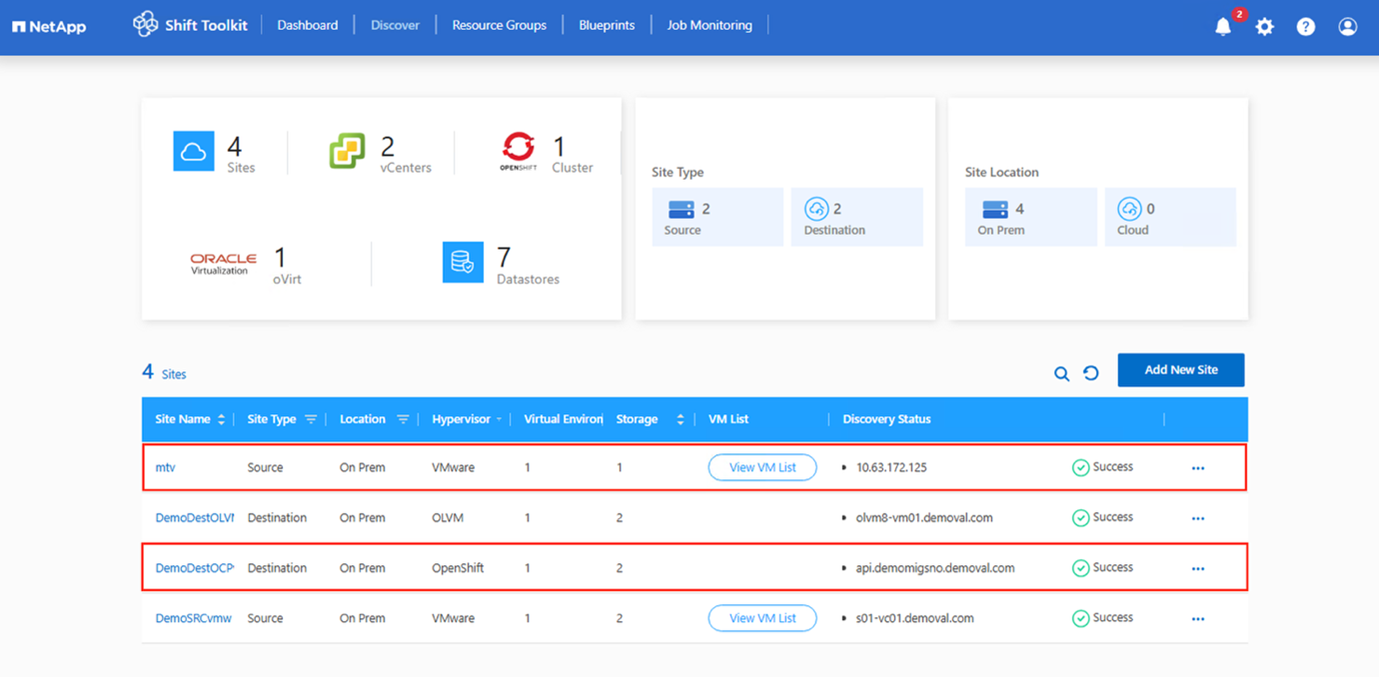
Once the migration plan is created, copy the name of the migration plan and head over to Shift toolkit UI.
-
Add the source and destination hypervisors. Follow this link
to create sites
The endpoint configured in the Shift Toolkit must match the format used when adding it through the MTV console. For example, if the source or destination endpoint was added using FQDN, the same FQDN should be used in the Shift Toolkit. Show example
-
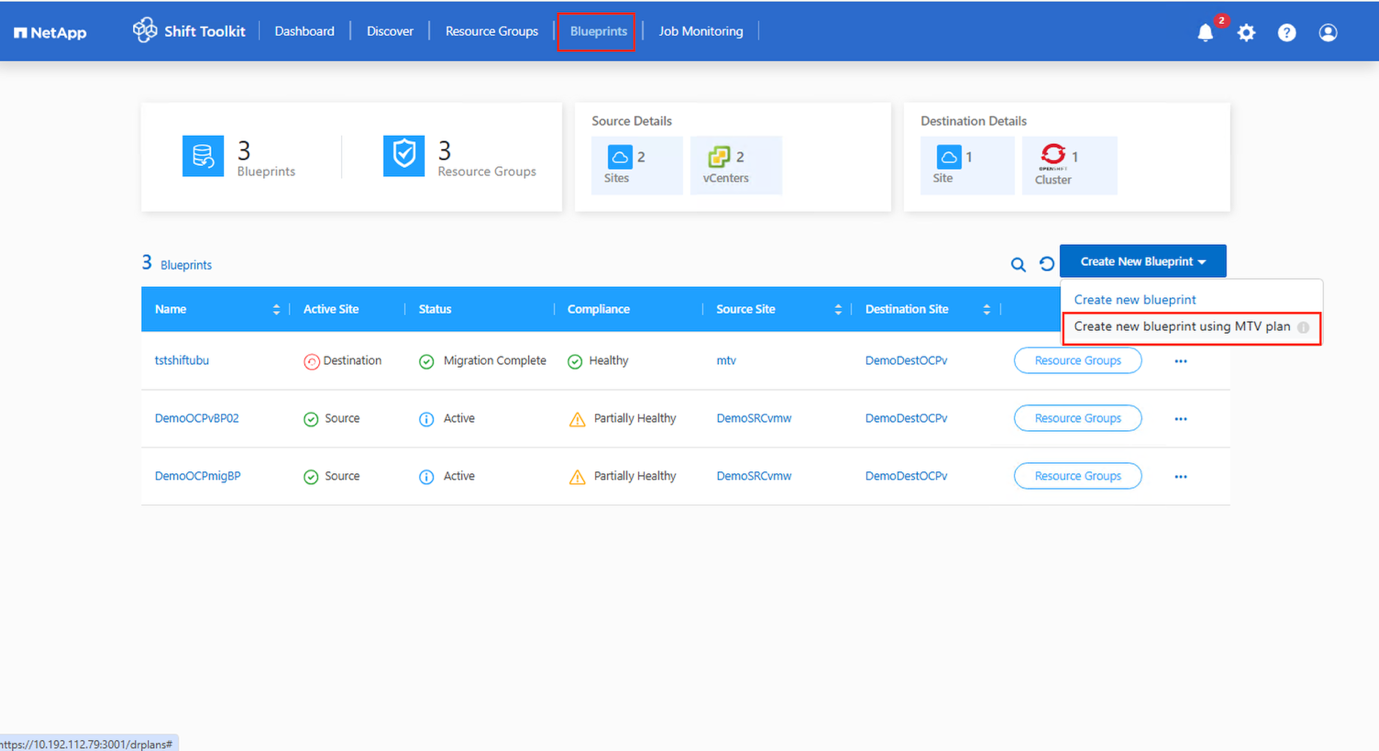
Navigate to Blueprints and Create a New Blueprint.
-
After completing the previous steps, go to Blueprints and select Create new blueprint using MTV plan.
Unlike the standard workflow in Shift Toolkit, there is no need to manually create a resource group when using an MTV plan-based migration. Shift Toolkit automatically generates resource groups and applies the necessary mappings based on the migration plan YAML. Show example
-
-
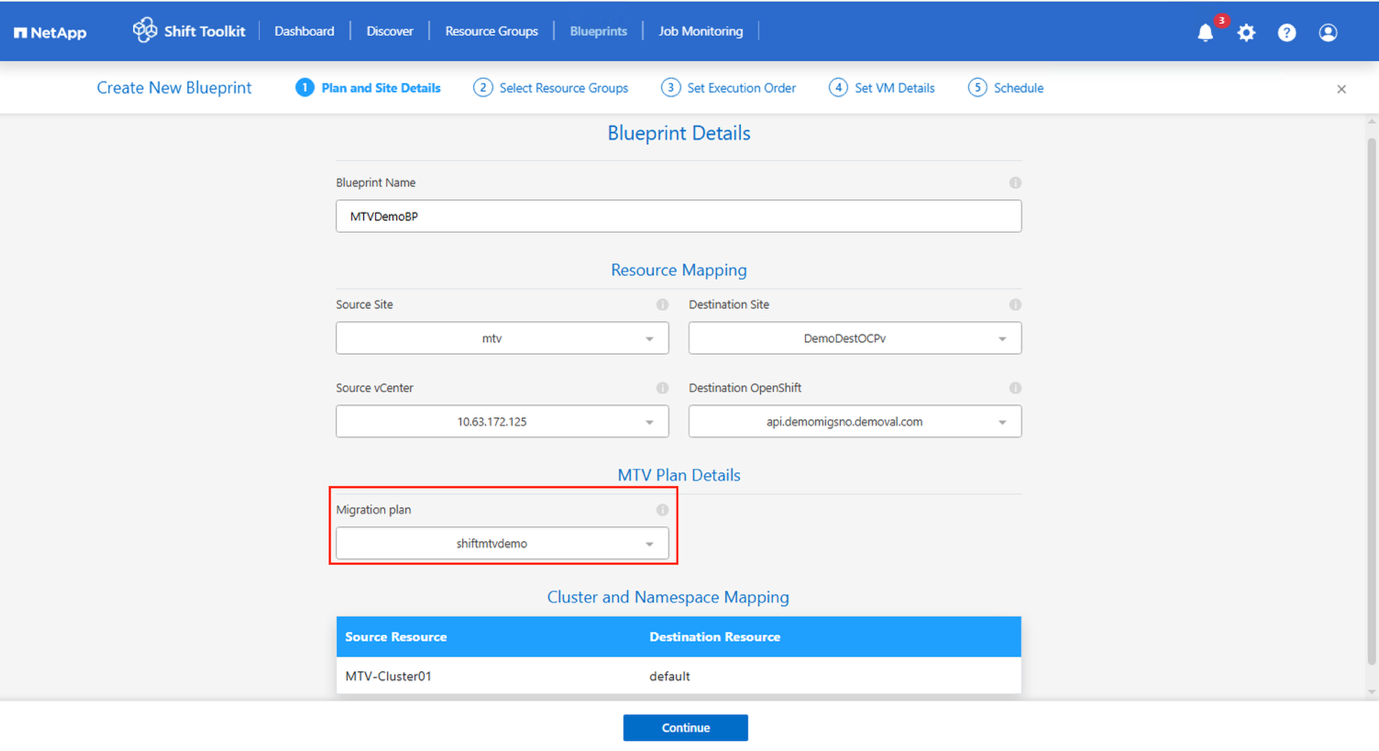
Select Destination and Migration Plan.
-
Choose the destination site and the corresponding OpenShift endpoint. After that, select the migration plan retrieved from the specified cluster, which contains the VMs to be migrated.
Show example
-
-
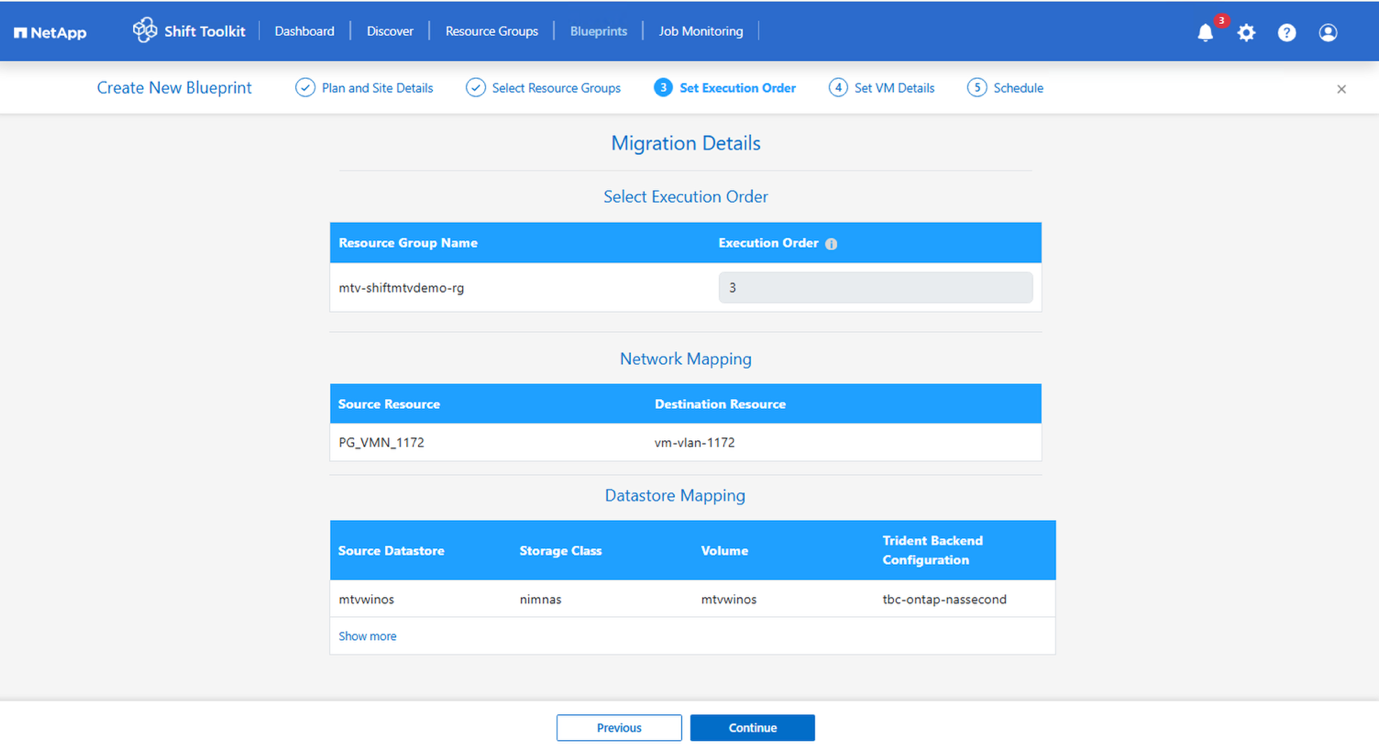
The resource group and mappings will all be autoconfigured based on the migration plan yaml.
Show example
-
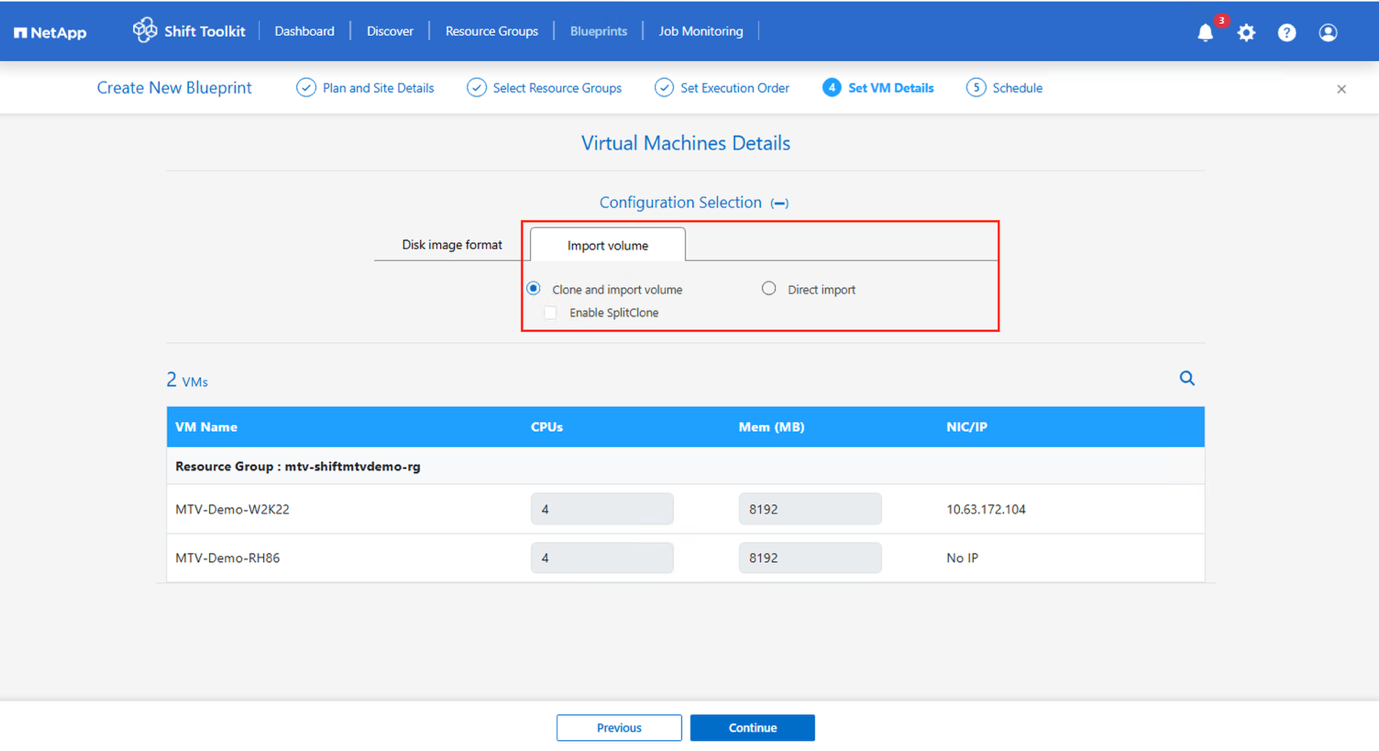
Choose the PVC import option. By default, the setting is Clone and import the volume.
Volumes can also be imported directly without creating a clone. Show example
-
Once done, create the blueprint.
-
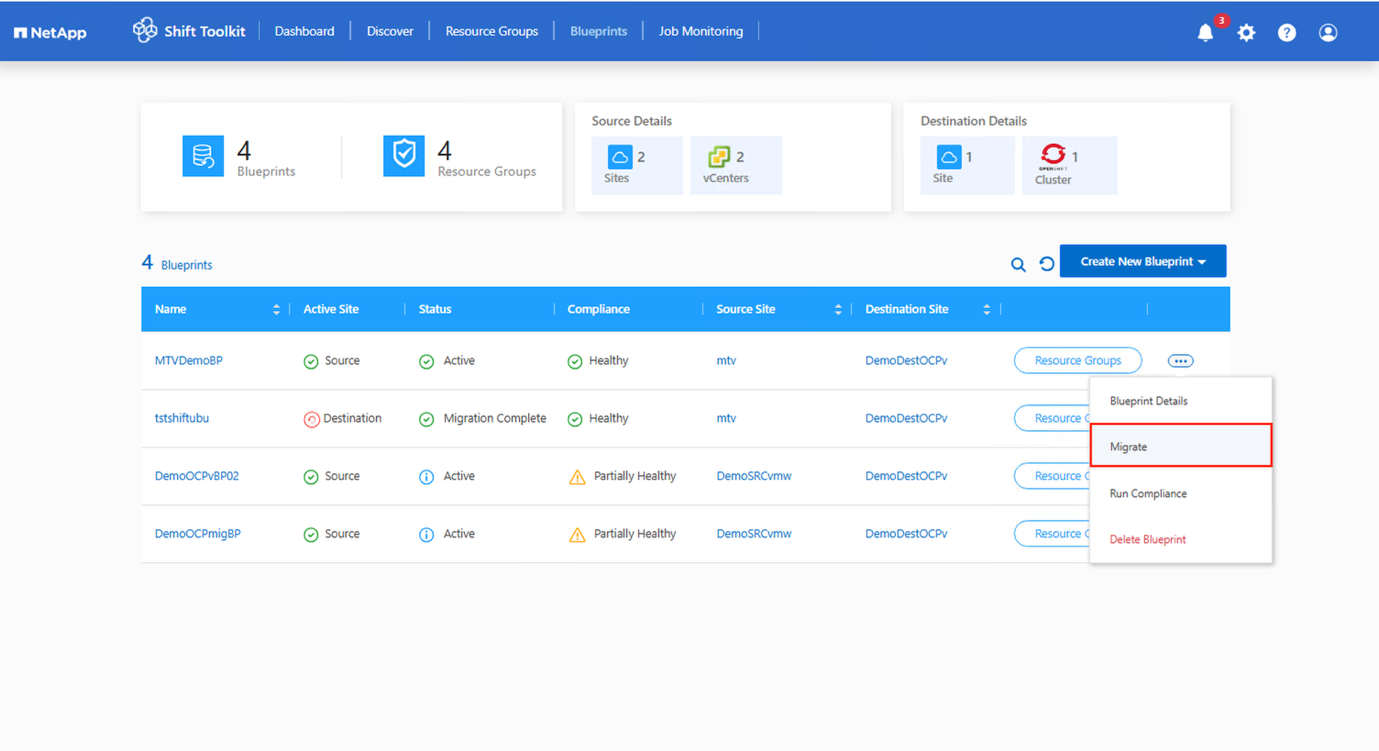
Trigger the migration by clicking on migration against the blueprint.
The VMs should be powered OFF before triggering the migration. MTV will bring up the VM based on the VM target power state attribute. Show example
-
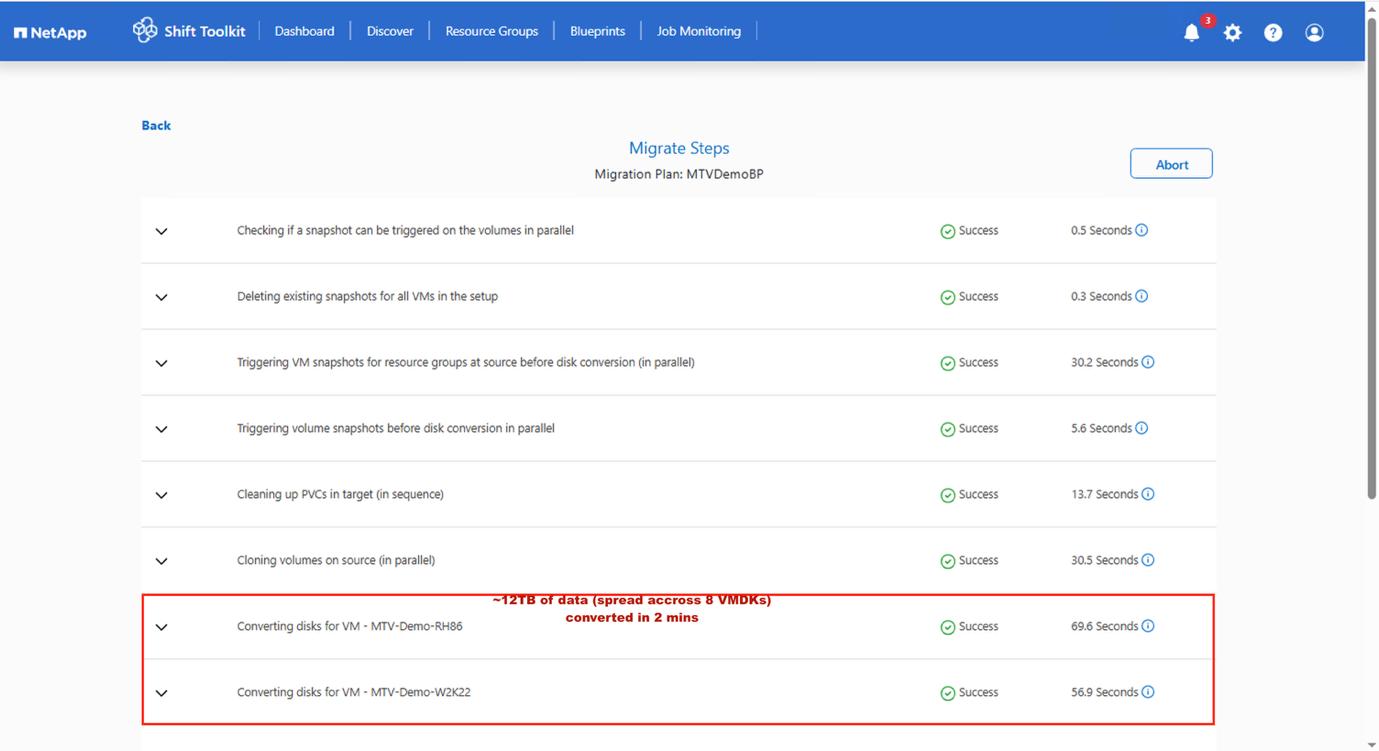
Shift toolkit executes the workflow steps to convert the disk format, import the PVCs and creating the VM using OpenShift APIs.
Show example
-
After all PVCs are in place as specified and Shift Toolkit triggers MTV, the MTV migration workflow is initiated.
-
The Migration Controller creates a VirtualMachineImport (VMI) custom resource (CR) for each source VM.
-
Since the PVCs are already imported by Shift Toolkit, the Virtual Machine Import Controller launches a Conversion Pod with the PVCs attached.
-
The Conversion Pod runs virt-v2v, installing and configuring device drivers on the PVCs for the target VM.
-
The Virtual Machine Import Controller then creates a VirtualMachineInstance (VMI) CR.
-
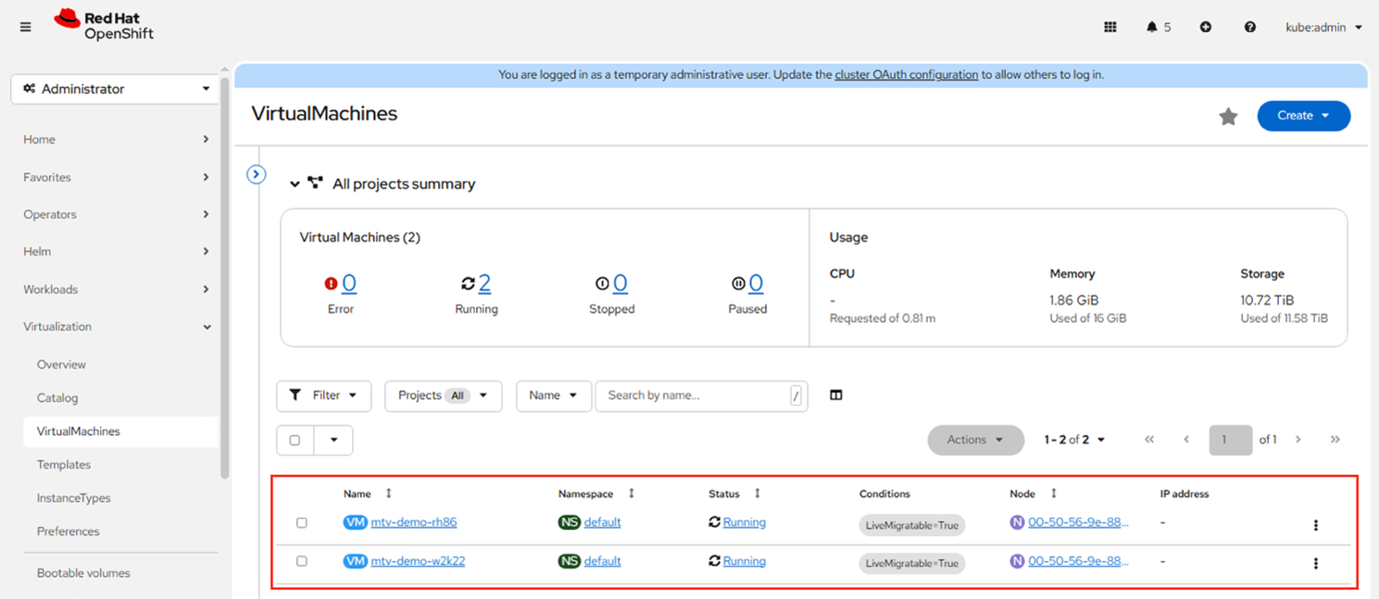
When the target VM powers on, the KubeVirt Controller creates a VM Pod, which runs QEMU-KVM with the PVCs attached as VM disks.
Show example
-
-
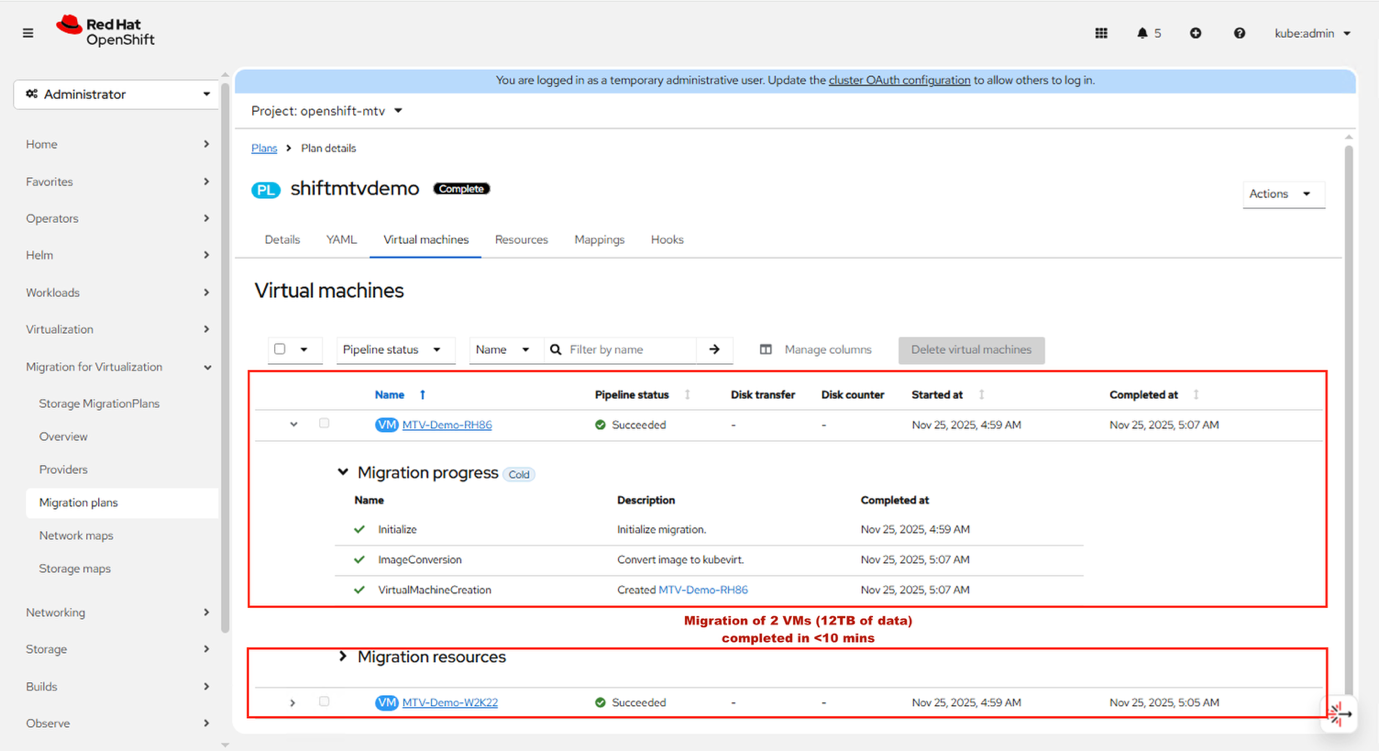
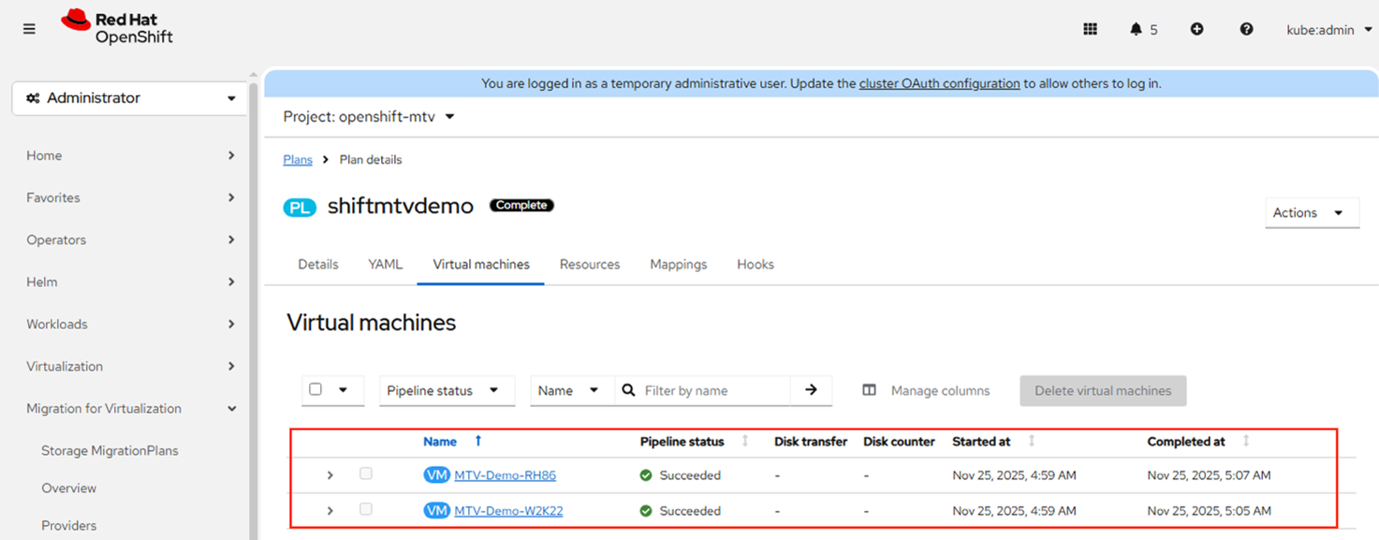
When all VMs have been migrated, the Migration Controller updates the migration plan status to Completed. The original power state of each source VM is preserved after migration.
Show example
Show example
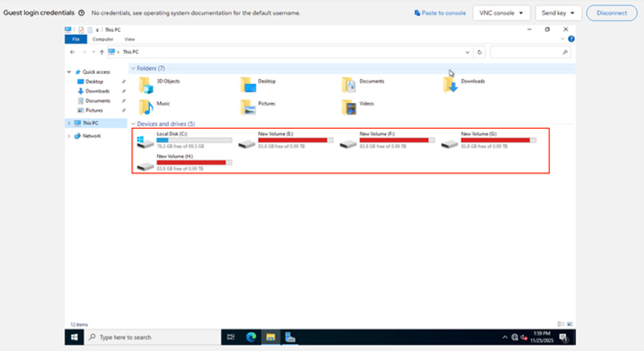
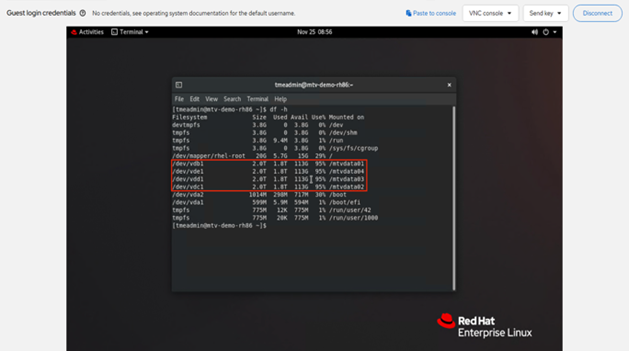
This shows Shift toolkit along with MTV simplifying the migration at lighting speed. In this example, 2 VMs with a total of 12TB was migrated. The entire process completed in around 8-10 mins. What’s happening behind the scenes:The following sections describe the steps triggered by Shift Toolkit APIs and MTV to convert VMDK files and create virtual machines on the OpenShift platform. This workflow remains consistent whether initiated through the Shift Toolkit UI or via scripts provided within Shift Toolkit Script Blocks.
Shift toolkit will automatically find the VMDKs associated with each VM including the primary boot disk.
|
|
If there are multiple VMDK files, each VMDK will be converted. |
Shift Toolkit uses Trident CSI to import volumes as PVCs into the cluster. Each PVC manifest is populated with specific labels and annotations to ensure MTV recognizes them:
-
Labels
-
vmID
-
vmUUID
-
-
Annotation:
-
vmdk disk path
-
Additionally, permissions on the disk.img file are updated. The permissions are modified using a POD that is deployed on the fly to mount the imported PVCs and set the permissions as follows:
-
"owner": { "id": 107 },"group": { "id": 107 },"mode": "0655"
Important Notes:
-
Forklift checks for vmID and vmUUID in the PVC.
-
Forklift uses the disk name (VMDK path) for forklift.konveyor.io/disk-source.
-
The number of imported PVCs must match the number of disks associated with the source VM. For example, if a VM has three VMDKs but four PVCs are imported with matching IDs, MTV will not update the migration plan status to “Ready to start.”
Once these steps are complete, Shift Toolkit patches the migration plan YAML so MTV understands that PVCs should be used directly, bypassing the data populator pod process (which is typically time-consuming). The patched YAML includes:
-
targetNamespace: default
-
type: conversion
-
storage: {}
Once the configuration is complete, MTV is invoked to begin the migration. The UI will display the migration type as Cold, but based on the YAML specification for conversion, MTV validates each PVC against the associated vmID and vmUUID, maps them accordingly, and then initializes the migration.
.Show example
Details
|
|
VMs are created under “Default” project for virtual machines, however it can be modified within the MTV migration plan YAML. |
Shift Toolkit accelerates migration by simplifying the process, minimizing downtime, and eliminating the need for ESXi host access or VDDK-based approaches.
After the migration is finished, the clone volume needs to be detached. The method used depends on the ONTAP version: use clone split for ONTAP 9.17.1 and later, or vol move for earlier versions. A script to initiate the detach process is available in the “Post migrate” folder within the provided ZIP package.