

Configure the NetApp Shift Toolkit
 Suggest changes
Configure the Shift Toolkit to automate the migration or conversion of VMs) This process includes adding source and destination sites, configuring storage, grouping VMs into resource groups, creating migration blueprints, and scheduling migrations.
Run Shift toolkit
-
Using the browser, access Shift toolkit UI by entering the
http://<IP address specified during installation>:3001
Use Google chrome or Internet explorer for best experience. -
Access the UI using default credentials as below:
Username: admin
Password: admin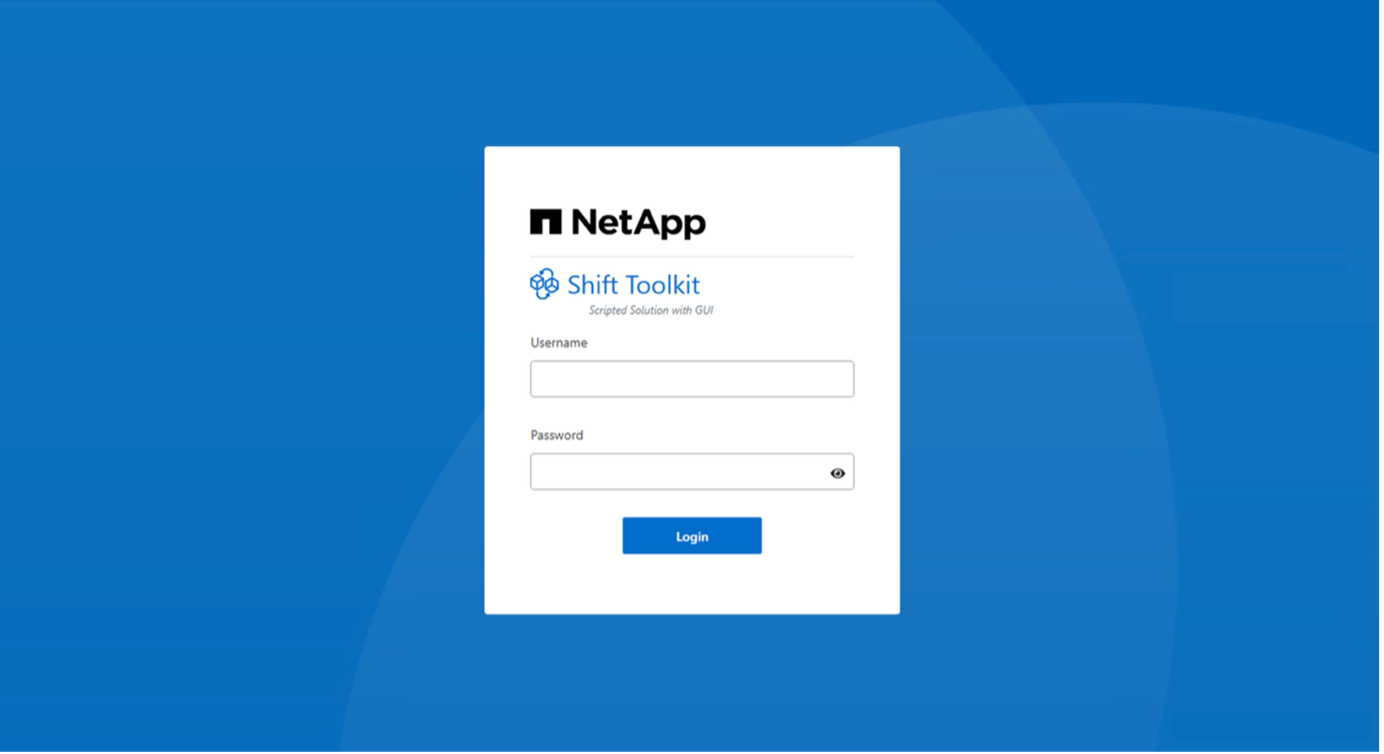
Admins are required to change their credentials during the initial login.
After the mandatory password change, the admin credential can also be changed using “Change Password” option after logging in to the GUI. 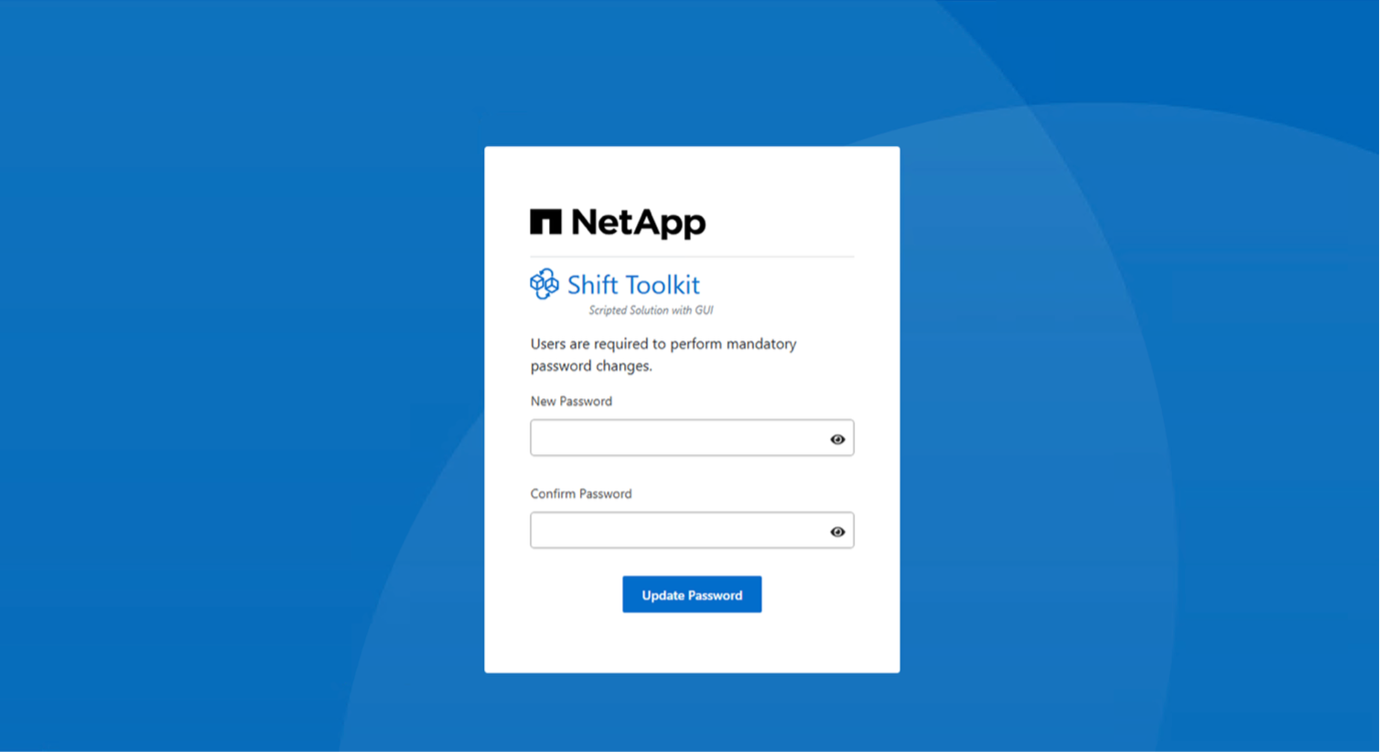
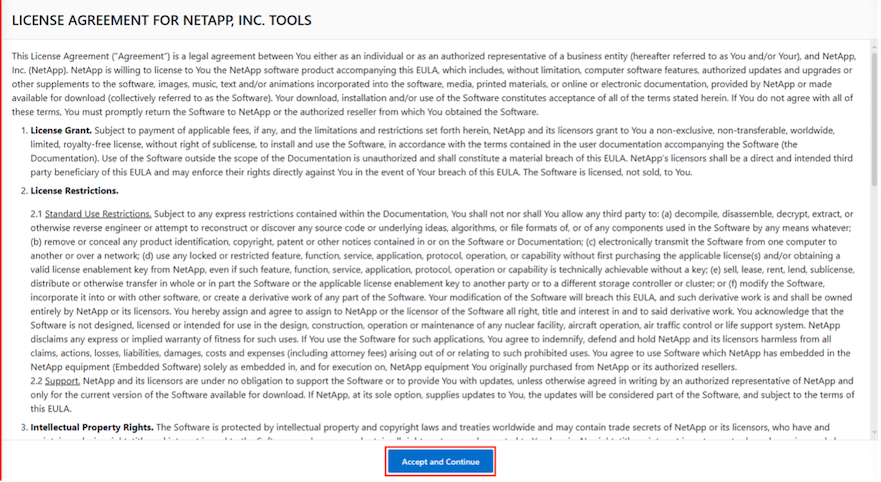
Once done, accept the legal EULA by clicking on “Accept and Continue”
Shift Toolkit Configuration
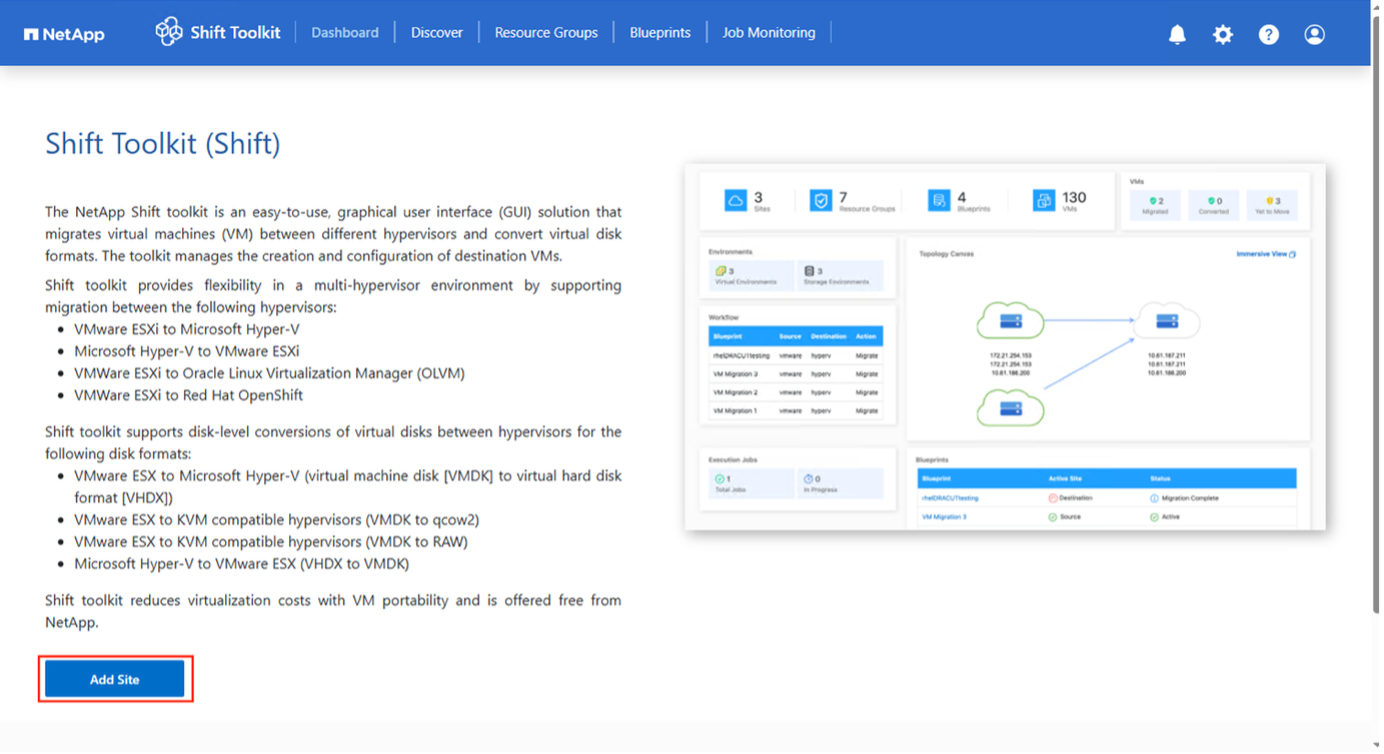
Once the storage and connectivity to both the source and destination hypervisors have been configured properly, begin configuring Shift toolkit to automate the migration or conversion of the virtual machines to appropriate format, leveraging the FlexClone functionality.
Add Sites
The first step is to discover and add the source and then the target Hypervisor details (both hypervisors and storage) to Shift toolkit. Open Shift toolkit in a supported browser and use the default username and the password and click on “Add Sites”.
|
|
Sites can also be added using Discover option. |
Add the following platforms:
Source
-
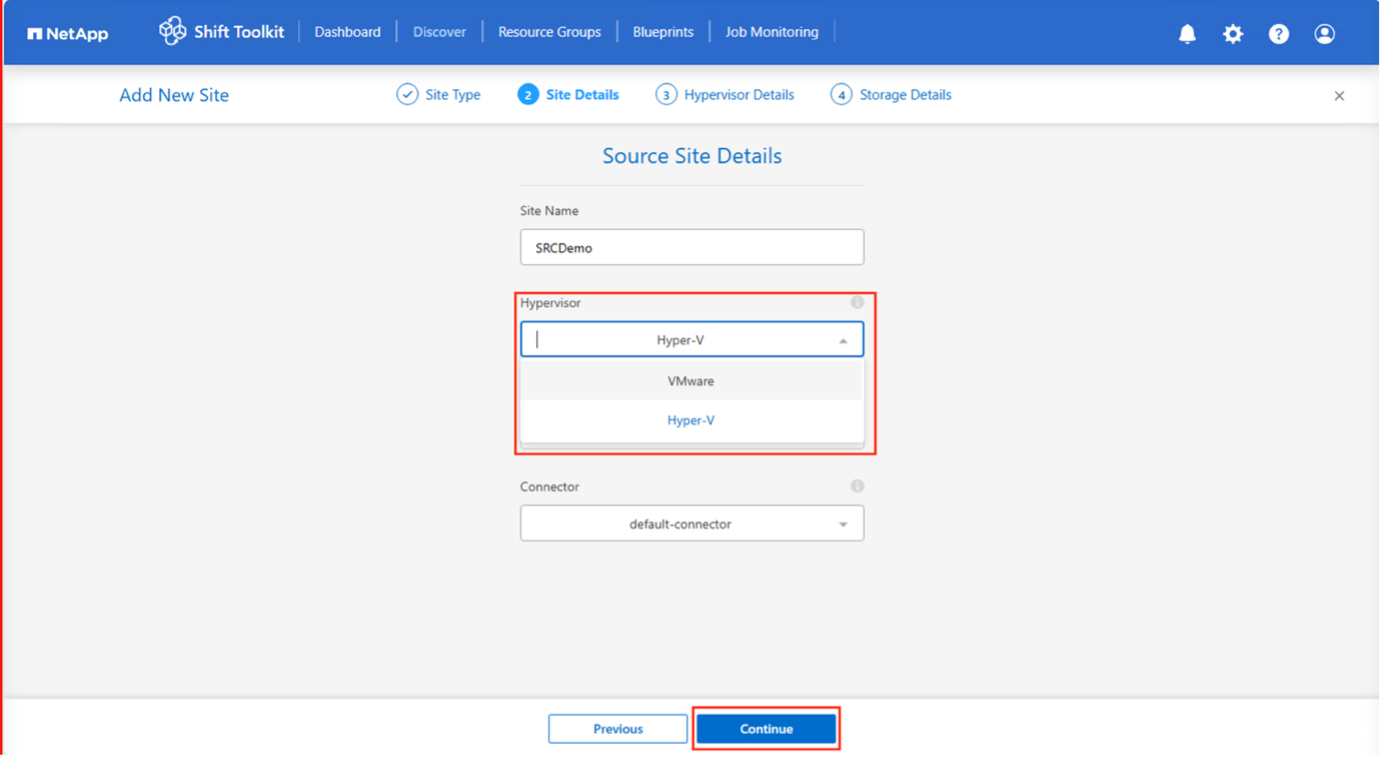
Source Site Details
-
Site Name - Provide a name for the site
-
Hypervisor – Select VMware or Hyper-V as the source
-
Site Location – Select the default option
-
Connector – Select the default selection
-
Once filled, click Continue.
-
If the selection is VMware, enter the Source vCenter details.
-
Endpoint - Enter the IP address or FQDN of the vCenter server
-
Username - username to access the vCenter (in UPN format: username@domain.com)
-
vCenter Password – Password to access vCenter for performing inventory of the resources.
-
vCenter SSL Thumbprint (optional)
-
-
If the selection is Hyper-V, enter the Source Hyper-V details.
-
Endpoint - Enter the IP address or FQDN of the standalone hosts or the failover cluster endpoint.
-
Hyper-V Username - username to access the Hyper-V (in Down-level login (domain\username) or UPN format)
-
Hyper-V Password – Password to access Hyper-V for performing inventory of the resources.
Select “Accept Self signed certificate” and click Continue.
-
-
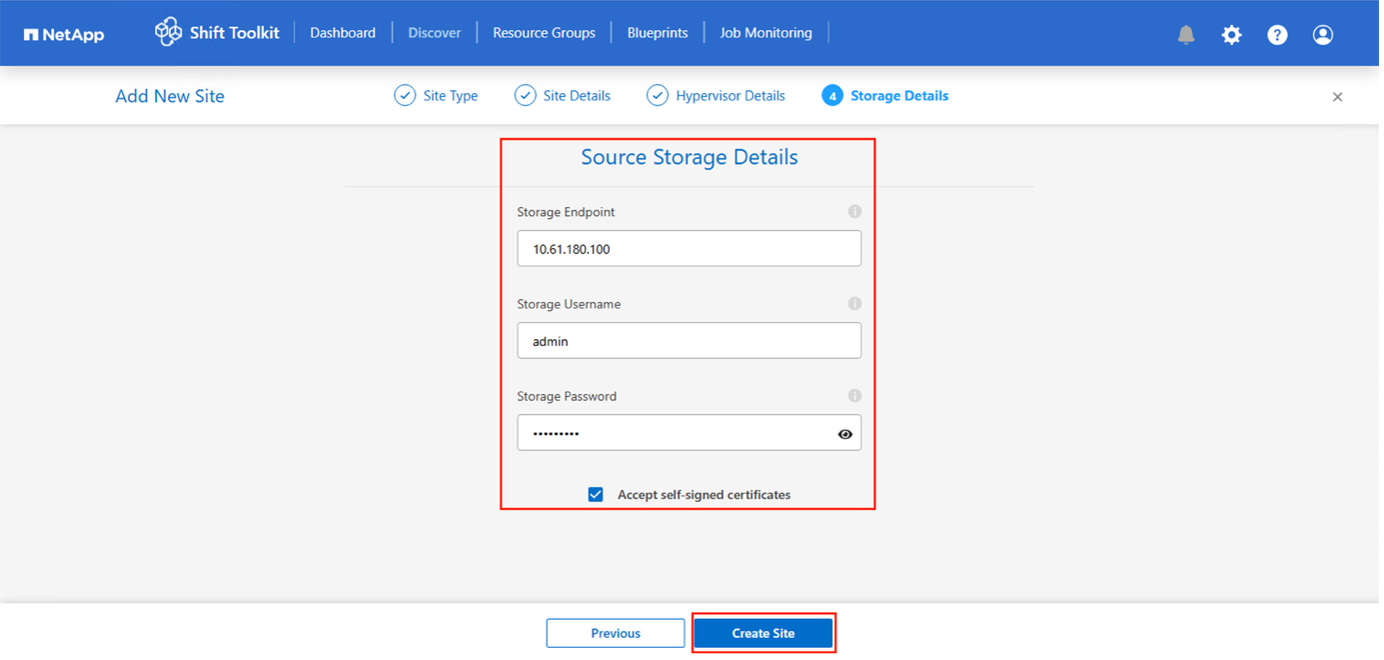
ONTAP Storage system credentials
Once added, Shift toolkit will perform an automatic discovery and display the VMs along with the relevant metadata information. Shift toolkit will automatically detect the networks and vLANs used by the VMs and will populate them.
|
|
If any modifications are made to the source site, ensure to run the discovery to fetch the latest information. This can be done by clicking on 3 dots against the site name and click on “Discover Site”. |
|
|
The VM inventory is auto-refreshed every 24 hours. |
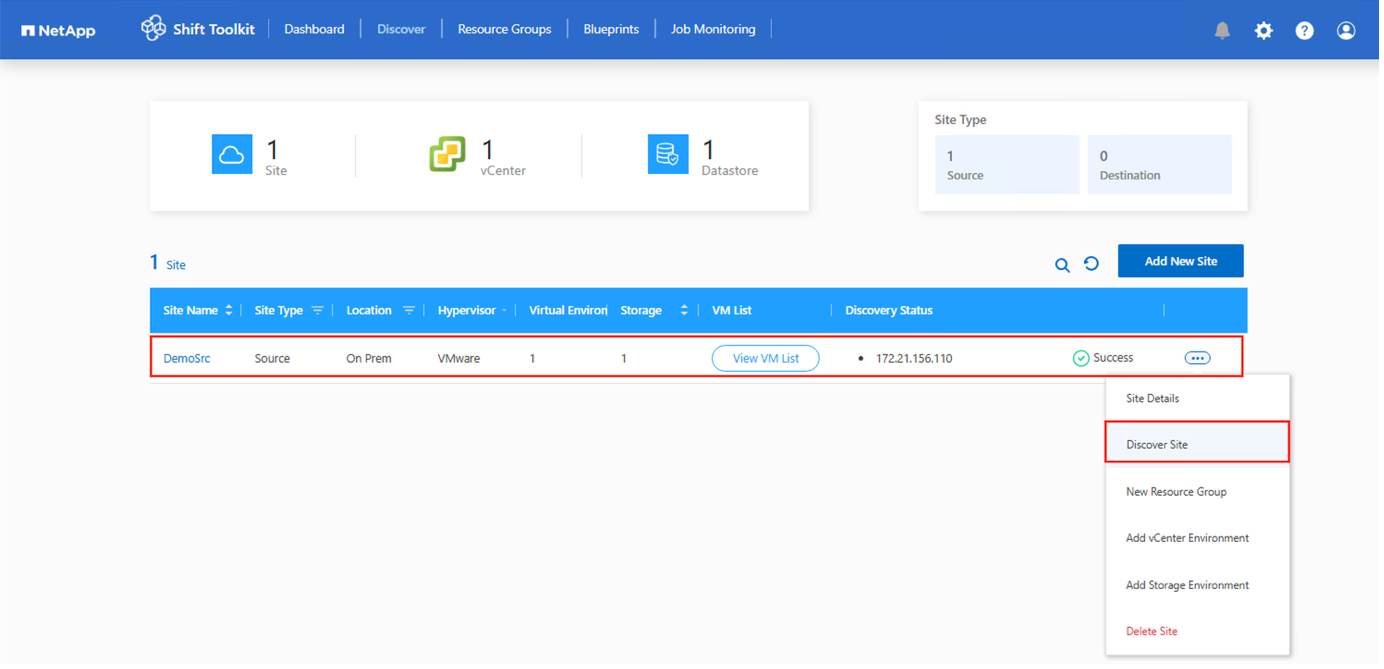
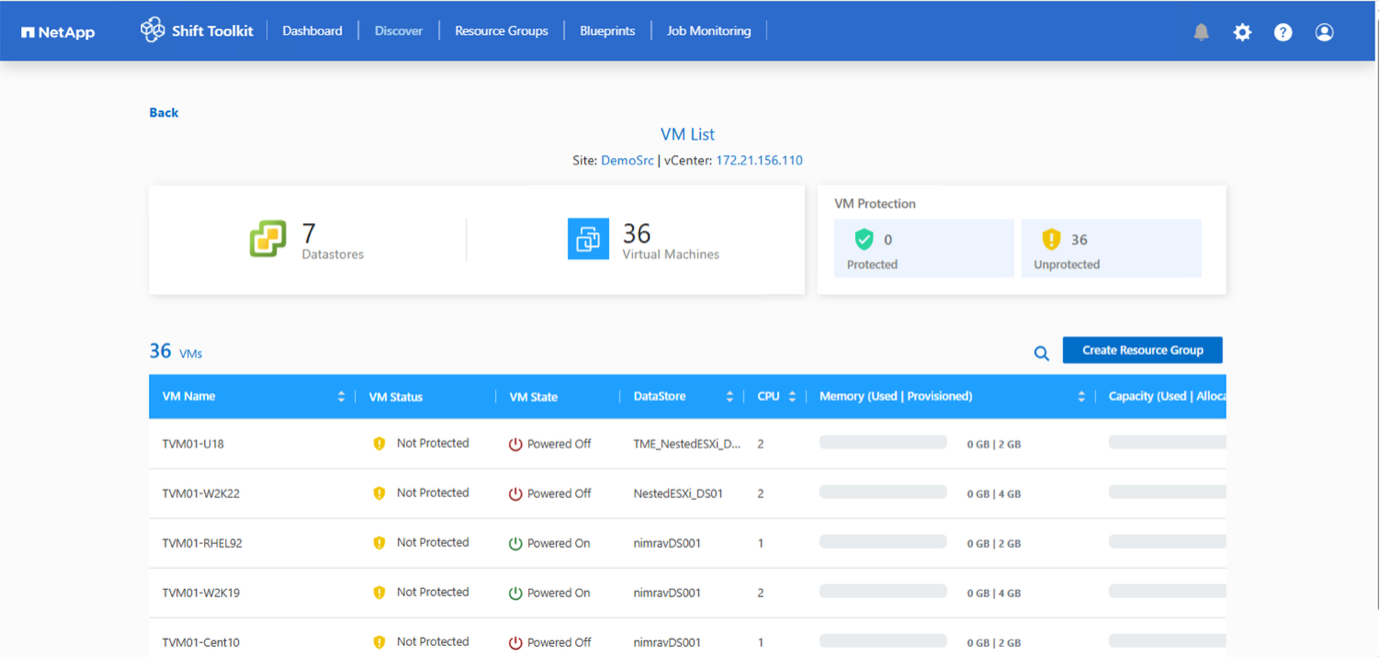
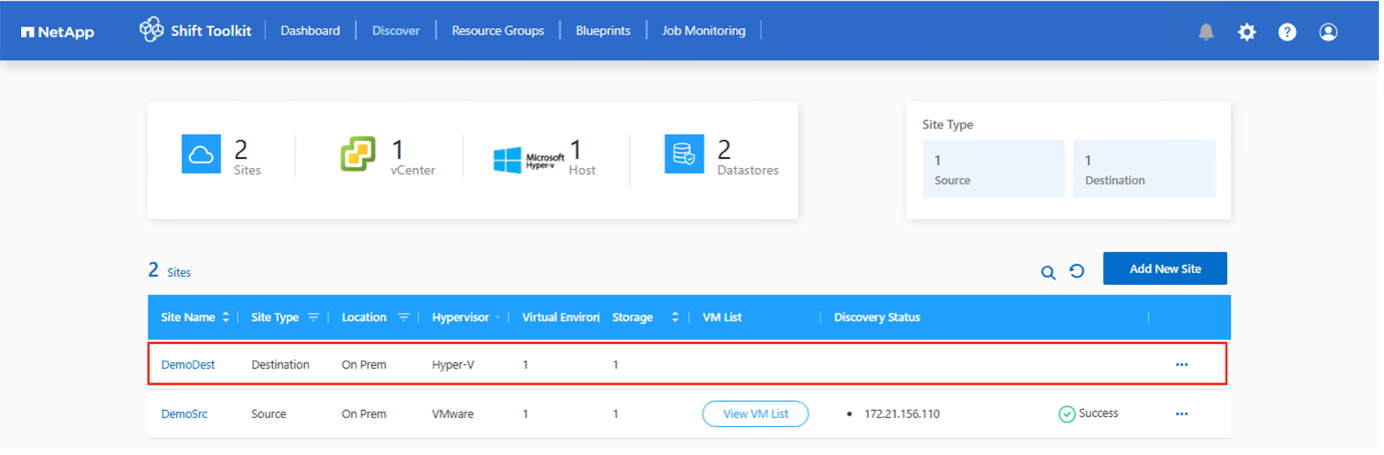
To view the discovery data for a specific source hypervisor, go to the dashboard, click on “View VM List” against the appropriate site name. The page will display the VM inventory along with the VM attributes.
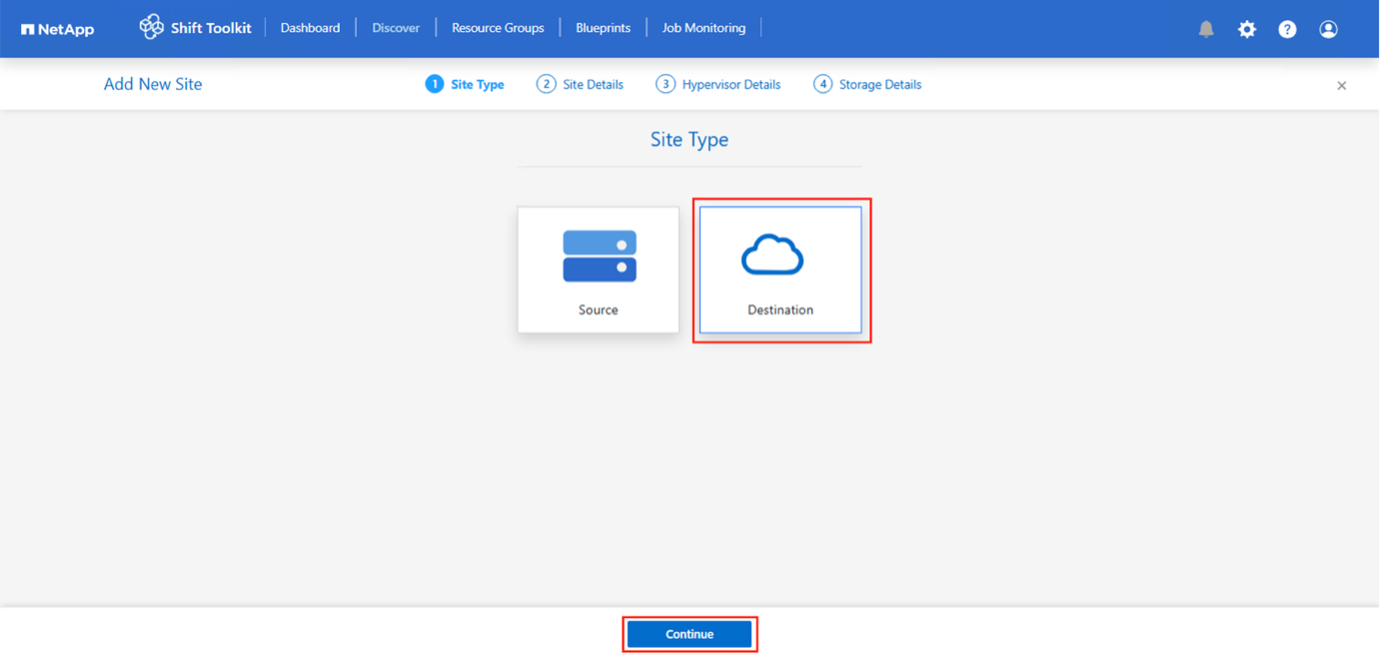
Next step is to add the destination hypervisor. To add, click on “Add New Site” and select “Destination”.
Destination
-
Destination Site Details
-
Site Name - Provide a name for the site
-
Hypervisor – Choose the appropriate target platform from the following options:
-
VMware
-
Hyper-V
-
OpenShift
-
OLVM
-
KVM (conversion only)
-
-
Site Location – Select the default option
-
Connector – Select the default selection
-
Once filled, click Continue.

Based on the hypervisor selection, fill in the necessary details.
-
Destination hypervisor details
-
Respective hypervisor manager Endpoint IP address or FQDN
-
Username - username to access (in UPN format: username@domain.com or domain\administrator)
Password – Password to access for performing inventory of the resources.
-
Select “Accept Self signed certificate”.
-
Once done, click “Create Site”
|
|
The source and destination storage system should be the same as the disk format conversion happens at the volume level and within the same volume. |
Next step is to group the required VMs into their migration groups as resource groups.
Resource Groupings
Once the platforms have been added, group the VMs you want to migrate or convert into resource groups. Shift toolkit resource groups allow you to group set of dependent VMs into logical groups that contain their boot orders and boot delays.
|
|
Ensure the Qtrees are provisioned (as mentioned in the pre-requisite section) before creating the resource groups. |
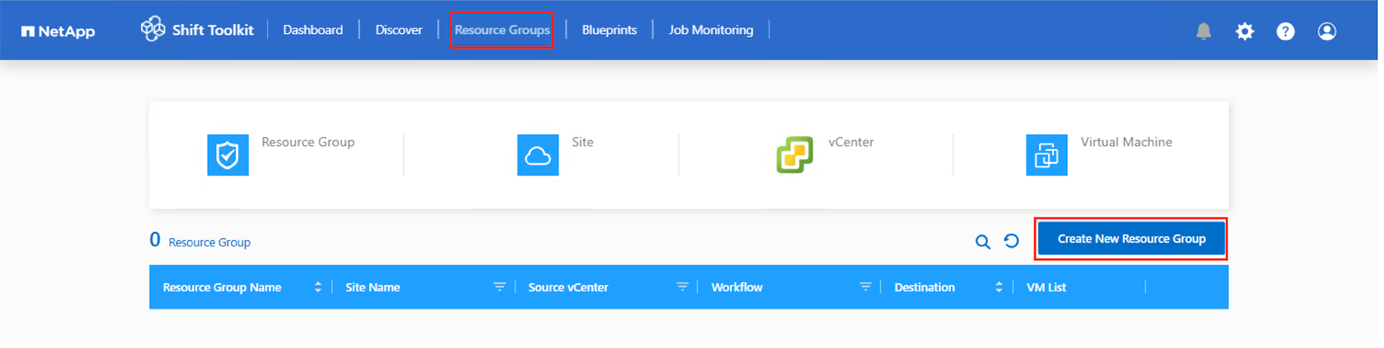
To start creating resource groups, click on the “Create New Resource Group” menu item.
-
Access Resource groups, click on “Create New Resource Group”.
-
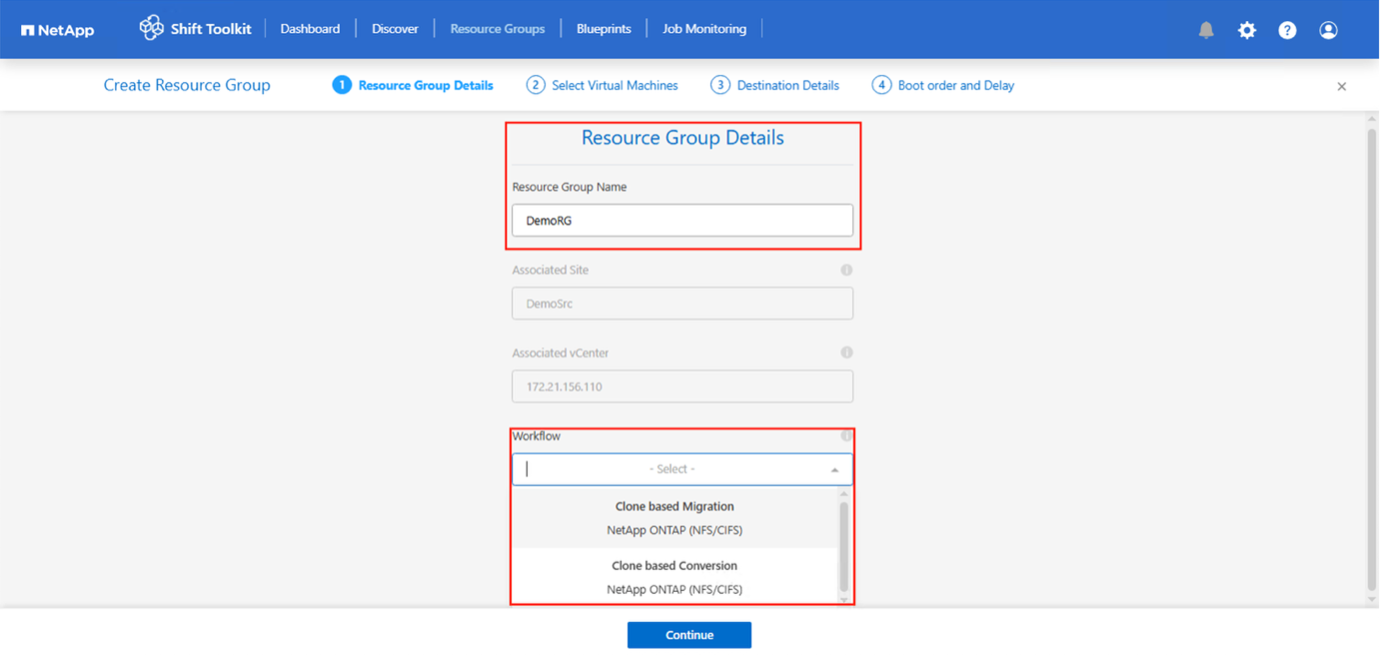
On the “New resource group”, select the Source site from the dropdown and click “Create”
-
Provide Resource Group Details and select the workflow. The workflow provides two options
-
Clone based Migration – performs end to end migration of the VM from source hypervisor to destination hypervisor.
-
Clone based Conversion – Performs conversion of the disk format to the selected hypervisor type.
-
-
Click on “Continue”
-
Select appropriate VMs using the search option. The default filter option is “Datastore”.
Move the VMs to convert or migrate to a designated datastore on a newly created ONTAP SVM before conversion. This helps isolating the production NFS datastore and the designated datastore can be used for staging the virtual machines.
For OpenShift environment, VMDKs should be relocated to their corresponding volumes to replicate the PVC (Persistent Volume Claim) structure using ONTAP NAS storage driver. In future releases, additional enhancements will be incorporated to leverage ONTAP NAS economy driver. 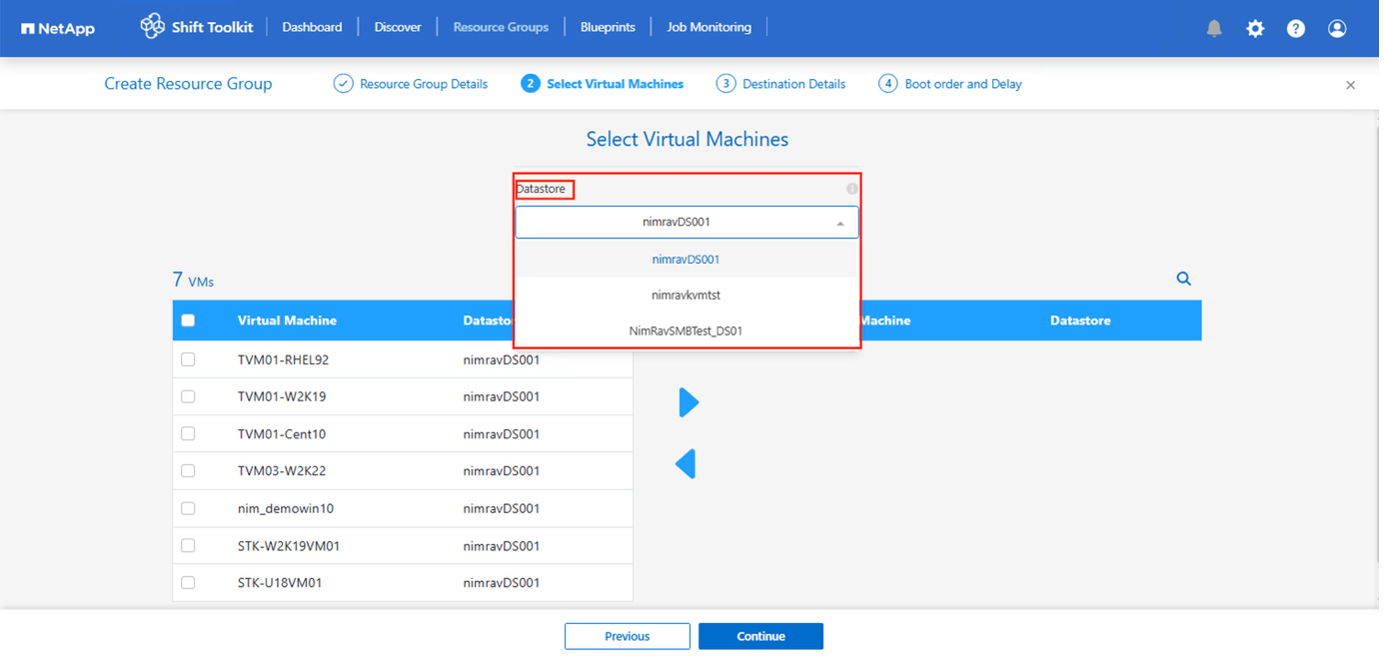
The datastore dropdown in this context will only show NFSv3 datastores. NFSv4 datastores will not be displayed. 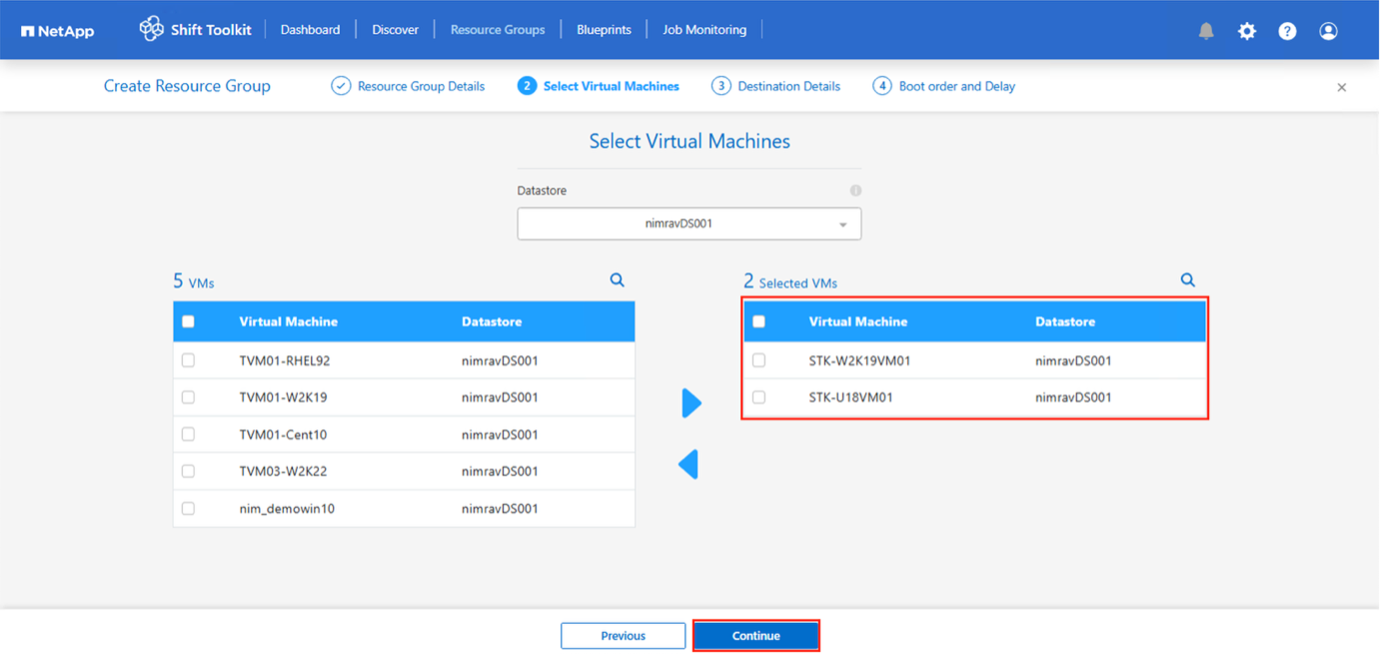
-
Update the migration details by selecting “Destination Site”, Destination Hypervisor entry” and Datastore to Qtree or storage class mapping.
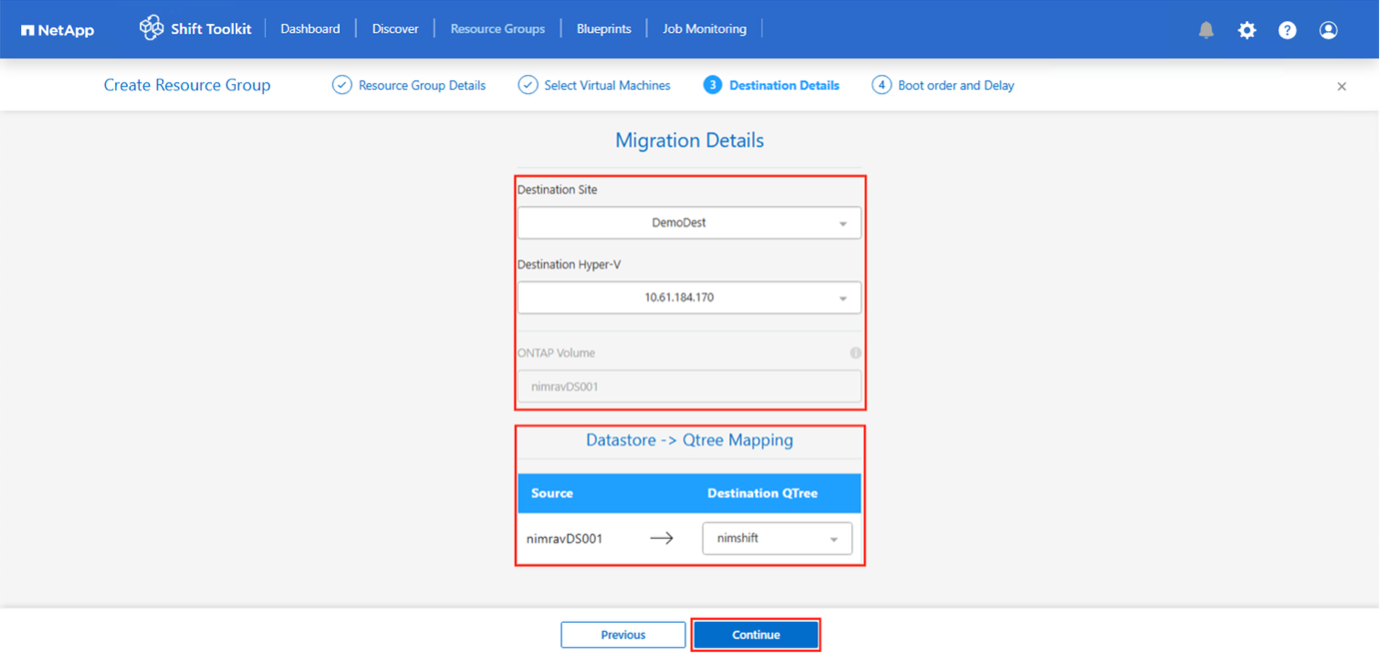
Make sure that the destination path (where the converted VMs are stored) is set to a qtree when converting VMs. Set the destination path to the appropriate qtree.
Multiple qtrees can be created and used for storing the converted VM disks accordingly.
Virtual machines can be running on spanned datastores, and Shit toolkit will automatically detect them, however a qtree should be mapped for each volume. Ability to migrate VMs with spanned VMDKs across multiple volumes
The Shift toolkit UI automatically selects all the spanned volumes that is part of a VM or VMs that are selected for that specific RG. This will list all the volumes in the RG page where we do the datastore – qtree mapping.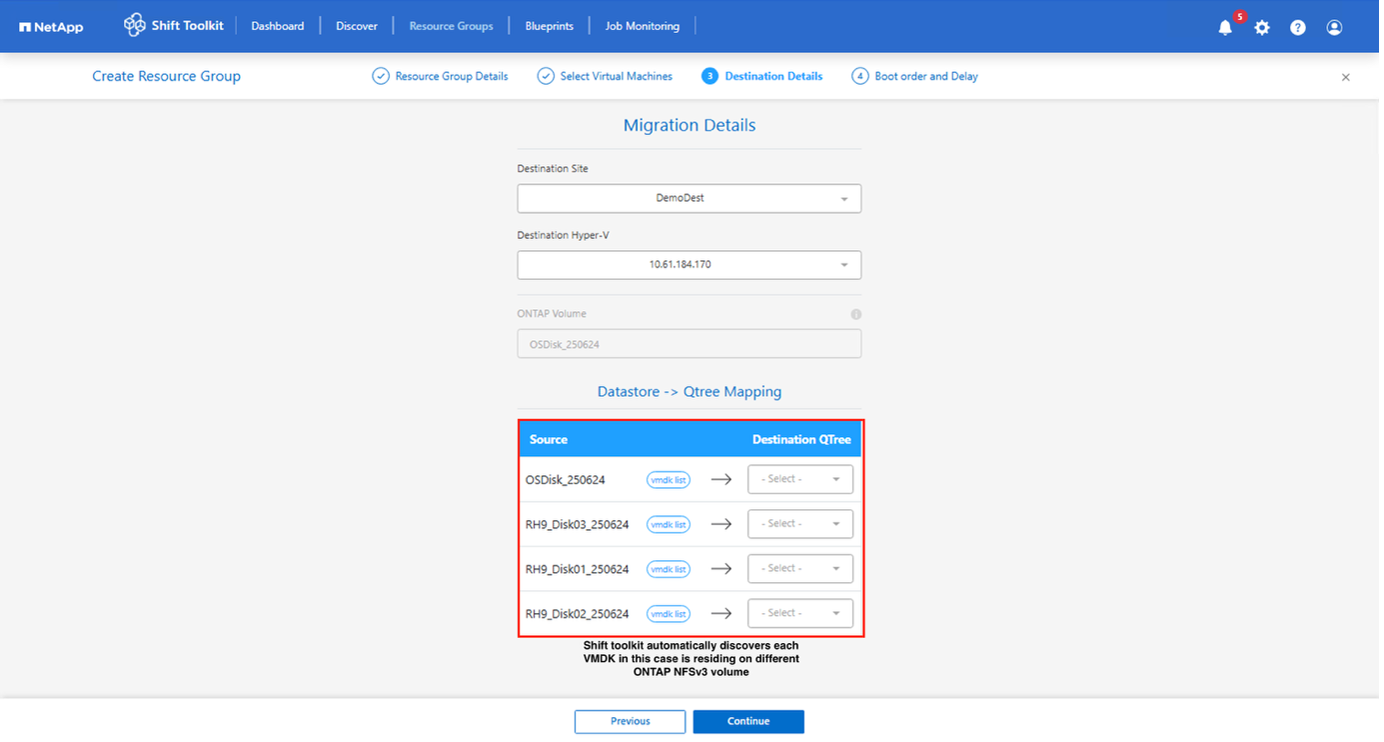
-
Select the Boot Order and Boot delay (secs) for all the selected VMs. Set the order of power on sequence by selecting each virtual machine and setting up the priority for it. 3 is the default value for all virtual machines.
Options are as follows:
1 – The first virtual machine to power on
3 – Default
5 – The last virtual machine to power on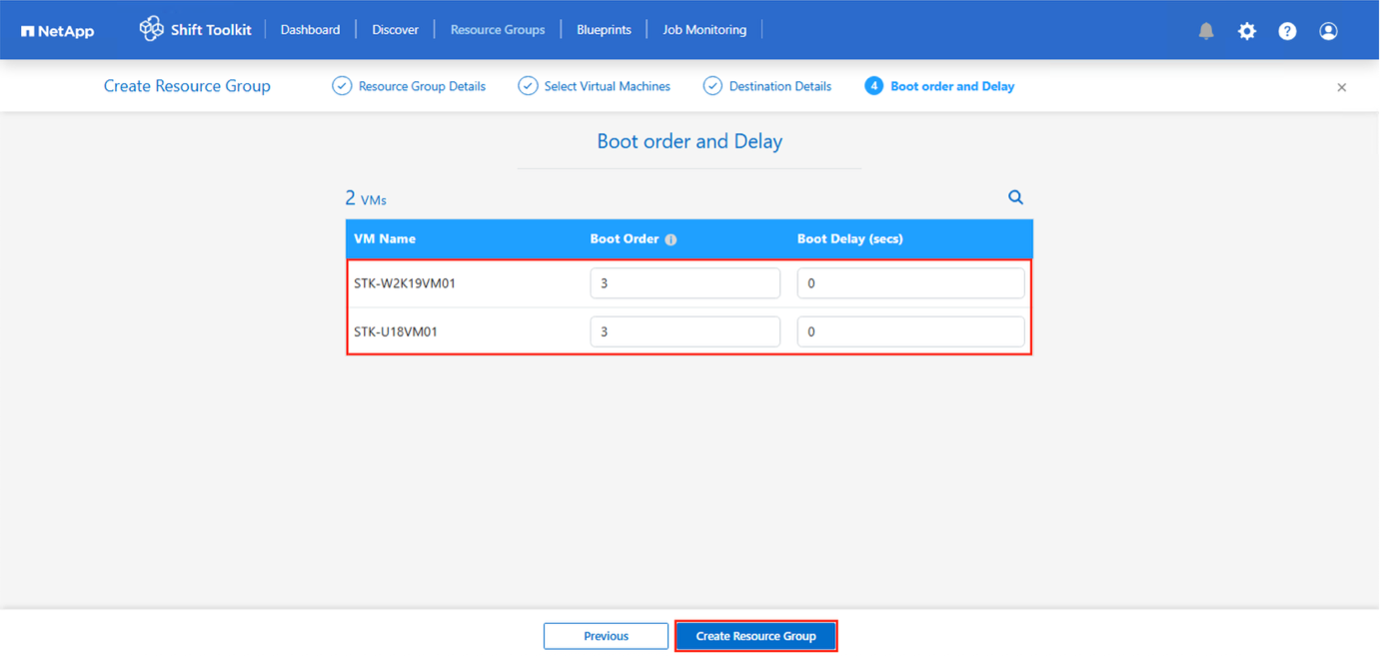
-
Click on “Create Resource Group”.
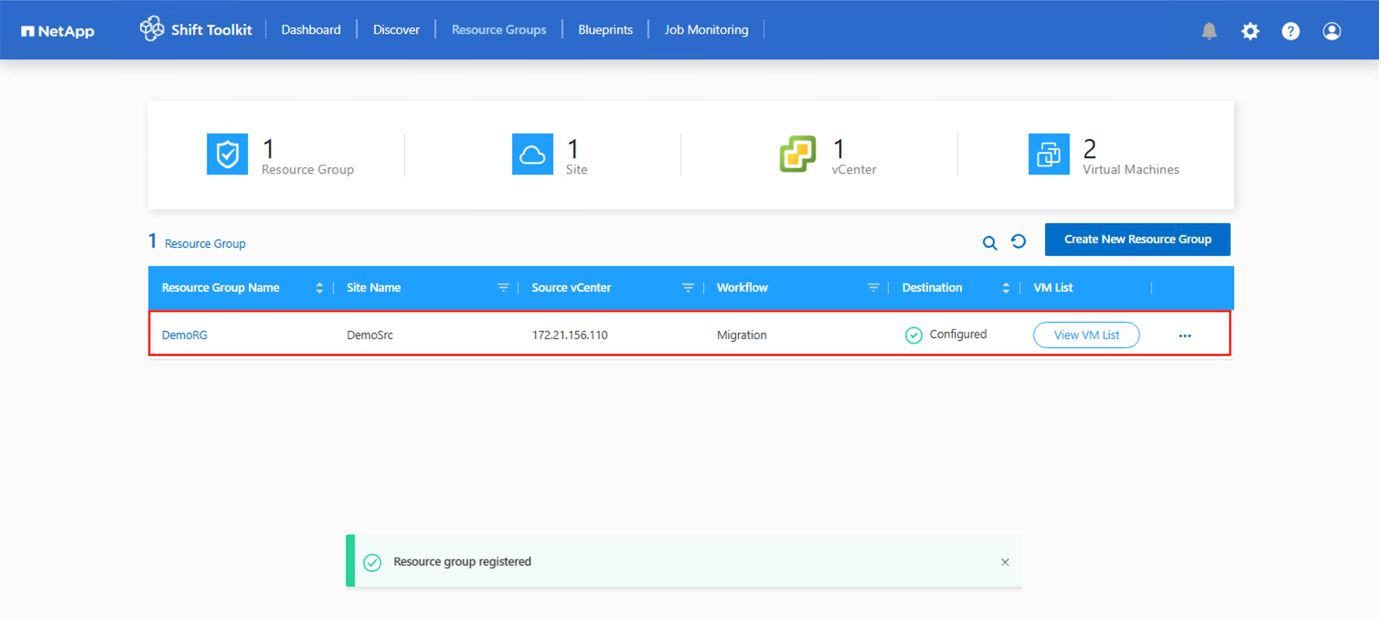
In the event of the need to modify the resource group so as to add or remove virtual machines, use this option against the resource group name and select “Edit Resource Group”.
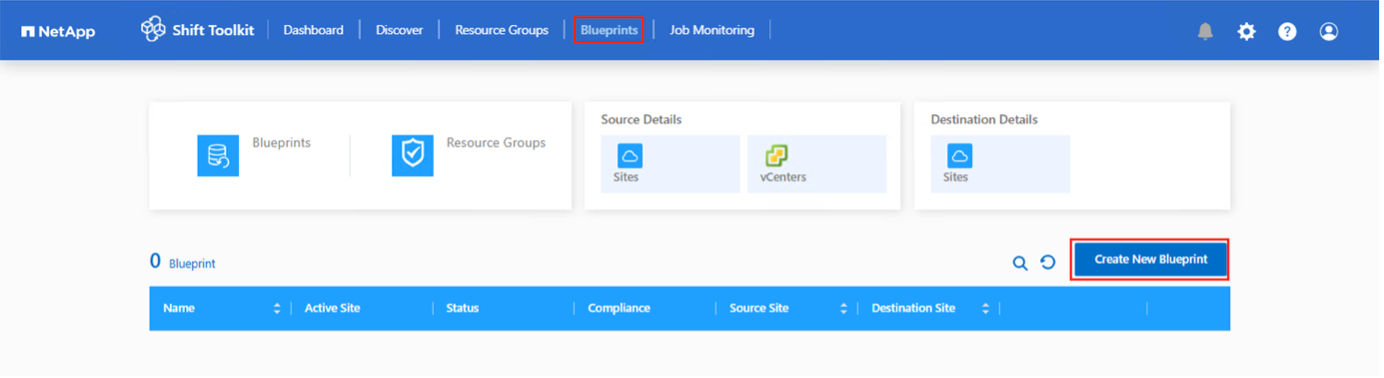
Blueprints
To migrate or convert virtual machines, a plan is necessary. Select the source and destination hypervisor platforms from the drop down and pick the resource groups to be included in this blueprint, along with the grouping of how applications should be powered on (i.e. domain controllers, then tier-1, then tier-2, etc). These are often called as migration plans as well. To define the blueprint, navigate to the “Blueprints” tab and click on “Create New Blueprint”.
To start creating blueprint, click on the “Create New Blueprint”.
-
Access Blueprints, click on “Create New Blueprint”.
-
On the “New Blueprint”, provide a name for plan and add necessary host mappings by selecting Source Site > associated vCenter, Destination Site and the associated hypervisor.
-
Once mappings are done, select the cluster and host mapping.
In the example below, Hyper-V is shown as the target. The hypervisor option displayed will vary based on the selected source site.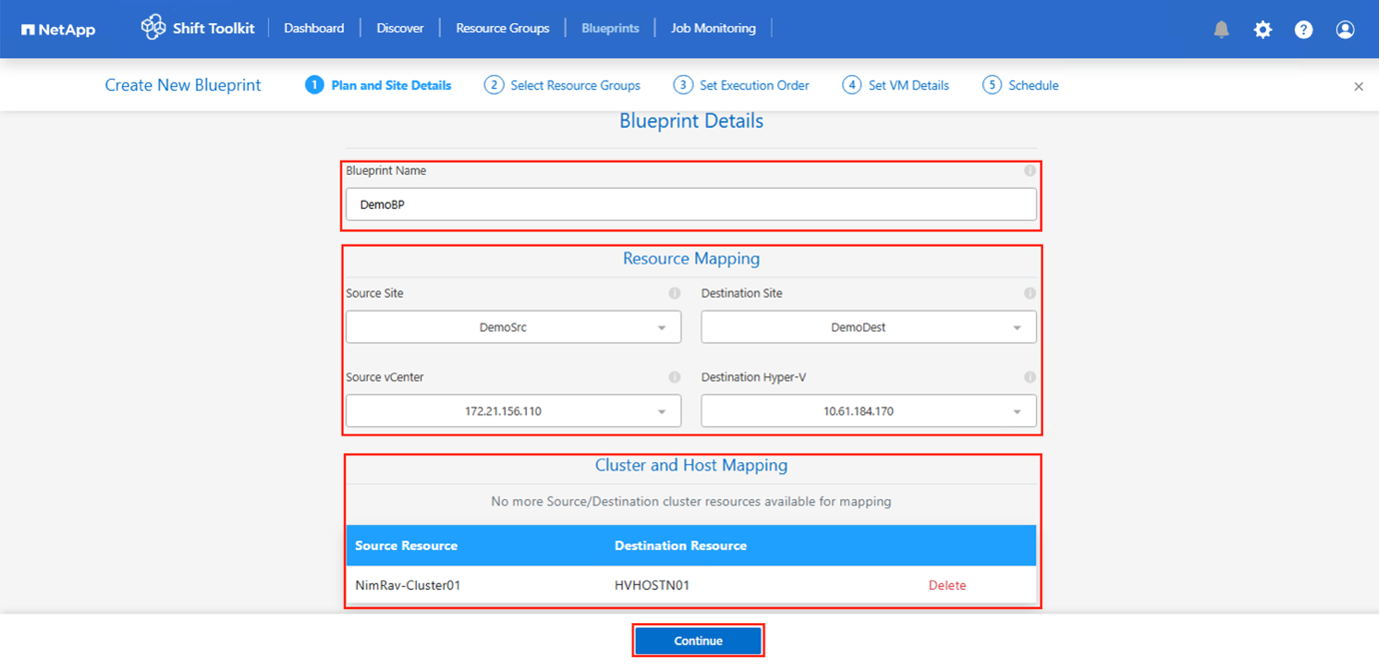
-
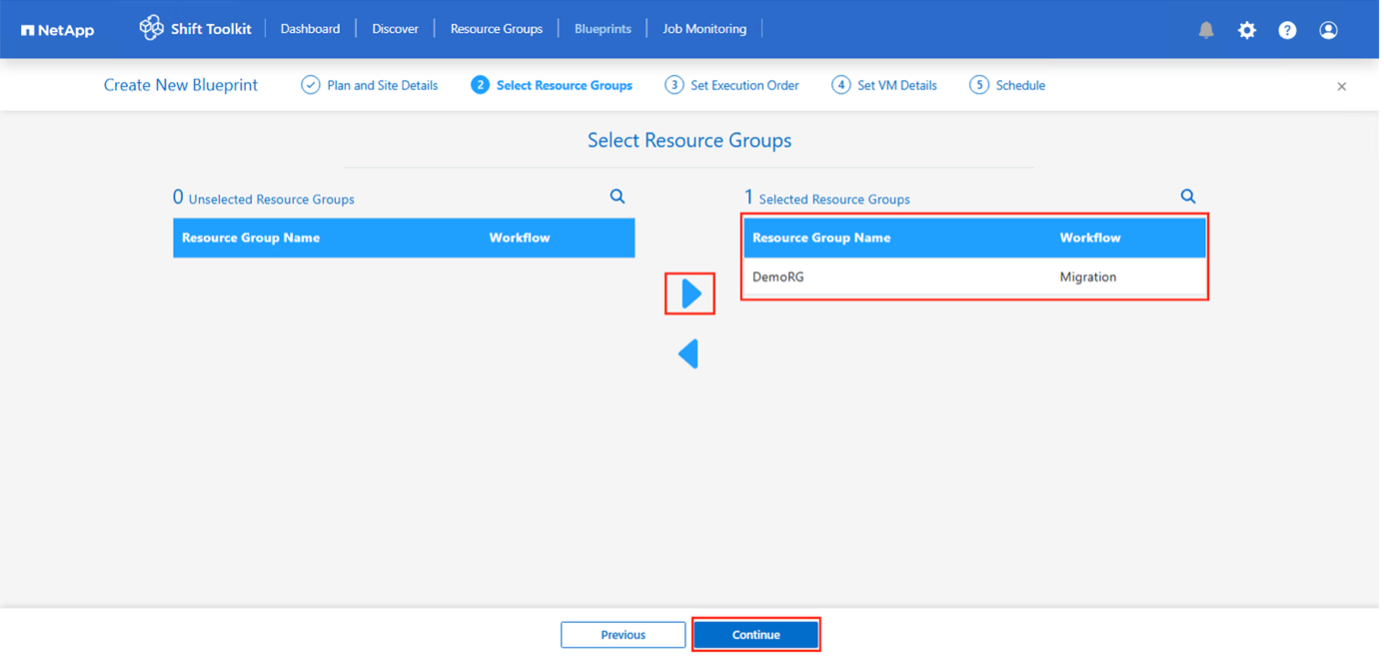
Select Resource Group Details and click on “Continue”
-
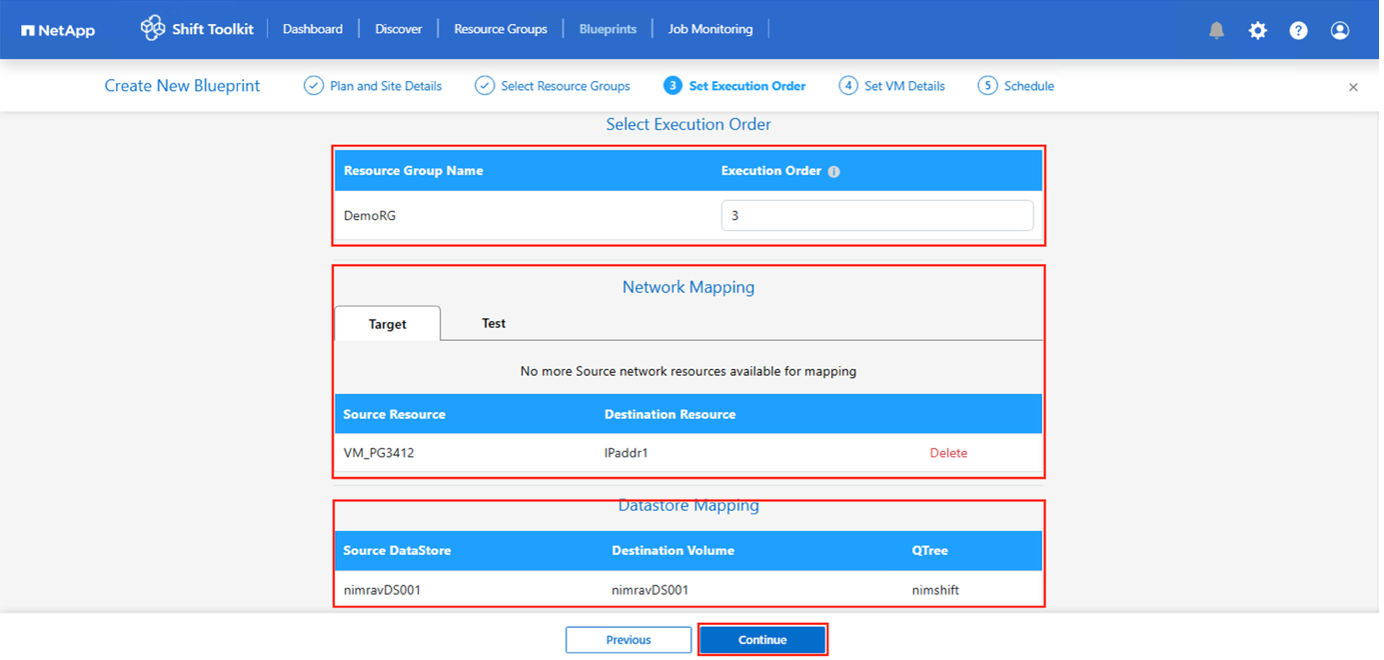
Set Execution Order for Resource Group. This option enables to select the sequence of operations when multiple resource groups exist.
-
After completing the previous steps, select Network Mapping and assign it to the appropriate network map. Ensure that the virtual switches, network profiles, or operators are already provisioned on the target hypervisor.
For test migration, “Do no configure Network” is the default selection and Shift toolkit does not perform IP address assignment. Once the disk is converted and virtual machine is bought on respective hypervisor side, manually assign the bubble network switches to avoid any colliding with production network. 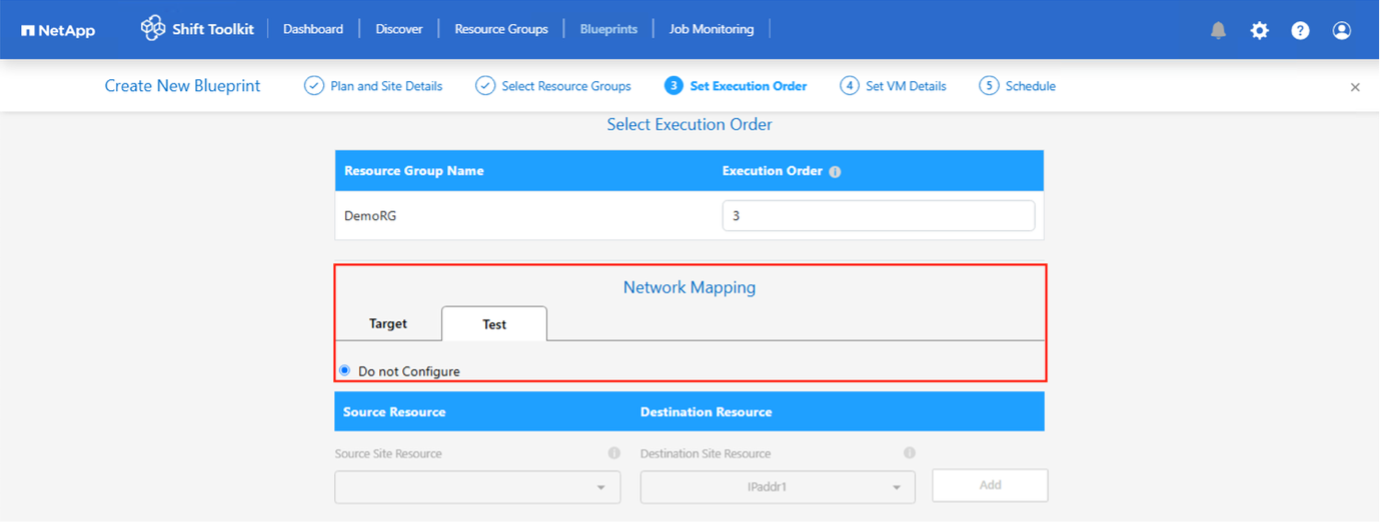
-
Based on the selection of VMs, storage mappings will be automatically selected.
Make sure the qtree is provisioned beforehand and the necessary permissions are assigned so the virtual machine can be created and powered ON.
NOTE: In case of OpenShift, the PVCs are created using Trident CSI and there is no need to pre-create qtrees. -
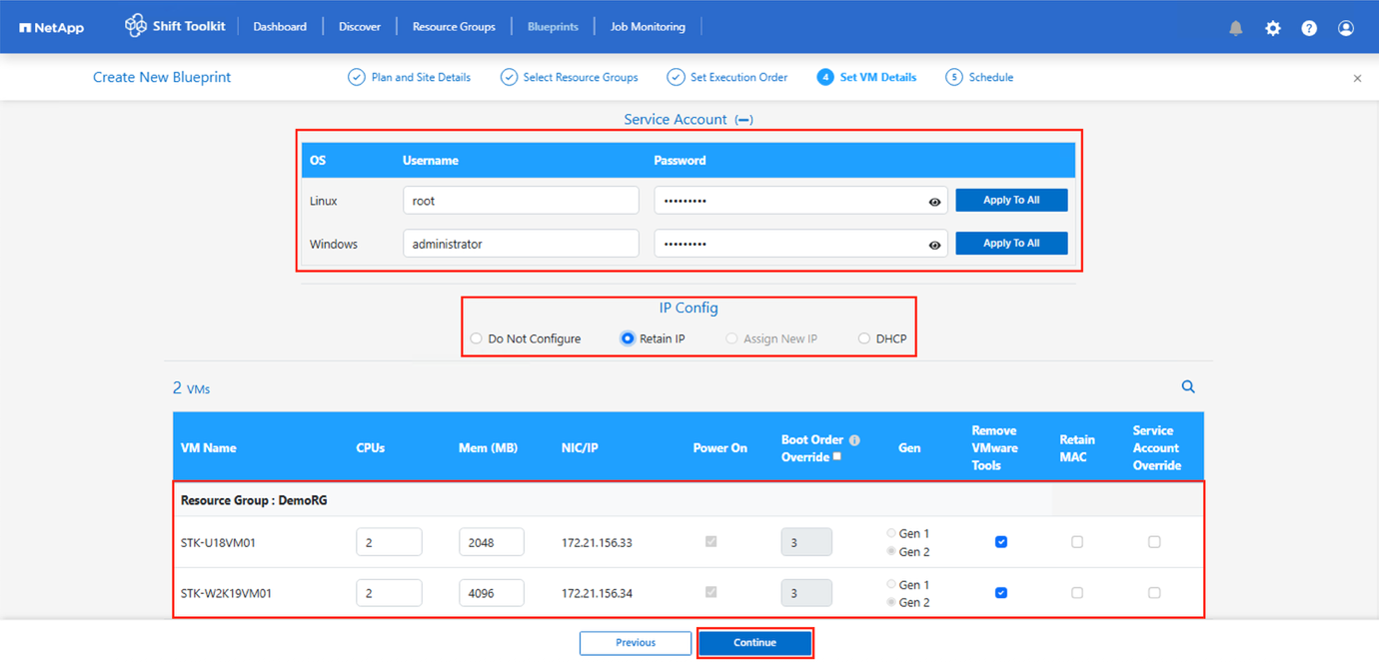
Under VM details, provide service account and valid user credentials for each OS type. This is used to connect to the virtual machine to create and run certain scripts that are necessary for removing VMware tools and backing up IP configuration details.
-
For Windows based OS, it is recommended to use a user with local administrator privileges. Domain credential can also be used, however ensure there is a user profile existing on the VM before conversion, otherwise domain credentials won’t work as it would look for domain authentication when there is no network connected.
-
In case of Linux distribution-based guest VMs, provide a user that can execute sudo commands without password meaning the user should be part of the sudoers list or added as a new configuration file to the /etc/sudoers.d/ folder.
In the recent release, the Shift Toolkit introduced greater flexibility in virtual machine preparation. By default, the toolkit automates VM preparation by deploying OS-specific scripts to:
* Remove VMware Tools
* Back up IP settings for reassignment based on the selected Blueprint+
With the new enhancement, users can now override the default prepareVM tasks, enabling to execute custom scripts for manual VM preparation including IP assignment. This provides more control for environments with unique configuration or compliance requirements.
-
-
Again under VM details, select the relevant IP config option. By default, “Do not configure” is selected.
-
To migrate VMs with the same IPs from the source system, select “Retain IP”.
-
To migrate VMs using static IPs in the source system and to assign DHCP on the target VMs, then select “DHCP”.
Make sure the following requirements are met for this functionality to work:
-
Ensure the VMs are powered on during the prepareVM phase and up to the scheduled migration time.
-
For VMware VMs, ensure that VMware Tools are installed.
-
For Hyper-v as the source hypervisor, ensure Integration services is enabled and configured.
-
For OLVM and OpenShift as the target hypervisor, ensure to mount the virtIO ISO file to the Windows VMs.
-
Ensure the preparation script is run on the source VM by an account with administrator privileges on windows OS and with sudo privileges with no password option on Linux based distribution OS to create cron jobs.
-
-
-
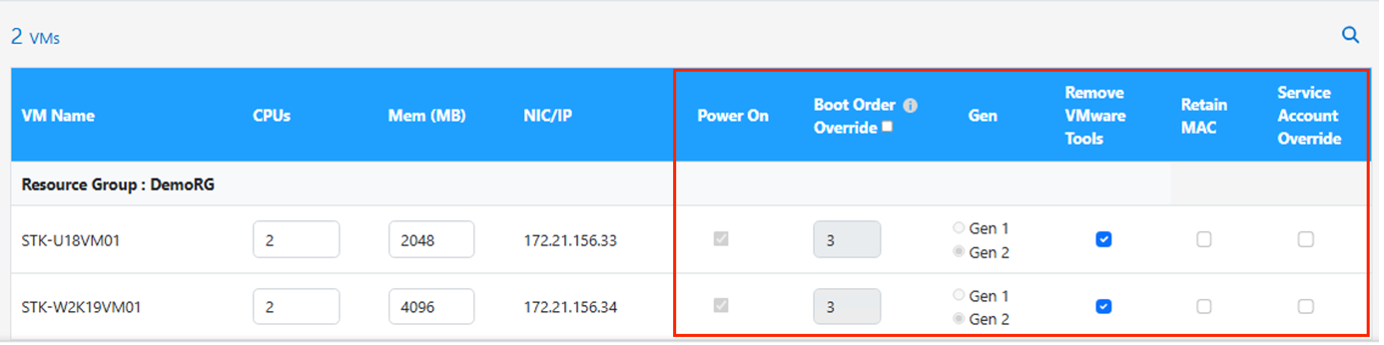
The next step is VM configuration.
-
Optionally resize the VMs CPU/RAM parameters which can be very helpful for resizing purposes.
-
Boot Order override: Also modify the Boot Order and Boot delay (secs) for all the selected VMs across the resource groups. This is an additional option to modify the boot order if any changes required from what was selected during Resource group boot order selection. By default, the boot order selected during resource group selection is used, however any modifications can be done at this stage.
-
Power ON: Uncheck this option if workflow should not power ON the virtual machine. Default option is ON meaning the VM will be powered ON.
-
Remove VMware tools: Shift toolkit removes VMware tools after the conversion. This option is selected by default. This is an be unselected if the plan is to execute customer’s own customized scripts.
-
Generation: Shift toolkit uses the following rule of thumb and defaults to the appropriate one- Gen1 > BIOS and Gen2 > EFI. No selection is possible for this option.
-
Retain MAC: The MAC address of the respective VMs can be retained to overcome licensing challenges for those applications relying on MAC.
-
Service Account override: This option allows to specify a separate service account if the global one cannot be used.
-
-
Click “Continue”.
-
In the next step, schedule the migration by selecting the checkbox to set the date and time. Make sure all the virtual machines (VMs) are prepared and powered off before the scheduled date. Once done, click on “Create Blueprint”.

While scheduling, choose a date that is at least 30 minutes ahead of the current Shift VM time. This is to ensure the workflow gets enough time to prepare the VMs within the resource group. -
Once the blueprint is created, a prepareVM job is initiated and it automatically runs scripts on the source VMs to prepare them for migration

This job runs a script using invoke-VMScript method to copy the necessary scripts for removing VMware tools and backing up network configuration details, including IP address, routes, and DNS information, which will be used to maintain the same settings on the target VM.
-
For Windows-based operating systems, the default location where the preparation scripts are stored is the “C:\NetApp” folder.

-
For Linux-based VMs, the default location where the preparation scripts are stored is /NetApp and the /opt directory.

For a Linux source VM running CentOS or Red Hat, Shift toolkit is intelligent to automatically install the necessary Hyper-V drivers. These drivers must be present in the source VM before the disk conversion to ensure the VM can boot successfully after the conversion.
For detailed information, refer to System stuck in dracut after the migration of a RHEL VM to hyper-v. Once the prepareVM job completes successfully (as shown in the screenshot below), the VMs are ready for migration, and the blueprint status will update to "Active."


Migration will now happen at the set time or can be started manually by clicking on Migrate option.
-