

Deploy Red Hat OpenShift Virtualization with FSx for ONTAP on a ROSA cluster
 Suggest changes
Set up Amazon FSx for NetApp ONTAP as the default StorageClass for a ROSA (Red Hat OpenShift Service on AWS) cluster. This procedure includes creating a VM that leverages FSx ONTAP storage for its volumes, reviewing all the objects created for the VM, and connecting to the VM using guest credentials.
We will also look into connecting to the Virtual Machine using the guest credentials, and restarting the VM. And finally, we will perform a live migration of the Virtual Machine from the current node to a new node. We will examine the contents of the disk storage after a VM restart and the live migration.
Prerequisites
-
IAM user with appropriate permissions to create and access ROSA cluster
-
A HCP ROSA cluster (with at least 3 bare-metal worker nodes)
-
Trident 25.02 or later
For the above Trident prerequisite, see Trident installation section for details.
Starting from Trident 25.02 release, you can easily prepare the worker nodes of the ROSA cluster(or any OpenShift cluster) to perform iSCSI operations on FSxN storage.
There are 2 easy ways of installing Trident 25.02 (or later) that automates worker node preparation for iSCSI.
Prior to installing the OpenShift Virtualization, you should have already created the trident backend, the storage class and the volume snapshot class objects and set them up as defaults. You can refer to the Trident installation section for details.
Initial Setup
Set up the trident backend, storage class and the VolumeSnapshotClass. You can refer to the Trident installation section for details.
Sample yaml to create a trident backend object
cat tbc.yaml
apiVersion: v1
kind: Secret
metadata:
  name: backend-tbc-ontap-san-secret
type: Opaque
stringData:
  username: fsxadmin
  password: <password for the fsxN filesystem>
---
apiVersion: trident.netapp.io/v1
kind: TridentBackendConfig
metadata:
  name: backend-tbc-ontap-san
spec:
  version: 1
  storageDriverName: ontap-san
  managementLIF: <management lif of fsxN filesystem>
  backendName: backend-tbc-ontap-san
  svm: svm_FSxNForROSAiSCSI
  credentials:
    name: backend-tbc-ontap-san-secret

cat sc.yaml
apiVersion: storage.k8s.io/v1
kind: StorageClass
metadata:
  name: trident-csi
provisioner: csi.trident.netapp.io
parameters:
  backendType: "ontap-san"
  media: "ssd"
  provisioningType: "thin"
  snapshots: "true"
allowVolumeExpansion: true

cat snapshot-class.yaml
apiVersion: snapshot.storage.k8s.io/v1
kind: VolumeSnapshotClass
metadata:
  name: fsx-snapclass
driver: csi.trident.netapp.io
deletionPolicy: Retain

#oc create -f tbc,yaml -n trident
#oc create -f sc.yaml
#oc create -f snapshot-class.yaml
Ensure that the storage class and the volume snapshot class is configured as defaults before installing the OpenShift Virtualization. For details on how to set up defaults, , you can refer to the Setting defaults with Trident Storage and Snapshot Class section for details.
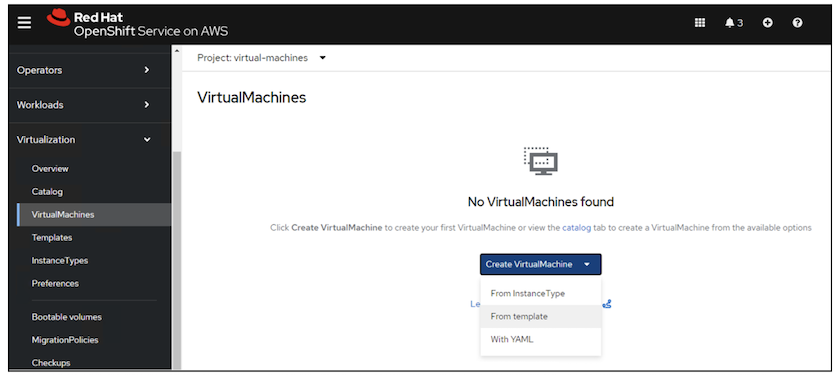
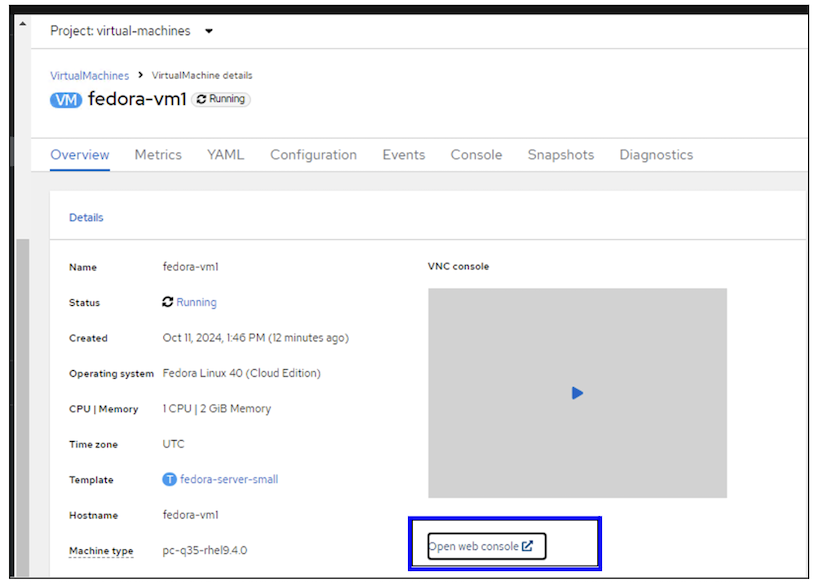
Create a VM from the template
Use the web console to create a VM from a template.
From the RedHat OpenShiftService on AWS console, create a virtual machine. There are templates available on the cluster that can be used to create the VM.
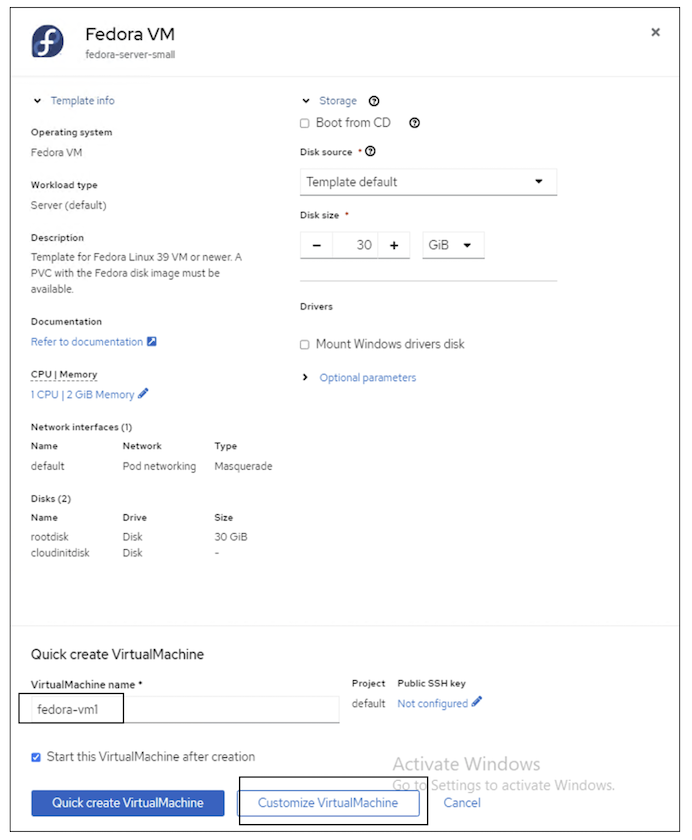
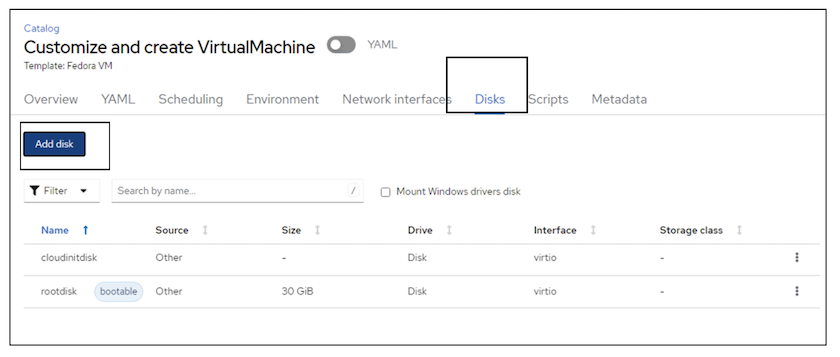
In the screenshot below, we choose fedora VM from this list. Give the VM a name,and then click on Customize Virtual Machine. Select the Disks tab and click on Add disks.
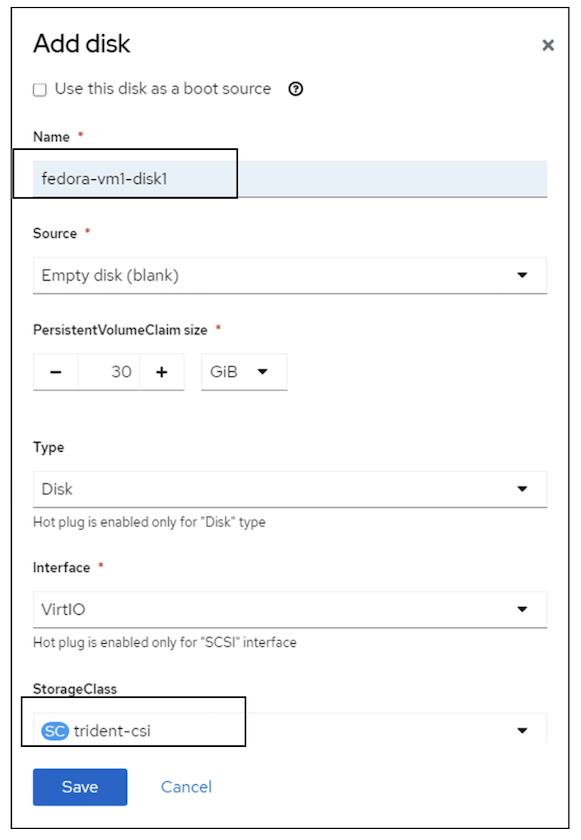
Change the name of the disk preferably to something meaningful, ensure that trident-csi is selected for storage class. Click on Save. Click on Create VirtualMachine
After a few minutes, the VM is in the running state

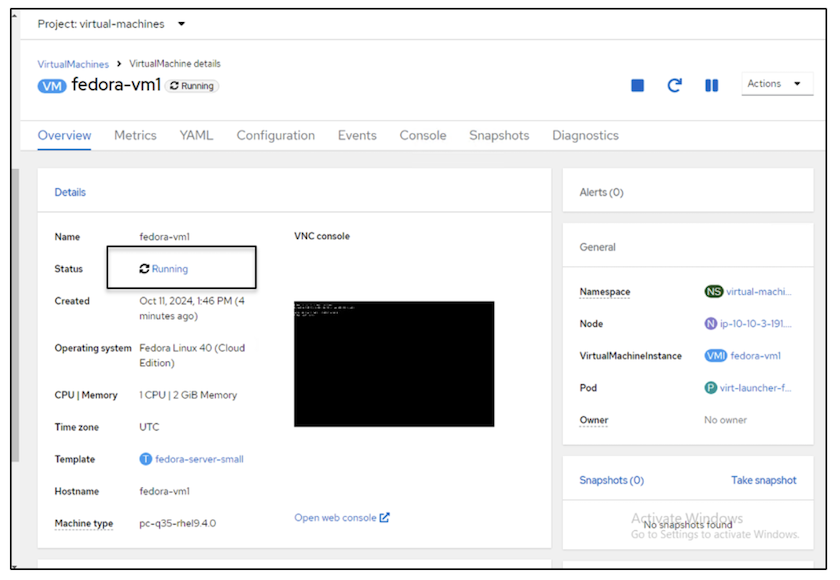
Review all the objects created for the VM
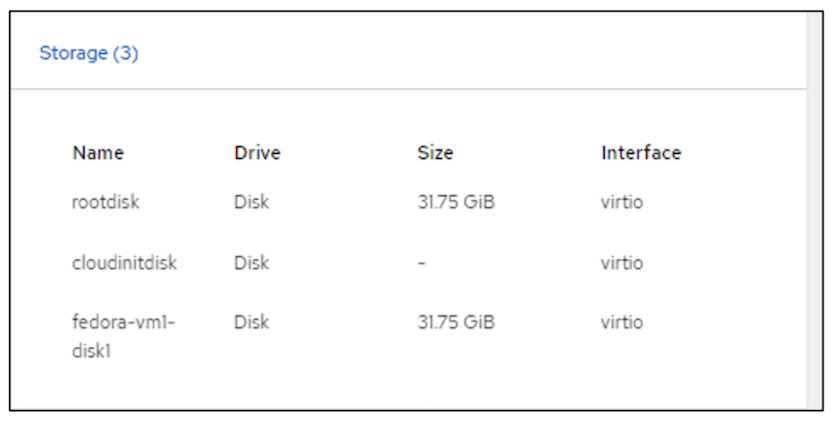
The storage disks.
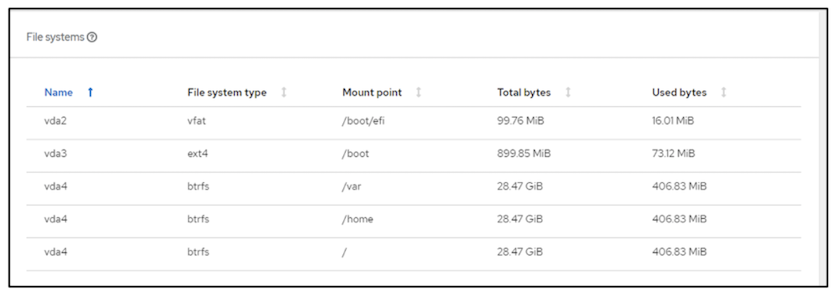
The file systems of the VM will show the Partitions, File system type and the Mount points.
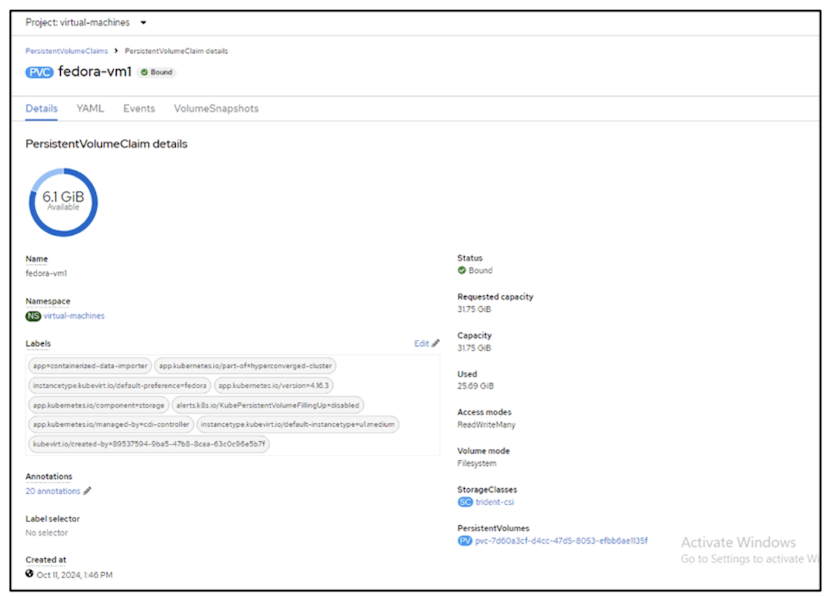
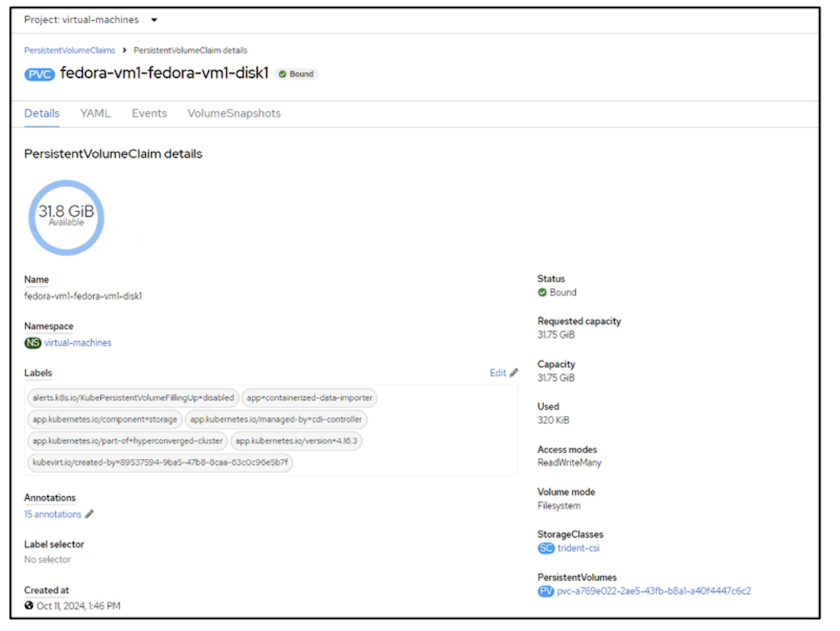
2 PVCs are created for the VM, one from the boot disk and one for the hot plug disk.
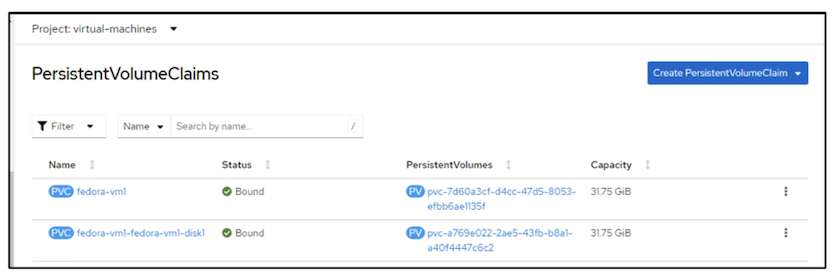
The PVC for the boot disk shows that the Access mode is ReadWriteMany, and the Storage Class is trident-csi.
Similarly, the PVC for the hot-plug disk shows that the Access mode is ReadWriteMany, and the Storage Class is trident-csi.
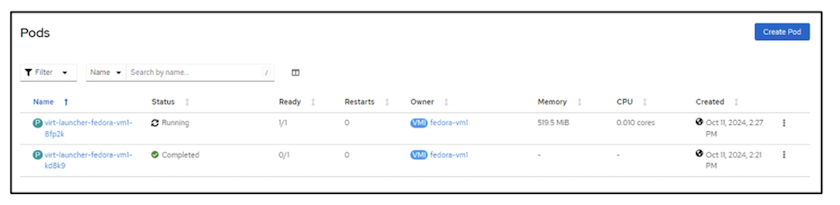
In the screenshot below we can see that the pod for the VM has a Status of Running.
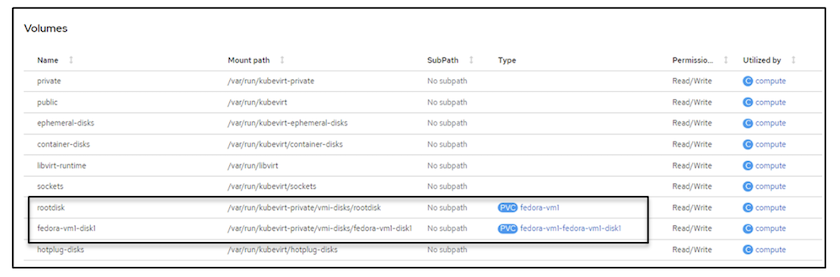
Here we can see the two Volumes associated with the VM pod and the 2 PVCs associated with them.
Connect to the VM
Click on 'Open web console' button, and login using Guest Credentials
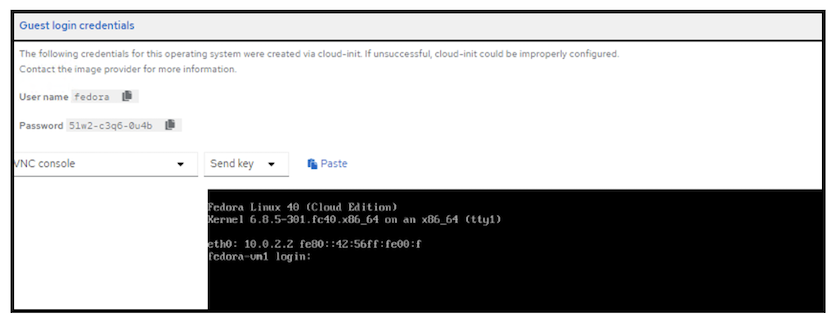
Issue the following commands
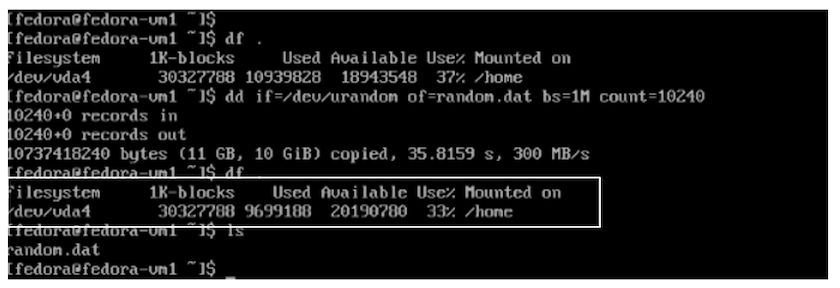
$ df (to display information about the disk space usage on a file system).$ dd if=/dev/urandom of=random.dat bs=1M count=10240 (to create a file called random.dat in the home dir and fill it with random data).The disk is filled with 11 GB of data.
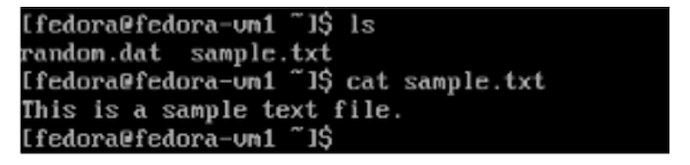
Use vi to create a sample text file that we will use to test.
Related Blogs