Deploying vVols on AFF, ASA, ASA r2, and FAS Systems
 Suggest changes
Follow these best practices for creating vVols storage for your virtual machines.
Provisioning vVols datastores involves several steps. NetApp's ASA r2 systems are designed for VMware workloads and provide a user experience different from traditional ONTAP systems. When using ASA r2 systems, ONTAP tools versions 10.3 or later require fewer steps to set up and include UI extensions and REST API support optimized for the new storage architecture.
Preparing to create vVols Datastores with ONTAP tools
You can skip the first two steps of the deployment process if you are already using ONTAP tools to manage, automate, and report on your existing VMFS or traditional NFS-based storage. You may also refer to this complete checklist for deploying and configuring ONTAP tools.
-
Create the Storage Virtual Machine (SVM) and its protocol configuration. Note that this may not be required for ASA r2 systems since they will typically already have a single SVM for data services. You will select NVMe/FC (ONTAP tools 9.13 only), NFSv3, NFSv4.1, iSCSI, FCP, or a mix of those options. NVMe/TCP and NVMe/FC may also be used for traditional VMFS datastores with ONTAP tools 10.3 and later. You may use either ONTAP System Manager wizards or the cluster shell command line.
-
Assign local tiers (aggregates) to SVMs for all non-ASA r2 systems.
-
At least one LIF per node for each switch/fabric connection. As a best practice, create two or more per node for FCP, iSCSI, or NVMe-based protocols. One LIF per node is sufficient for NFS-based vVols, but this LIF should be protected by an LACP ifgroup. Refer to Configure LIFs overview and Combine physical ports to create interface groups for details.
-
At least one management LIF per SVM if you intend to use SVM-scoped credentials for your tenant vCenters.
-
If you plan to use SnapMirror, make sure your source and target ONTAP clusters and SVMs are peered.
-
For non-ASA r2 systems, volumes may be created at this time, but it is the best practice to let the Provision Datastore wizard in ONTAP tools create them. The only exception to this rule is if you plan to use vVols replication with VMware Site Recovery Manager and ONTAP tools 9.13. This is easier to set up with pre-existing FlexVol volumes with existing SnapMirror relationships. Be mindful not to enable QoS on any volumes to be used for vVols, as this is intended to be managed by SPBM and ONTAP tools.
-
-
Deploy ONTAP tools for VMware vSphere using the OVA downloaded from the NetApp Support Site.
-
ONTAP tools 10.0 and later supports multiple vCenter servers per appliance; you are no longer required to deploy one ONTAP tools appliance per vCenter.
-
If you plan to connect multiple vCenters to a single ONTAP tools instance, you must create and install CA-signed certificates. Refer to Manage certificates for steps.
-
-
Beginning in 10.3, ONTAP tools now deploys as a single-node small-type appliance suitable for most non-vVols workloads.
-

|
|
-
Configure ONTAP tools 10.3 for your environment.
-
Add vCenter Server instances in the ONTAP tools manager UI.
-
ONTAP tools 10.3 supports secure multitenancy. If you do not need secure multitenancy, you may simply add your ONTAP clusters by going to the ONTAP tools menu in vCenter and clicking on Storage backends and clicking the add button.
-
In a secure multitenant environment where you want to delegate specific Storage Virtual Machines (SVMs) to specific vCenters, you must do the following.
-
Log into the ONTAP tools manager UI
-
Provide the specific SVM credentials to the vCenter administrator, who will then add the SVM as a storage backend in the ONTAP tools storage backends menu in vCenter.
-
-
|
|
|

|
The reason that the entire cluster must be onboarded in the ONTAP tools manager UI is that many of the APIs used for vVols are only available at the cluster level. |
Creating vVols Datastores with ONTAP tools
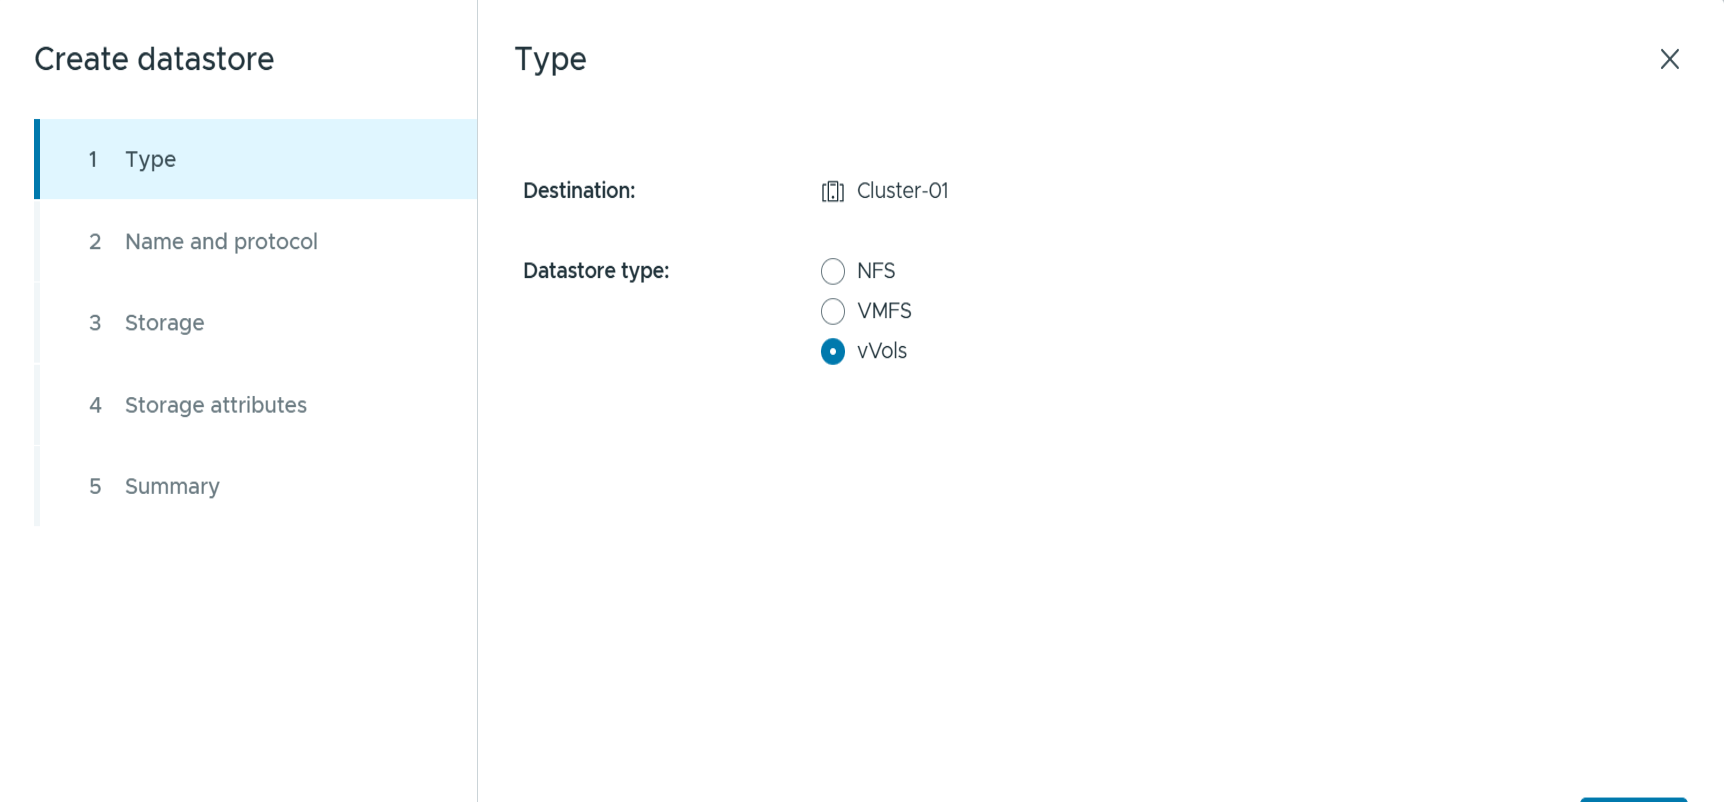
Right-click on the host, cluster, or datacenter on which you want to create the vVols datastore, then select ONTAP tools > Provision Datastore.
-
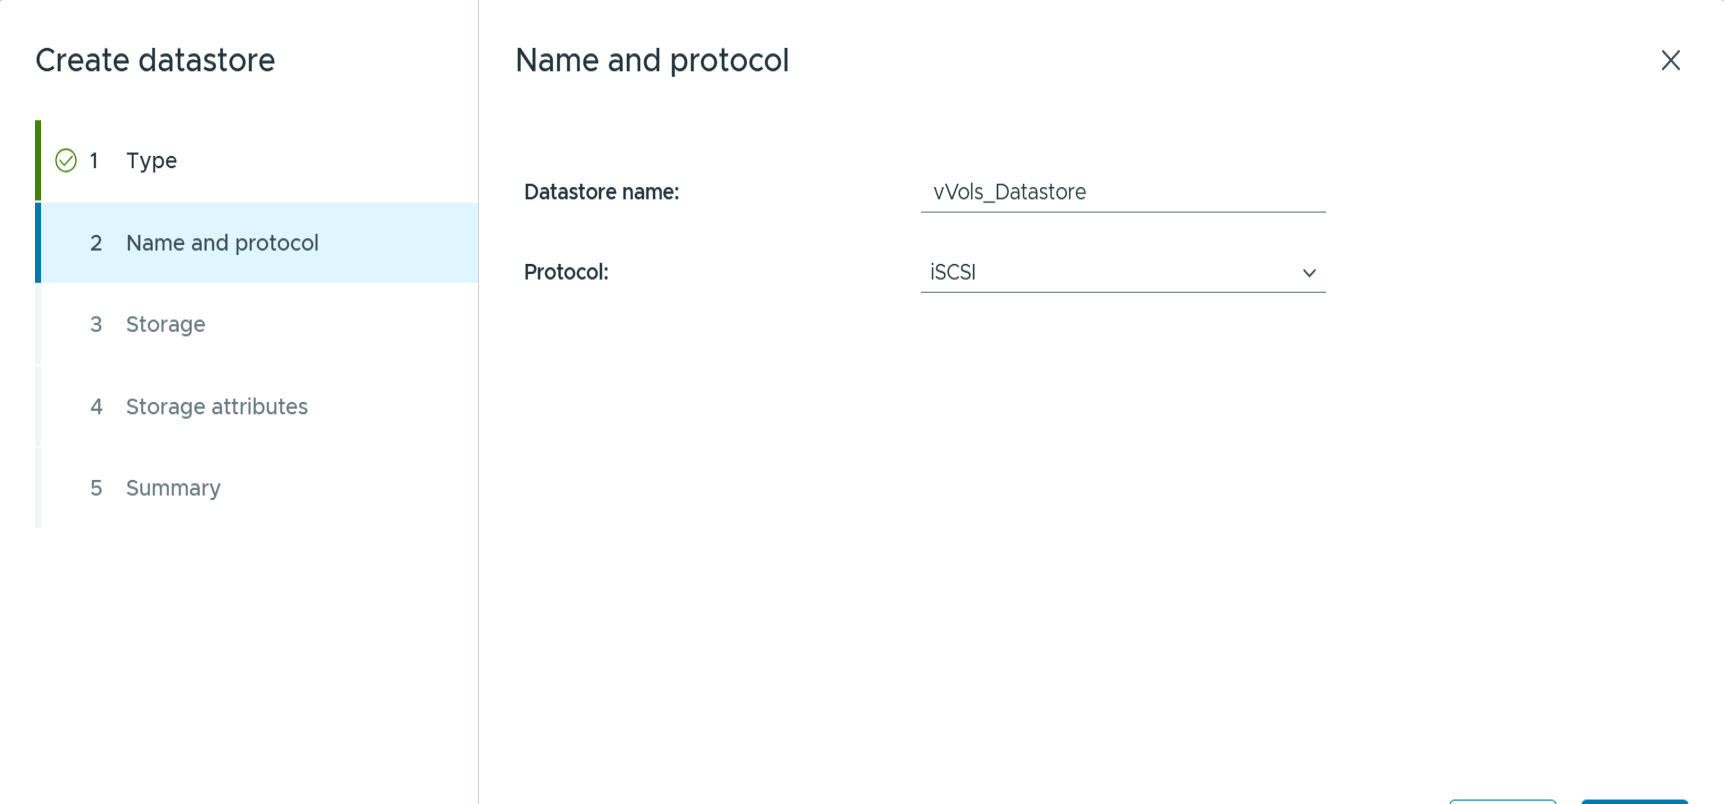
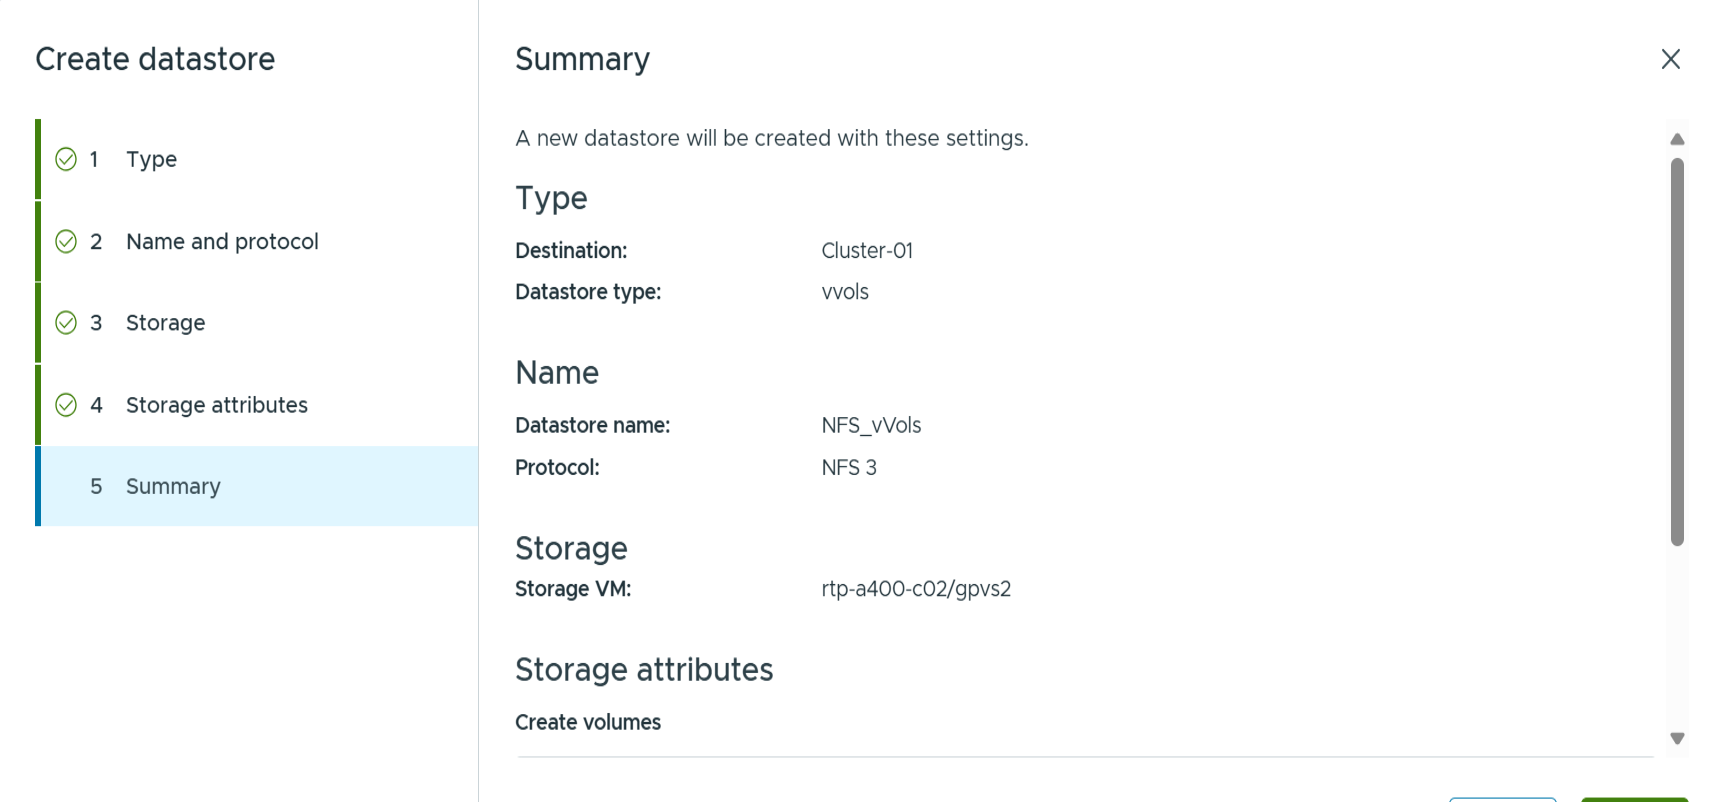
Choose vVols and provide a meaningful name and select the desired protocol. You may provide a description of the datastore as well.
-
ONTAP tools 10.3 with ASA r2.
-
-
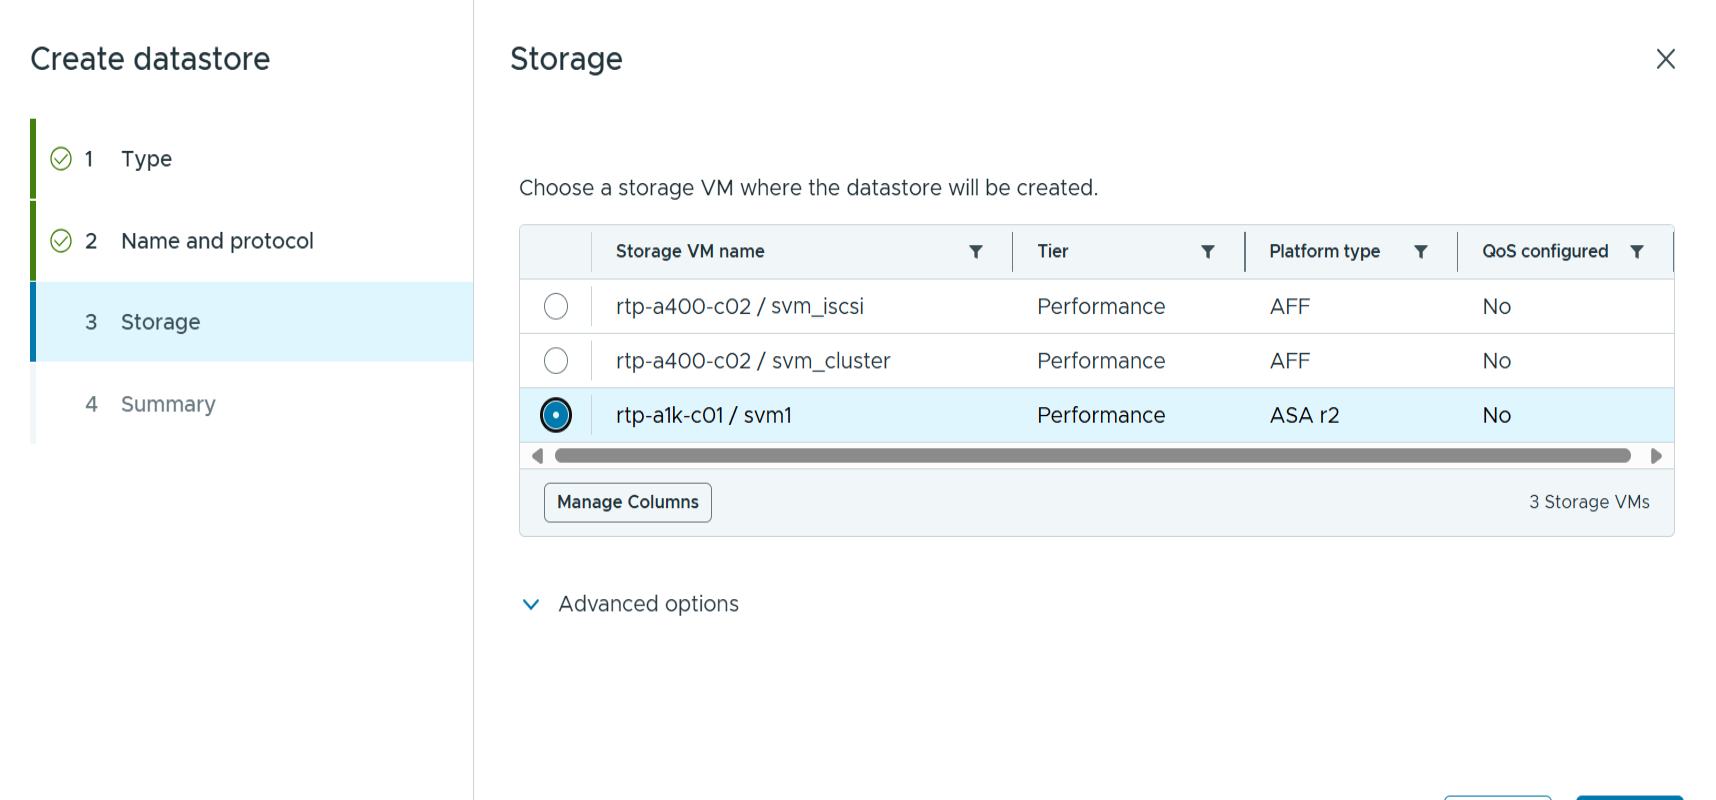
Select the ASA r2 system SVM and click next.
-
Click finish
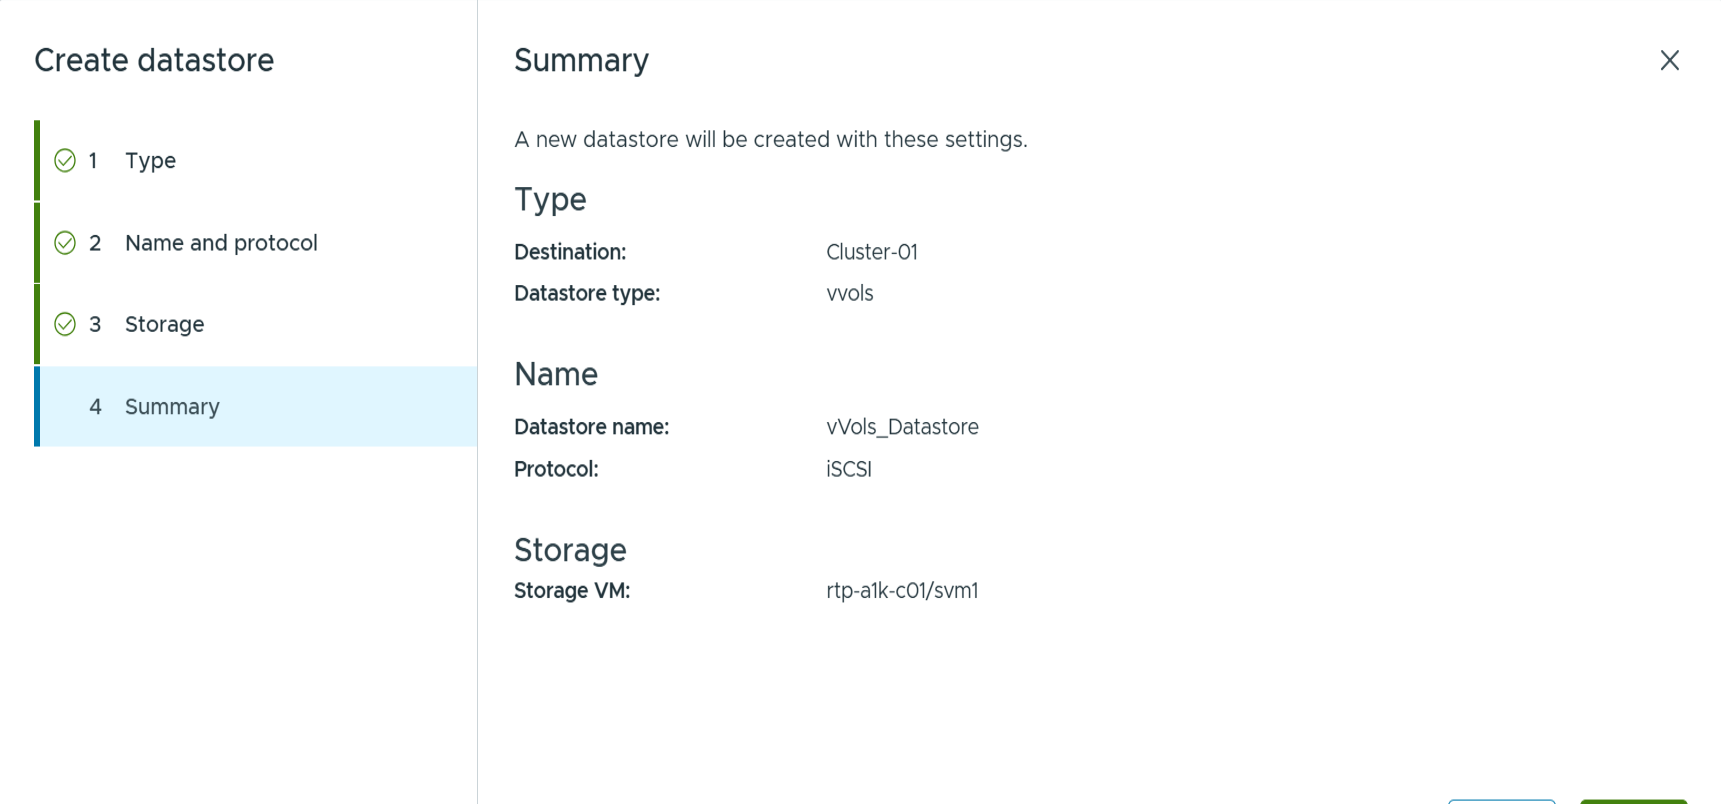
-
It's that easy!
-
ONTAP tools 10.3 with ONTAP FAS, AFF, and ASA prior to ASA r2.
-
-
Select the protocol

-
Select the SVM and click next.
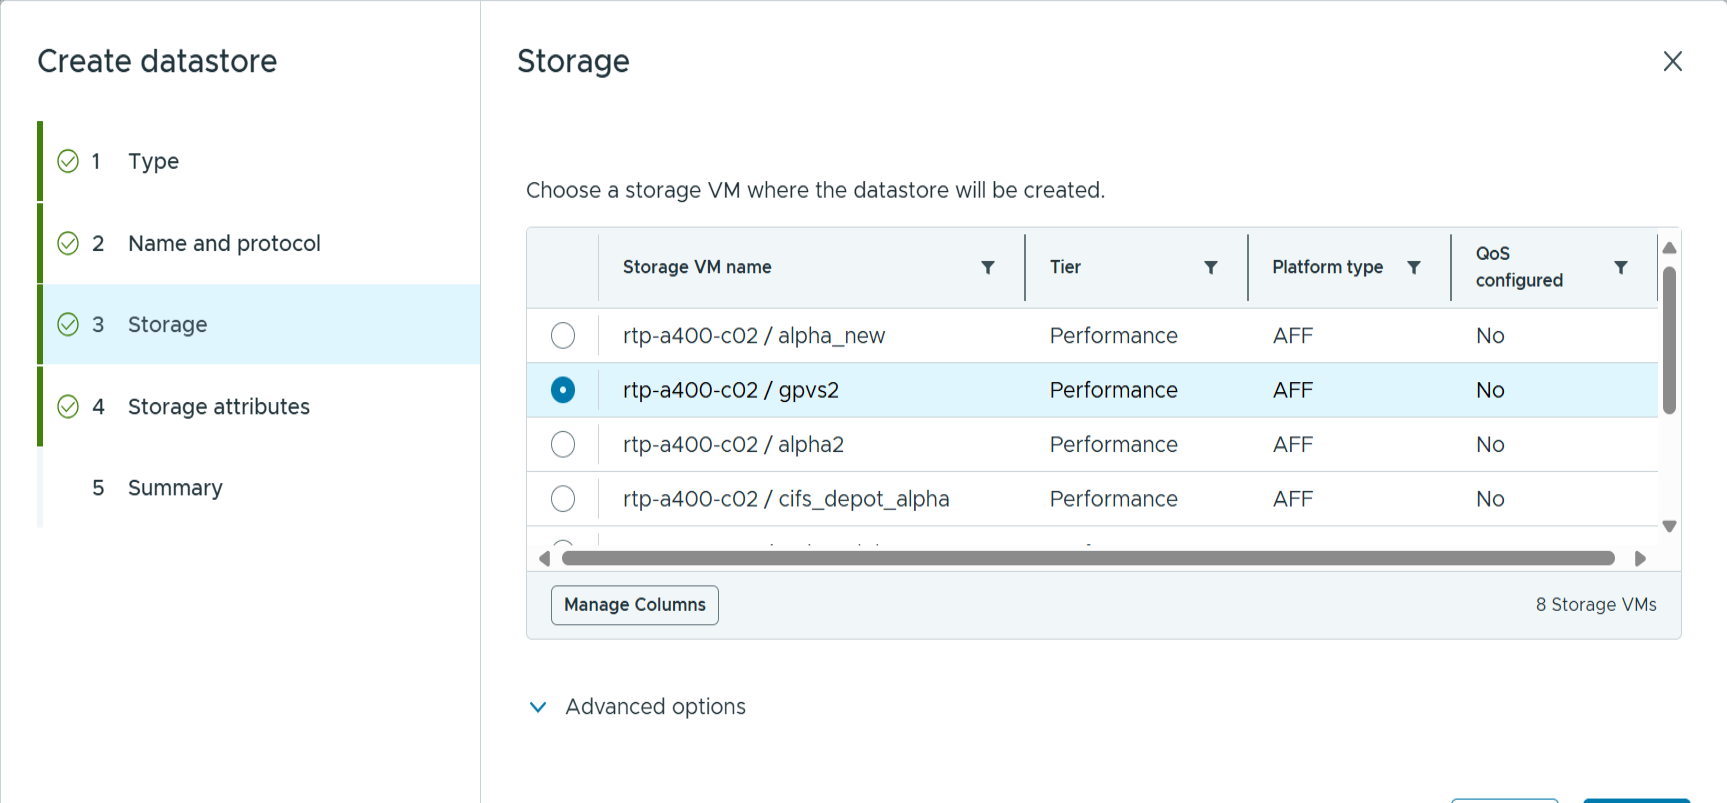
-
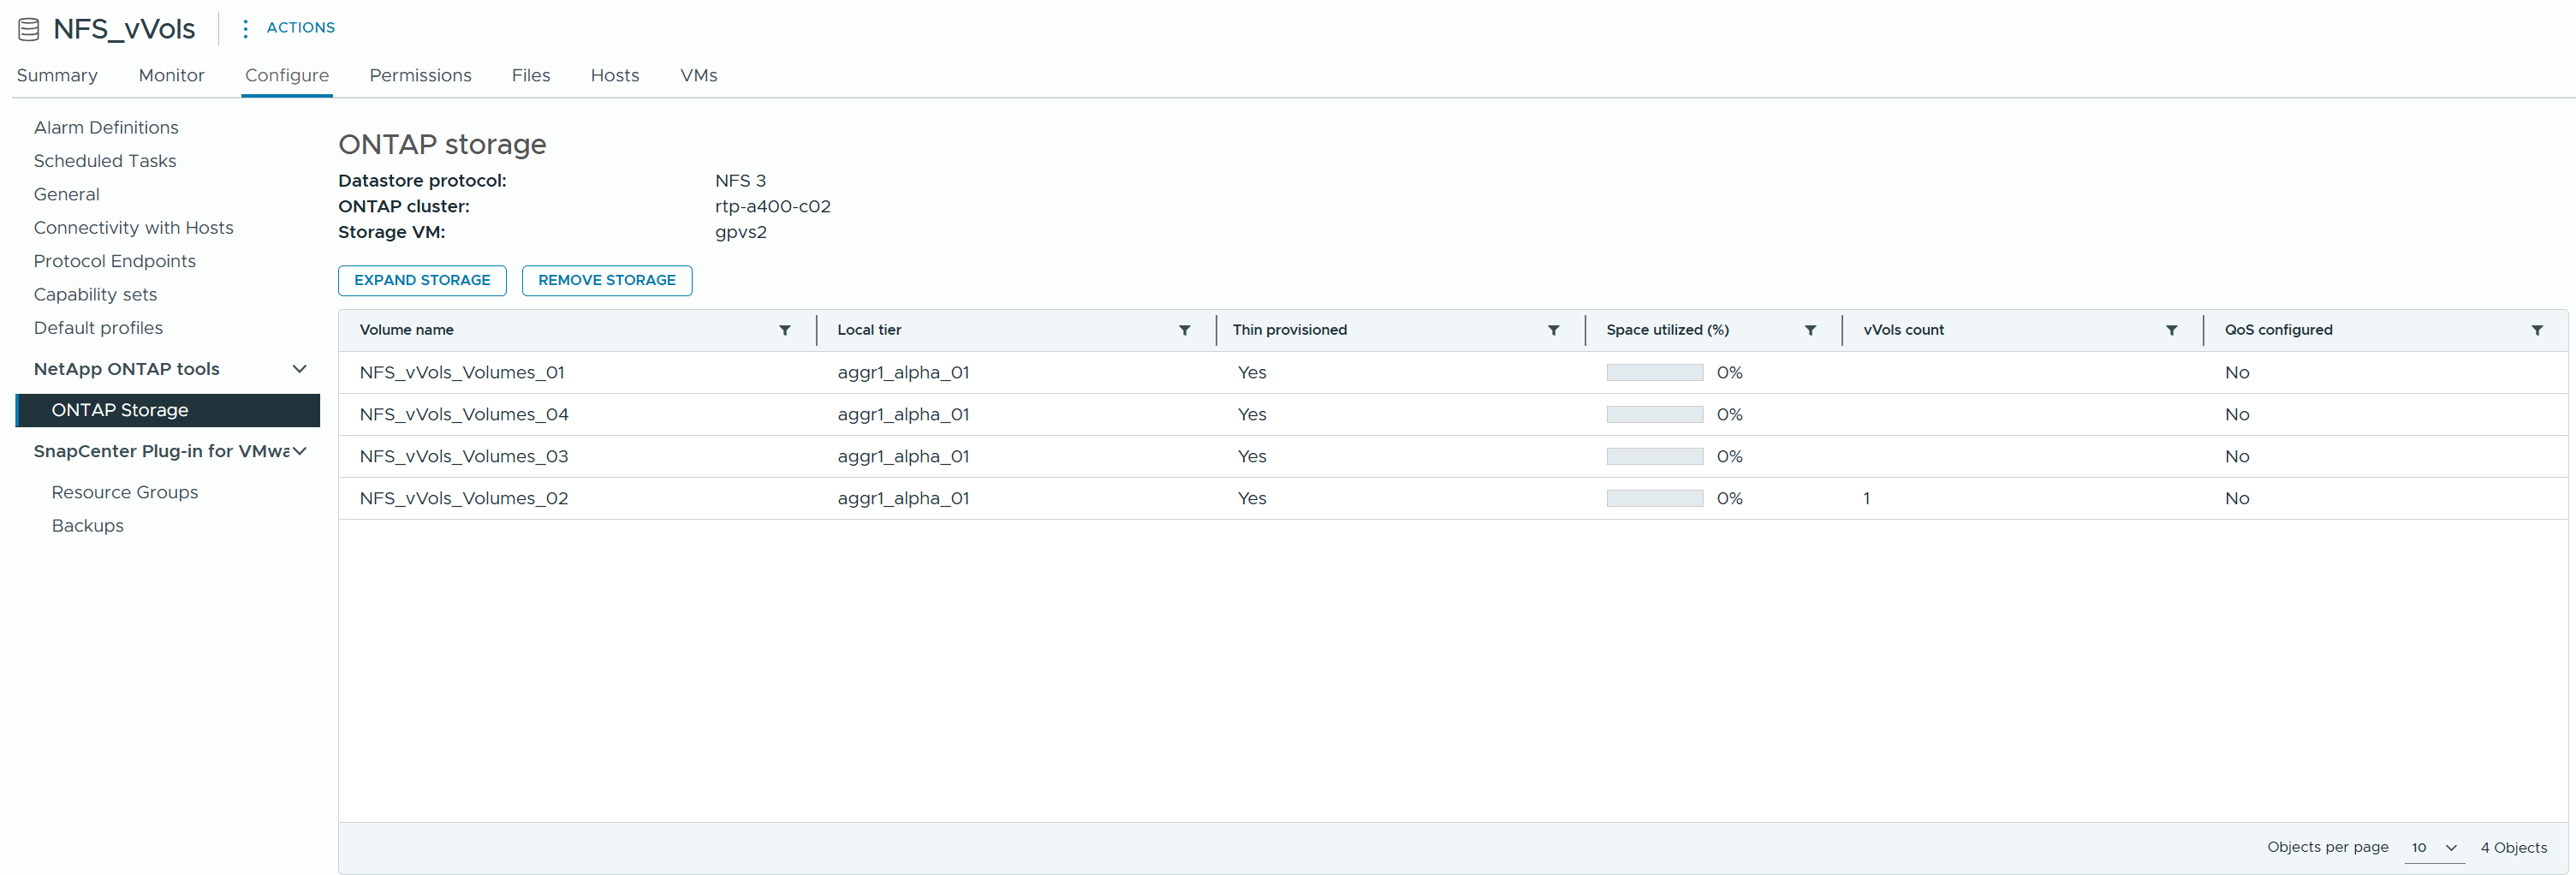
Click add new volumes or use existing volume and specify the attributes. Note that in ONTAP tools 10.3, you can request multiple volumes to be created at the same time. You may also manually add multiple volumes to balance them across the ONTAP cluster. Click next
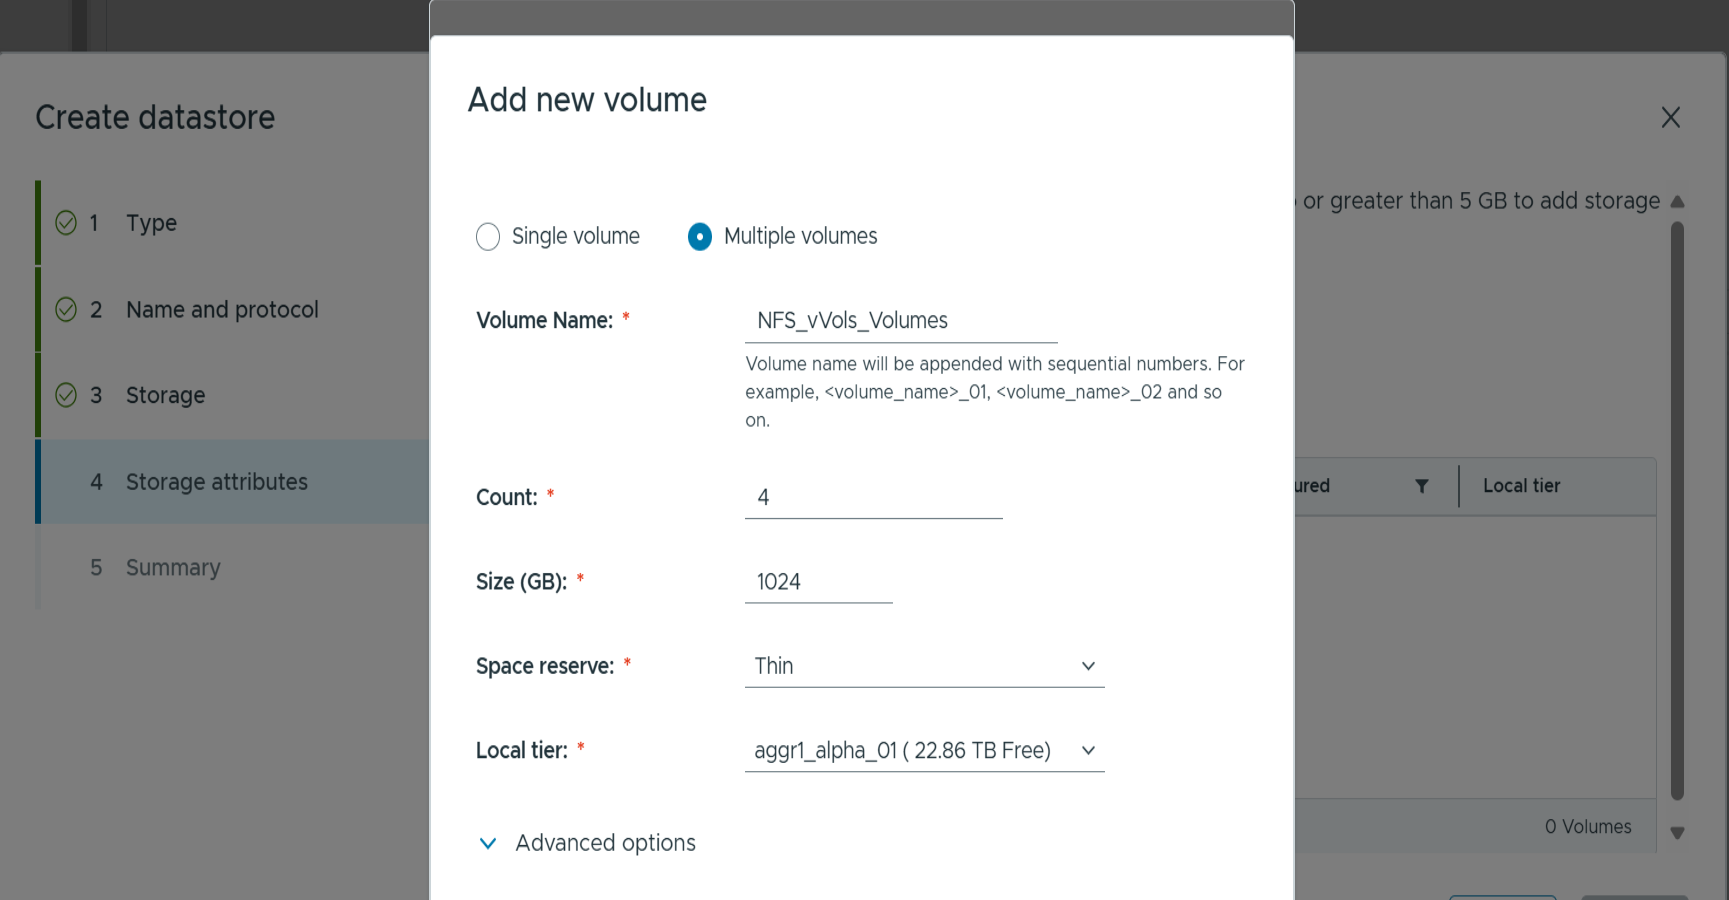
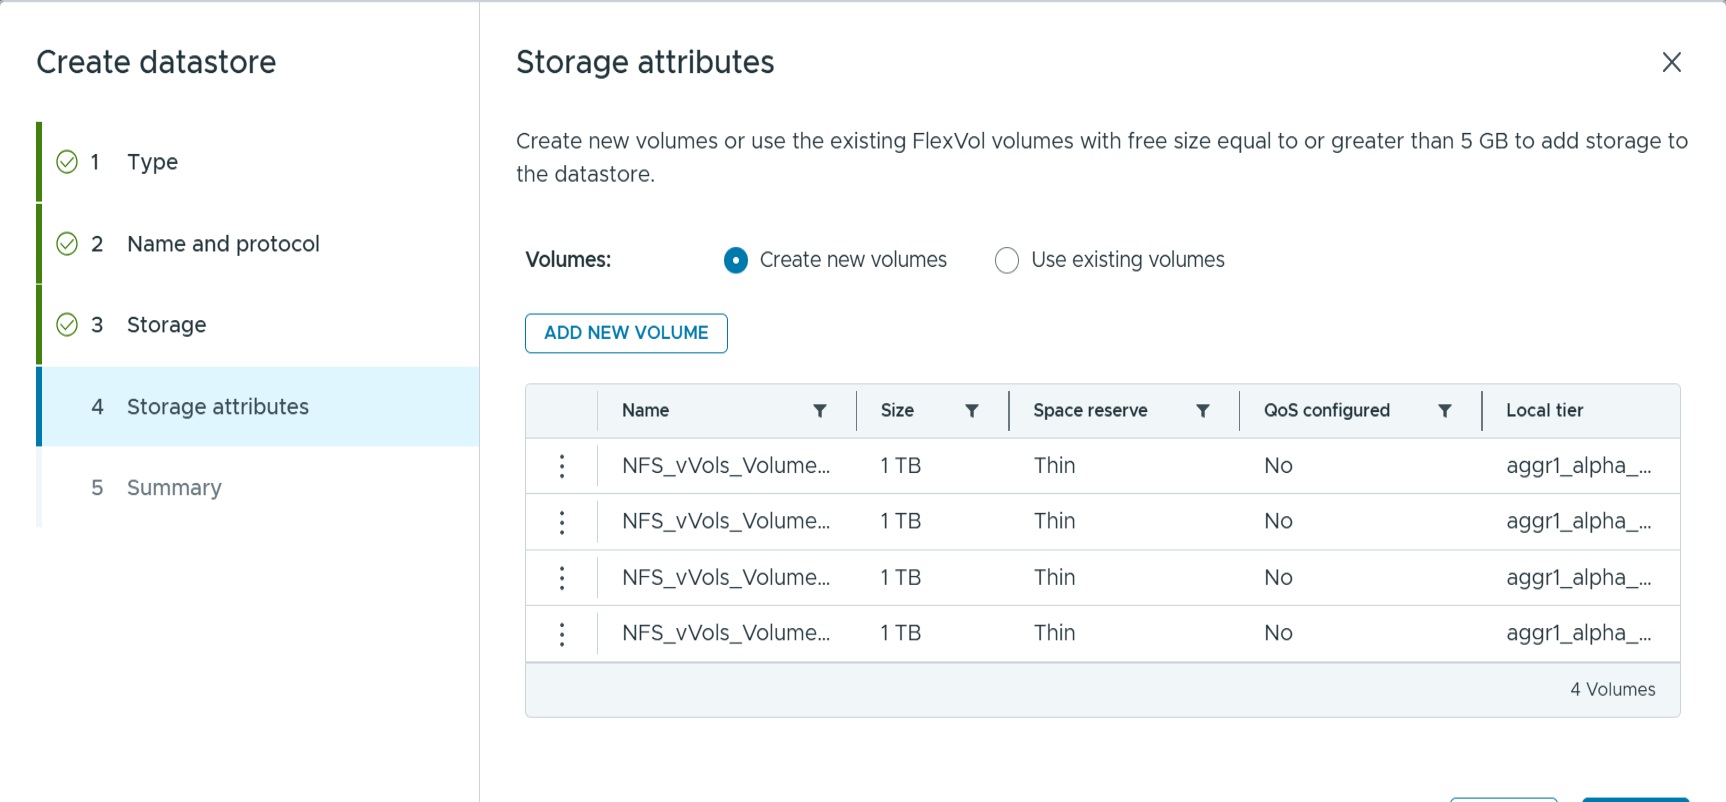
-
Click finish
-
You can see the assigned volumes in the ONTAP tools menu of the configure tab for the datastore.
-
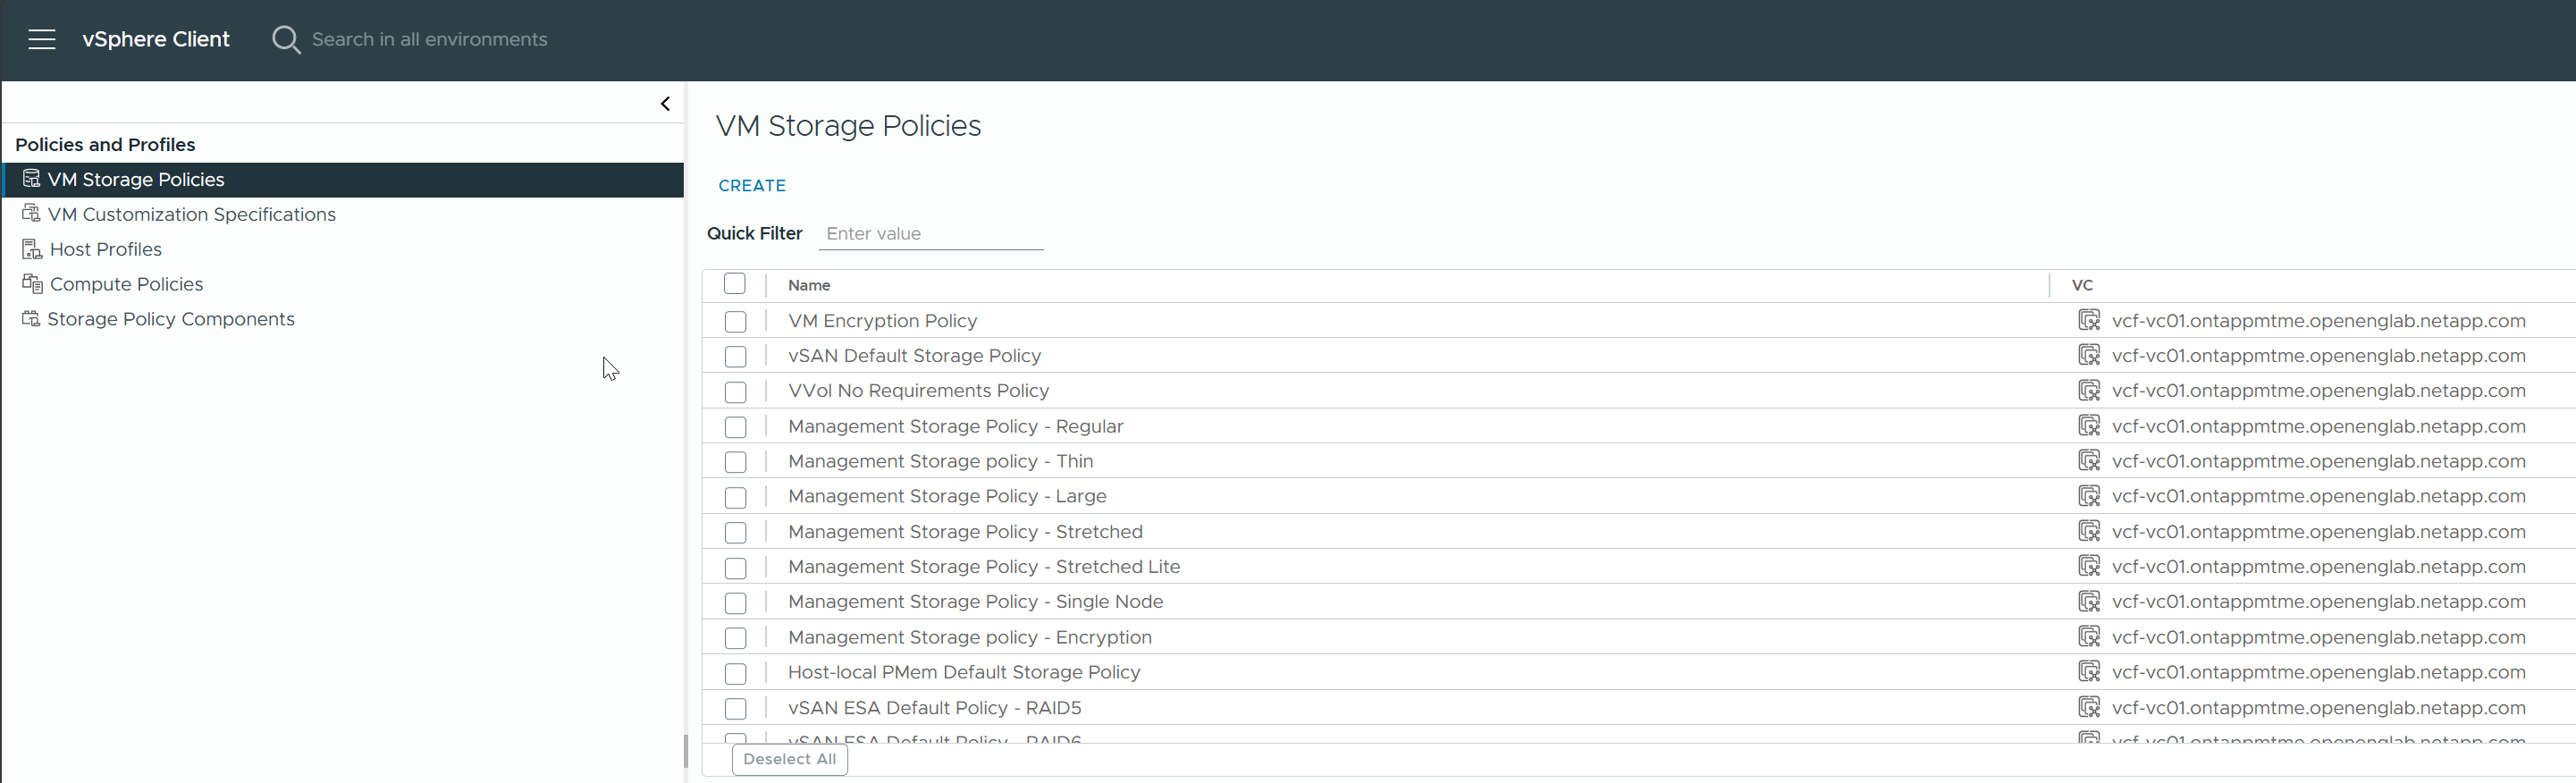
Now you can create VM storage policies from the Policies and Profiles menu in the vCenter UI.
Migrating VMs from traditional datastores to vVols
Migration of VMs from traditional datastores to a vVols datastore is as simple as moving VMs between traditional datastores. Simply select the VM(s), then select Migrate from the list of Actions, and select a migration type of change storage only. When prompted, select a VM storage policy that matches your vVols datastore. Migration copy operations can be offloaded with vSphere 6.0 and later for SAN VMFS to vVols migrations, but not from NAS VMDKs to vVols.
Managing VMs with policies
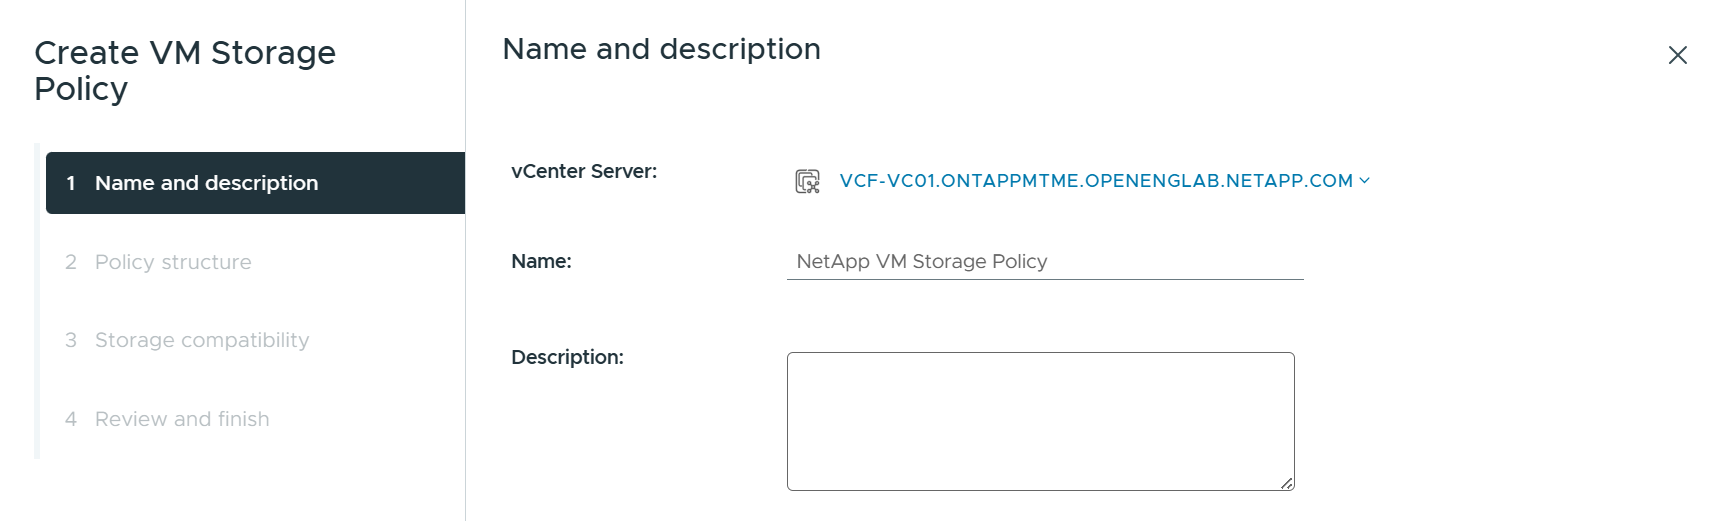
To automate storage provisioning with policy-based management, you need to create VM storage policies that map to the desired storage capabilities.
|
|
ONTAP tools 10.0 and later no longer use Storage Capability Profiles like previous versions. Instead, the storage capabilities are defined directly in the VM storage policy itself. |
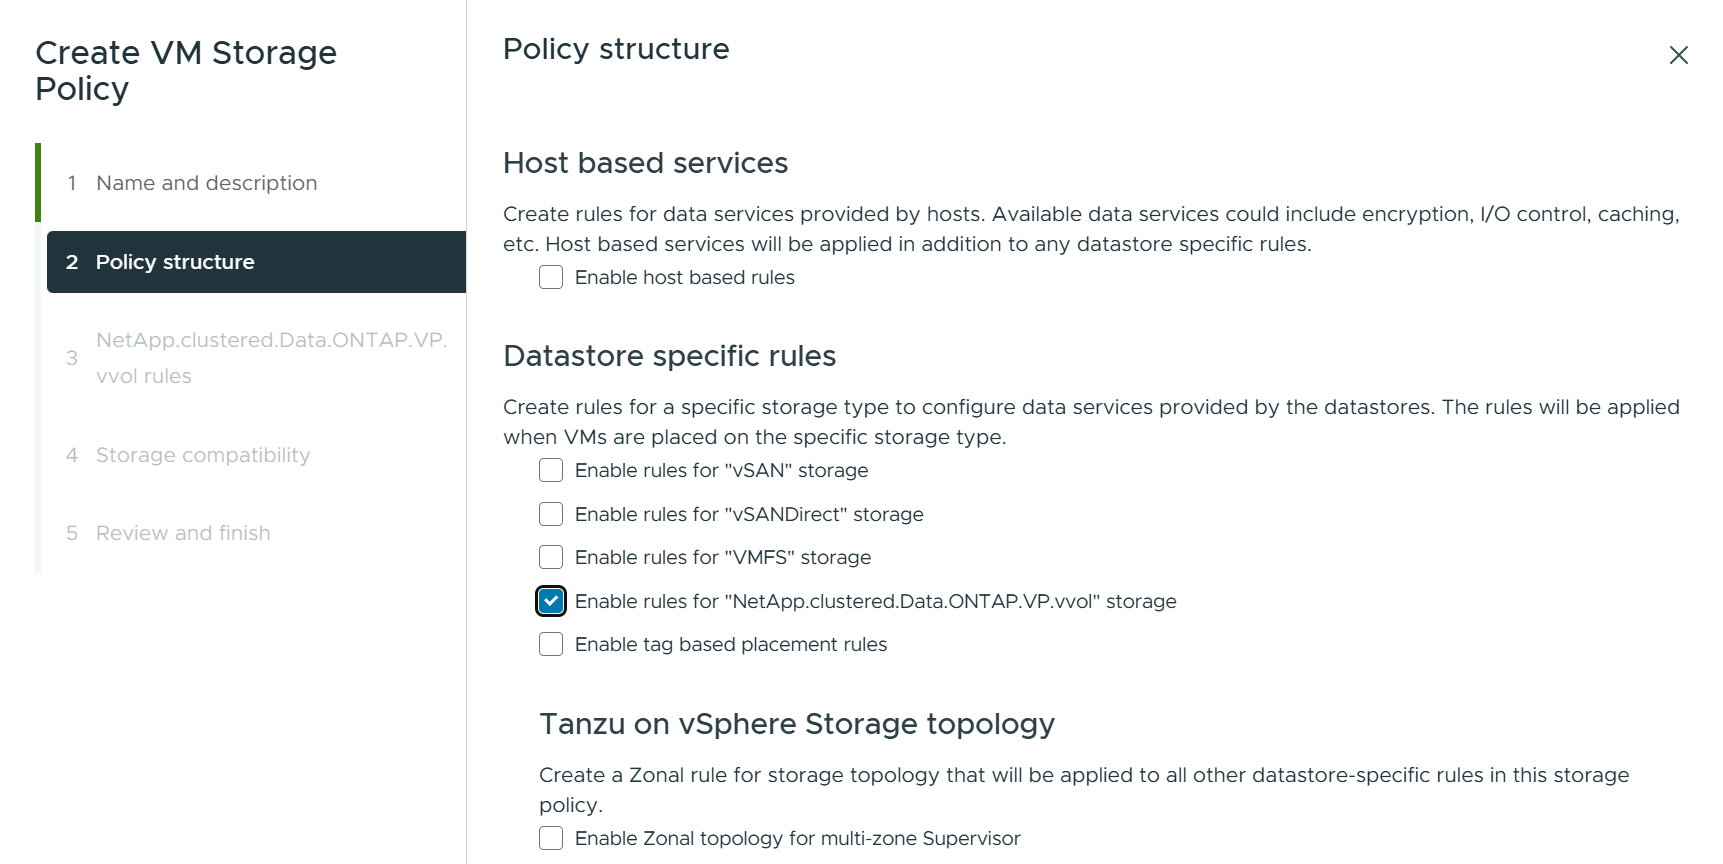
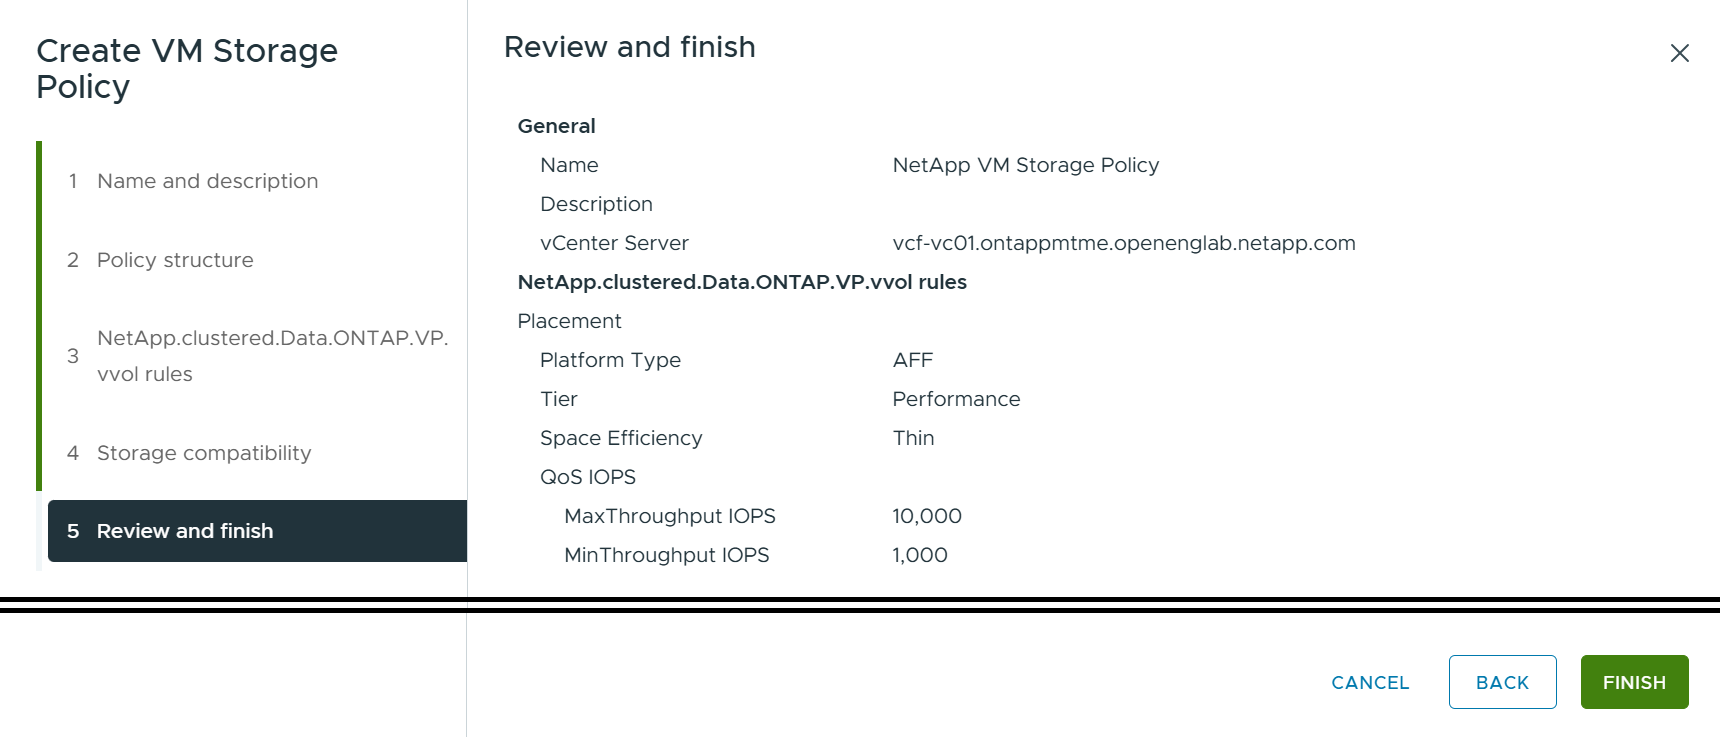
Creating VM Storage Policies
VM Storage Policies are used in vSphere to manage optional features such as Storage I/O Control or vSphere Encryption. They are also used with vVols to apply specific storage capabilities to the VM. Use the "NetApp.clustered.Data.ONTAP.VP.vvol" storage type. See link:vmware-vvols-ontap.html#Best Practices[example network configuration using vVols over NFS v3] for an example of this with the ONTAP tools VASA Provider. Rules for "NetApp.clustered.Data.ONTAP.VP.VASA10" storage are to be used with non-vVols-based datastores.
Once the storage policy has been created, it can be used when provisioning new VMs.
Performance management with ONTAP tools
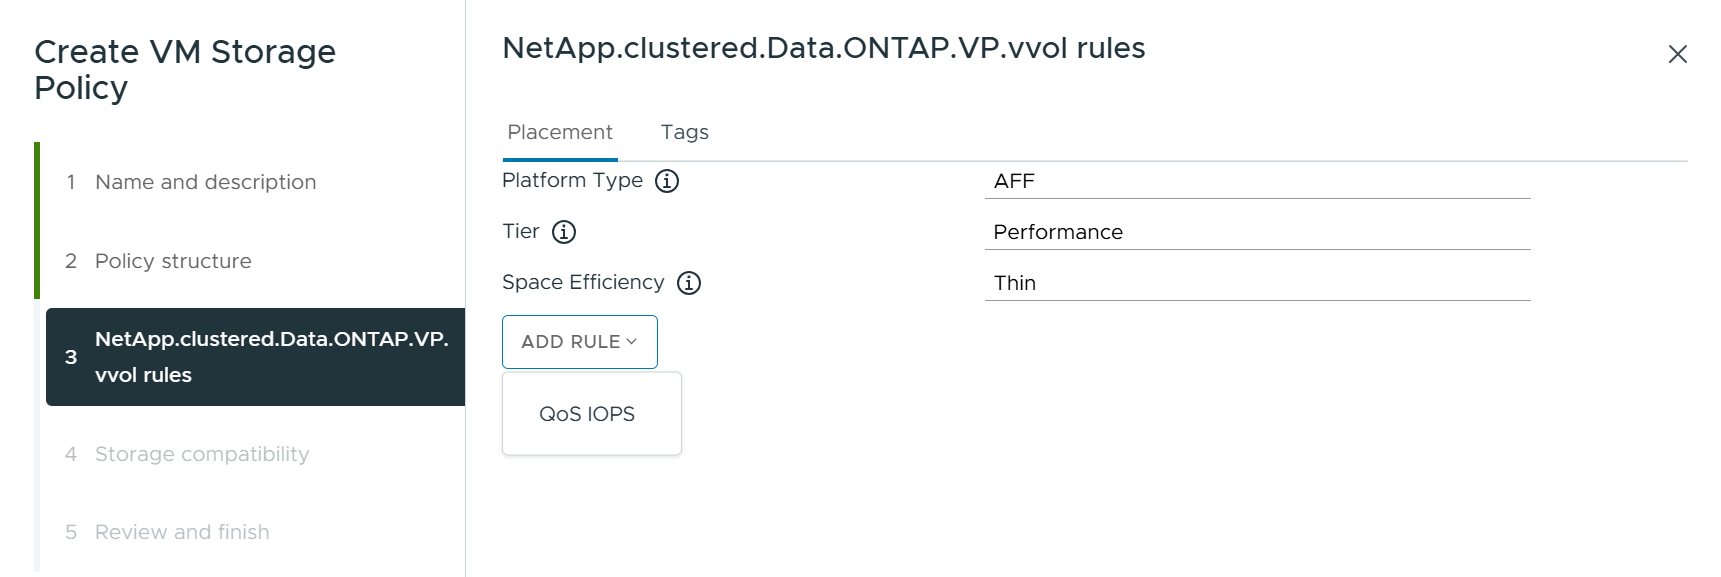
ONTAP tools uses its own balanced placement algorithm to place a new vVol in the best FlexVol volume with unified or classic ASA systems, or Storage Availability Zone (SAZ) with ASA r2 systems, within a vVols datastore. Placement is based on matching the backing storage with the VM storage policy. This makes sure that the datastore and backing storage can meet the specified performance requirements.
Changing Performance capabilities, such as Min and Max IOPS, requires some attention to the specific configuration.
-
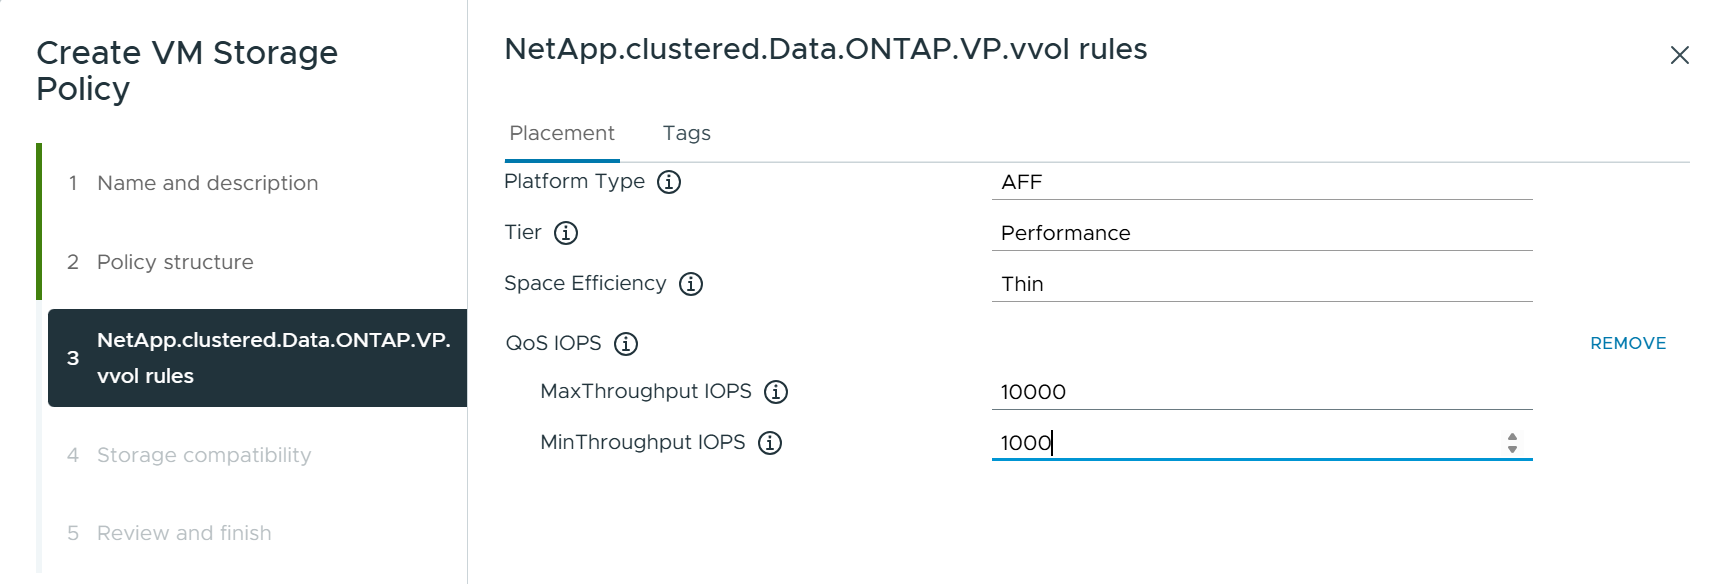
Min and Max IOPS may be specified in a VM Policy.
-
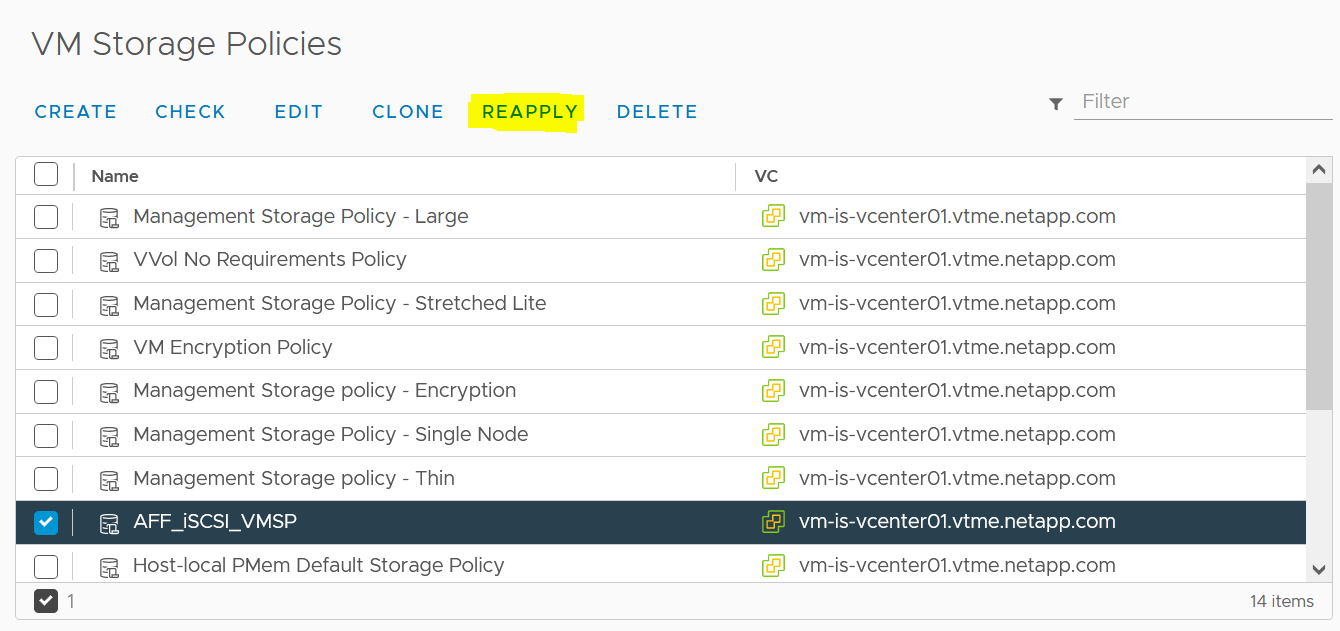
Changing the IOPS in the policy will not change QoS on the vVols until the VM Policy is reapplied to the VMs that use it. Or you may create a new policy with the desired IOPS and apply it to the target VMs. Generally, it is recommended to simply define separate VM storage policies for different tiers of service and simply change the VM storage policy on the VM.
-
ASA, ASA r2, AFF, and FAS personalities have different IOPs settings. Both Min and Max are available on all flash systems; however, non-AFF systems can only use Max IOPs settings.
-
-
ONTAP tools creates individual non-shared QoS policies with currently supported versions of ONTAP. Therefore, each individual VMDK will receive its own allocation of IOPs.
Reapplying VM Storage Policy