Creating scheduled jobs
 Suggest changes


If you are using a local retention policy (located in the configuration file), you can use the Snap Creator graphical user interface (GUI) scheduler to create schedules and run tasks. The scheduler—which is contained within Snap Creator Server—can schedule backups (Snapshot copies), LUN clones, volume clones, application-defined clones, Open Systems SnapVault (OSSV) transfers, archive jobs, and custom actions.
If you plan to use policy objects instead of a local retention policy, you should skip this procedure and create a policy schedule instead.
-
From the main menu of the Snap Creator GUI, select Management > Schedules and click Create.
-
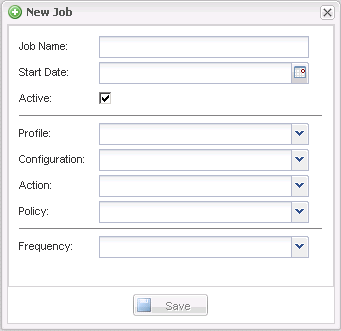
In the New Job window, enter the details for the job.

Field Description Job Name
Specify the name of the scheduled job.
Start Date
Select today's date or a future date.
Active
Set to Active to signify that the job will run as scheduled. Active is the default setting.
Profile
Select the profile to be associated with this job.
Configuration
Select the configuration to be associated with this job.
Action
Select one of the following options:
-
Backup: Creates a backup by using NetApp storage technology.
-
CloneLun: Creates a backup and clones one or more LUNs by using the lun clone command.
-
CloneVol: Creates a backup and clones a volume.
-
Clone: Performs a plug-in-driven clone operation.
-
OSSV: Uses Open Systems SnapVault to perform the backup.
No primary backup is created.
-
Arch: Performs archive log management only.
No backup is created.
-
Custom: Executes a plug-in-defined cloning action.
Policy
Select the policy to be associated with this job.
Frequency
Select the frequency for this job. Depending on your selection, you must select the appropriate time fields for running the scheduled job.
+
-
-
Click Save.
Related information


