

Add resources to folders and projects in NetApp Console
 Suggest changes
Control user access to resources by adding them to projects and folders in your NetApp Console organization. Grant access to users at the project level.
A resource is an entity that the Console is aware of, such as a storage resource, a Console agent, or a Backup and Recovery workload.
You can view and manage resources from the Resources page in the Console.
Console resource types
You can associate several types of resources to projects in your NetApp Console organization:
- Storage resources
-
Storage resources are the most common type of resource in your organization and represent both on-premises and cloud storage systems. When you add a storage system to the Console, you need to add it to a project. Until then, the Console marks it as undiscovered and does not display it on the Resources page.

Users with the Org admin role can add resources to a folder to delegate the task of associating the resource with projects to Folder or project admins of the respective folder. Learn about associating a resource with a folder. - Console agents
-
If you used a Console agent to discover storage systems, add the agent to the same project as the storage system. This allows users to perform agent-enabled functions, such as data services or Console-native storage management. You can add agents to projects from the Agents page in the Console. Learn how to associate a Console agent with a project.
- Keystone subscriptions
-
If you have Keystone subscriptions in your organization, you can view them on the Resources page. You can associate Keystone subscriptions with projects to provide access to members who have permissions for those projects.
- Backup and Recovery workloads
-
Backup and Recovery workloads are also considered resources. You can assign users permissions to access Backup and Recovery workloads by associating the workloads with projects. For example, assign a user access to a Backup and Recovery workload by associating it with a project the user can access and granting the appropriate Backup and Recovery role.
View the resources in your organization
You can view both discovered and undiscovered resources associated with your organization. The system finds storage resources and marks them as undiscovered until you add them to the Console.
|
|
The Console excludes Amazon FSx for NetApp ONTAP resources from the Resources page because users cannot associate them with a role. You can view these resources on the Systems page or from Workloads. |
-
Select Administration > Identity and access.
-
Select Resources.
-
Select Advanced Search & Filtering.
-
Use the available options to find a resource:
-
Search by resource name: Enter a text string and select Add.
-
Platform: Select one or more platforms, such as Amazon Web Services.
-
Resources: Select one or more resources, such as Cloud Volumes ONTAP.
-
Organization, folder, or project: Select the entire organization, a specific folder, or a specific project.
-
-
Select Search.
Associate a resource with folders and projects
Associate a resource to a folder or project to make it available to members who have permissions for that folder or project.
-
From the Resources page, navigate to a resource in the table, select
 and then select Associate to folders or projects.
 -
Select a folder or project and then select Accept.
-
To associate an additional folder or project, select Add folder or project and then select the folder or project.
Note that you can only select from the folders and projects for which you have admin permissions.
-
Select Associate resources.
-
If you associated the resource with projects, members who have permissions for those projects now have the ability to access the resource from the Console.
-
If you associated the resource with a folder, a Folder or project admin can now access the resource and associate it with a project within the folder. Learn about associating a resource with a folder.
-
If you discover a resource using a Console agent, associate the Console agent with the project to grant access. Otherwise, the Console agent and its associated resource are not accessible by members without the Organization admin role.
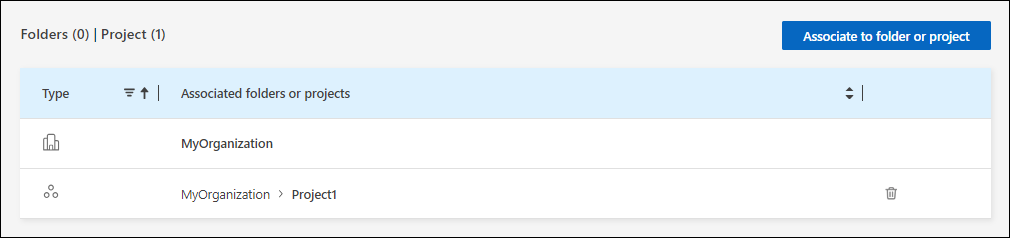
View the folders and projects associated with a resource
You can view the folders and projects that are associated with a particular resource.
|
|
If you need to find out which organization members have access to the resource, you can view the members who have access to the folders and projects that are associated with the resource. |
-
From the Resources page, navigate to a resource in the table, select
and then select View details.
The following example shows a resource that is associated with one project.
|
|
To see which organization members have access to the resource, view members with access to associated folders and projects. |
Remove a resource from a folder or project
To remove a resource from a folder or project, remove its association. This prevents members from managing the resource in that folder or project.
|
|
To remove a discovered resource from the entire organization, go to the Systems page and remove the system. |
-
From the Resources page, navigate to a resource in the table, select
and then select View details. -
To remove a resource from a folder or project, select
 next to the folder or project.
 -
Select Delete to remove the association.