

Configure networking for NVMe/TCP on ESXi hosts in a VCF VI workload domain
 Suggest changes
Configure networking for NVMe over TCP (NVMe/TCP) storage on ESXi hosts in a VI workload domain. You'll create distributed port groups for NVMe traffic, set up VMkernel adapters on each ESXi host, and add an NVMe/TCP adapter to enable reliable connectivity and multipathing.
Perform the following steps on the VI workload domain cluster using the vSphere client. In this case vCenter Single Sign-On is being used so the vSphere client is common to both the management and workload domains.
Step 1: Create distributed port groups for NVME/TCP traffic
Complete the following steps to create a new distributed port group for each NVMe/TCP network.
-
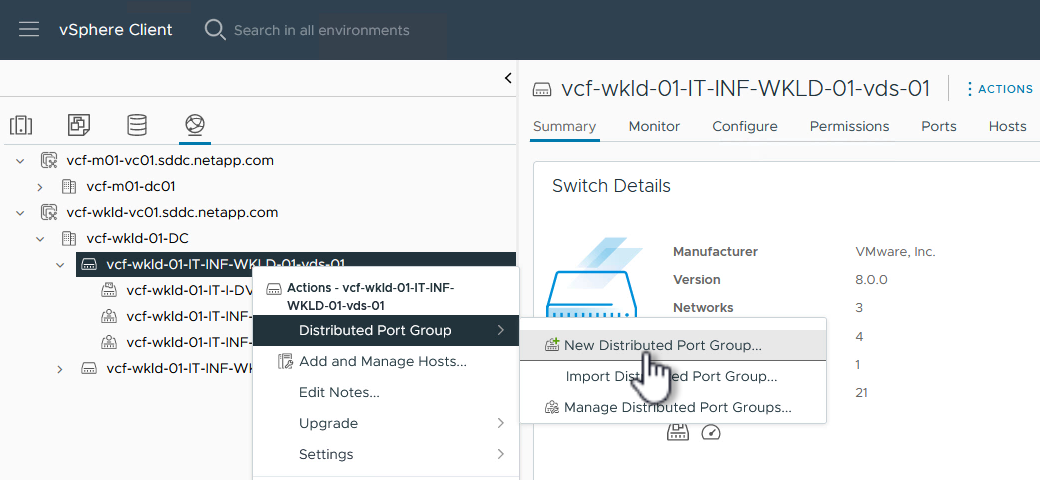
From the vSphere client , navigate to Inventory > Networking for the workload domain. Navigate to the existing Distributed Switch and choose the action to create New Distributed Port Group….
Show example
-
In the New Distributed Port Group wizard, fill in a name for the new port group and click Next to continue.
-
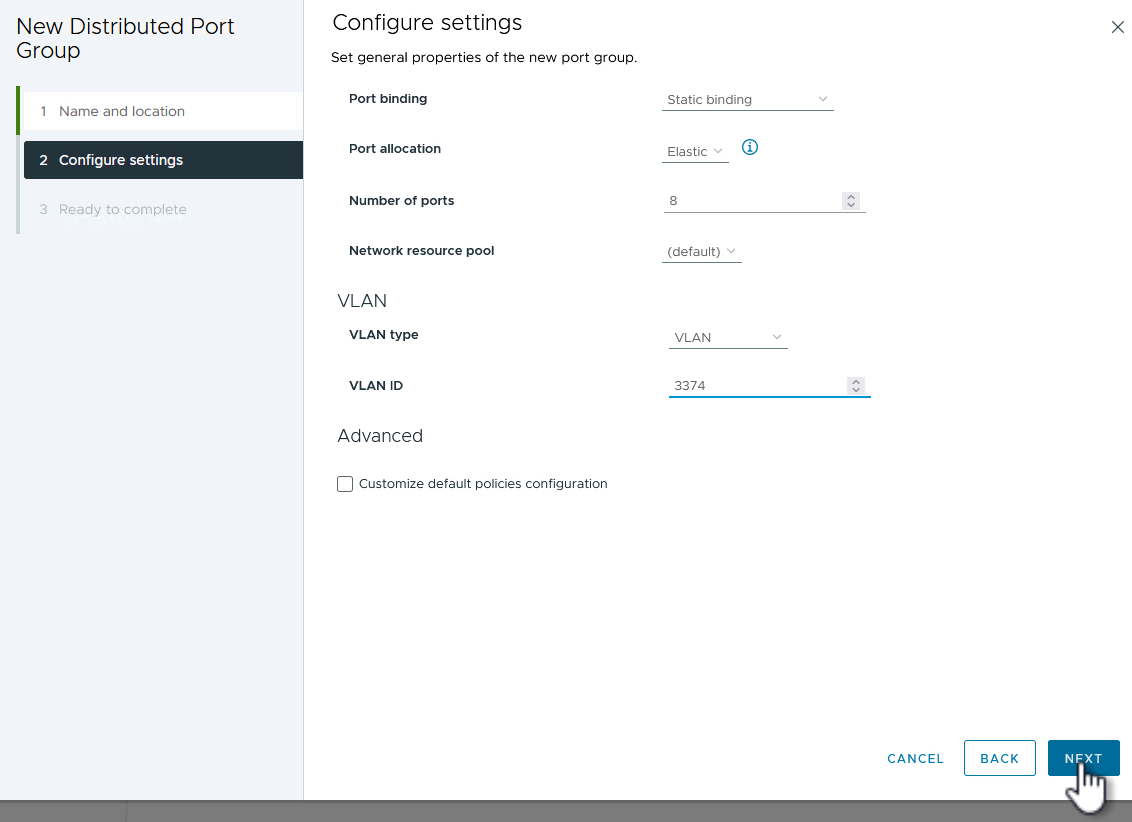
On the Configure settings page, fill out all settings. If VLANs are being used be sure to provide the correct VLAN ID. Click Next to continue.
Show example
-
On the Ready to complete page, review the changes and click Finish to create the new distributed port group.
-
Repeat this process to create a distributed port group for the second NVMe/TCP network being used and ensure you have input the correct VLAN ID.
-
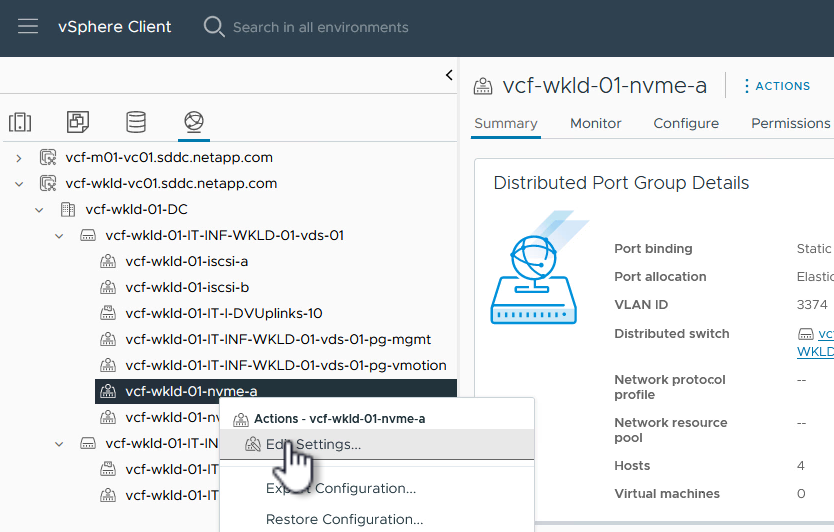
When both port groups have been created, navigate to the first port group and select the action to Edit settings….
Show example
-
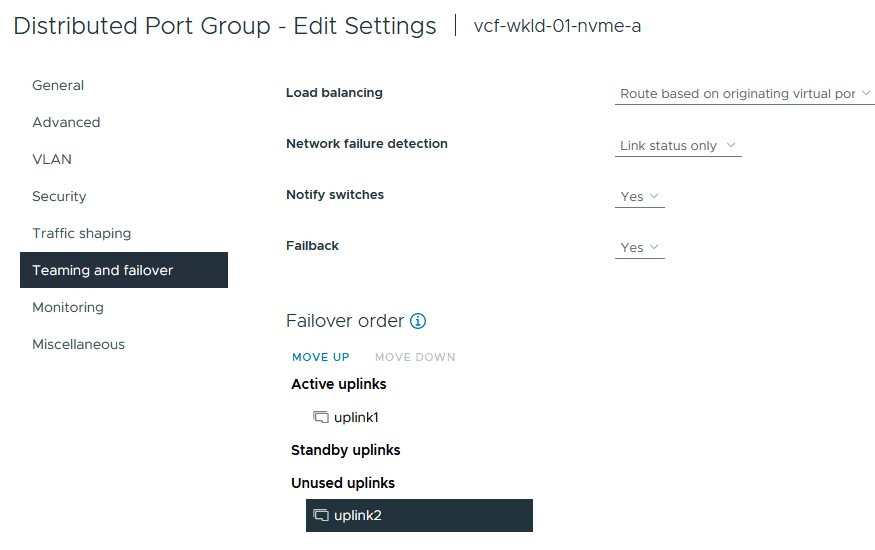
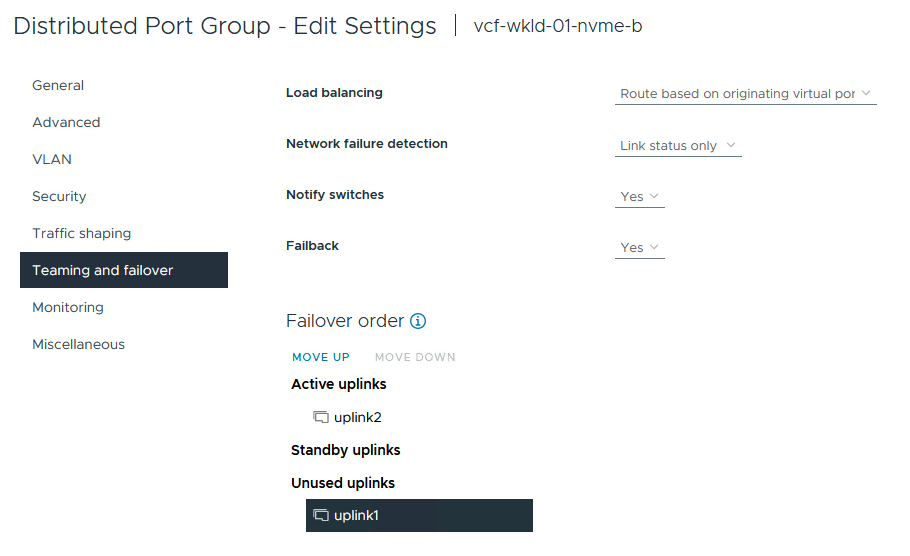
On the Distributed Port Group - Edit Settings page, navigate to Teaming and failover in the left-hand menu and click uplink2 to move it down to Unused uplinks.
Show example
-
Repeat this step for the second NVMe/TCP port group. This time, move uplink1 down to Unused uplinks.
Show example
Step 2: Create the VMkernel adapters on each ESXi host
Create the VMkernel adapters on each ESXi host in the workload domain.
-
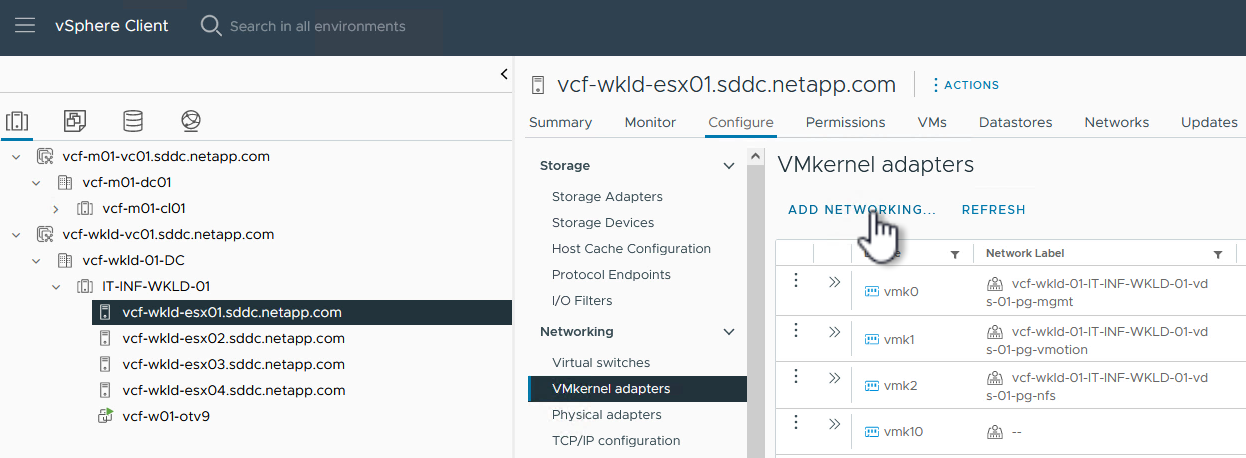
From the vSphere client, navigate to one of the ESXi hosts in the workload domain inventory. From the Configure tab select VMkernel adapters and click Add Networking… to start.
Show example
-
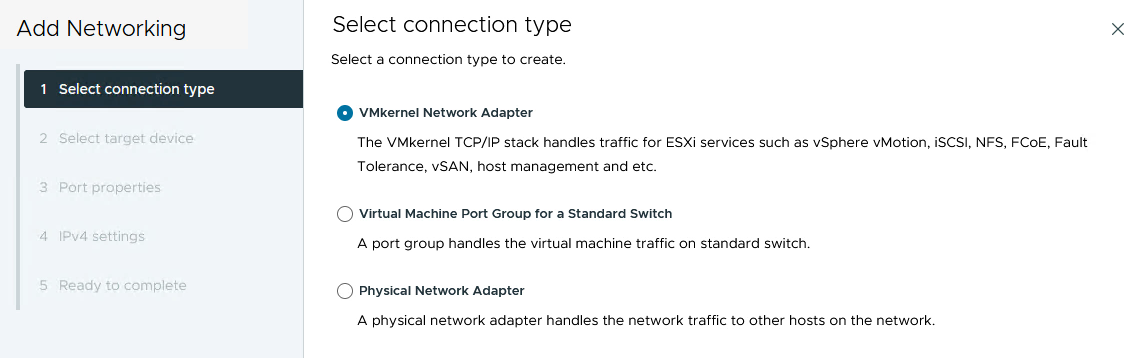
On the Select connection type window, choose VMkernel Network Adapter and click Next to continue.
Show example
-
On the Select target device page, choose one of the distributed port groups for iSCSI that was created previously.
Show example

-
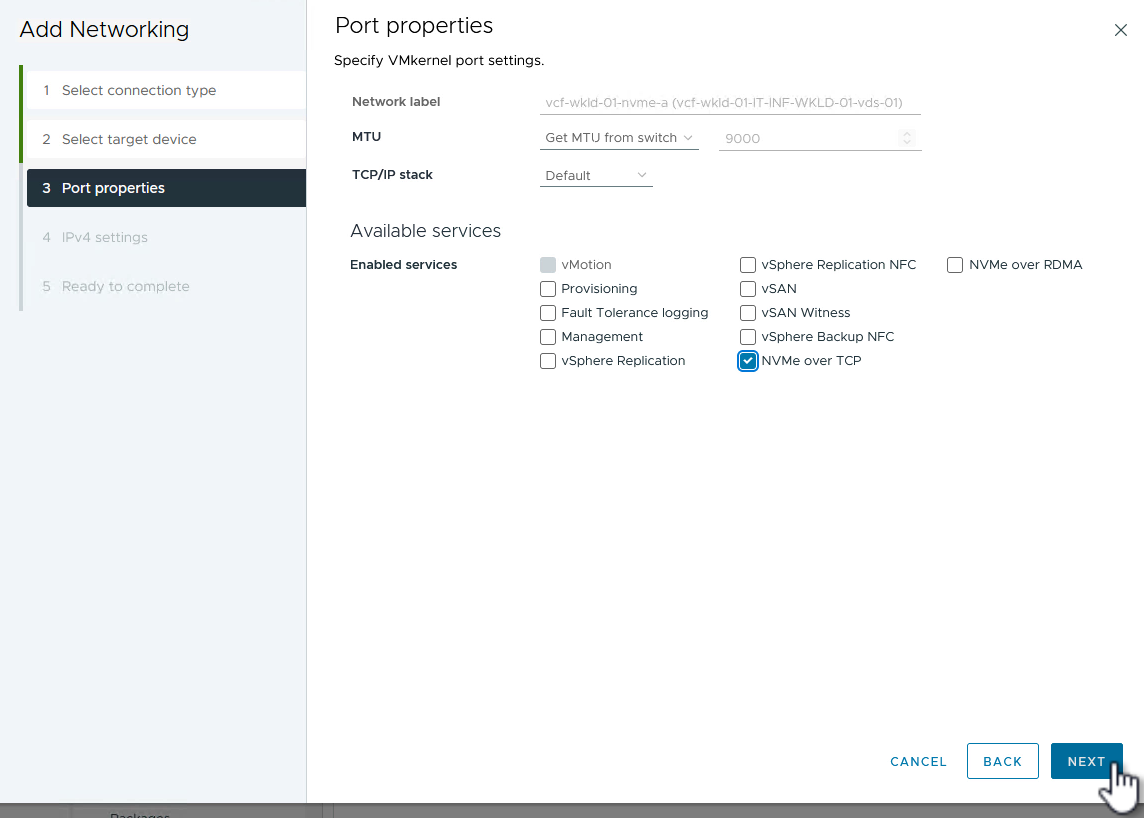
On the Port properties page, click the box for NVMe/TCP and click Next to continue.
Show example
-
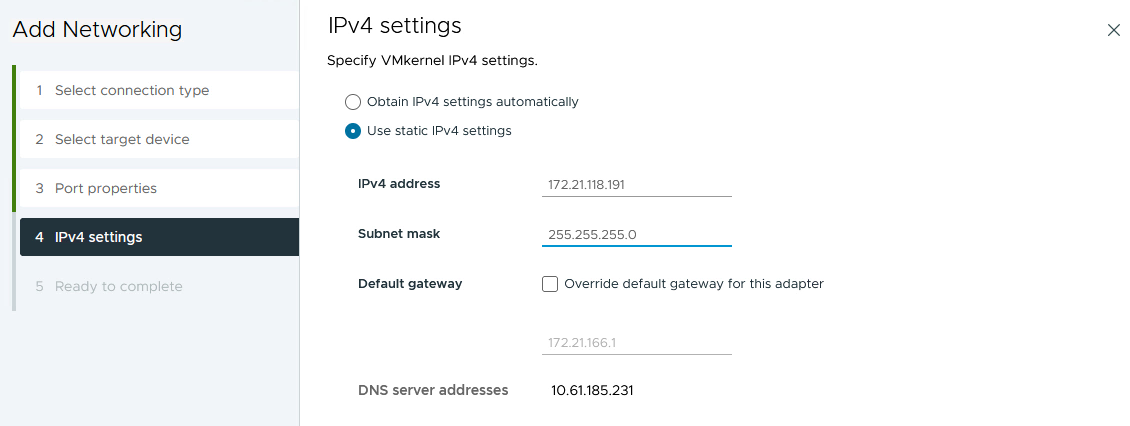
On the IPv4 settings page, fill in the IP address and Subnet mask and provide a new gateway IP address (only if required). Click Next to continue.
Show example
-
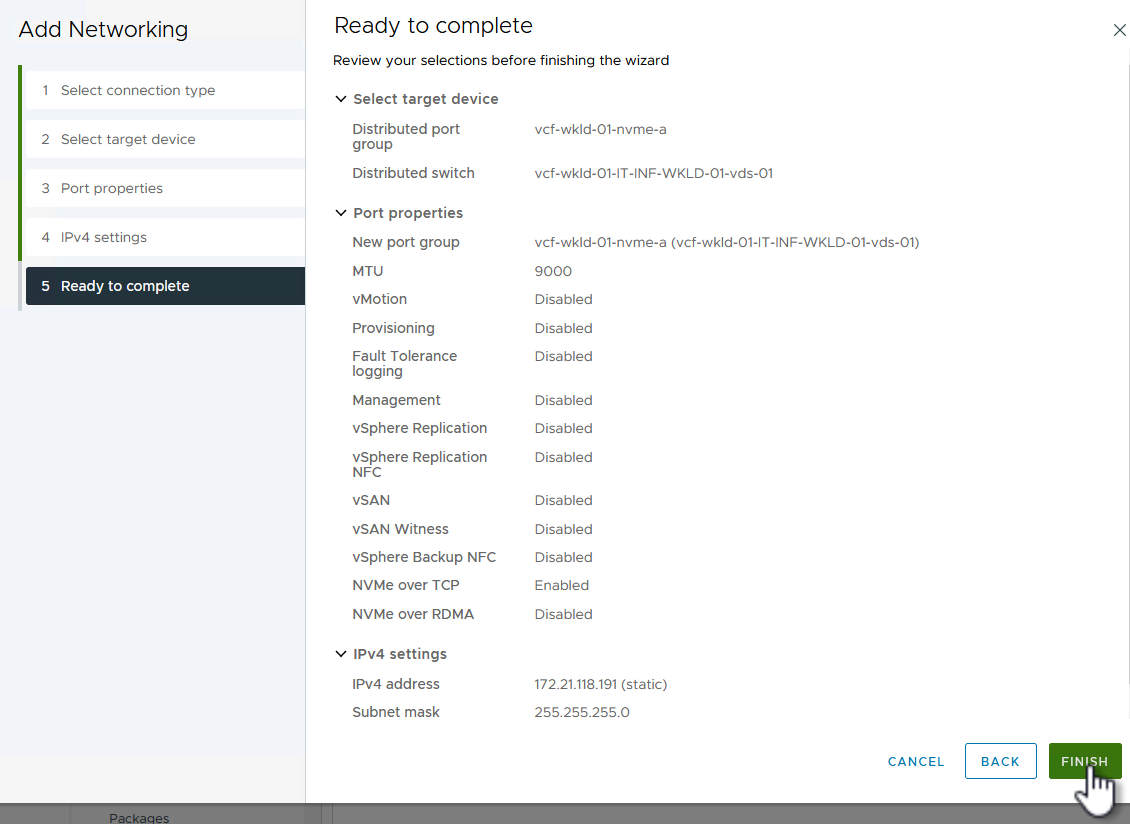
Review your selections on the Ready to complete page and click Finish to create the VMkernel adapter.
Show example
-
Repeat this process to create a VMkernel adapter for the second iSCSI network.
Step 3: Add NVMe/TCP adapter
Each ESXi host in the workload domain cluster must have an NVMe/TCP software adapter installed for every established NVMe/TCP network dedicated to storage traffic.
To install NVMe/TCP adapters and discover the NVMe controllers, complete the following steps.
-
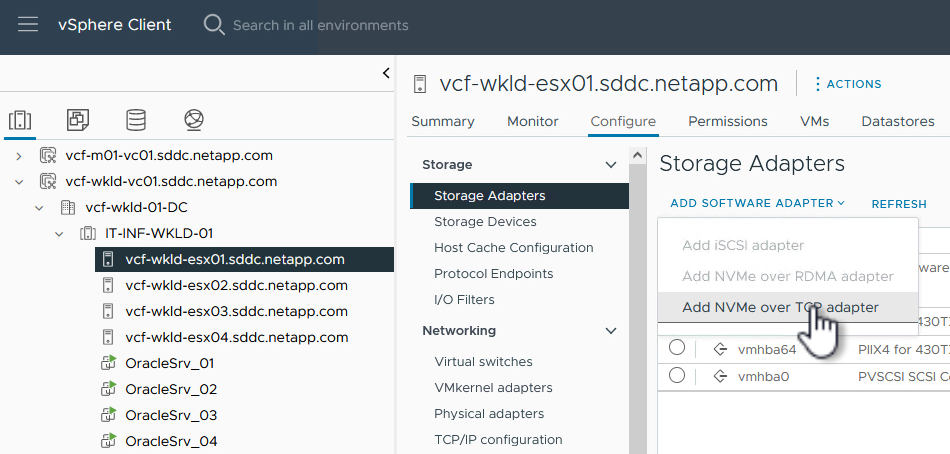
In the vSphere client, navigate to one of the ESXi hosts in the workload domain cluster. From the Configure tab, click Storage Adapters in the menu.
-
From the Add Software Adapter drop-down menu, select Add NVMe over TCP adapter.
Show example
-
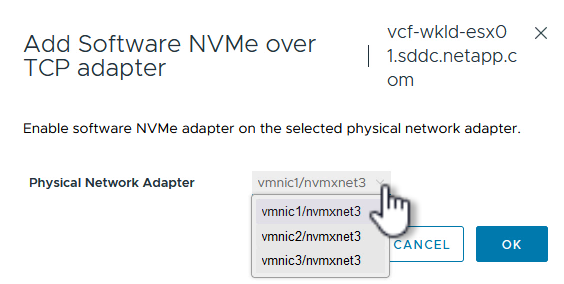
In the Add Software NVMe over TCP adapter window, access the Physical Network Adapter drop-down menu and select the correct physical network adapter on which to enable the NVMe adapter.
Show example
-
Repeat this process for the second network assigned to NVMe/TCP traffic, assigning the correct physical adapter.
-
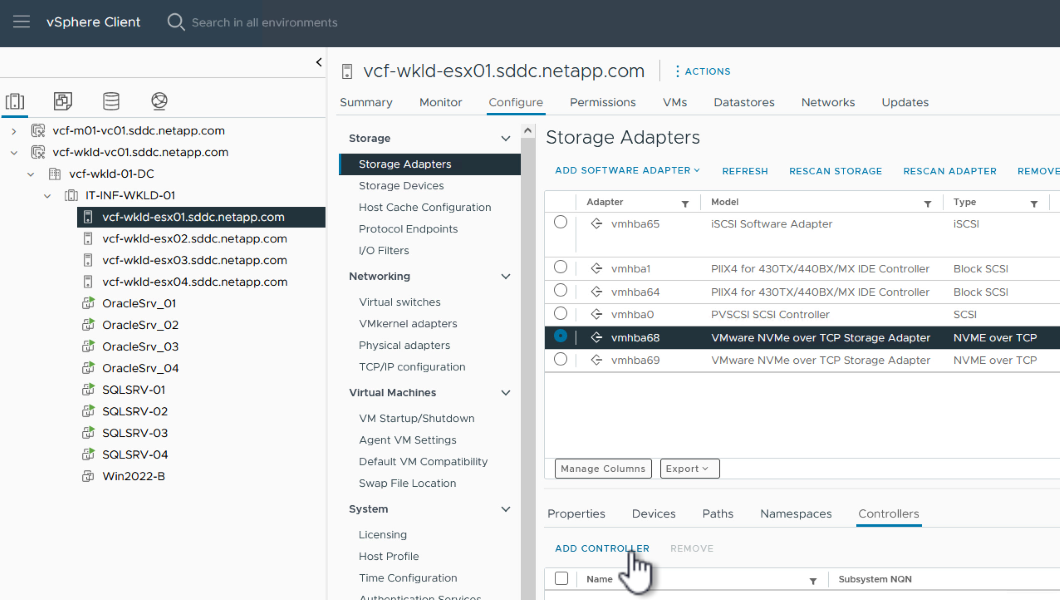
Select one of the newly installed NVMe/TCP adapters. On the Controllers tab, select Add Controller.
Show example
-
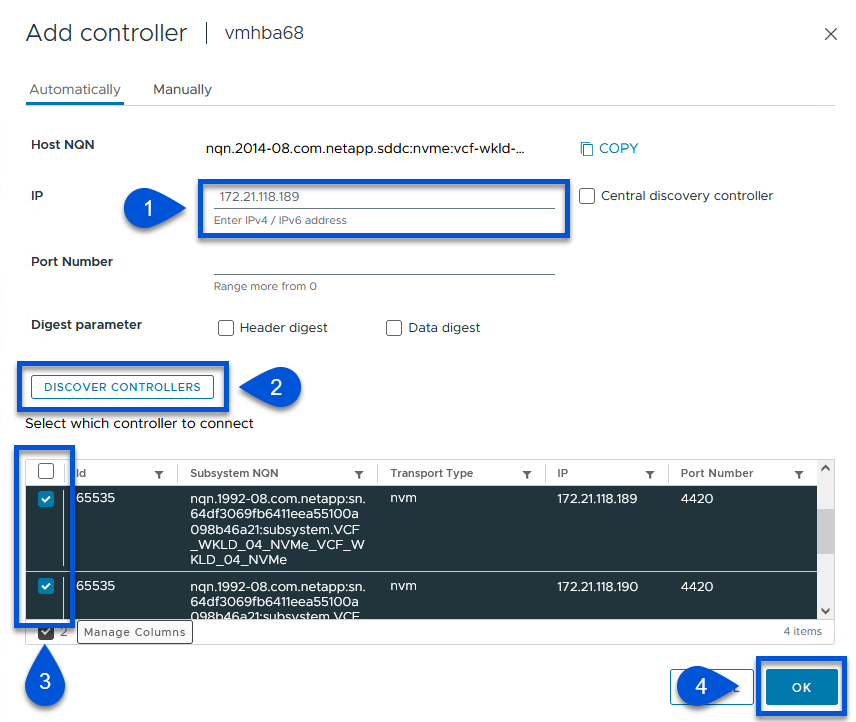
In the Add controller window, select the Automatically tab and complete the following steps.
-
Enter an IP address for one of the SVM logical interfaces on the same network as the physical adapter assigned to this NVMe/TCP adapter.
-
Click the Discover Controllers button.
-
From the list of discovered controllers, click the checkbox for the two controllers with network addresses aligned with this NVMe/TCP adapter.
-
-
Click OK to add the selected controllers.
Show example
-
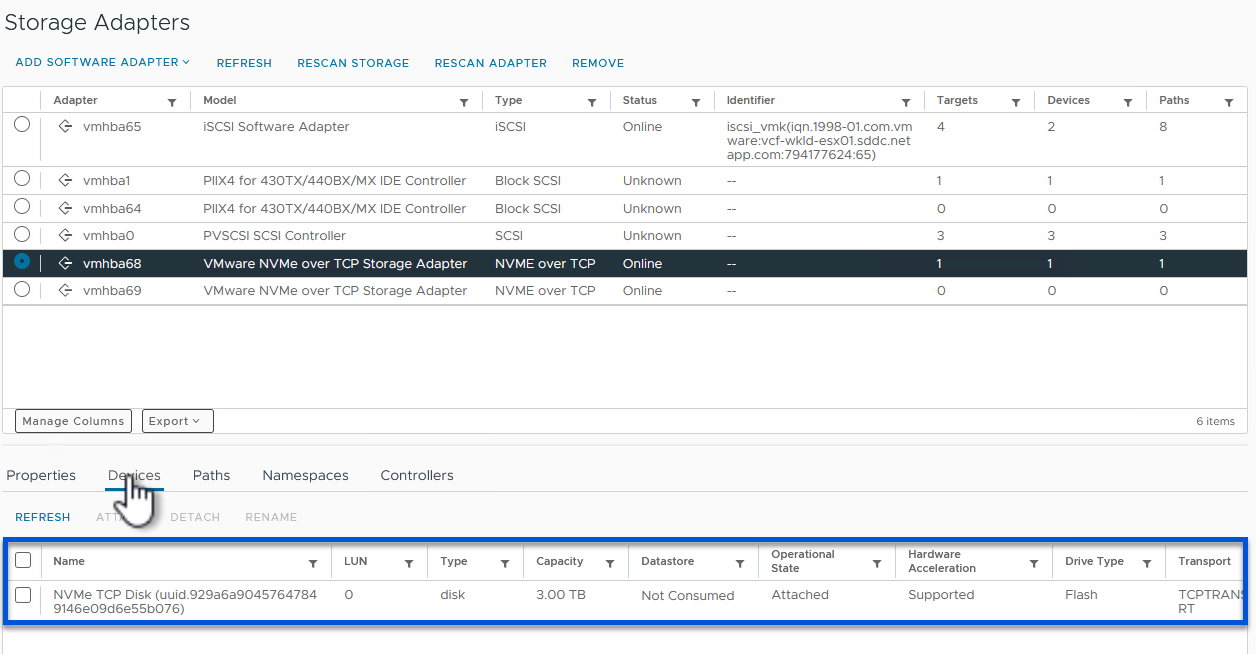
After a few seconds you should see the NVMe namespace appear on the Devices tab.
Show example
-
Repeat this procedure to create an NVMe/TCP adapter for the second network established for NVMe/TCP traffic.
What's next?
After configuring networking, configure storage for NVMe vVols.