使用 Trident Protect 在 vSphere Kubernetes Service 叢集中備份及還原 Container 應用程式

 建議變更
建議變更

 PDF
PDF
使用 Trident Protect 快照和備份功能,在 vSphere Kubernetes Service (VKS) 叢集中備份和還原 Container 應用程式。此程序包括使用 ONTAP S3 物件儲存建立 AppVault、設定 Trident Protect 以擷取應用程式資料(包括 Kubernetes 資源物件和持續儲存 Volume),以及在必要時還原資料。
在 VKS 叢集中執行的 Container 應用程式會作為 Kubernetes 工作負載在工作節點命名空間中進行代管。保護應用程式中繼資料和持續儲存 Volume 至關重要,以便在遺失或損毀時能夠加以恢復。
VKS 應用程式的持續性 Volume 可由與 VKS 叢集整合的 ONTAP 儲存設備提供支援,使用 "Trident CSI"。此程序使用 "Trident Protect" 建立應用程式快照和備份。應用程式快照的中繼資料儲存在 ONTAP 物件儲存中,而 Volume 快照資料則保留在儲存設備後端;備份資料則複製到 ONTAP 物件儲存。您可以在需要時從快照或備份還原。
Trident Protect 支援對 Kubernetes 叢集上的應用程式進行快照、備份、還原和災難恢復。Trident Protect 可保護的資料包括與應用程式及其持續性 Volume 相關聯的 Kubernetes 資源物件。
以下是本節範例中使用的各種元件版本
-
VMware Cloud Foundation (VCF) 9.1 與 vSphere Kubernetes 服務
在 vSphere Kubernetes 叢集上安裝 Trident Protect
安裝 Trident Protect
使用 Helm 在 vSphere Kubernetes Service 叢集上安裝 Trident Protect。本節中的範例使用 tridentctl-protect,即 Trident Protect CLI。請依照"Trident Protect CLI 文件"中的說明進行安裝。其他 Trident Protect 安裝方法已記錄於"Trident Protect 說明文件"中。
首先,建立並標記 `trident-protect`命名空間。 `enforce=privileged`標籤為必要項目,因為 Trident Protect 執行特權工作負載。若無此標籤,Kubernetes Pod 安全性許可控制器將封鎖 Trident Protect Pod 的啟動。
kubectl create namespace trident-protect
kubectl label namespace trident-protect pod-security.kubernetes.io/enforce=privileged
然後新增 Helm 儲存庫並將 Trident Protect 安裝到命名空間。
helm repo add netapp-trident-protect https://netapp.github.io/trident-protect-helm-chart
helm install trident-protect netapp-trident-protect/trident-protect --set clusterName=<name-of-cluster> --version 100.2606.0 --namespace trident-protect

|
如果 Trident Protect Pod 啟動失敗並出現 `PodSecurity`許可錯誤,則可能是安裝前未將 Pod 安全性標籤套用到 `trident-protect`命名空間。請使用 `--overwrite`重新套用這些標籤,然後驗證 Pod 是否啟動。 |
kubectl label namespace trident-protect pod-security.kubernetes.io/enforce=privileged --overwritekubectl get pods -n trident-protect

建立用於物件儲存的 App Vault
建立 AppVault
在為應用程式建立快照和備份之前,必須先在 Trident Protect 中設定物件儲存設備。這可以透過建立 AppVault CR 來完成。只有管理員才能建立和設定 AppVault CR。
AppVault 物件是儲存設備貯體的 Kubernetes 自訂資源表示。AppVault CR 包含儲存設備貯體在保護作業(例如備份、快照、還原作業和 SnapMirror 複寫)中使用所需的組態。
以下步驟建立針對 ONTAP S3 設定的 AppVault CR:.在 ONTAP 叢集的 SVM 中建立 S3 物件存放區伺服器。.在物件存放區伺服器中建立儲存桶。.在 SVM 中建立 S3 使用者。請將存取金鑰和私密金鑰保存在安全的位置。
+ 注意:Trident Protect 要求 S3 使用者至少擁有 PutObject、 GetObject、 ListBucket 和 DeleteObject 權限。如果沒有這些權限,AppVault 備份與恢復作業將會失敗並出現存取被拒絕的錯誤。如需詳細資訊,請參閱"Trident Protect AppVault 文件"。。在 VKS 叢集中,建立一個金鑰來儲存 ONTAP S3 憑證。。為 ONTAP S3 建立 AppVault 物件。
為 ONTAP S3 設定 Trident Protect AppVault

|
以下清單使用啟用了憑證驗證的 HTTPS,這是生產環境的必要條件。如果您的 ONTAP S3 端點使用叢集已信任的公共 CA 所簽署的憑證,則無需進行額外的憑證組態。如果使用自簽名或內部 CA 憑證,請使用 `rootCA`欄位提供自訂根目錄 CA 憑證,如清單所示。如果您需要用於隔離的非生產環境測試的 HTTP 組態,請參閱本節末尾的實驗室專用版本。 |
# alias tp='tridentctl-protect'

# cat appvault-secret.yaml
apiVersion: v1
data:
  accessKeyID: <base64 encoded access key>
  secretAccessKey: <base64 encoded secret access key>
# Alternatively, remove the data section above and use:
# stringData:
#   accessKeyID: "<access key of S3>"
#   secretAccessKey: "<secret access key of S3>"
kind: Secret
metadata:
  name: ontap-s3-appvault-secret1
  namespace: trident-protect
type: Opaque

# cat appvault.yaml
apiVersion: protect.trident.netapp.io/v1
kind: AppVault
metadata:
  name: ontap-s3-appvault1
  namespace: trident-protect
spec:
  providerConfig:
    azure:
      accountName: ""
      bucketName: ""
      endpoint: ""
    gcp:
      bucketName: ""
      projectID: ""
    s3:
      bucketName: trident-protect
      endpoint: <lif for S3 access>
      secure: "true"
      skipCertValidation: "false"
      # If your ONTAP S3 endpoint uses a certificate signed by a public CA
      # already trusted by the cluster, no additional certificate config is needed.
      # If it uses a self-signed or internal CA certificate, provide the
      # root CA certificate:
      # rootCA: <root CA certificate>
  providerCredentials:
    accessKeyID:
      valueFromSecret:
        key: accessKeyID
        name: ontap-s3-appvault-secret1
    secretAccessKey:
      valueFromSecret:
        key: secretAccessKey
        name: ontap-s3-appvault-secret1
  providerType: OntapS3

# kubectl create -f appvault-secret.yaml -n trident-protect
# kubectl create -f appvault.yaml -n trident-protect
僅限實驗室環境(HTTP,無憑證驗證)
以下 `s3`設定僅可在不含敏感資料的隔離實驗室環境中使用。請勿在生產環境中使用這些設定。
    s3:
      bucketName: trident-protect
      endpoint: <lif for S3 access>
      secure: "false"
      skipCertValidation: "true"
建立 Trident Protect 應用程式
建立 Trident Protect 應用程式
本範例涵蓋範例 PostgreSQL 應用程式的資料保護,該應用程式安裝在 `postgres`命名空間中。如需安裝的詳細資訊,請參閱"使用 NetApp 儲存設備部署 VKS 工作負載"。
|
|
範例 PostgreSQL PVC 請求 RWO 存取模式。存取模式必須在 PVC 清單中明確指定;Trident 不會根據儲存傳輸協定自動選擇存取模式。NAS 支援的 PVC 支援 RWX 存取模式,SAN 支援的 PVC 可透過額外組態支援 RWX 存取模式。如需詳細資訊,請參閱 "Trident Protect 說明文件"。 |
在本例中,postgres 命名空間有一個應用程式,在建立 Trident Protect 應用程式時會包含該命名空間的所有資源。
# alias tp='tridentctl-protect'
# tp create app postgres-app --namespaces postgres -n postgres --dry-run > postgres-app.yaml

# cat postgres-app.yaml
apiVersion: protect.trident.netapp.io/v1
kind: Application
metadata:
  name: postgres-app
spec:
  includedNamespaces:
  - namespace: postgres
  resourceFilter: {}
# kubectl create -f postgres-app.yaml -n postgres
建立備份以保護應用程式
建立備份
建立隨需備份
為先前建立的 postgres-app 建立備份,備份內容應包含 postgres 命名空間中的所有資源。請提供用於儲存備份的 appvault 名稱。
# cat postgres-backup-on-demand.yaml
apiVersion: protect.trident.netapp.io/v1
kind: Backup
metadata:
  name: postgres-backup-on-demand
spec:
  appVaultRef: ontap-s3-appvault1
  applicationRef: postgres-app
  cleanupSnapshot: true
  replicateSnapshot: false
kubectl create -f postgres-backup-on-demand.yaml -n postgres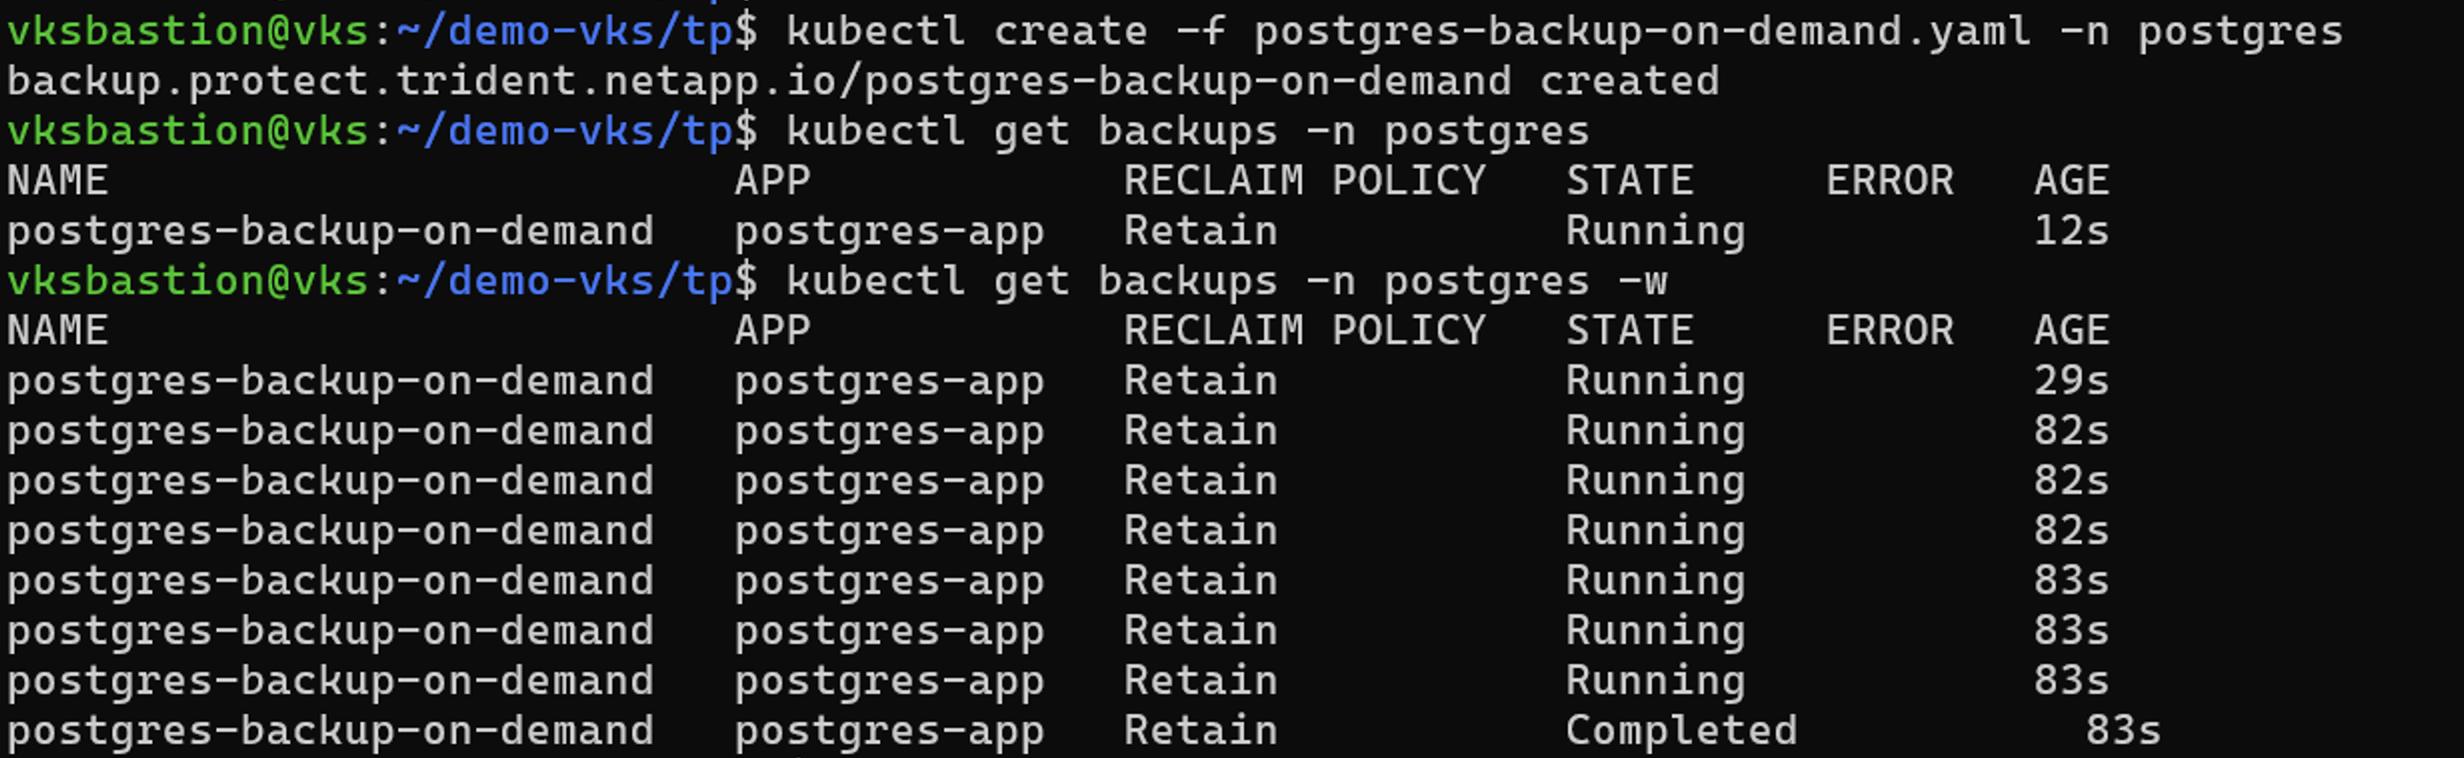

按排程建立備份
制定備份計劃,指定精細度和要保留的備份數量。
# tp create schedule backup-schedule1 --app postgres-app --appvault ontap-s3-appvault1 --granularity Hourly --minute 45 --backup-retention 1 -n postgres --dry-run>postgres-backup-schedule1.yaml

#cat postgres-backup-schedule1.yaml
apiVersion: protect.trident.netapp.io/v1
kind: Schedule
metadata:
  name: backup-schedule1
  namespace: postgres
spec:
  appVaultRef: ontap-s3-appvault1
  applicationRef: postgres-app
  backupRetention: "1"
  dayOfMonth: ""
  dayOfWeek: ""
  enabled: true
  granularity: Hourly
  hour: ""
  minute: "45"
  recurrenceRule: ""
  replicationRetention: "0"
  runImmediately: false
  snapshotRetention: "0"
# kubectl create -f postgres-backup-schedule1.yaml -n postgres

從備份還原
從備份還原
將應用程式還原到相同的命名空間
在這個範例中,備份 postgres-backup-on-demand 包含 postgres-app 的備份。
刪除應用程式之前,請確認您計劃從中還原的備份處於 `Completed`狀態。進行中或失敗的備份無法用於還原應用程式。
kubectl get backup -n postgres確認備份狀態為 `Completed`後,刪除 postgres 應用程式,並確保從命名空間「postgres」中刪除 PVC 和 pod 物件。
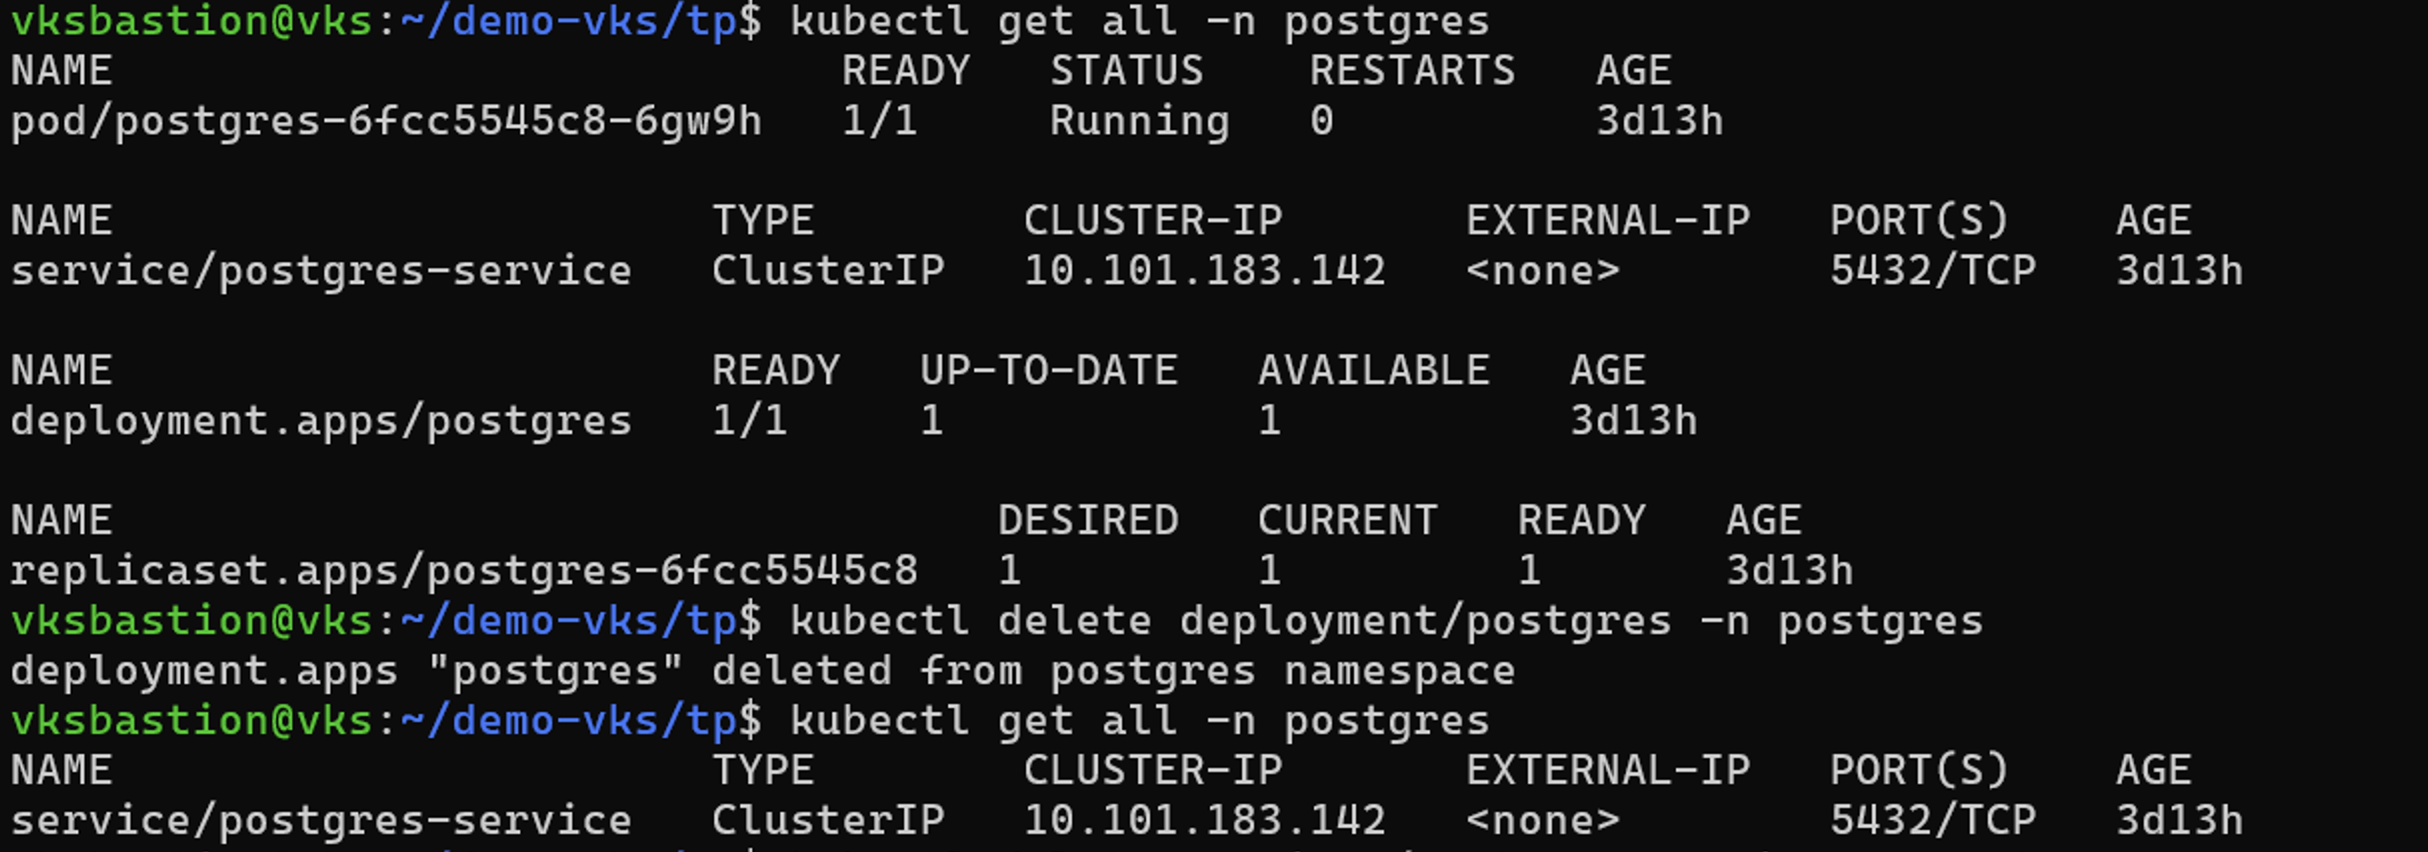


現在,建立一個備份原地還原物件。
# tp create bir postgres-app-restore --backup postgres/postgres-backup-on-demand -n postgres --dry-run>postgres-app-bir.yaml

# cat postgres-app-bir.yaml
apiVersion: protect.trident.netapp.io/v1
kind: BackupInplaceRestore
metadata:
  annotations:
    protect.trident.netapp.io/max-parallel-restore-jobs: "25"
  name: postgres-app-restore
  namespace: postgres
spec:
  appArchivePath: postgres-app_314bbaf6-2ce3-4065-b3c1-ab85c7bb7c7c/backups/postgres-backup-on-demand_63efc9d1-92d7-45ce-84fe-846ce7db7b29
  appVaultRef: ontap-s3-appvault1
  cleanUpAdditionalExecHooks: true
  cleanUpArchivedExecHooks: false
  resourceFilter: {}
  runArchivedExecHooks: true

# kubectl create -f postgres-app-bir.yaml -n postgres
驗證 postgres 應用程式部署、服務、pod 和 PVC 是否已還原。
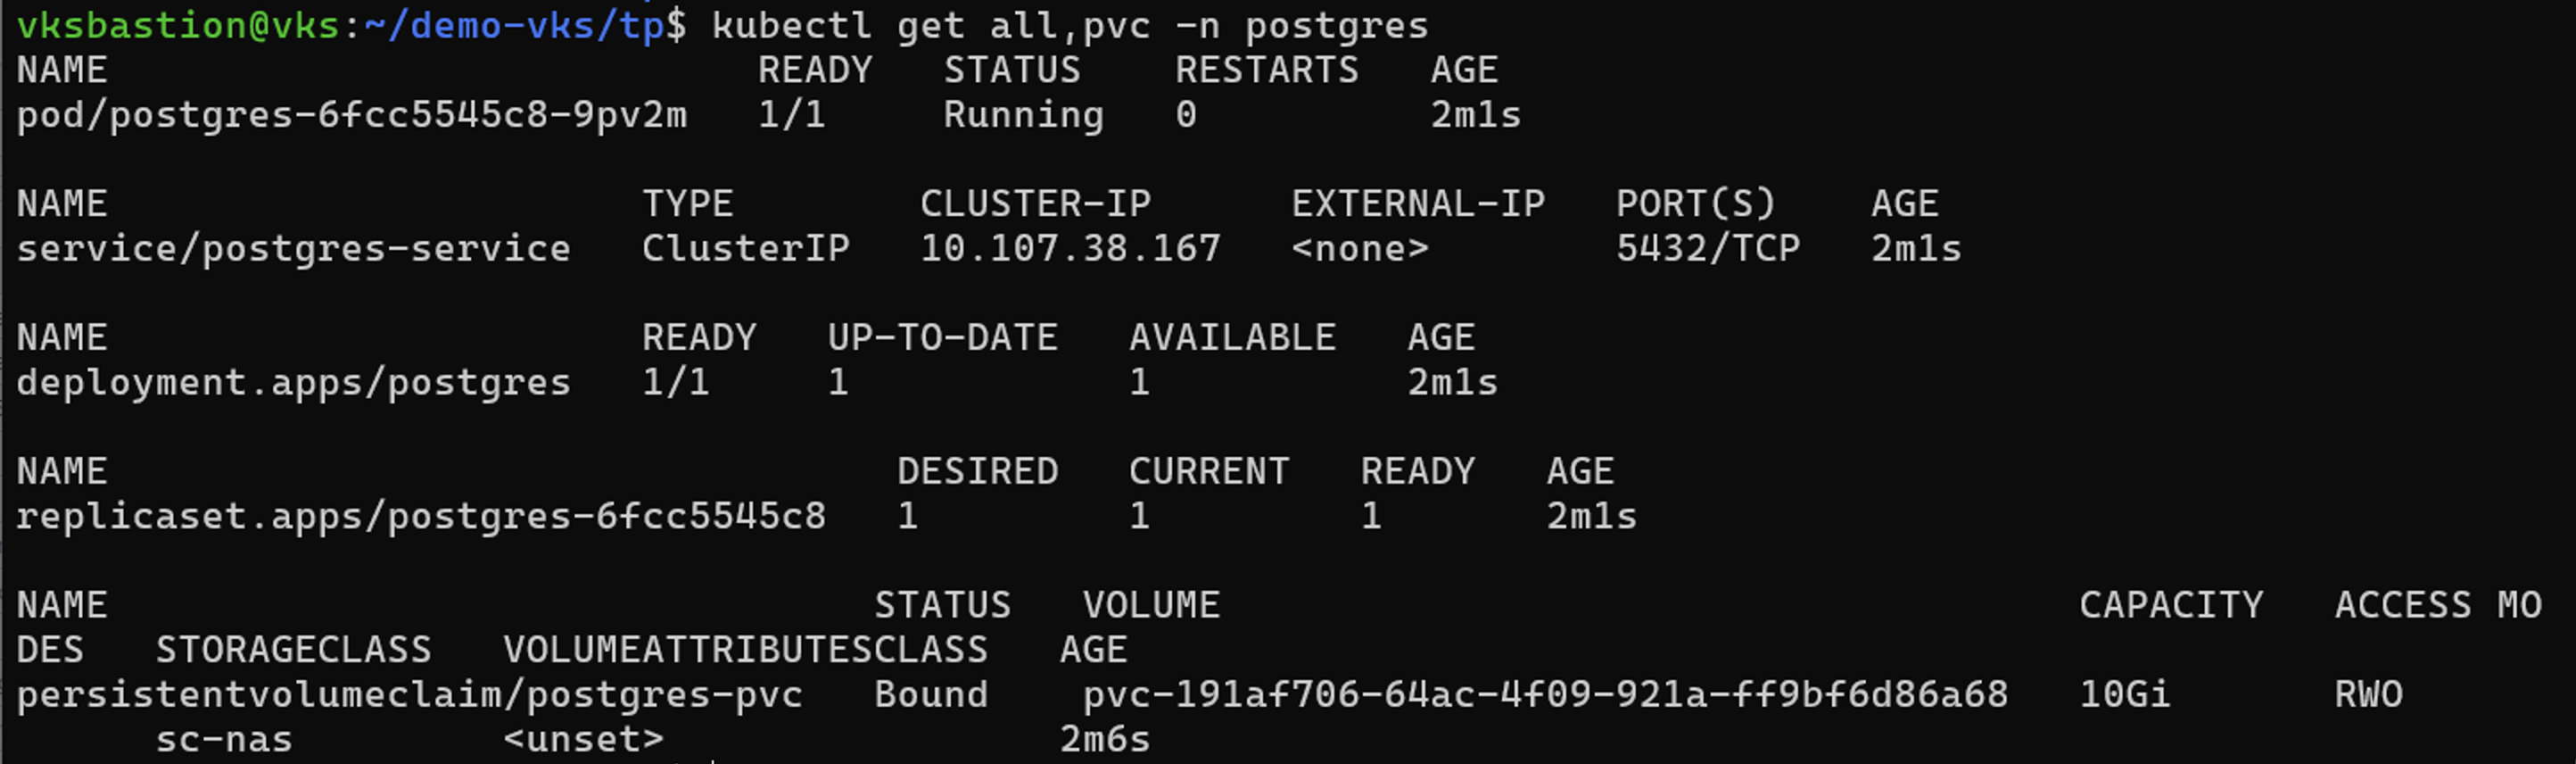
將應用程式還原到不同的命名空間
首先,建立一個新的命名空間,以便將應用程式還原至其中,本範例中為 postgres2。此時,postgres-app 已可使用依排程建立的每小時備份。使用此備份將應用程式還原至新的命名空間 postgres2。

# tp create backuprestore --appvault ontap-s3-appvault1 --path postgres-app_314bbaf6-2ce3-4065-b3c1-ab85c7bb7c7c/backups/hourly-cbd11-20260831124500_2b57bda9-5cb0-4c8f-ae7a-20f94c23c3b9 --namespace-mapping postgres:postgres2 -n postgres2 --dry-run>postgres-app-postgres2-br.yaml|
|
若要取得備份的路徑,請使用命令 kubectl get backups <backup-name> -n postgres -o jsonpath='{.status.appArchivePath}'。
|

apiVersion: protect.trident.netapp.io/v1
kind: BackupRestore
metadata:
  annotations:
    protect.trident.netapp.io/max-parallel-restore-jobs: "25"
  name: postgres-app-z2woek
  namespace: postgres2
spec:
  appArchivePath: postgres-app_314bbaf6-2ce3-4065-b3c1-ab85c7bb7c7c/backups/hourly-cbd11-20260831124500_2b57bda9-5cb0-4c8f-ae7a-20f94c23c3b9
  appVaultRef: ontap-s3-appvault1
  cleanUpAdditionalExecHooks: true
  cleanUpArchivedExecHooks: false
  namespaceMapping:
  - destination: postgres2
    source: postgres
  resourceFilter: {}
  runArchivedExecHooks: true
  skipApplicationCreation: false

# kubectl create -f postgres-app-postgres2-br.yaml -n postgres2
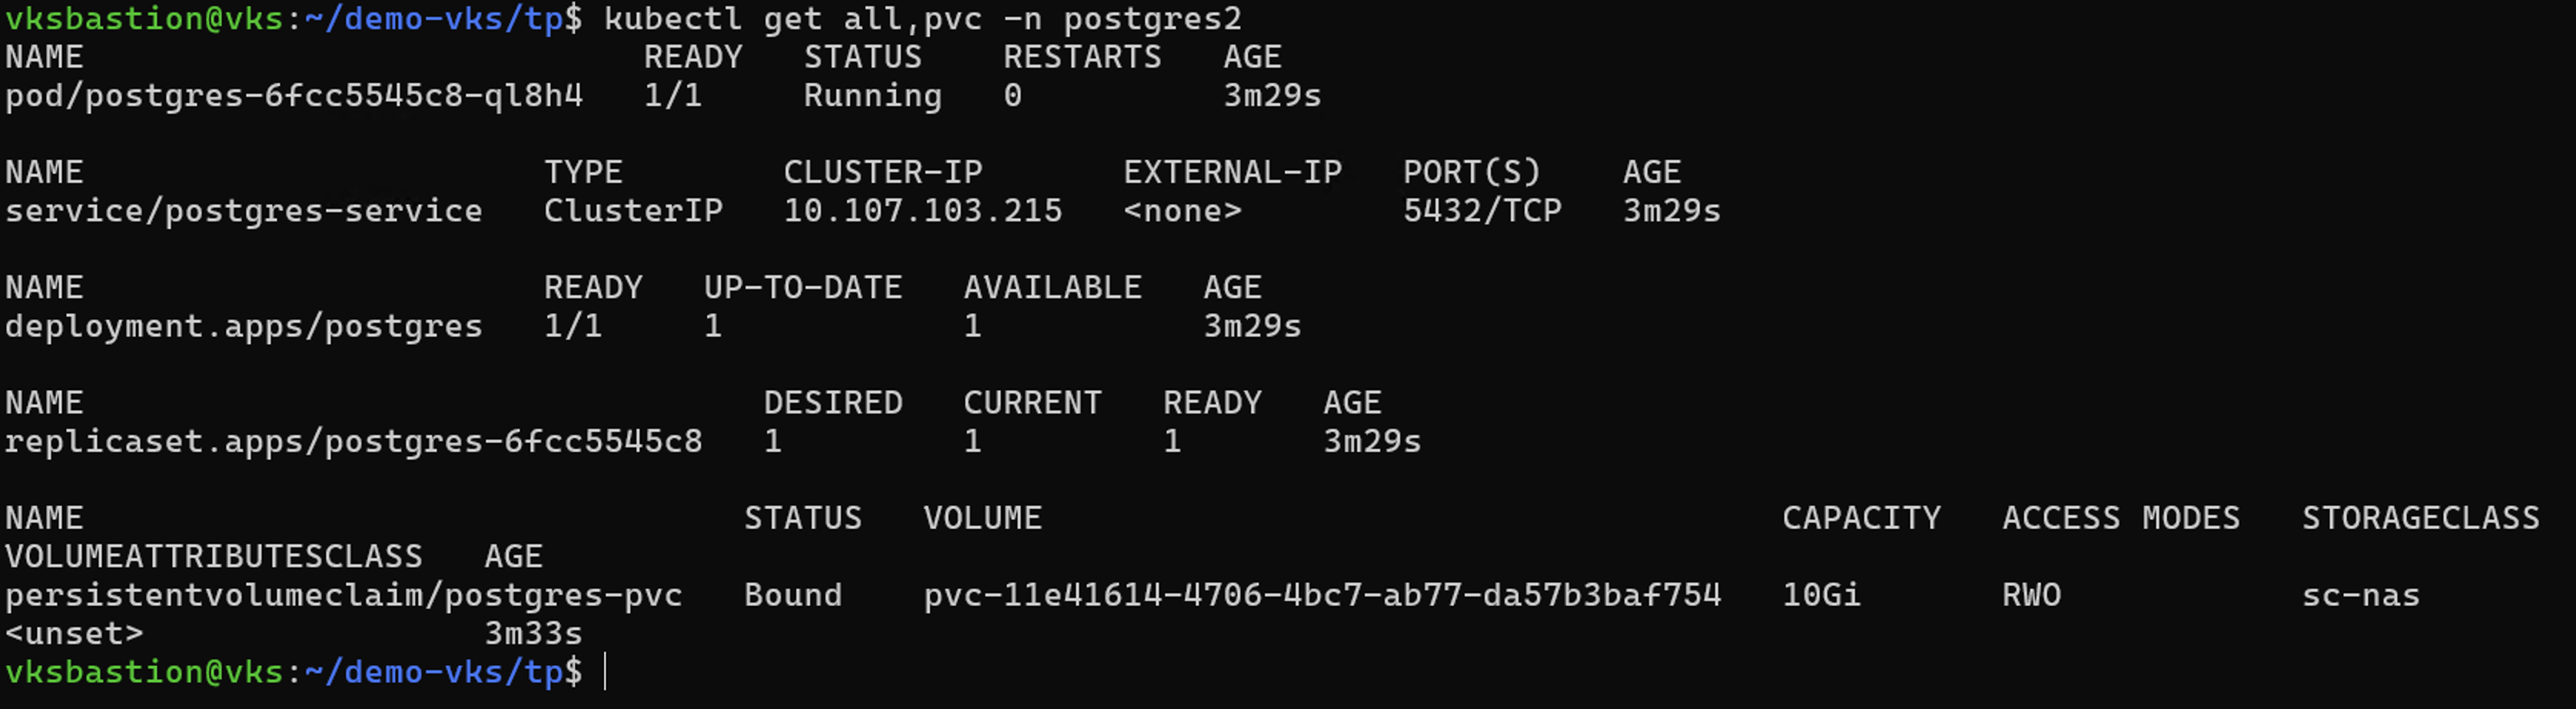
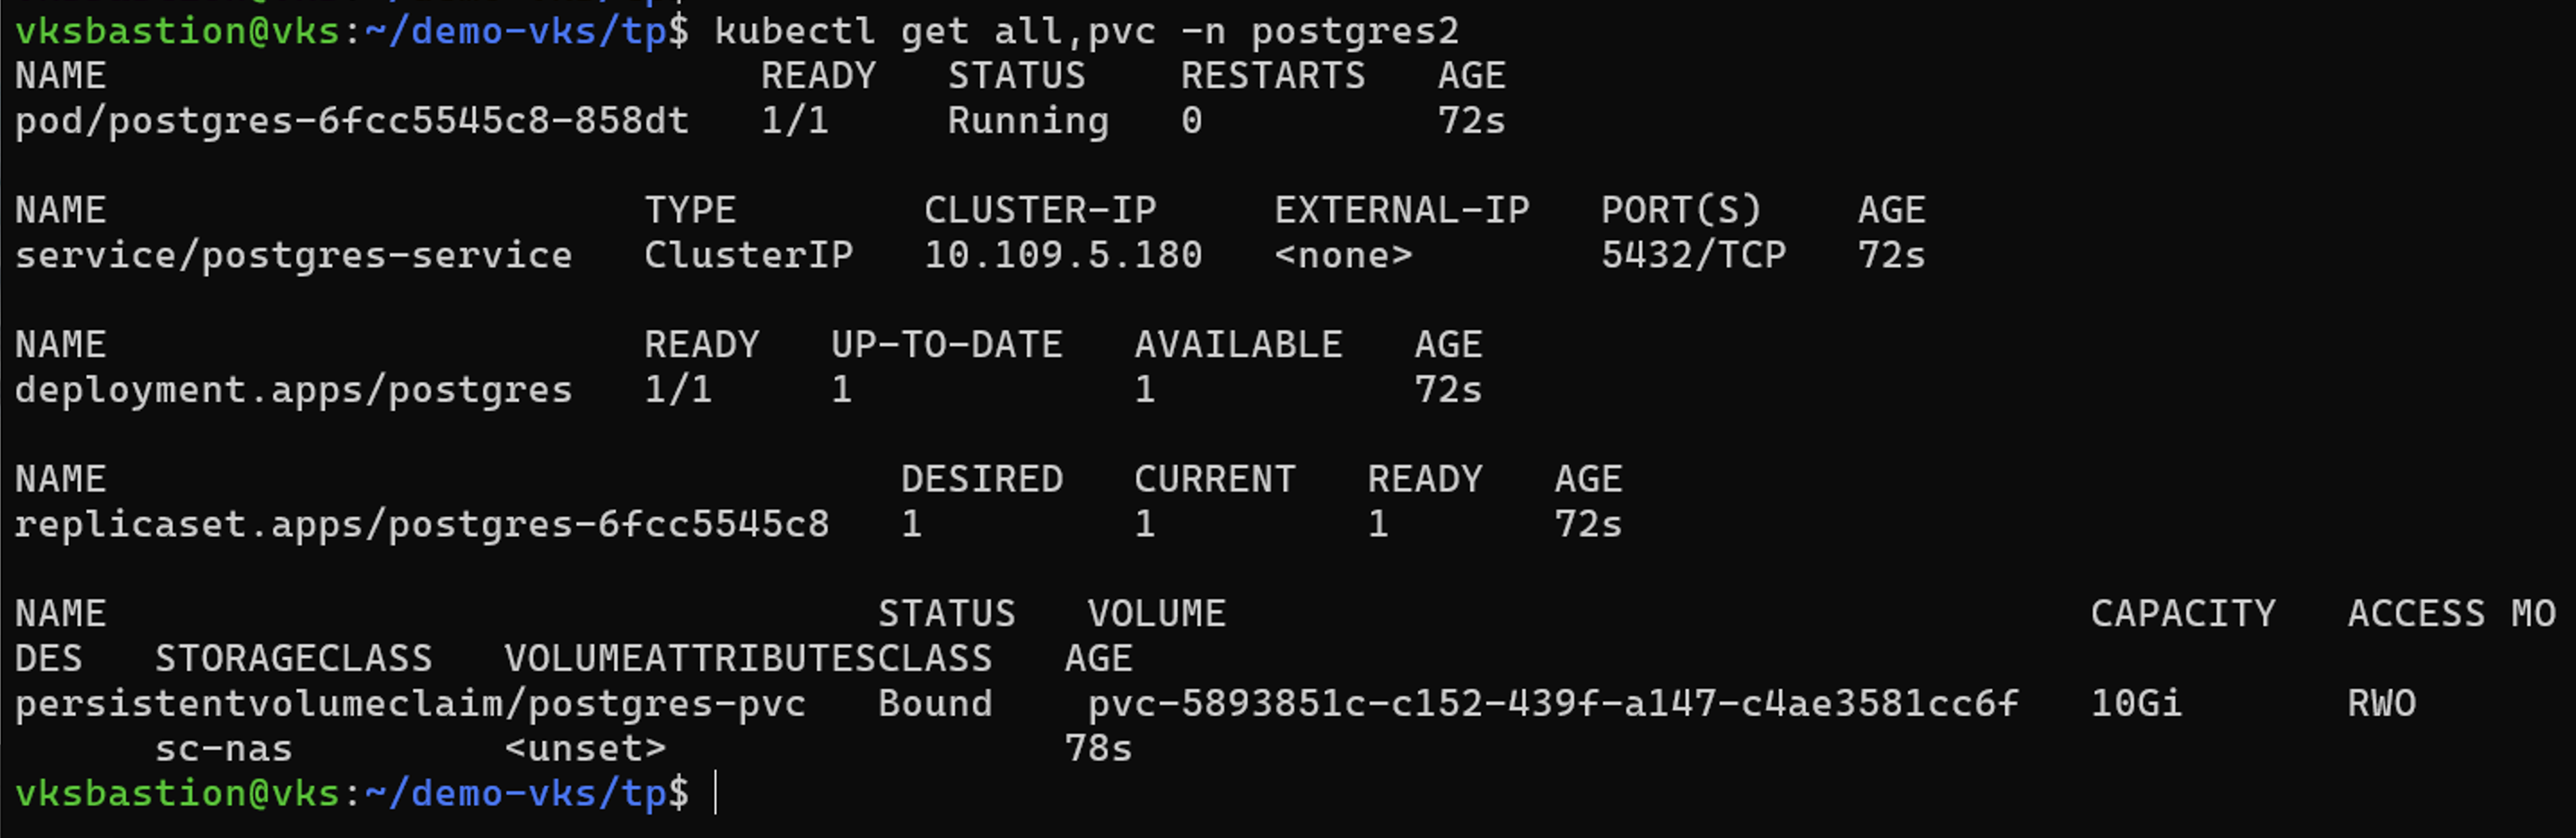
驗證 postgres 應用程式物件和 PVC 是否已在新命名空間 postgres2 中建立。
使用 Snapshot 快照技術保護應用程式
建立 Snapshot 快照技術
建立隨選 Snapshot 快照技術 為應用程式建立 Snapshot 快照技術,並指定 AppVault 以存放 Snapshot 快照技術中繼資料。Volume Snapshot 快照技術資料本身不會複製到物件儲存設備,而是保留在儲存設備後端。
# tp create snapshot postgres-app-snapshot-ondemand --app postgres-app --appvault ontap-s3-appvault1 -n postgres --dry-run>postgres-app-snapshot-ondemand.yaml

# cat postgres-app-snapshot-ondemand.yaml
apiVersion: protect.trident.netapp.io/v1
kind: Snapshot
metadata:
  name: postgres-app-snapshot-ondemand
  namespace: postgres
spec:
  appVaultRef: ontap-s3-appvault1
  applicationRef: postgres-app
  cleanupSnapshot: false
  completionTimeout: 0s
  volumeSnapshotsCreatedTimeout: 0s
  volumeSnapshotsReadyToUseTimeout: 0s

# kubectl create -f postgres-app-snapshot-ondemand.yaml
snapshot.protect.trident.netapp.io/postgres-app-snapshot-ondemand created
建立 Snapshot 快照技術計劃 建立 Snapshot 快照技術計劃。指定 Snapshot 快照技術的精細度以及要保留的 Snapshot 快照技術數量。
# tp create schedule snapshot-schedule1 --app postgres-app --appvault ontap-s3-appvault1 --granularity Hourly --minute 55 --snapshot-retention 1 -n postgres --dry-run>postgres-app-snapshot-schedule1.yaml

# cat postgres-app-snapshot-schedule1.yaml
apiVersion: protect.trident.netapp.io/v1
kind: Schedule
metadata:
  name: snapshot-schedule1
  namespace: postgres
spec:
  appVaultRef: ontap-s3-appvault1
  applicationRef: postgres-app
  backupRetention: "0"
  dayOfMonth: ""
  dayOfWeek: ""
  enabled: true
  granularity: Hourly
  hour: ""
  minute: "55"
  recurrenceRule: ""
  replicationRetention: "0"
  runImmediately: false
  snapshotRetention: "1"

# kubectl create -f postgres-app-snapshot-schedule1.yaml
schedule.protect.trident.netapp.io/snapshot-schedule1 created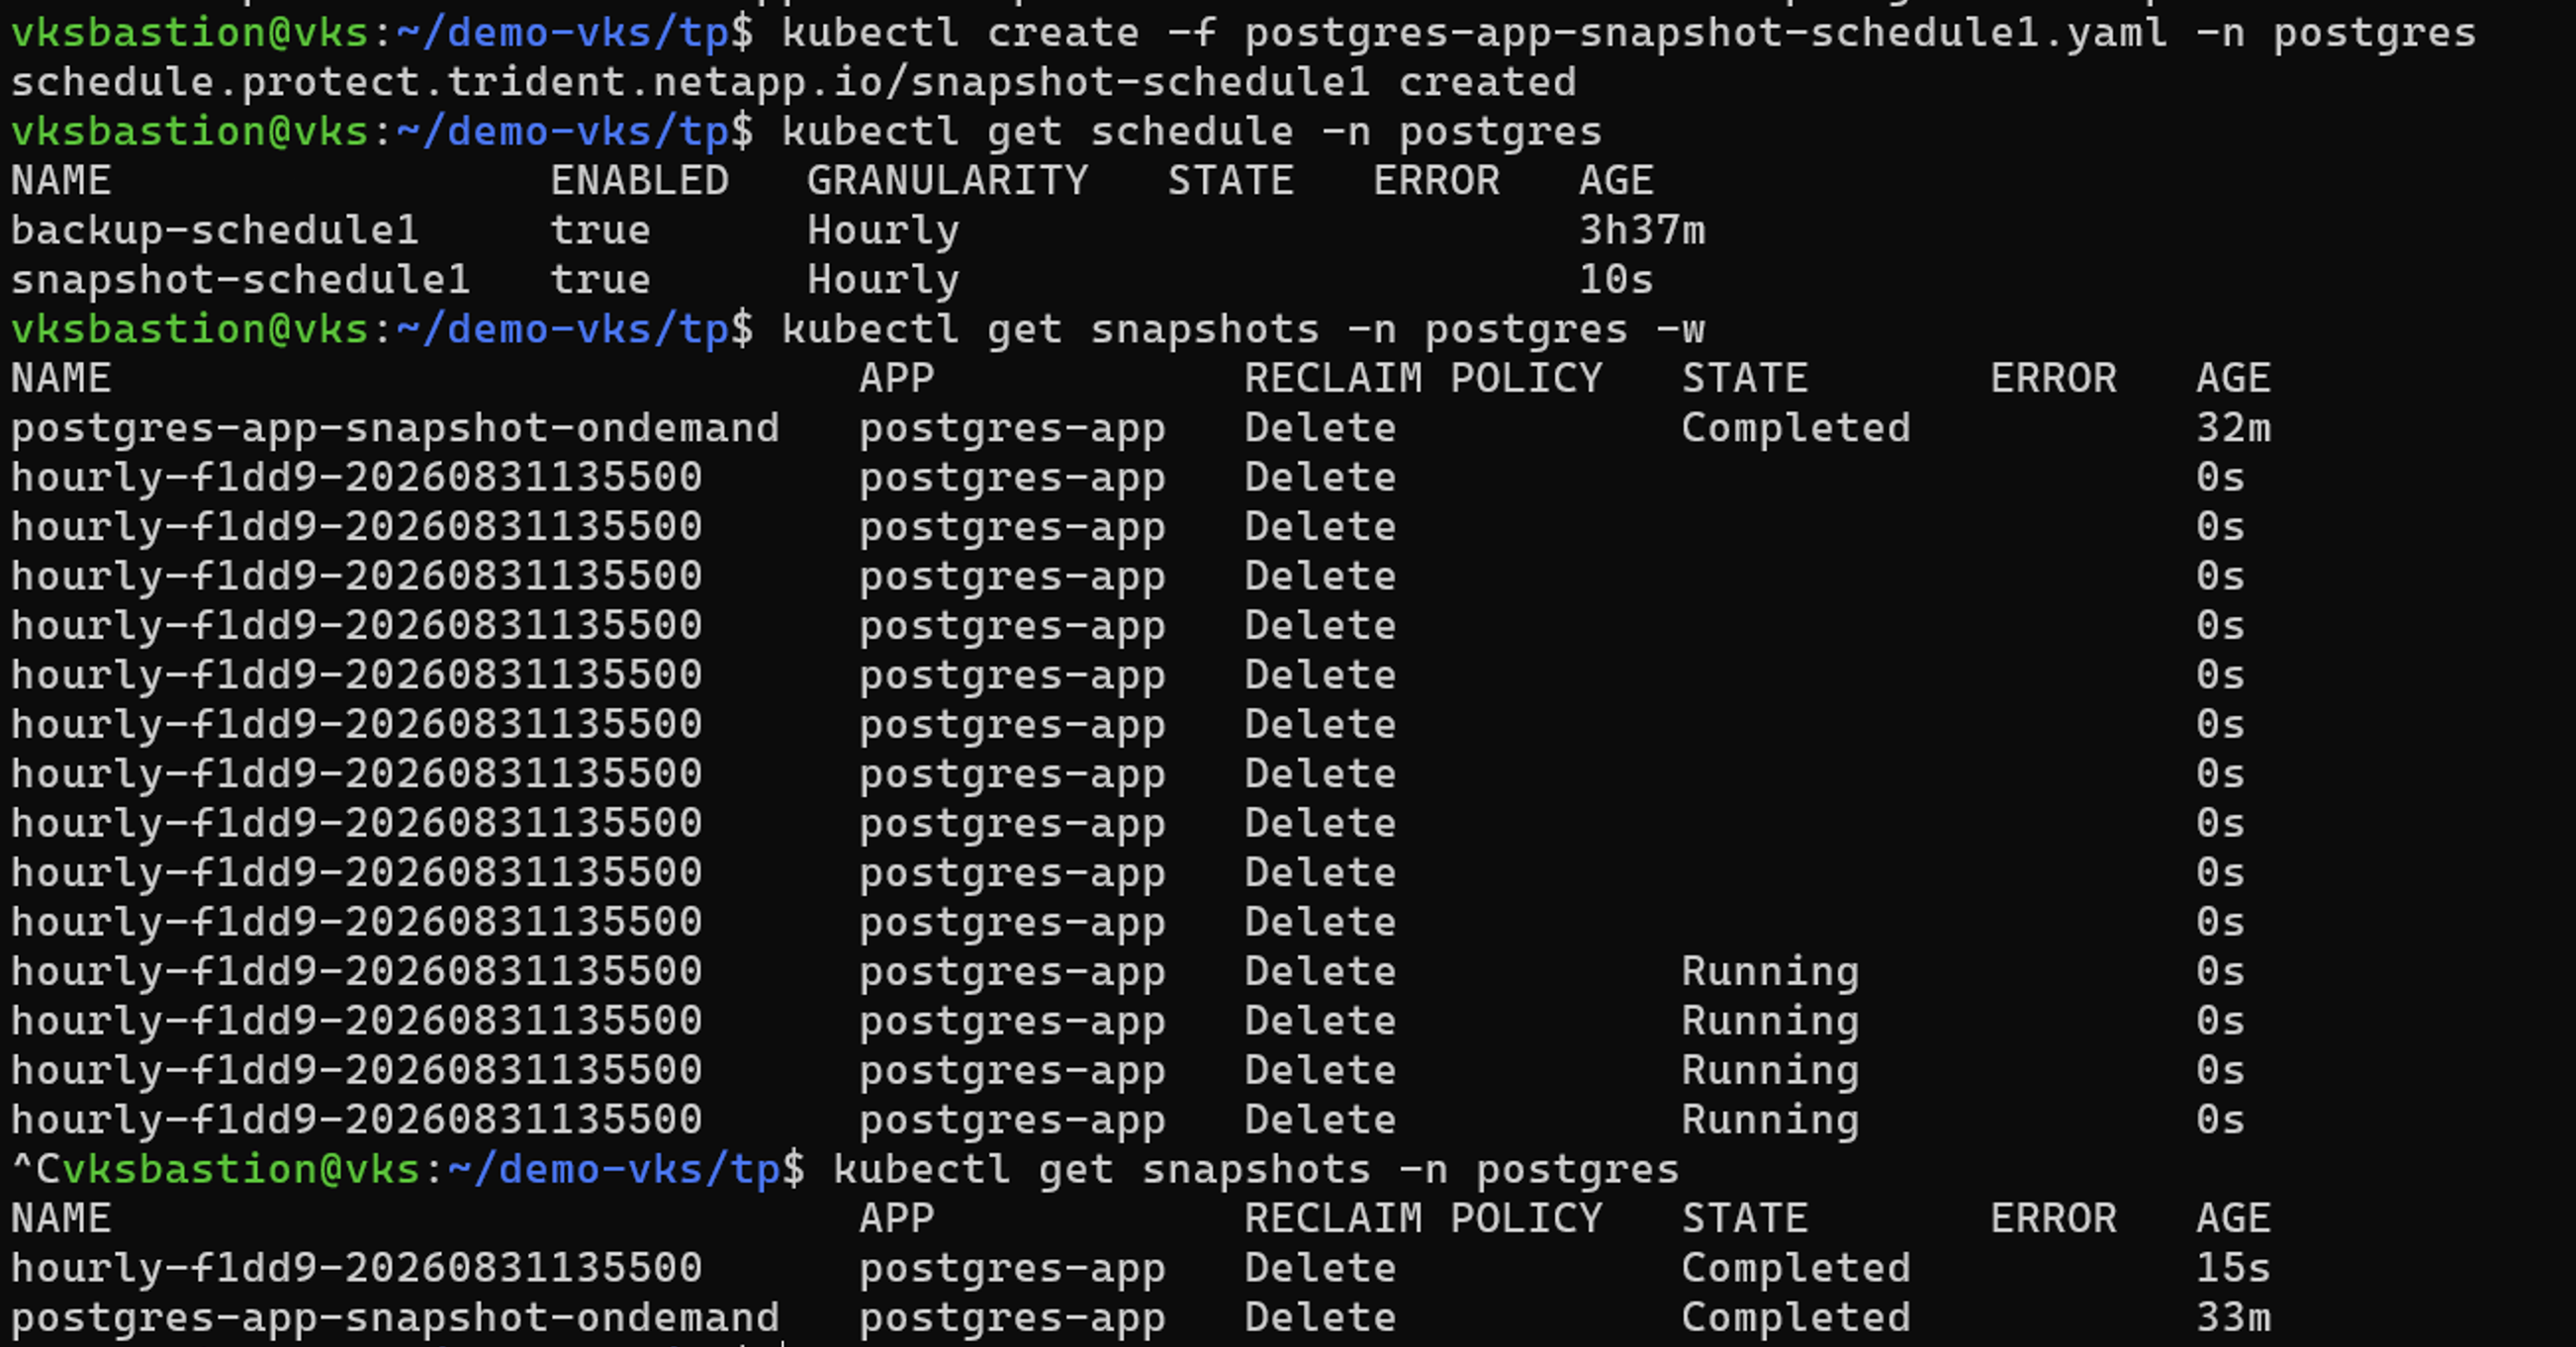
從 Snapshot 快照技術還原
從 Snapshot 快照技術還原
將應用程式從 Snapshot 快照技術還原至相同命名空間
刪除應用程式之前,請確認您計劃從中還原的 Snapshot 快照技術處於 `Completed`狀態。進行中或失敗的 Snapshot 快照技術無法用於還原應用程式。
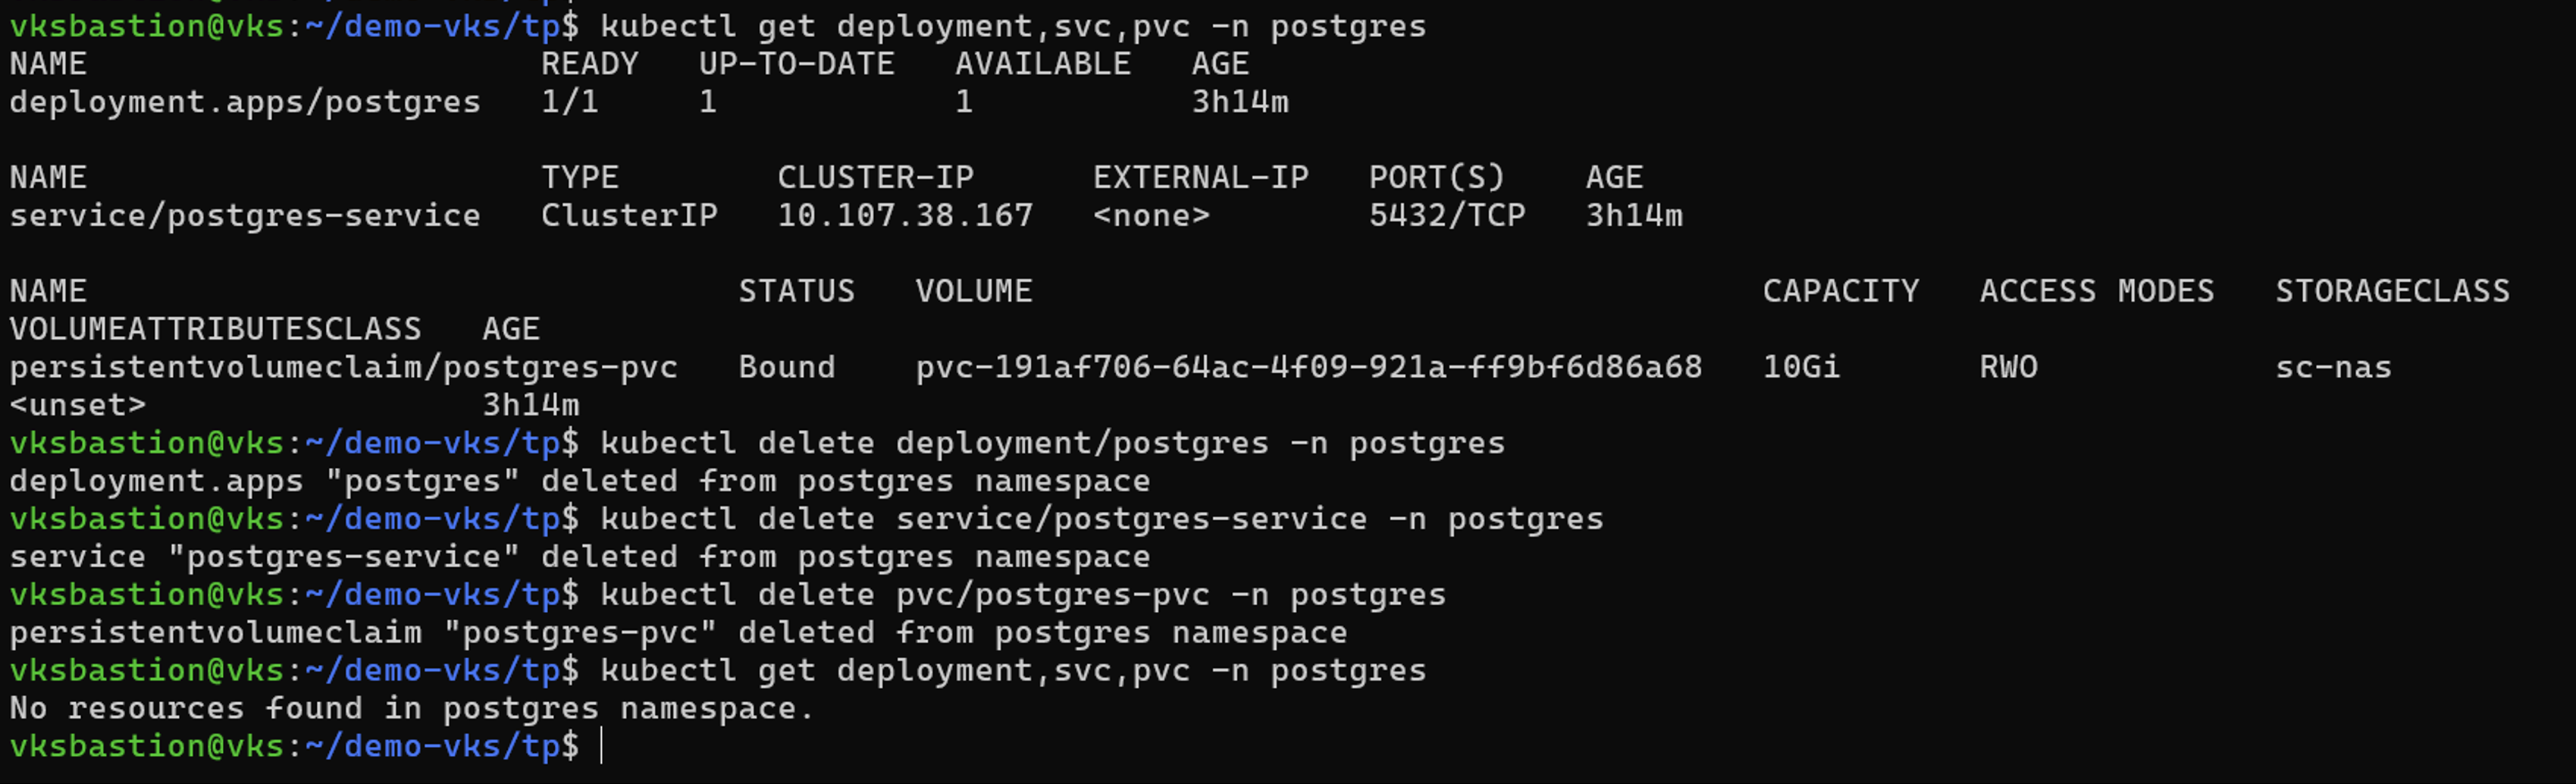
kubectl get snapshot -n postgres確認 Snapshot 快照技術狀態為 `Completed`後,從 postgres 命名空間中刪除 postgres 的應用程式物件和 PVC。
從 Snapshot 快照技術建立原地還原物件。
# tp create sir postgres-restore-from-snapshot --snapshot postgres/hourly-f1dd9-20260831135500 -n postgres --dry-run > postgres-sir.yaml

# cat postgres-sir.yaml
apiVersion: protect.trident.netapp.io/v1
kind: SnapshotInplaceRestore
metadata:
  name: postgres-restore-from-snapshot
  namespace: postgres
spec:
  appArchivePath: postgres-app_314bbaf6-2ce3-4065-b3c1-ab85c7bb7c7c/snapshots/20260831135500_hourly-f1dd9-20260831135500_36c2bd2a-9405-4424-88a7-75e6bbc5b315
  appVaultRef: ontap-s3-appvault1
  cleanUpAdditionalExecHooks: true
  cleanUpArchivedExecHooks: false
  resourceFilter: {}
  runArchivedExecHooks: true

# kubectl create -f postgres-sir.yaml
snapshotinplacerestore.protect.trident.netapp.io/postgres-restore-from-snapshot created
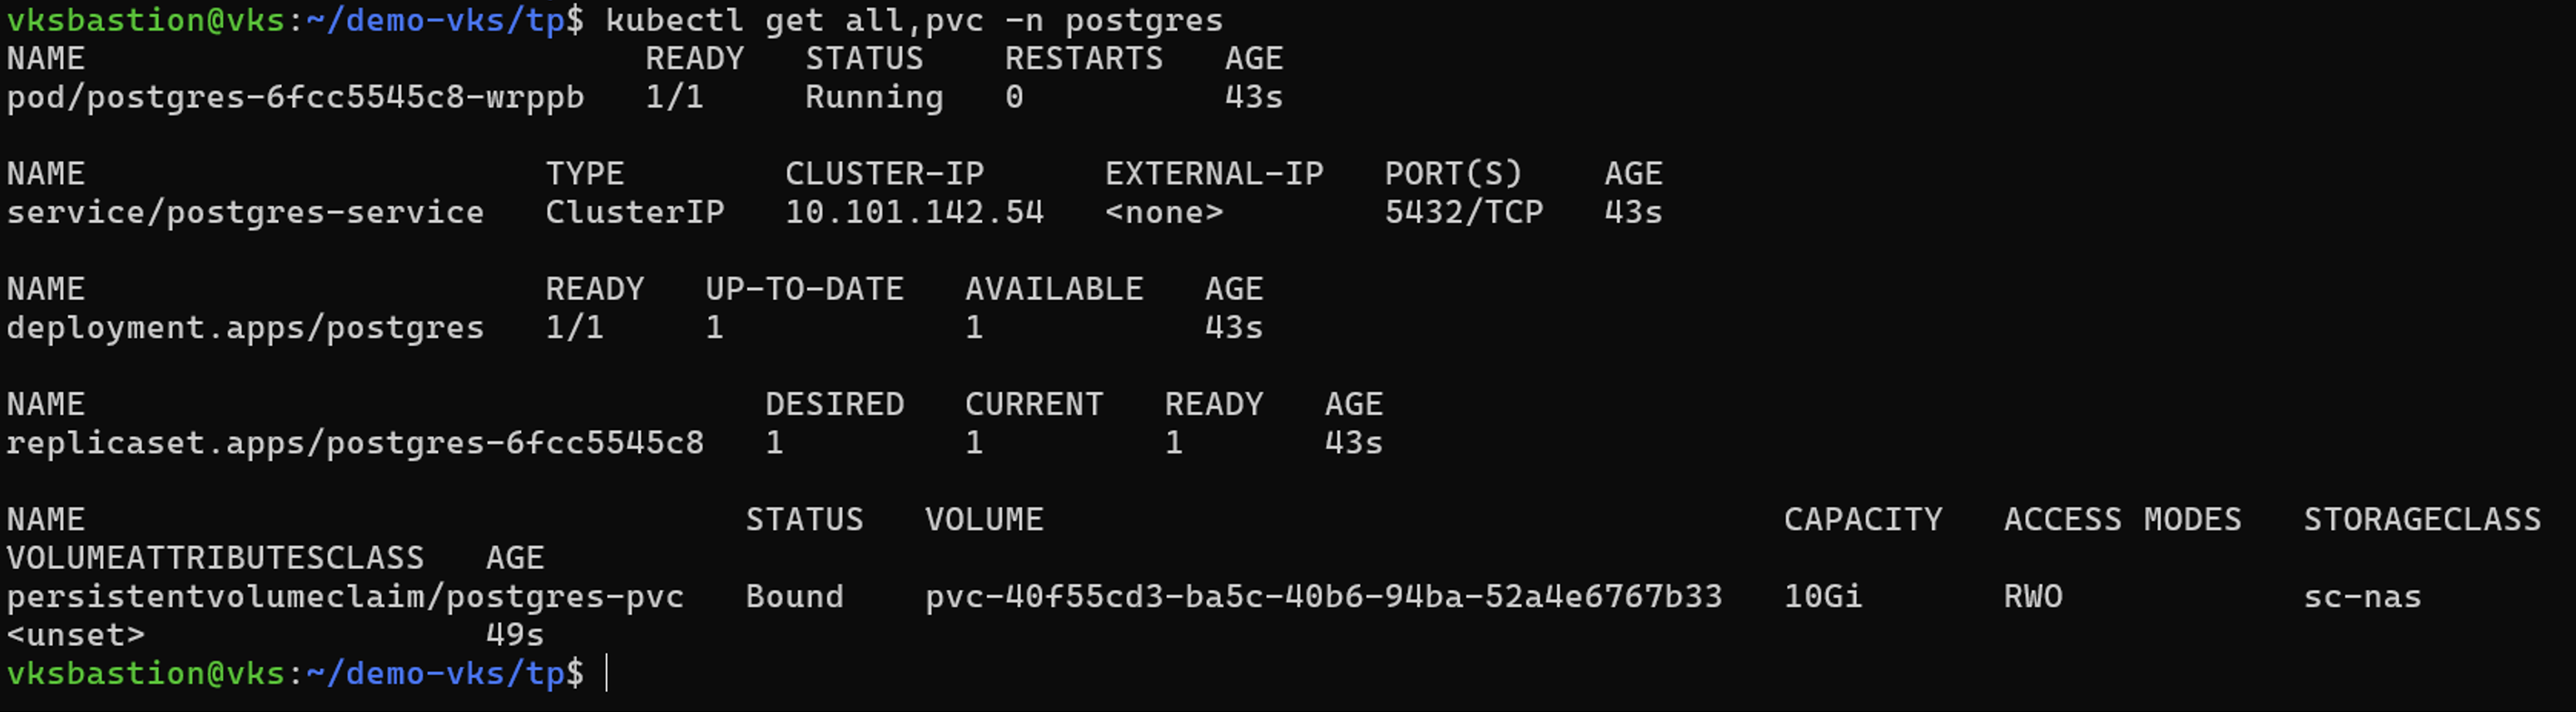
確認應用程式的物件和 PVC 是否在 postgres 命名空間中建立。
將應用程式從 Snapshot 快照技術還原至不同的命名空間
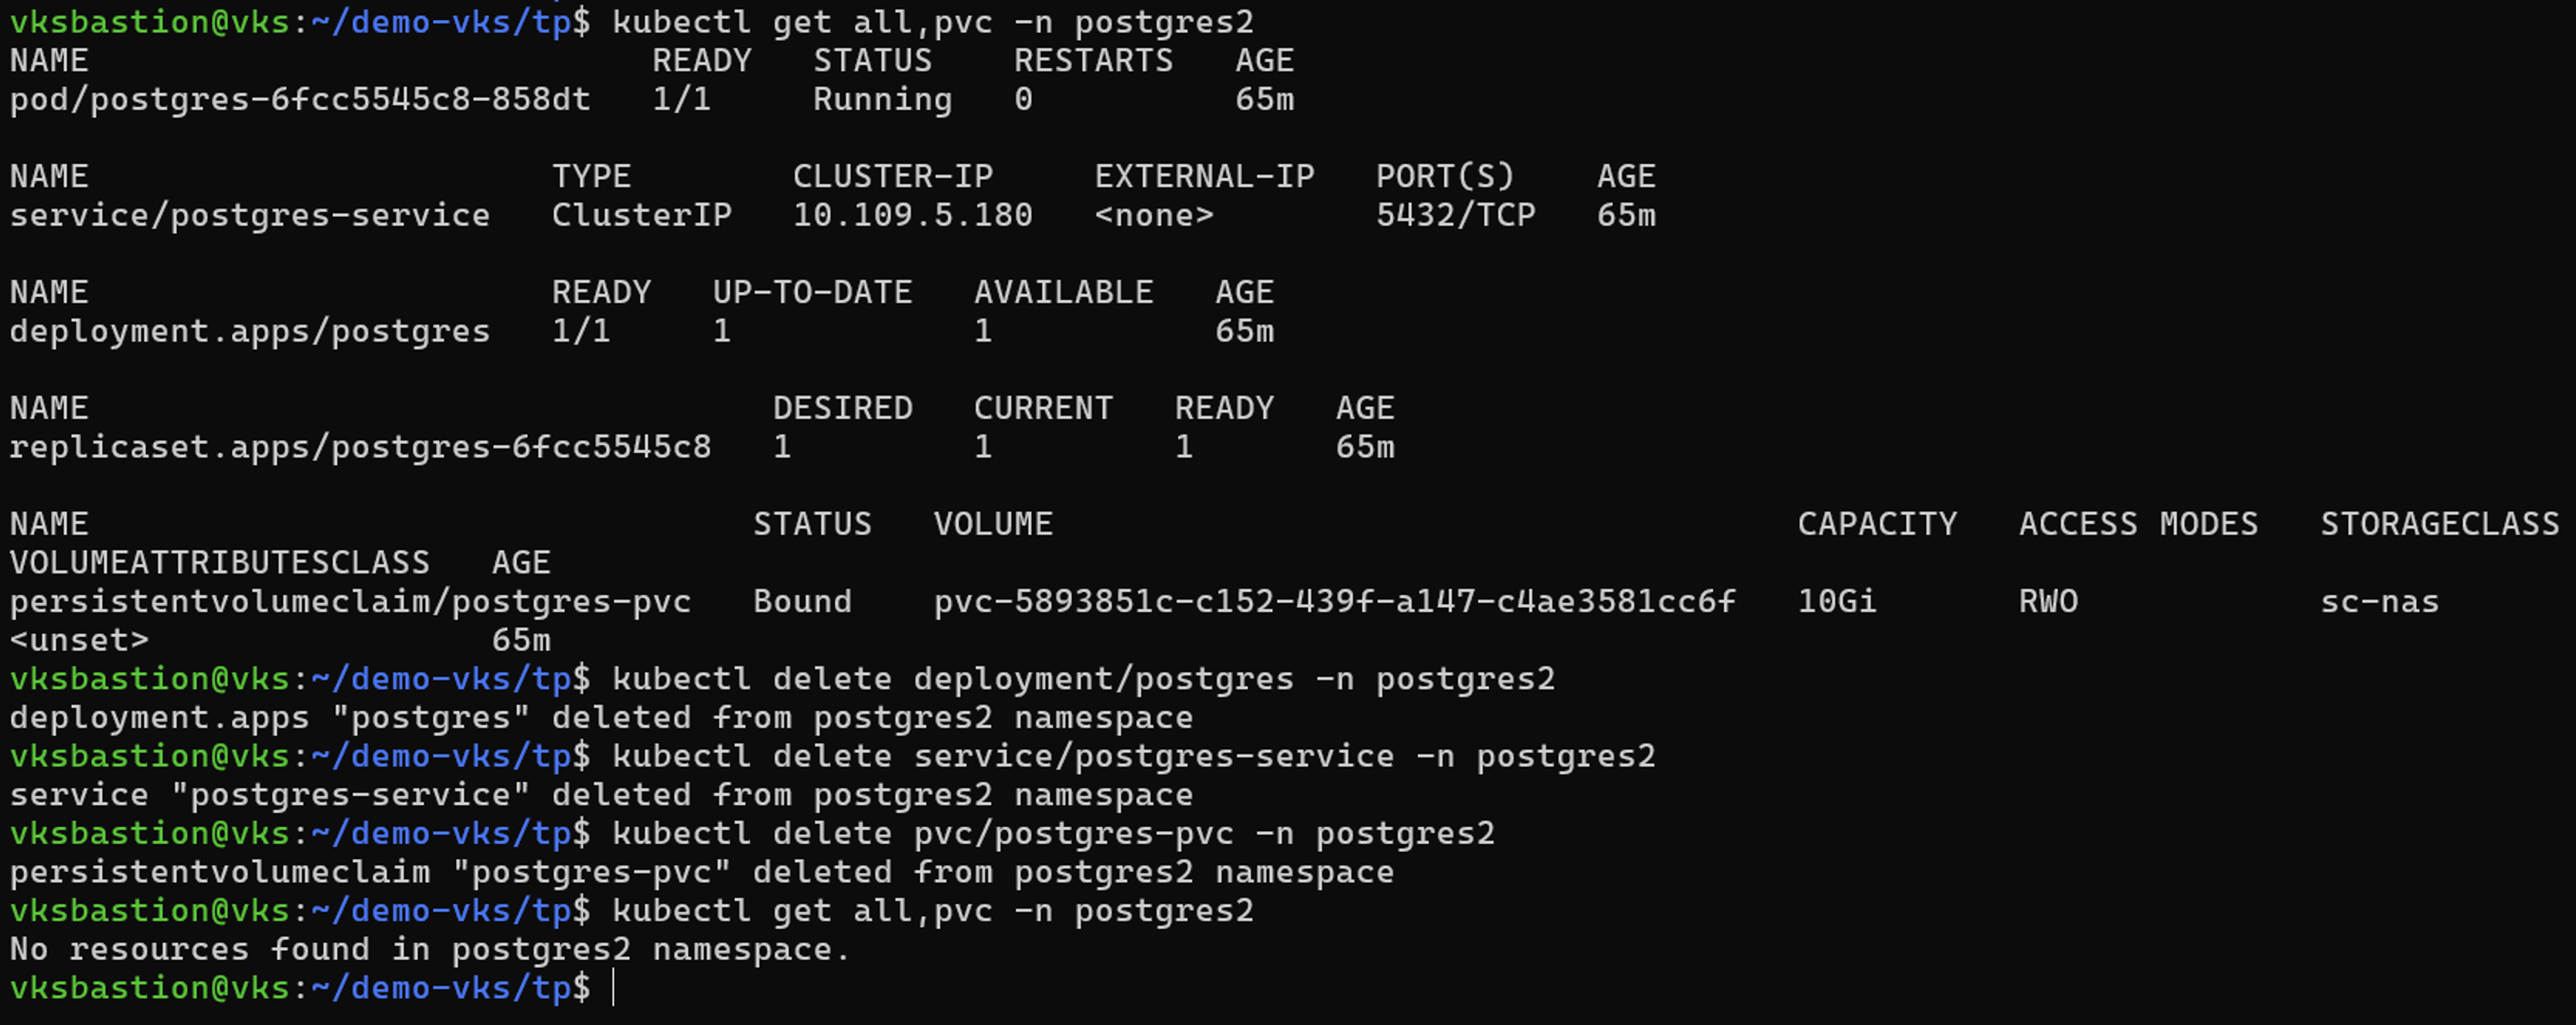
刪除先前從備份還原的 postgres2 命名空間中的應用程式。
從 Snapshot 快照技術建立 Snapshot 快照技術還原物件,並提供命名空間映射。
# tp create sr postgres-sr --snapshot postgres/hourly-f1dd9-20260831135500 --namespace-mapping postgres:postgres2 -n postgres2 --dry-run>postgres-sr.yaml

# cat postgres-sr.yaml
apiVersion: protect.trident.netapp.io/v1
kind: SnapshotRestore
metadata:
  name: postgres-sr
  namespace: postgres2
spec:
  appArchivePath: postgres-app_314bbaf6-2ce3-4065-b3c1-ab85c7bb7c7c/snapshots/20260831135500_hourly-f1dd9-20260831135500_36c2bd2a-9405-4424-88a7-75e6bbc5b315
  appVaultRef: ontap-s3-appvault1
  cleanUpAdditionalExecHooks: true
  cleanUpArchivedExecHooks: false
  namespaceMapping:
  - destination: postgres2
    source: postgres
  resourceFilter: {}
  runArchivedExecHooks: true
  skipApplicationCreation: false

# kubectl create -f postgres-sr.yaml
snapshotrestore.protect.trident.netapp.io/postgres-sr created
驗證應用程式的物件和 PVC 是否已在 postgres2 命名空間中還原。