

Install Astra Control Center using OpenShift OperatorHub
 Suggest changes
If you use Red Hat OpenShift, you can install Astra Control Center using the Red Hat certified operator. Use this procedure to install Astra Control Center from the Red Hat Ecosystem Catalog or using the Red Hat OpenShift Container Platform.
After you complete this procedure, you must return to the installation procedure to complete the remaining steps to verify installation success and log on.
-
Meet environmental prerequisites: Before you begin installation, prepare your environment for Astra Control Center deployment.

Deploy Astra Control Center in a third fault domain or secondary site. This is recommended for app replication and seamless disaster recovery. -
Ensure healthy cluster operators and API services:
-
From your OpenShift cluster, ensure all cluster operators are in a healthy state:
oc get clusteroperators -
From your OpenShift cluster, ensure all API services are in a healthy state:
oc get apiservices
-
-
Ensure a routable FQDN: The Astra FQDN you plan to use can be routed to the cluster. This means that you either have a DNS entry in your internal DNS server or you are using a core URL route that is already registered.
-
Obtain OpenShift permissions: You'll need all necessary permissions and access to the Red Hat OpenShift Container Platform to perform the installation steps described.
-
Configure a cert manager: If a cert manager already exists in the cluster, you need to perform some prerequisite steps so that Astra Control Center does not install its own cert manager. By default, Astra Control Center installs its own cert manager during installation.
-
Set up Kubernetes ingress controller: If you have a Kubernetes ingress controller that manages external access to services, such as load balancing in a cluster, you need to set it up for use with Astra Control Center:
-
Create the operator namespace:
oc create namespace netapp-acc-operator
-
Complete setup for your ingress controller type.
-
-
(ONTAP SAN driver only) Enable multipath: If you are using an ONTAP SAN driver, be sure that multipath is enabled on all your Kubernetes clusters.
You should also consider the following:
-
Get access to the NetApp Astra Control image registry:
You have the option to obtain installation images and functionality enhancements for Astra Control, such as Astra Control Provisioner, from the NetApp image registry.
-
Record your Astra Control account ID that you'll need to log in to the registry.
You can see your account ID in the Astra Control Service web UI. Select the figure icon at the top right of the page, select API access, and write down your account ID.
-
From the same page, select Generate API token and copy the API token string to the clipboard and save it in your editor.
-
Log into the Astra Control registry:
docker login cr.astra.netapp.io -u <account-id> -p <api-token>
-
-
Install a service mesh for secure communications: It is strongly recommended that Astra Control host cluster communications channels be secured using a supported service mesh.

Integrating Astra Control Center with a service mesh can only be done during Astra Control Center installation and not independent of this process. Changing back from a meshed to an unmeshed environment is not supported. For Istio service mesh use, you'll need to do the following:
-
Add an
istio-injection:enabledlabel to the Astra namespace prior to deploying Astra Control Center. -
Use the
Genericingress setting and provide an alternative ingress for external load balancing. -
For Red Hat OpenShift clusters, you'll need to define
NetworkAttachmentDefinitionon all associated Astra Control Center namespaces (netapp-acc-operator,netapp-acc,netapp-monitoringfor application clusters, or any custom namespaces that have been substituted).cat <<EOF | oc -n netapp-acc-operator create -f - apiVersion: "k8s.cni.cncf.io/v1" kind: NetworkAttachmentDefinition metadata: name: istio-cni EOF cat <<EOF | oc -n netapp-acc create -f - apiVersion: "k8s.cni.cncf.io/v1" kind: NetworkAttachmentDefinition metadata: name: istio-cni EOF cat <<EOF | oc -n netapp-monitoring create -f - apiVersion: "k8s.cni.cncf.io/v1" kind: NetworkAttachmentDefinition metadata: name: istio-cni EOF
-
|
|
Do not delete the Astra Control Center operator (for example, kubectl delete -f astra_control_center_operator_deploy.yaml) at any time during Astra Control Center installation or operation to avoid deleting pods.
|
Download and extract Astra Control Center
Download the Astra Control Center images from one of the following locations:
-
Astra Control Service image registry: Use this option if you don't use a local registry with the Astra Control Center images or if you prefer this method to the bundle download from the NetApp Support Site.
-
NetApp Support Site: Use this option if you use a local registry with the Astra Control Center images.
-
Log in to Astra Control Service.
-
On the Dashboard, select Deploy a self-managed instance of Astra Control.
-
Follow the instructions to log in to the Astra Control image registry, pull the Astra Control Center installation image, and extract the image.
-
Download the bundle containing Astra Control Center (
astra-control-center-[version].tar.gz) from the Astra Control Center downloads page. -
(Recommended but optional) Download the certificates and signatures bundle for Astra Control Center (
astra-control-center-certs-[version].tar.gz) to verify the signature of the bundle.tar -vxzf astra-control-center-certs-[version].tar.gzopenssl dgst -sha256 -verify certs/AstraControlCenter-public.pub -signature certs/astra-control-center-[version].tar.gz.sig astra-control-center-[version].tar.gzThe output will show
Verified OKafter successful verification. -
Extract the images from the Astra Control Center bundle:
tar -vxzf astra-control-center-[version].tar.gz
Complete additional steps if you use a local registry
If you are planning to push the Astra Control Center bundle to your local registry, you need to use the NetApp Astra kubectl command line plugin.
Install the NetApp Astra kubectl plugin
Complete these steps to install the most recent NetApp Astra kubectl command line plugin.
NetApp provides plugin binaries for different CPU architectures and operating systems. You need to know which CPU and operating system you have before you perform this task.
If you already have the plugin installed from a previous installation, make sure you have the latest version before completing these steps.
-
List the available NetApp Astra kubectl plugin binaries, and note the name of the file you need for your operating system and CPU architecture:

The kubectl plugin library is part of the tar bundle and is extracted into the folder kubectl-astra.ls kubectl-astra/ -
Move the correct binary into the current path and rename it to
kubectl-astra:cp kubectl-astra/<binary-name> /usr/local/bin/kubectl-astra
Add the images to your registry
-
If you are planning to push the Astra Control Center bundle to your local registry, complete the appropriate step sequence for your container engine:
Docker-
Change to the root directory of the tarball. You should see the
acc.manifest.bundle.yamlfile and these directories:acc/
kubectl-astra/
acc.manifest.bundle.yaml -
Push the package images in the Astra Control Center image directory to your local registry. Make the following substitutions before running the
push-imagescommand:-
Replace <BUNDLE_FILE> with the name of the Astra Control bundle file (
acc.manifest.bundle.yaml). -
Replace <MY_FULL_REGISTRY_PATH> with the URL of the Docker repository; for example, "https://<docker-registry>".
-
Replace <MY_REGISTRY_USER> with the user name.
-
Replace <MY_REGISTRY_TOKEN> with an authorized token for the registry.
kubectl astra packages push-images -m <BUNDLE_FILE> -r <MY_FULL_REGISTRY_PATH> -u <MY_REGISTRY_USER> -p <MY_REGISTRY_TOKEN>
-
Podman-
Change to the root directory of the tarball. You should see this file and directory:
acc/
kubectl-astra/
acc.manifest.bundle.yaml -
Log in to your registry:
podman login <YOUR_REGISTRY> -
Prepare and run one of the following scripts that is customized for the version of Podman you use. Substitute <MY_FULL_REGISTRY_PATH> with the URL of your repository that includes any sub-directories.
Podman 4export REGISTRY=<MY_FULL_REGISTRY_PATH> export PACKAGENAME=acc export PACKAGEVERSION=24.02.0-69 export DIRECTORYNAME=acc for astraImageFile in $(ls ${DIRECTORYNAME}/images/*.tar) ; do astraImage=$(podman load --input ${astraImageFile} | sed 's/Loaded image: //') astraImageNoPath=$(echo ${astraImage} | sed 's:.*/::') podman tag ${astraImageNoPath} ${REGISTRY}/netapp/astra/${PACKAGENAME}/${PACKAGEVERSION}/${astraImageNoPath} podman push ${REGISTRY}/netapp/astra/${PACKAGENAME}/${PACKAGEVERSION}/${astraImageNoPath} donePodman 3export REGISTRY=<MY_FULL_REGISTRY_PATH> export PACKAGENAME=acc export PACKAGEVERSION=24.02.0-69 export DIRECTORYNAME=acc for astraImageFile in $(ls ${DIRECTORYNAME}/images/*.tar) ; do astraImage=$(podman load --input ${astraImageFile} | sed 's/Loaded image: //') astraImageNoPath=$(echo ${astraImage} | sed 's:.*/::') podman tag ${astraImageNoPath} ${REGISTRY}/netapp/astra/${PACKAGENAME}/${PACKAGEVERSION}/${astraImageNoPath} podman push ${REGISTRY}/netapp/astra/${PACKAGENAME}/${PACKAGEVERSION}/${astraImageNoPath} done
The image path the script creates should resemble the following, depending on your registry configuration: https://downloads.example.io/docker-astra-control-prod/netapp/astra/acc/24.02.0-69/image:version
-
-
Change the directory:
cd manifests
Find the operator install page
-
Complete one of the following procedures to access the operator install page:
Red Hat OpenShift web console-
Log in to the OpenShift Container Platform UI.
-
From the side menu, select Operators > OperatorHub.
You can upgrade only to the current version of Astra Control Center using this operator. -
Search for
netapp-accand select the NetApp Astra Control Center operator.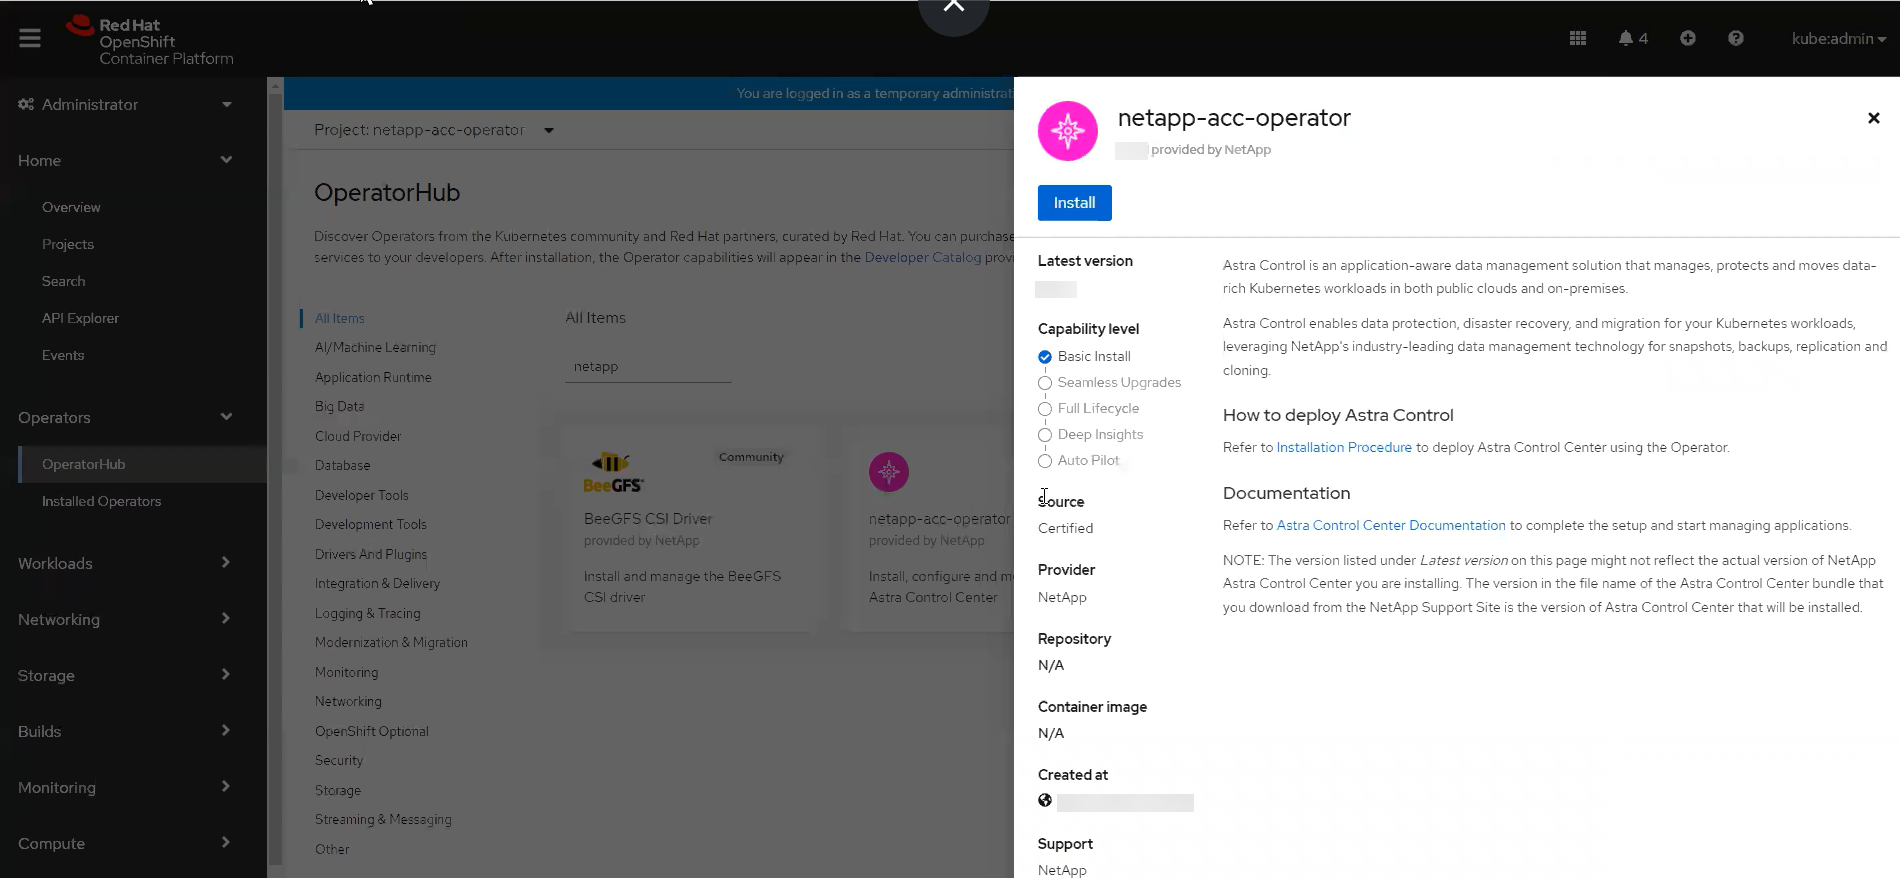
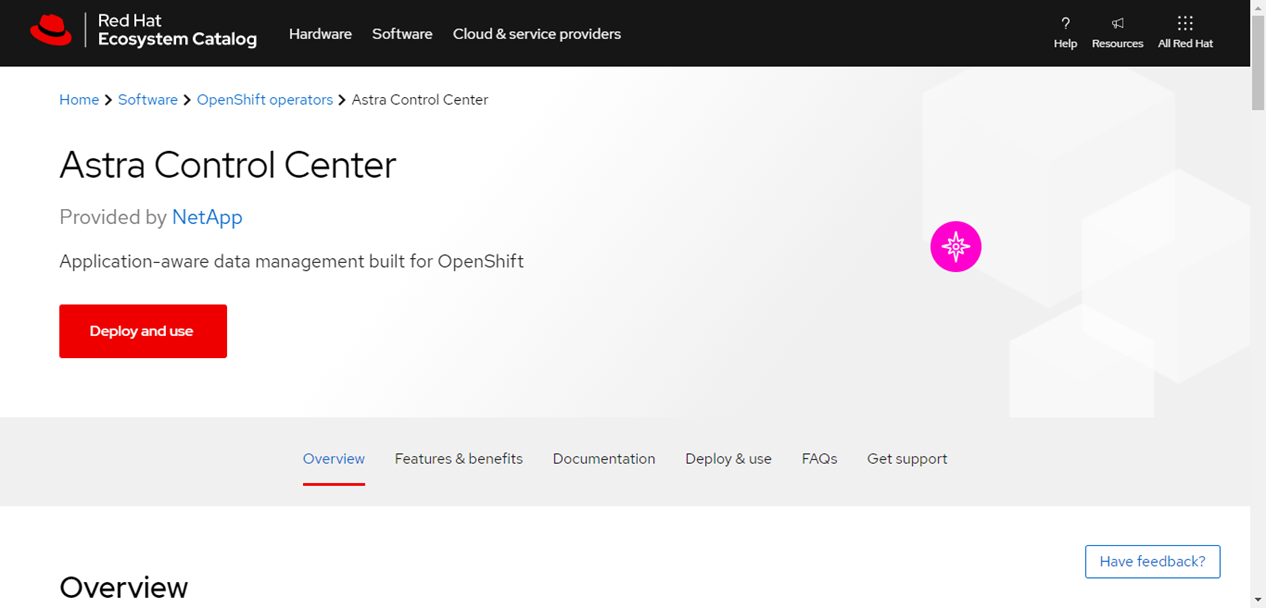
Red Hat Ecosystem Catalog-
Select the NetApp Astra Control Center operator.
-
Select Deploy and use.
-
Install the operator
-
Complete the Install Operator page and install the operator:
The operator will be available in all cluster namespaces. -
Select the operator namespace or
netapp-acc-operatornamespace will be created automatically as part of the operator installation. -
Select a manual or automatic approval strategy.
Manual approval is recommended. You should only have a single operator instance running per cluster. -
Select Install.
If you selected a manual approval strategy, you'll be prompted to approve the manual install plan for this operator.
-
-
From the console, go to the OperatorHub menu and confirm that the operator installed successfully.
Install Astra Control Center
-
From the console within the Astra Control Center tab of the Astra Control Center operator, select Create AstraControlCenter.

-
Complete the
Create AstraControlCenterform field:-
Keep or adjust the Astra Control Center name.
-
Add labels for the Astra Control Center.
-
Enable or disable Auto Support. Retaining Auto Support functionality is recommended.
-
Enter the Astra Control Center FQDN or IP address. Do not enter
http://orhttps://in the address field. -
Enter the Astra Control Center version; for example, 24.02.0-69.
-
Enter an account name, email address, and admin last name.
-
Choose a volume reclaim policy of
Retain,Recycle, orDelete. The default value isRetain. -
Select the scale size of the installation.
By default, Astra will use High Availability (HA) scaleSizeofMedium, which deploys most services in HA and deploys multiple replicas for redundancy. WithscaleSizeasSmall, Astra will reduce the number of replicas for all services except for essential services to reduce consumption. -
-
Generic (
ingressType: "Generic") (Default)Use this option when you have another ingress controller in use or would prefer to use your own ingress controller. After Astra Control Center is deployed, you'll need to configure the ingress controller to expose Astra Control Center with a URL.
-
AccTraefik (
ingressType: "AccTraefik")Use this option when you would prefer not to configure an ingress controller. This deploys the Astra Control Center
traefikgateway as a Kubernetes "LoadBalancer" type service.Astra Control Center uses a service of the type "LoadBalancer" (
svc/traefikin the Astra Control Center namespace), and requires that it be assigned an accessible external IP address. If load balancers are permitted in your environment and you don't already have one configured, you can use MetalLB or another external service load balancer to assign an external IP address to the service. In the internal DNS server configuration, you should point the chosen DNS name for Astra Control Center to the load-balanced IP address.
For details about the service type of "LoadBalancer" and ingress, refer to Requirements.
-
-
In Image Registry, use the default value unless you configured a local registry. For a local registry, replace this value with the local image registry path where you pushed the images in a previous step. Do not enter
http://orhttps://in the address field. -
If you use an image registry that requires authentication, enter the image secret.
If you use a registry that requires authentication, create a secret on the cluster. -
Enter the admin first name.
-
Configure resources scaling.
-
Provide the default storage class.
If a default storage class is configured, ensure that it is the only storage class that has the default annotation. -
Define CRD handling preferences.
-
-
Select the YAML view to review the settings you have selected.
-
Select
Create.
Create a registry secret
If you use a registry that requires authentication, create a secret on the OpenShift cluster and enter the secret name in the Create AstraControlCenter form field.
-
Create a namespace for the Astra Control Center operator:
oc create ns [netapp-acc-operator or custom namespace]
-
Create a secret in this namespace:
oc create secret docker-registry astra-registry-cred -n [netapp-acc-operator or custom namespace] --docker-server=[your_registry_path] --docker username=[username] --docker-password=[token]
Astra Control supports Docker registry secrets only. -
Complete the remaining fields in the Create AstraControlCenter form field.
What's next
Complete the remaining steps to verify that Astra Control Center installed successfully, set up an ingress controller (optional), and log in to the UI. Additionally, you'll need to perform setup tasks after completing installation.