

Scan Cloud Volumes ONTAP and on-premises ONTAP volumes with NetApp Data Classification
 Suggest changes
Complete a few steps to start scanning your Cloud Volumes ONTAP and on-premises ONTAP volumes using NetApp Data Classification.
Prerequisites
Before you enable Data Classification, make sure you have a supported configuration.
-
If you are scanning Cloud Volumes ONTAP and on-premises ONTAP systems that are accessible over the internet, you can deploy Data Classification in the cloud or in an on-premises location that has internet access.
-
If you are scanning on-premises ONTAP systems that have been installed in a dark site that has no internet access, you need to deploy Data Classification in the same on-premises location that has no internet access. This requires the Console agent to be deployed in that same on-premises location.
Verify that Data Classification has access to volumes
Make sure that Data Classification can access volumes by checking your networking, security groups, and export policies. You'll need to provide Data Classification with CIFS credentials so it can access CIFS volumes.
-
Make sure that there's a network connection between the Data Classification instance and each network that includes volumes for Cloud Volumes ONTAP or on-prem ONTAP clusters.
-
Ensure that the security group for Cloud Volumes ONTAP allows inbound traffic from the Data Classification instance.
You can either open the security group for traffic from the IP address of the Data Classification instance, or you can open the security group for all traffic from inside the virtual network.
-
Ensure that NFS volume export policies include the IP address of the Data Classification instance so it can access the data on each volume.
-
From the Data Classification menu, select Configuration.
-
Find the system you want to add or modify the CIFS credentials for then select Manage.
-
Select Edit CIFS Credentials and enter the user name and password that Data Classification needs to access CIFS volumes on the system.
The credentials can be read-only, but providing admin credentials ensures that Data Classification can read any data that requires elevated permissions. The credentials are stored on the Data Classification instance.
If you want to make sure your files "last accessed times" are unchanged by Data Classification scans, it's recommended the user has Write Attributes permissions in CIFS or write permissions in NFS. If possible, configure the Active Directory user as part of a parent group in the organization which has permissions to all files.
If you've entered the credentials correctly, a message confirms all CIFS volumes were authenticated successfully.
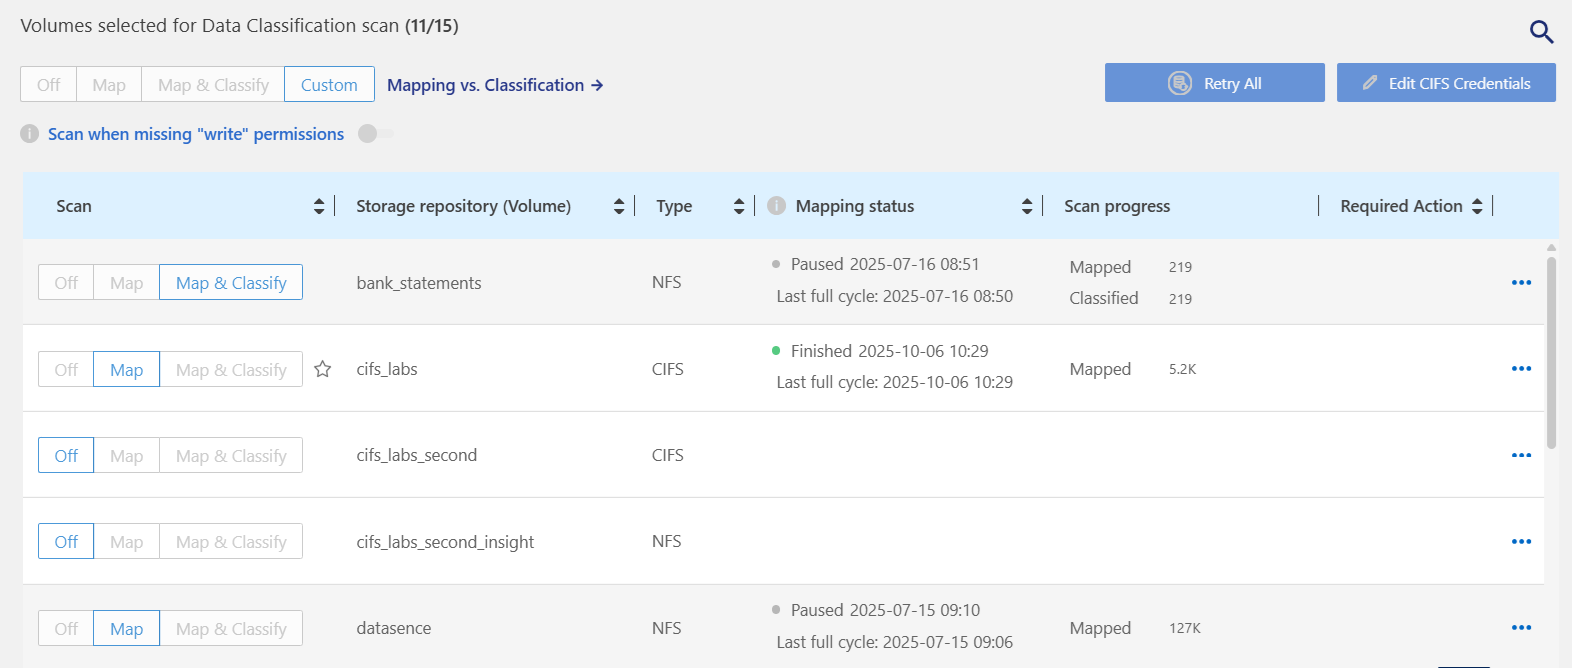
Enable or disable scans on volumes
You can start or stop scans on any system at any time from the Configuration page. You can also switch scans from map-only scans to mapping and classification scans, and vice-versa. It's recommended that you scan all volumes in a system.
The option to Scan without write permissions is disabled by default. This means that if Data Classification doesn't have appropriate write permissions, the system won't scan the files because Data Classification can't revert the "last accessed time" to the original timestamp. If your system can tolerate the last accessed time being modified, select this option. Learn more.

|
New volumes added to the system are automatically scanned only when you have enabled scanning for all volumes. If you've only enabled scanning on certain volumes, you must manually enable scanning on the newly added volume. |
-
From the Data Classification menu, select Configuration.
-
Identify the system you want to scan. Select Activate scan. In the dropdown, choose Scan all volumes: full scan, Scan all volumes: mapping only, or Manage scans to open the system menu and configure scanning on specific volumes.
To enable or disable scans for individual volumes, find the volumes in the list. In the scan type column, select Map only or Full scan.
When you enable scanning, Data Classification starts scanning the volumes you selected in the system. Results start to appear in the Compliance dashboard as soon as Data Classification starts the scan. Scan completion time depends on the amount of data, ranging from minutes to hours.
|
|
Data Classification scans only one file share under a volume. If you have multiple shares in your volumes, you'll need to scan those other shares separately as a shares group. See more details about this Data Classification limitation. |