

Manage member access in NetApp Console
 Suggest changes
Manage member access in your Console organization. Assign roles to set permissions. Remove members when they leave.
Super admin, Org admin, or Folder or project admin (for folders and projects that they are administering). Link:reference-iam-predefined-roles.html[Learn about access roles].
You can assign access roles on a project or folder basis. For example, assign a role to a user for two specific projects or assign the role at the folder level to give a user the Ransomware Resilience admin role for all projects in a folder

|
Add your folders and projects before assigning users access. Learn how to add folders and projects. |
Understand how access is granted in NetApp Console
NetApp Console uses a role-based access control (RBAC) model to manage user permissions. You can assign predefined roles to members individually or through federated groups. You can add and assign roles to service accounts, as well as federated groups. Each role defines what actions a member can perform at the associated resources.
Note the following about granting access in NetApp Console:
-
All users must first sign up for the NetApp Console before they can be granted access to resources.
-
You must explicitly assign a role to each user in the Console before they can access resources, even if they are members of a federated group that has been assigned a role.
-
You can add service accounts directly from the Console and assign them roles.
Using role inheritance
When you assign a role at the organization, folder, or project level in NetApp Console, that role is automatically inherited by all resources within the selected scope. For example, folder-level roles apply to all contained projects, while project-level roles apply to all resources within that project.
View organization members
To understand which resources and permissions are available to a member, you can view the roles assigned to the member at different levels of your organization's resource hierarchy. Learn how to use roles to control access to Console resources.
-
Select Administration > Identity and access.
-
Select Members.
The Members table lists the members of your organization.
-
From the Members page, navigate to a member in the table, select
 and then select View details.
View roles(s) assigned to a member
You can verify which roles they are currently assigned.
If you have the Folder or project admin role, the page displays all members in the organization. However, you can only view and manage member permissions for the folders and projects for which you have permissions. Learn more about the actions that a Folder or project admin can complete.
-
From the Members page, navigate to a member in the table, select
and then select View details. -
In the table, expand the respective row for organization, folder, or project where you want to view the member's assigned role and select View in the Role column.
View members associated with a folder or project
You can view members who have access to a specific folder or project.
-
Select Administration > Identity and access.
-
Select Organization.
-
From the Organization page, navigate to a project or folder in the table, select
and then select Edit folder or Edit project.-
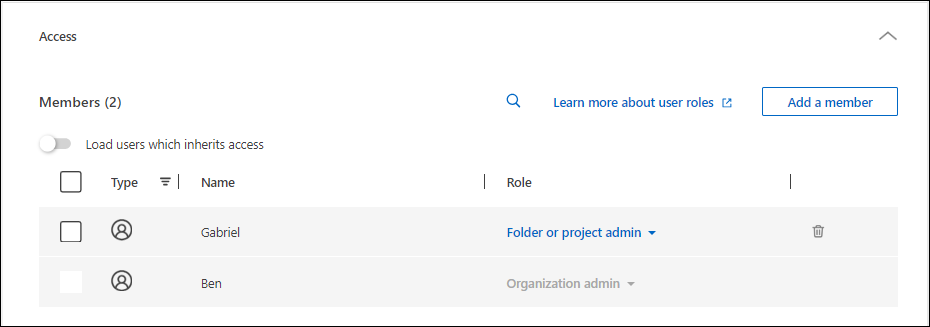
Select Access to view the members who have access to the folder or project.
-
Assign or modify member access
After a user signs up for NetApp Console, you can add them to your organization and assign them a role to provide access to resources. Learn how to add members to your organization.
You can adjust a member's access by adding or removing roles as needed.
Add an access role to a member
You typically assign a role when adding a member to your organization, but you can update it at any time by removing or adding roles.
You can assign a user an access role for your organization, folder, or project.
Members can have multiple roles within the same project and in different projects. For example, smaller organizations may assign all available access roles to the same user, while larger organizations may have users do more specialized tasks. Alternatively, you could also assign one user the Ransomware Resilience admin role at the organization level. In that example, the user would be able to perform Ransomware Resilience tasks on all projects within your organization.
Your access role strategy should align with the way you have organized your NetApp resources.
-
Select Administration > Identity and access.
-
Select Members.
-
Select one of the member tabs: Users, Service accounts, or Federated groups.
-
Select the actions menu
next to the member that you want to assign a role and select Add a role. -
To add a role, complete the steps in the dialog box:
-
Select an organization, folder, or project: Choose the level of your resource hierarchy that the member should have permissions for.
If you select the organization or a folder, the member will have permissions to everything that resides within the organization or folder.
-
Select a category: Choose a role category. Learn about access roles.
-
Select a Role: Choose a role that provides the member with permissions for the resources that are associated with the organization, folder, or project that you selected.
-
Add role: If you want to provide access to additional folders or projects within your organization, select Add role, specify another folder or project or role category, and then select a role category and a corresponding role.
-
-
Select Add new roles.
Change a member's assigned role
Change a member's roles to update their access.
|
|
Users must have at least one role assigned to them. You can't remove all roles from a user. If you need to remove all roles, you must delete the user from your organization. |
-
Select Administration > Identity and access.
-
Select Members.
-
Select one of the member tabs: Users, Service accounts, or Federated groups.
-
From the Members page, navigate to a member in the table, select
and then select View details. -
In the table, expand the respective row for organization, folder, or project where you want to change the member's assigned role and select View in the Role column to view the roles assigned to this member.
-
You can change an existing role for a member or remove a role.
-
To change a member's role, select Change next to the role you want to change. You can only change a role to a role within the same role category. For example, you can change from one data service role to another. Confirm the change.
-
To unassign a member's role, select
 next to the role to remove the respective role from the member.. You'll be asked to confirm the removal.
-
Remove a member from your organization
Remove a member if they leave your organization.
When you remove a member, the system revokes their Console permissions but retains their Console and NetApp Support Site accounts.
|
|
Federated members
|
-
Select Administration > Identity and access.
-
Select Members.
-
Select one of the member tabs: Users, Service accounts, or Federated groups.
-
From the Members page, navigate to a member in the table, select
then select Delete user. -
Confirm that you want to remove the member from your organization.