

Add folders and projects to your NetApp Console organization
 Suggest changes
Add folders and projects to match your business structure. After you create folders and projects, you can associate resources with them and manage member access to those projects.
The Console automatically creates one project for you when you create a new organization. Most organizations have the need for more than one project, as well as folders to keep things organized. Learn about the resource hierarchy in NetApp Console.
Using folders and projects to organize resources
In NetApp Console, an organization contains folders and projects that help you organize your resources. Folders help you group related projects, and projects help you manage resources and member access.
Folders
Folders help you organize related projects. You can create nested folders to represent different levels of your organization's structure. For example, you might create a top-level folder for each business unit and then create subfolders for different teams within that business unit. You then create projects within folders.
Folders also enable you to manage member access more efficiently using role inheritance. When you assign roles to members at the folder level, they inherit permissions for all child projects and folders.

|
Folders are an organizational tool and not visible to members who do not have IAM permissions such as the Org admin, Folder or project admin, or Super admin roles. Members access projects, not folders. |
Org admins can delegate administrative responsibilities by creating folders. After creating a folder, an Org admin can assign a member the Folder or project admin roles for particular folders. These members can then manage all projects within that folder without having access to the entire organization.
Folders can have other folders or projects as children, but they cannot have resources directly associated with them. Resources must be associated with a project.
|
|
When to associate a resource with a folder
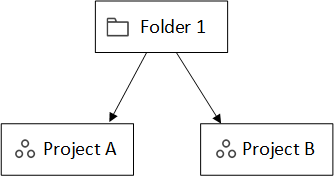
An Organization administrator can associate a resource with a folder so a Folder or project administrator can link it to the appropriate projects in the folder. For example, let's say you have a folder that contains two projects:
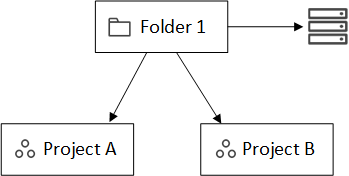
The Organization admin can associate a resource with the folder:
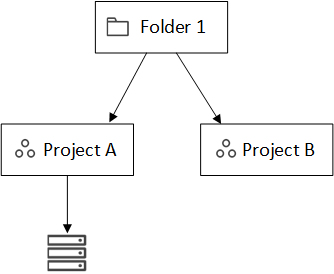
Associating a resource with a folder does not make it accessible to all projects; only the folder or project admin can see it. The Folder or project admin decides which projects can access it and associates the resource with the appropriate projects. In this example, the admin associates the resource with Project A:
Members who have permissions for project A can now access the resource. |
Projects
Associate resources with projects to allow members to manage them. Resources must be associated with a project for management and user access.
An organization can have one or many projects. A project can be directly under the organization or inside a folder. If an agent is used to discover resources within a project, you must also associate the agent with that project.
Users navigate between assigned projects on the Systems page to manage the resources associated with each project.
Add a folder or project
Add projects to manage resources and folders to group related projects.
When you create a new organization, the Console includes one project.
You can create up to seven levels of folders and projects in your organization's resource structure. Create nested folders to organize your resources as needed.
-
Select Administration > Identity and access.
-
Select Organization.
-
From the Organization page, select Add folder or project.
-
Select Folder or Project.
-
Enter folder or project details:
-
Name and location: Enter a name and choose a location for the folder or project. You can place folders or projects under the organization or inside another folder.
-
Resources: Select the resources that you want to associate with this folder or project. If you haven't added storage systems to the Console yet, you can do this step later.
Members can't access resources in a folder until those resources are assigned to a project. Use folders to hold resources temporarily until you create the necessary projects. This can help the Organization admin delegate resource allocation to a Folder or project admin, who then assigns resources to projects within the folder. -
Access: Select Add a member to assign access and a role. You can add or remove members from the project or folder at any time.
-
-
Select Add.
Rename a folder or project
Rename a folder or project as needed. Renaming does not affect associated resources or member access.
-
From the Organization page, navigate to a project or folder in the table, select
 and then select Edit folder or Edit project.
 -
On the Edit page, enter a new name and select Apply.
Delete a folder or project
Delete folders and projects you no longer need, such as after team restructuring or project completion.
Before you delete a folder or project, make sure it does not contain any resources. Learn how to remove resources.
-
From the Organization page, navigate to a project or folder in the table, select
and then select Delete. -
Confirm that you want to delete the folder or project.
View the resources associated with a folder or project
View which resources and members are associated with a folder or project.
-
From the Organization page, navigate to a project or folder in the table, select
and then select Edit folder or Edit project.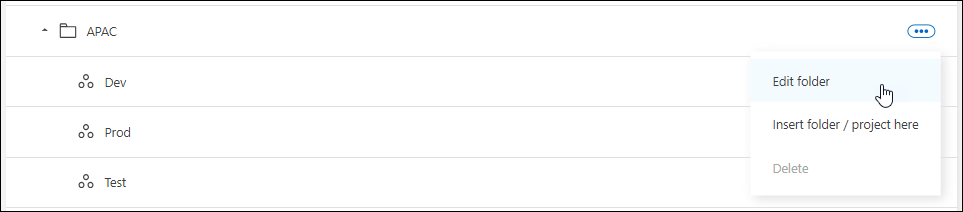
-
On the Edit page, you can view details about the selected folder or project by expanding the Resources or Access sections.
-
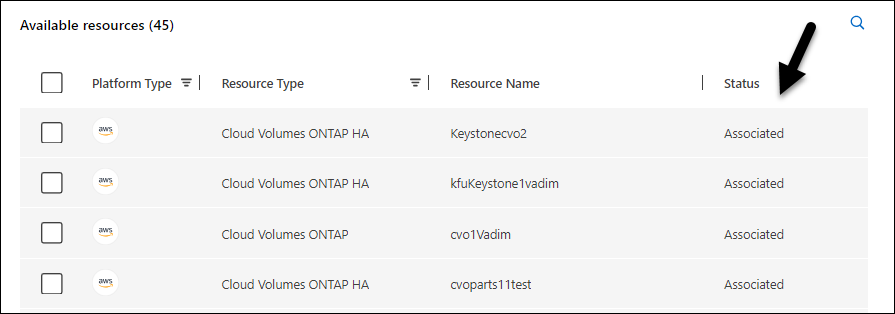
Select Resources to view the associated resources. In the table, the Status column identifies the resources that are associated with the folder or project.
-
Change the resources associated with a folder or project
You can change the resources associated with a folder or project as your organization's needs change.
-
From the Organization page, navigate to a project or folder in the table, select
and then select Edit folder or Edit project. -
On the Edit page, select Resources.
In the table, the Status column identifies the resources that are associated with the folder or project.
-
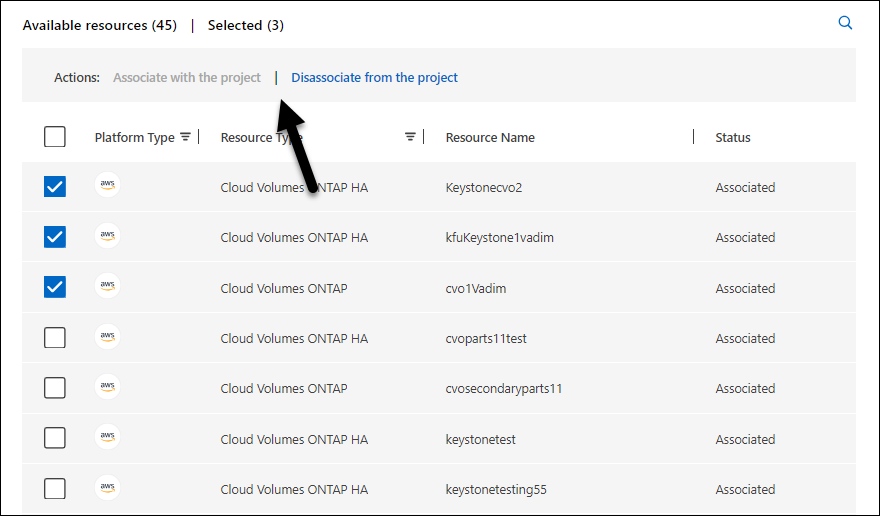
Select the resources that you'd like to associate or disassociate.
-
Based on the resources that you selected, select either Associate with the project or Disassociate from the project.
-
Select Apply.
View members associated with a folder or project
You can view the members associated with a folder or project from the Organization page.
-
From the Organization page, navigate to a project or folder in the table, select
and then select Edit folder or Edit project. -
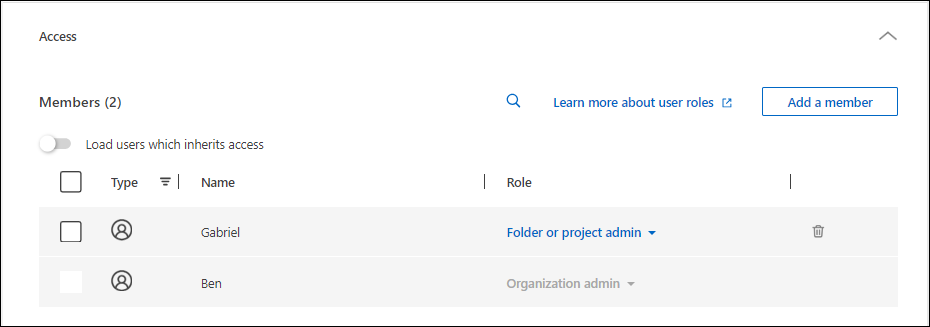
On the Edit page, select Access to view the list of members who have access to the selected folder or project.
-
Select Access to view the members who have access to the folder or project.
-
Modify member access to a folder or project
Modify member access to control resource access. Remember that roles assigned at the folder level are inherited by all child projects and folders.
You cannot change member access at lower levels if it is inherited from the folder or organization level. Change the member's permission at the higher hierarchy level to change access Alternatively, you can manage permissions from the Members page.
-
From the Organization page, navigate to a project or folder in the table, select
and then select Edit folder or Edit project. -
On the Edit page, select Access to view the list of members who have access to the selected folder or project.
-
Modify member access:
-
Add a member: Select the member that you'd like to add to the folder or project and assign them a role.
-
Change a member's role: For any members with a role other than Organization Admin, select their existing role and then choose a new role.
-
Remove member access: For members who have a role defined at the folder or project for which you're viewing, you can remove their access.
-
-
Select Apply.