

Deploy Cloud Volumes ONTAP with Quick create
 Suggest changes
You can deploy Cloud Volumes ONTAP in Amazon Web Services (AWS), Microsoft Azure, and Google Cloud using Quick create for faster deployment in both single node and high availability (HA) configurations. This simplified process reduces deployment steps compared to the advanced method by automatically setting default values on a single page and minimizing navigation.
Before getting started, make sure you have the following:
-
A Console agent that's up and running and associated with your project or workspace. Keep in mind that the Console agent needs to run at all times. For information, refer to:
-
An understanding of the configuration that you want to use. Before you begin, choose a configuration and obtain networking information from your administrator. For information, refer to:
-
Knowledge of the licensing requirements for Cloud Volumes ONTAP. For information, refer to:
Google Cloud -
DNS and Active Directory for CIFS configurations. For information, refer to:
-
From the left navigation menu, select Storage > Management.
-
On the Canvas page, click Add System and follow the prompts.
-
Select your cloud provider (Amazon Web Services, Microsoft Azure, or Google Cloud) > Cloud Volumes ONTAP/Cloud Volumes ONTAP HA > Add new. The Quick create option is selected by default.
Sample screenshots of the Quick create option
AWS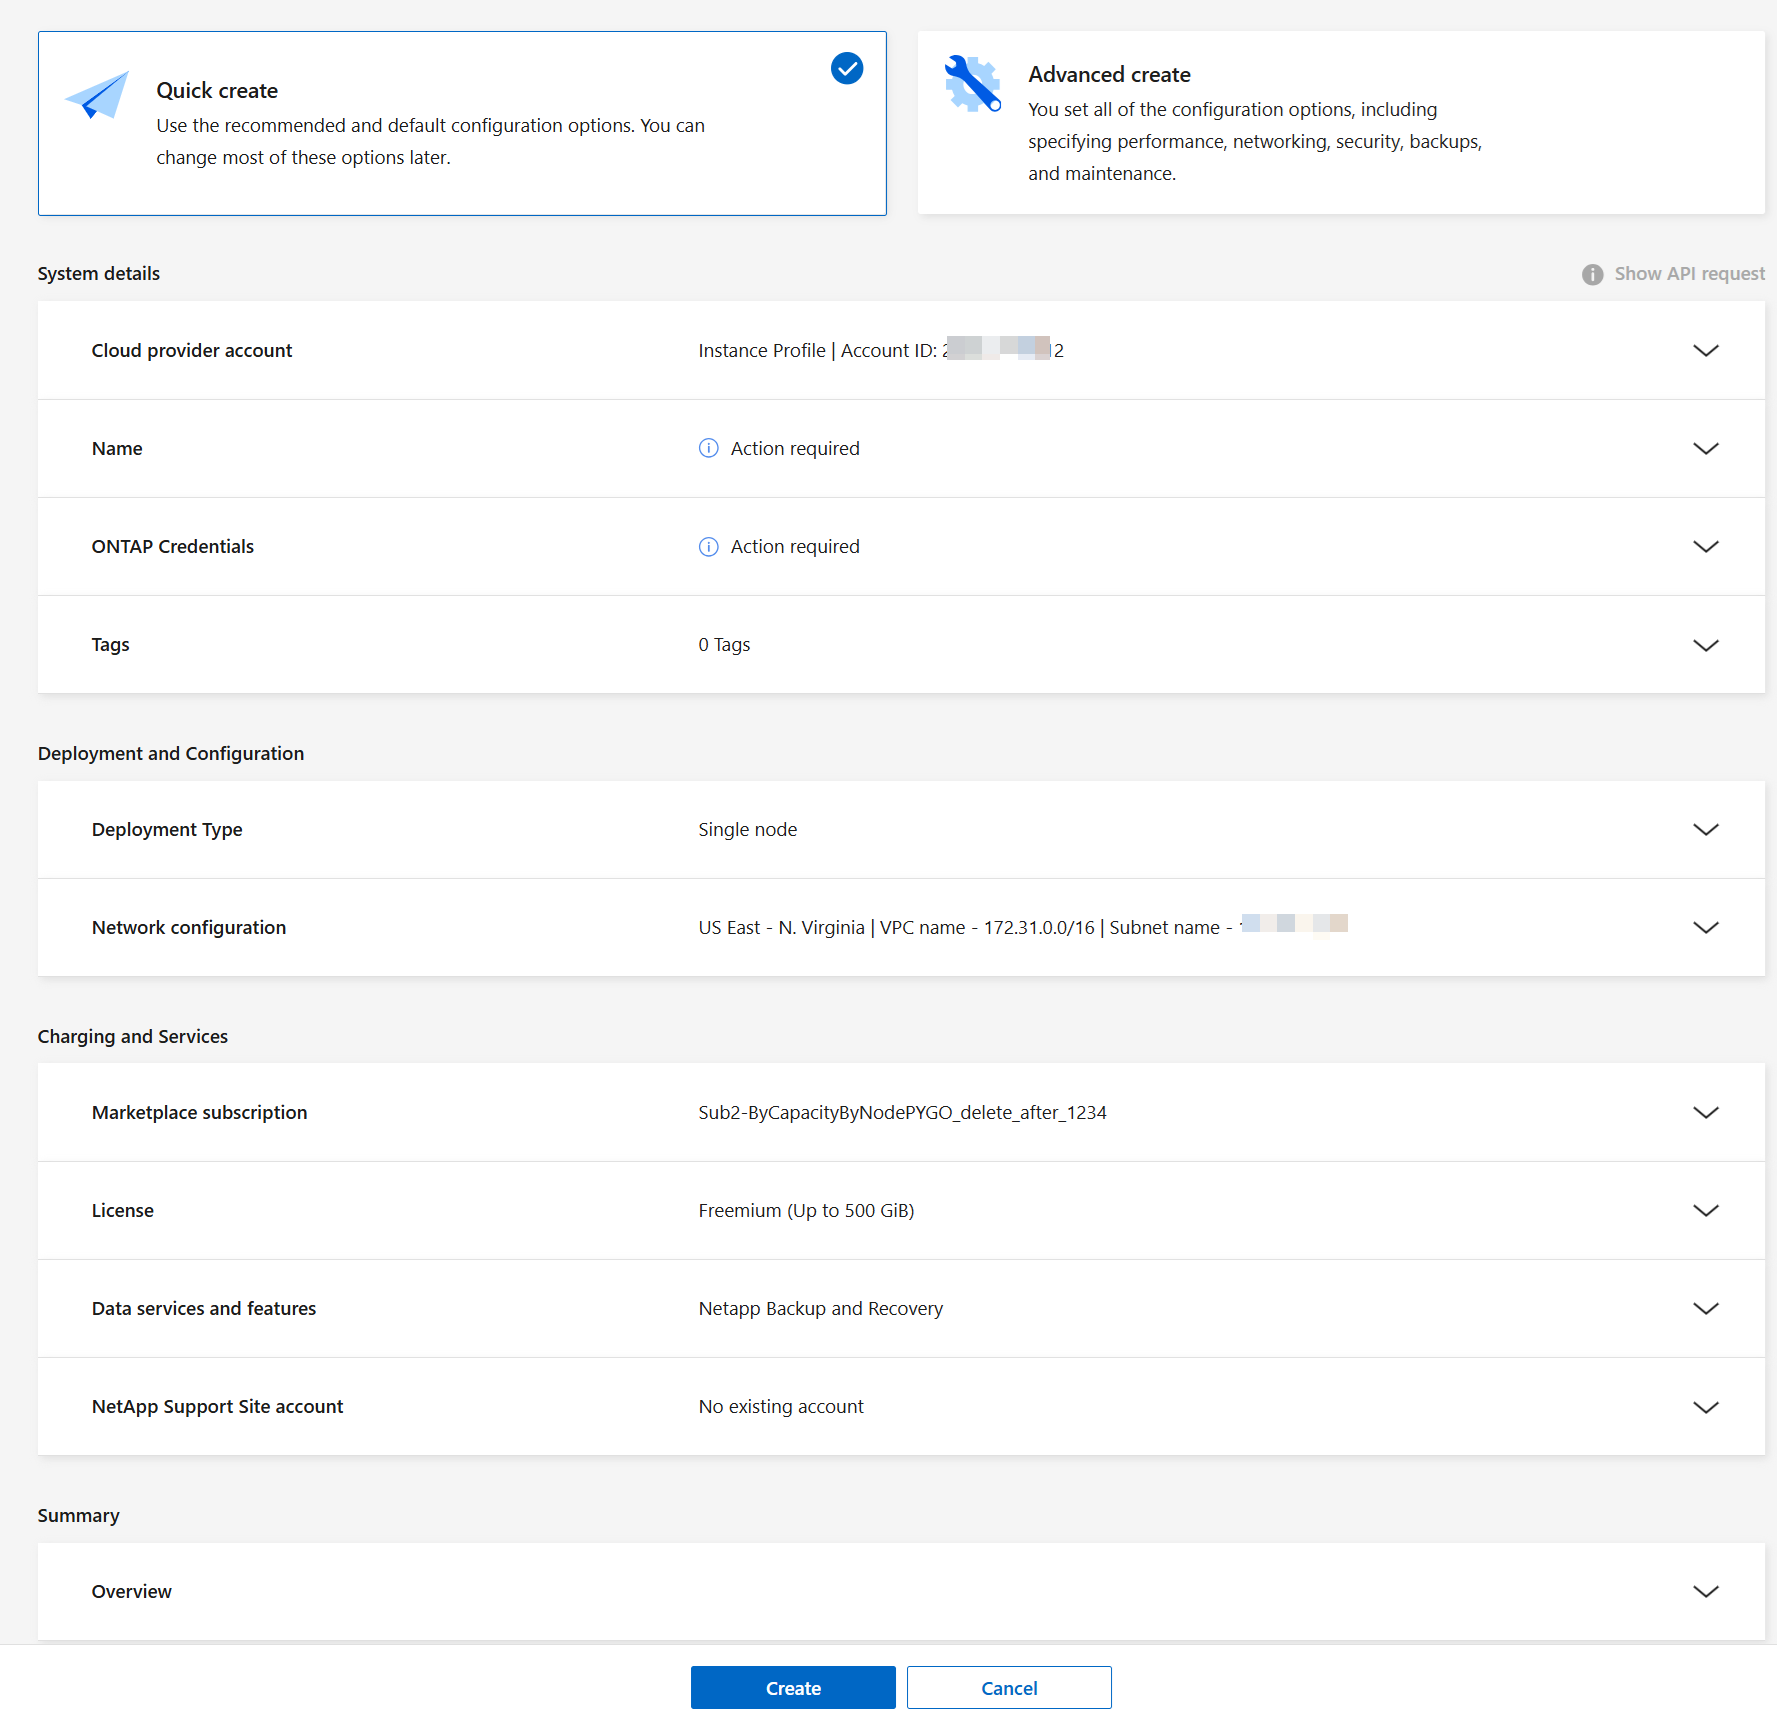 Azure
Azure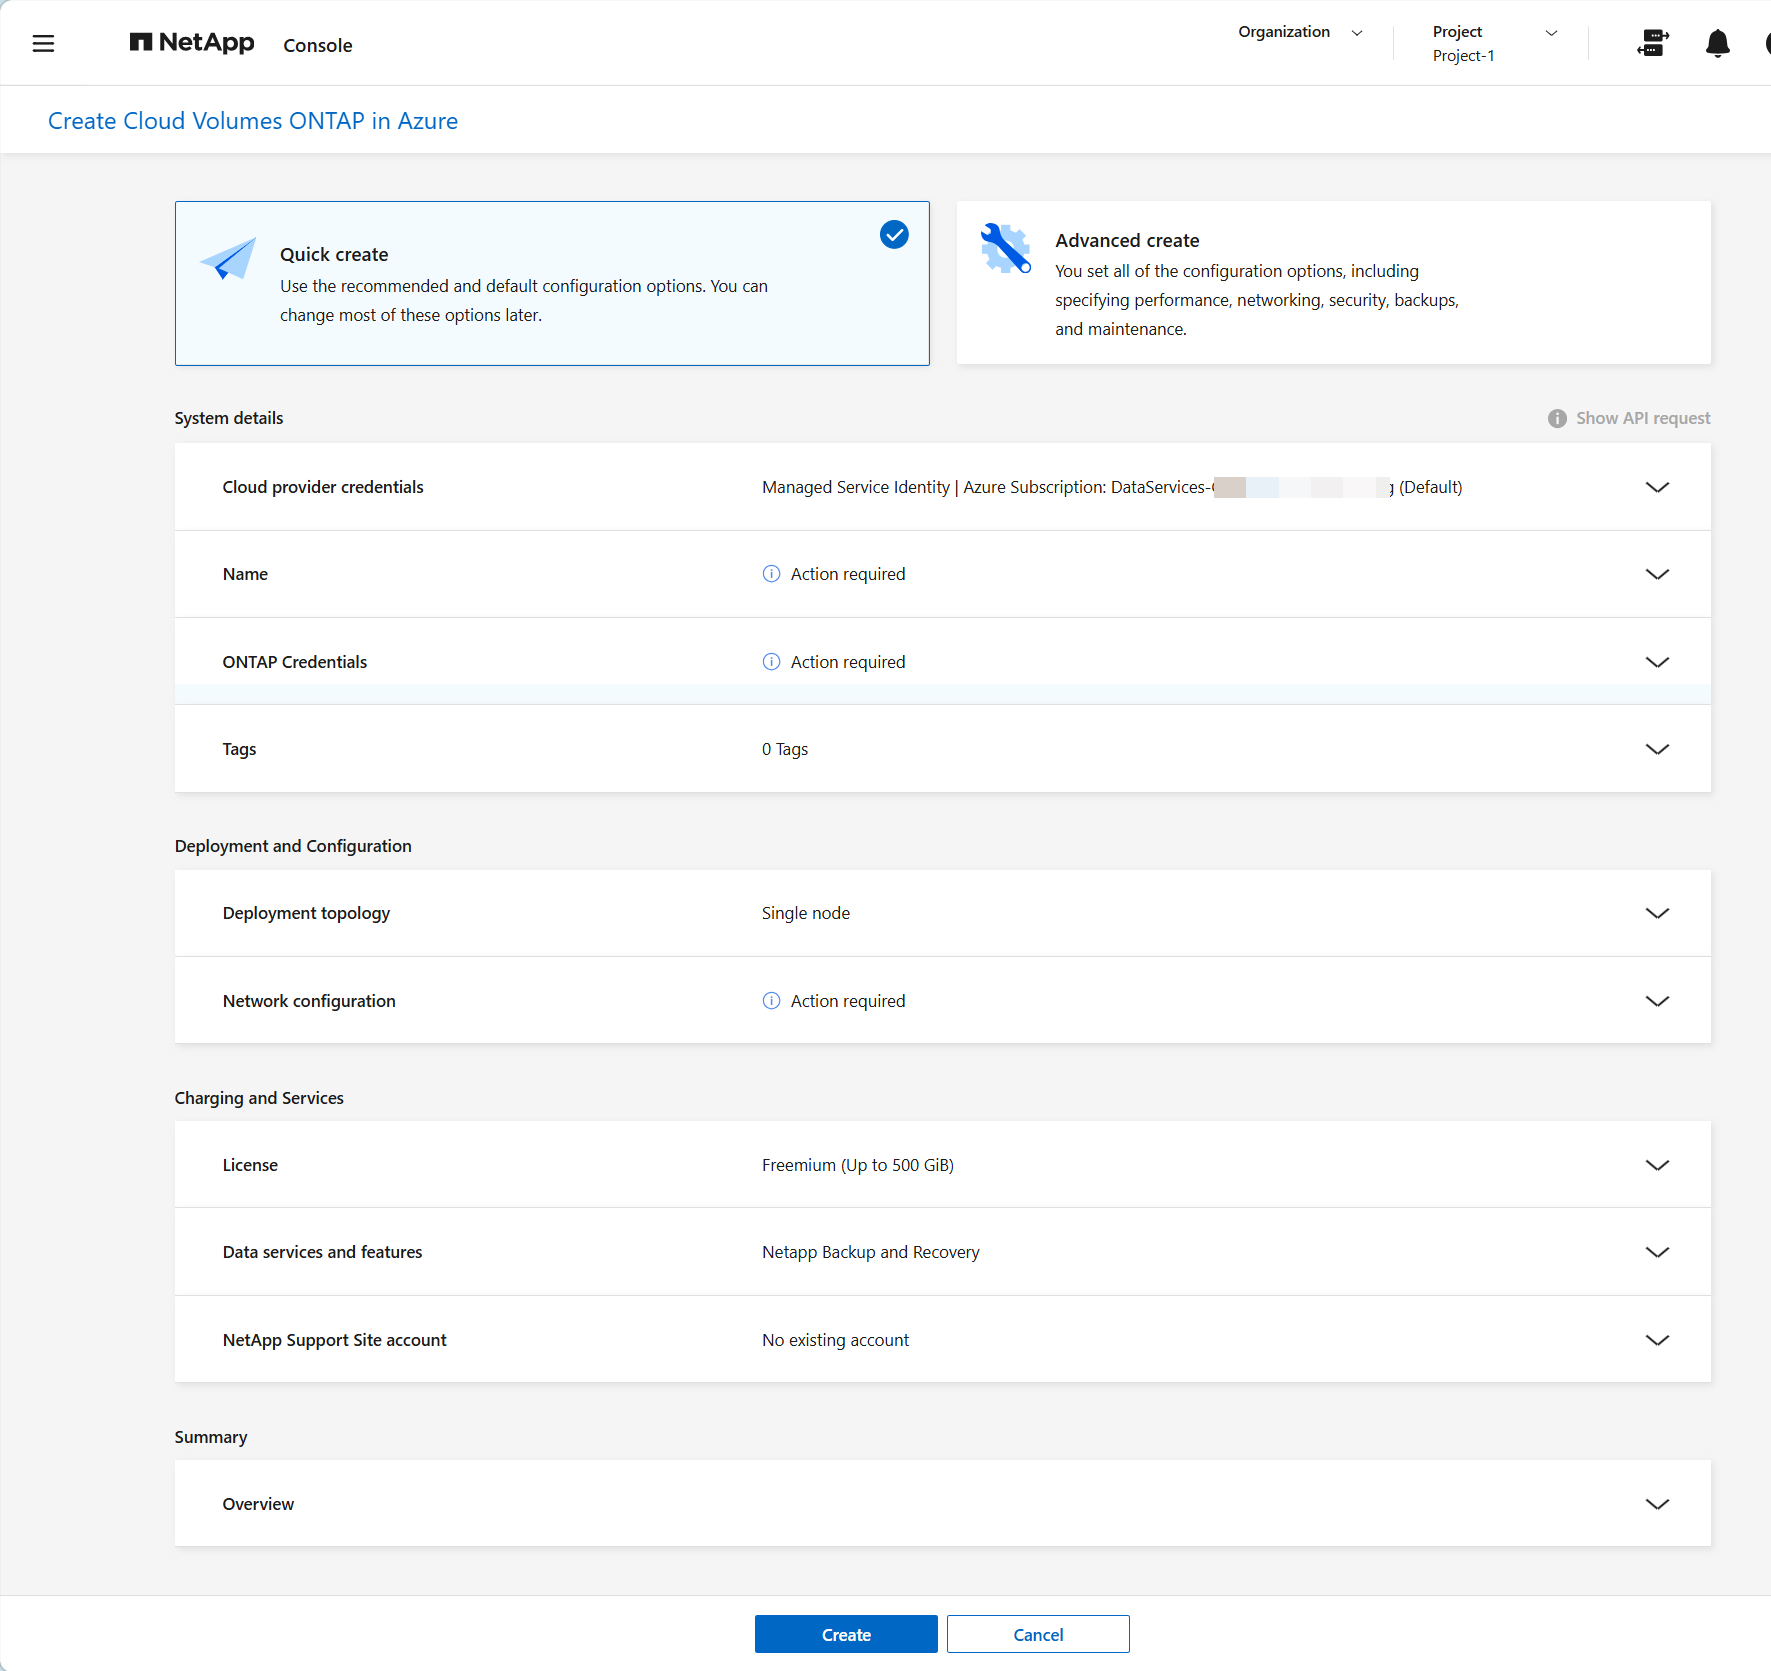 Google Cloud
-
Cloud provider account/credentials/Google Cloud project: The account and subscription details are automatically populated based on your Console agent. If you have multiple accounts or subscriptions, select the one you want to use. If a Console agent is unavailable, you'll be prompted to create a Console agent.
For Google Cloud, you need to select a marketplace subscription with the project name. -
Name: Enter a name for your Cloud Volumes ONTAP system (also called the cluster name). The Console uses the system (cluster) name to name the Cloud Volumes ONTAP system and the VM instance. It also uses the name as the prefix for the predefined security group, if you select that option.
-
ONTAP credentials: These are the credentials for the Cloud Volumes ONTAP cluster administrator account. You can use these credentials to connect to Cloud Volumes ONTAP through ONTAP System Manager or the ONTAP CLI. You can keep the default admin user name or change it to a custom user name.
For Google Cloud, If you plan to use data tiering or NetApp Backup and Recovery with Cloud Volumes ONTAP, then you need to enable Service Account and select a service account that has the predefined Storage Admin role. Learn how to create a service account. The service account associated with the Console agent should have the required permissions. -
Tags/Labels: Tags are the metadata for your AWS or Azure resources. The Console adds the tags to the Cloud Volumes ONTAP instance and each resource associated with the instance. You can add up to 15 tags from the user interface when creating a Cloud Volumes ONTAP system, and then you can add more after it's created. For more information, refer to:
-
Deployment type/topology: Select the deployment type that you want to use, single node, high availability (HA) in a single availability zone (AZ), or HA in multiple AZs.
-
Network configuration: Enter the network information that you recorded in the planning worksheet for regions, VNets, and subnets.
-
Region: By default, the region of the associated cloud account with the resources is selected.
-
Availability zone: You can select the availability zone based on the deployment type you choose, and if the selected region supports the availability zone.
-
Subnet: Select a subnet for the region.
For AWSVPC: For AWS, enter a Amazon Virtual Private Cloud (VPC) network for the region with a subnet as per your planned deployment.
AWS High AvailabilityIf you selected an HA configuration, enter the following information:
HA in single AZ-
Mediator Access: Specify the mediator access information. The mediator is a separate instance that monitors the health of the HA pair and provides quorum in case of a failure. Provide the key pair name to enable the mediator instance to connect to the AWS EC2 service, and select the connection method.
HA in multiple AZ-
Availability zones and mediator: Select the availability zones (AZs) for each node and the mediator and the corresponding subnets where you want to deploy the Cloud Volumes ONTAP HA pair.
-
Floating IPs: If you chose multiple AZs, specify the floating IP addresses for the NFS and CIFS services and cluster and SVM management. The IP addresses must be outside of the CIDR block for all VPCs in the region. For additional details, refer to AWS networking requirements for Cloud Volumes ONTAP HA in multiple AZs.
-
Mediator Access: Specify the mediator access information. The mediator is a separate instance that monitors the health of the HA pair and provides quorum in case of a failure. Provide the key pair name to enable the mediator instance to connect to the AWS EC2 service, and select the connection method.
-
Route Tables: If you chose multiple AZs, select the route tables that include routes to the floating IP addresses. If you have more than one route table, it is important to select the correct route tables. Otherwise, some clients might not have access to the Cloud Volumes ONTAP HA pair. For more information about route tables, refer to the AWS Documentation: Route Tables.
Charging and ServicesMarketplace Subscription: In AWS, select the AWS marketplace subscription you want to use with this Cloud Volumes ONTAP system.
For AzureVNET: Select the required Azure Virtual Network (VNet). For information about VNet requirements, refer to Networking for Azure VNet encryption.
For Google CloudVPC and subnet: For Google Cloud, enter a Google Virtual Private Cloud (VPC) network for the region and a subnet as per your planned deployment.
HA in single AZ or multiple AZsIf you selected an HA configuration, enter the following information:
Zone for node 1 and 2, and the mediator: Add the zones for the two nodes and the mediator.
Connectivity
Select four different VPCs for the HA configuration and a subnet in each VPC. For more information on VPC-1, VPC-2, and VPC-3, refer to Rules for VPC-1, VPC-2, and VPC-3.
Cloud Volumes ONTAP 9.19.1 and later support shared disks for single AZ HA configurations, making the mediator instance optional or redundant. In this configuration, you don't need a mediator zone, VPC, and subnet for data replication. -
-
-
License: Select the license type you want to use with this Cloud Volumes ONTAP system. You can choose from Professional, Essentials, and Freemium licenses. For information about different licenses, refer to Learn about Cloud Volumes ONTAP licenses.
-
Data services and features: Keep the services enabled or disable the services you don't want to use with Cloud Volumes ONTAP.
In Google Cloud, In order to select Backup and Recovery, or to use NetApp Cloud Tiering, you must have specified the Service Account.-
Learn about WORM storage on Cloud Volumes ONTAP

If you want to utilize WORM and data tiering, you must disable Backup and Recovery and deploy a Cloud Volumes ONTAP system with version 9.8 or above.
-
NetApp Support Site account: If you have multiple accounts, select the one you want to use.
-
Check or edit the details you entered, and then click Create.
In Azure, the Overview section displays the resources that will be allocated when the deployment process completes.
In AWS, immediately after you create the Cloud Volumes ONTAP system, the NetApp Console launches a test instance in the specified VPC to verify connectivity. If successful, the Console immediately terminates the instance and then starts deploying the system. If the Console cannot verify connectivity, creation of the system fails. The test instance is either a t2.nano (for default VPC tenancy) or a m3.medium (for dedicated VPC tenancy).
The Console deploys the Cloud Volumes ONTAP system. You can track the progress on the Audit page.
If you experience any issues deploying the Cloud Volumes ONTAP system, review the failure message. You can also select Re-create environment on the system to continue with the deployment using the Advanced mode wizard.

|
After the deployment process completes, do not modify the system-generated Cloud Volumes ONTAP configurations in the AWS or Azure cloud portal, especially the system tags. Any changes made to these configurations may lead to unexpected behavior or data loss. |