


Set up licensing for Cloud Volumes ONTAP in AWS


 Suggest changes

 PDFs
PDFs
Complete the setup for your chosen Cloud Volumes ONTAP licensing option in AWS, such as a capacity-based package, Freemium, or Keystone Subscription, so you can select it when you create a new system.
Set preferred billing for standalone AWS listing
If you have a standalone AWS subscription linked to your AWS account, you can pay for Cloud Volumes ONTAP through that subscription. If you also have NetApp Intelligent Services (NIS) subscriptions, you can pay for your data services through the package associated with the NIS subscription. For existing subscriptions, NetApp recommends switching to the standalone subscription approach for better cost management of your Cloud Volumes ONTAP usage.
If you are an existing customer with NIS subscriptions associated with the AWS account, NetApp recommends switching to the standalone subscription approach for better cost management of your Cloud Volumes ONTAP usage. This is the complete process:
-
Subscribe to a new standalone listing on the AWS portal.
-
Link the standalone subscription to your AWS account.
-
Set your billing preference to the standalone subscription for Cloud Volumes ONTAP usage with the Essentials package.
-
(If applicable) Convert your Professional package to an Essentials package and set the billing preference. Refer to Change charging methods for capacity licenses for information about converting your Professional package to an Essentials package.
-
Continue billing data services through your NIS subscription.
-
On the left panel of the NetApp Console, select Administration > Licenses and subscriptions > Billing preferences > Cloud Volumes ONTAP.
-
On the AWS tab, select the standalone subscription and select the options icon
 .
. -
On the Edit configuration window, select the subscription number of the standalone listing in the AWS account credentials field.
-
Select Configure. You can see the subscription as the preferred option for your Cloud Volumes ONTAP billing in AWS.
-
When deploying a new Cloud Volumes ONTAP system, select the Essentials package to bill through the standalone subscription. For information, refer to Deploy Cloud Volumes ONTAP with Quick create.
Repeat the same steps for the NIS subscription on the Data services tab to use the NIS subscription for your data services. When deploying a new Cloud Volumes ONTAP system, select the Professional package to bill through the NIS subscription.
Capacity-based license
Capacity-based licensing enables you to pay for Cloud Volumes ONTAP per TiB of capacity. Capacity-based licensing is available in the form of a package: the Essentials package or the Professional package.
The Essentials and Professional packages are available with the following consumption models or purchase options:
-
A license purchased from NetApp (Bring-Your-Own License or BYOL)
-
An hourly, pay-as-you-go (PAYGO) subscription from the AWS Marketplace
-
An annual contract from the AWS Marketplace
To get started, follow the steps for the consumption model that you chose.
BYOL
Pay upfront by purchasing a license (BYOL) from NetApp to deploy Cloud Volumes ONTAP systems in any cloud provider.
NetApp has restricted the purchase, extension, and renewal of BYOL licensing. For more information, refer to Restricted availability of BYOL licensing for Cloud Volumes ONTAP.
-
Add your NetApp Support Site account to the Console
The Console automatically queries NetApp's licensing service to obtain details about the licenses associated with your NetApp Support Site account. If there are no errors, the Console automatically adds the licenses.
Your license must be available from the Console before you can use it with Cloud Volumes ONTAP. If needed, you can manually add the license to the Console.
-
On the Systems page of the Console, select Add System and follow the steps.
-
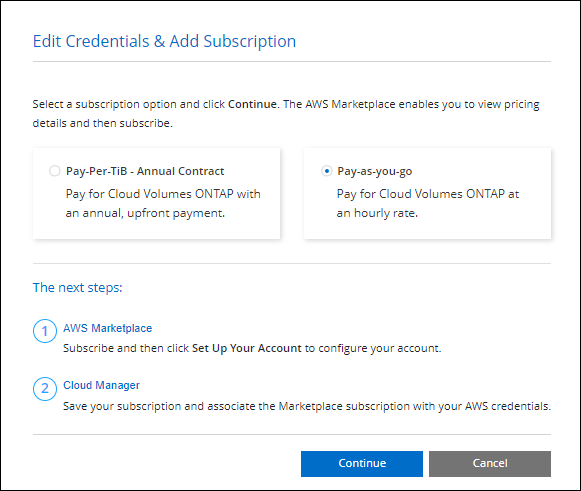
On the Details and Credentials page, select Edit Credentials > Add Subscription and then follow the prompts to subscribe to the pay-as-you-go offering in the AWS Marketplace.
The license that you purchased from NetApp is always charged first, but you'll be charged at the hourly rate in the marketplace if you exceed your licensed capacity or if the term of your license expires.
-
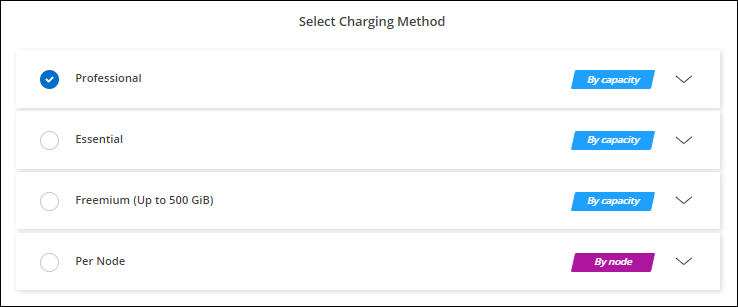
After you return to the Console, select a capacity-based package when you reach the charging methods page.
-
PAYGO subscription
Pay hourly by subscribing to the offer from your cloud provider's marketplace.
When you create a Cloud Volumes ONTAP system, the Console prompts you to subscribe to the agreement that's available in the AWS Marketplace. That subscription is then associated with the system for charging. You can use that same subscription for additional Cloud Volumes ONTAP systems.
-
From the left navigation menu, select Storage > Management.
-
On the Systems page, select Add System and follow the steps.
-
On the Details and Credentials page, select Edit Credentials > Add Subscription and then follow the prompts to subscribe to the pay-as-you-go offering in the AWS Marketplace.
-
After you return to the Console, select a capacity-based package when you reach the charging methods page.
-

|
You can manage the AWS Marketplace subscriptions associated with your AWS accounts from the Settings > Credentials page. Learn how to manage your AWS accounts and subscriptions |
Annual contract
Pay annually by purchasing an annual contract from your cloud provider's marketplace.
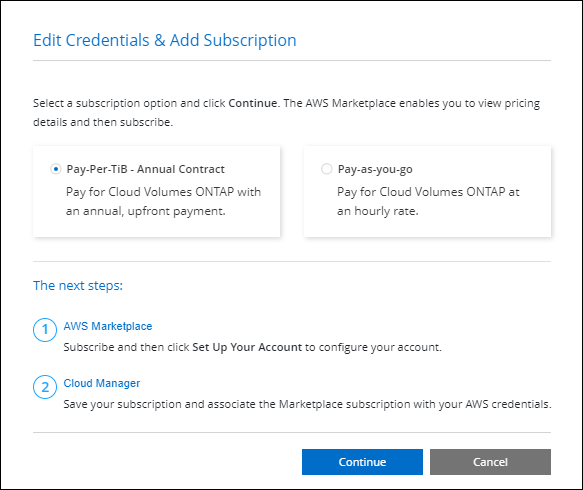
Similar to an hourly subscription, the Console prompts you to subscribe to the annual contract that's available in the AWS Marketplace.
-
On the Systems page, select Add System and follow the steps.
-
On the Details and Credentials page, select Edit Credentials > Add Subscription and then follow the prompts to subscribe to the annual contract in the AWS Marketplace.
-
After you return to the Console, select a capacity-based package when you reach the charging methods page.
-
Freemium
Select the Freemium offering to use Cloud Volumes ONTAP free of charge with up to 500 GiB of provisioned capacity. Learn more about the Freemium offering.
-
From the left navigation menu of the NetApp Console, select Storage > Management.
-
On the Systems page, select Add System and follow the steps.
-
On the Details and Credentials page, select Edit Credentials > Add Subscription and then follow the prompts to subscribe to the pay-as-you-go offering in the AWS Marketplace.
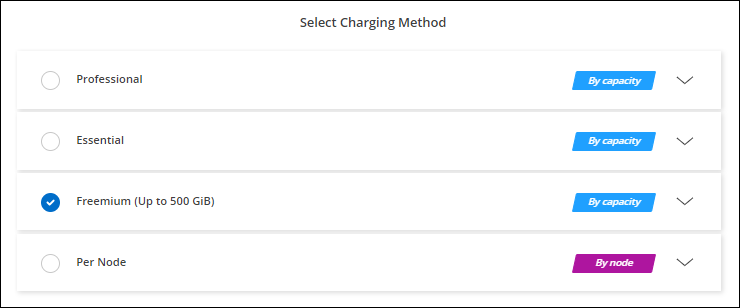
You won't be charged through the marketplace subscription unless you exceed 500 GiB of provisioned capacity, at which time the system is automatically converted to the Essentials package.
-
After you return to the Console, select Freemium when you reach the charging methods page.
-
Keystone Subscription
A Keystone Subscription is a pay-as-you-grow subscription-based service. Learn more about NetApp Keystone Subscriptions.
-
If you don't have a subscription yet, contact NetApp
-
Contact NetApp to authorize your user account with one or more Keystone Subscriptions.
-
After NetApp authorizes your account, link your subscriptions for use with Cloud Volumes ONTAP.
-
On the Systems page, select Add System and follow the steps.
-
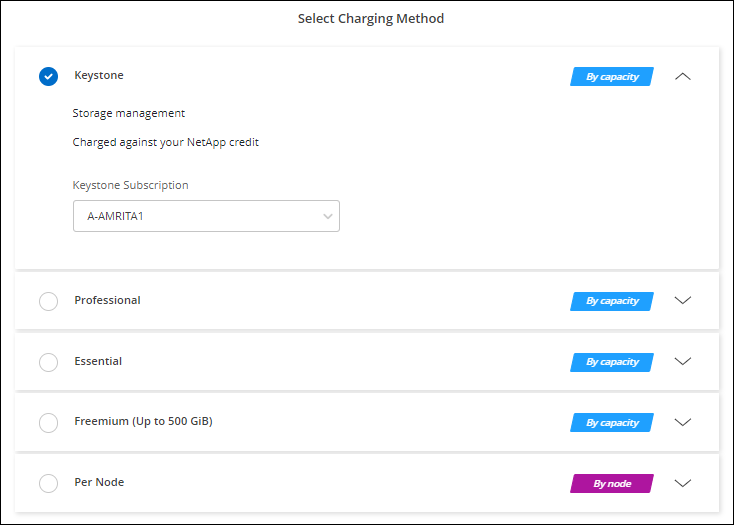
Select the Keystone Subscription charging method when prompted to choose a charging method.
-
Node-based license
A node-based license is the previous generation license for Cloud Volumes ONTAP. You could purchase a node-based license from NetApp (BYOL), and you can renew it only in specific cases. For information, refer to: