

 Get started
Create volumes for FSx for ONTAP
 Suggest changes
After you set up your working environment, you can create and mount FSx for ONTAP volumes.
Create volumes
You can create and manage NFS, CIFS, and iSCSI volumes from your FSx for ONTAP working environment in BlueXP. Volumes created using ONTAP CLI will also be visible in your FSx for ONTAP working environment.
You can add volumes by opening the working environment and selecting the Volumes tab or simply using working environment Details panel from the Canvas. This task describes adding volumes using the Details panel.
-
You need an active Connector in AWS.
-
If you want to use SMB, you must have set up DNS and Active Directory. For more information on DNS and Active Directory network configuration, see AWS: Prerequisites for using a self-managed Microsoft AD.
-
Select the FSx for ONTAP working environment on the Canvas. If you don't have a Connector enabled, you'll be prompted to add one.
-
In the Details panel, use the three dots (
 ) to open the options menu. Click Add Volume.
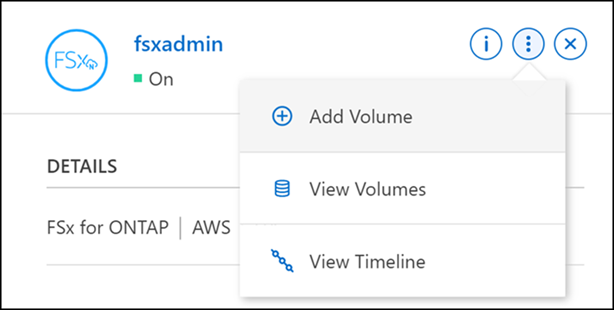
-
Volume details, protection, & tags
-
Enter a name for your new volume.
-
The Storage VM (SVM) field auto-populates the SVM based on the name of your working environment.
-
Enter the volume size and select a unit (GiB or TiB). Note that the volume size will grow with usage.
-
Select a snapshot policy. By default, a snapshot is taken every hour (keeping the last six copies), every day (keeping the last two copies), and every week (keeping the last two copies).
-
Optionally, create tags to categorize your volumes by clicking the plus sign and entering a tag name and value.
-
Optionally, select the optimization option to create a FlexGroup and distribute volume data across the cluster.

FlexGroup distribution is available for NFS and CIFS volume protocols only.
-
-
Volumes protocol:
-
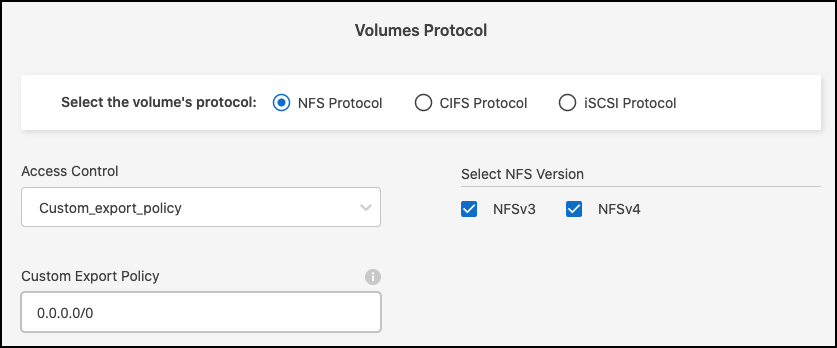
Select an NFS, CIFS, or iSCSI volume protocol.
NFS-
Select an Access Control policy.
-
Select the NFS versions.
-
Select a Custom Export Policy. Click the information icon for valid value criteria.
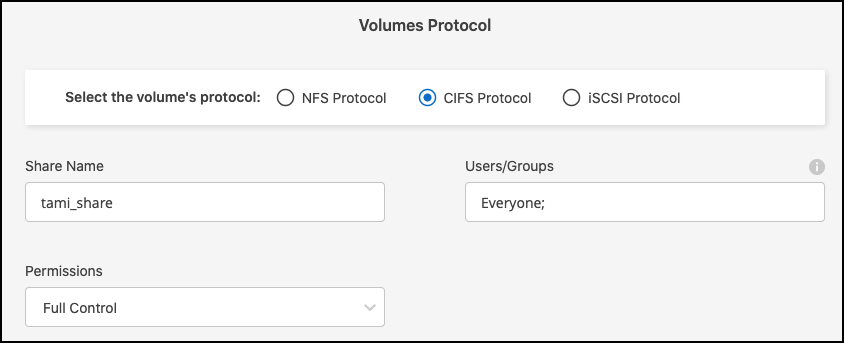
CIFS-
Enter a Share Name.
-
Enter users or groups separated by a semicolon.
-
Select the permission level for the volume.
-
If this is the first CIFS volume for this working environment, you will be prompted to configure CIFS connectivity using an Active Directory or Workgroup setup.
-
If you select a Workgroup setup, enter the server and workgroup name for a workgroup configured for CIFS.
-
If you select an Active Directory setup, you'll need to provide the following configuration information.
Field Description DNS Primary IP Address
The IP addresses of the DNS servers that provides name resolution for the CIFS server.
The listed DNS server must contain the service location records (SRV) needed to locate the Active Directory LDAP servers and domain controllers for the domain the CIFS server will join.Active Directory Domain to join
The FQDN of the Active Directory (AD) domain you want the CIFS server to join.
Credentials authorized to join the domain
The name and password of a Windows account with sufficient privileges to add computers to the specified Organizational Unit (OU) within the AD domain.
CIFS server NetBIOS name
A CIFS server name that is unique in the AD domain.
Organizational Unit
The organizational unit within the AD domain to associate with the CIFS server. The default is CN=Computers.
DNS Domain
The DNS domain for the storage virtual machine (SVM). In most cases, the domain is the same as the AD domain.
NTP Server
Select Enable NTP Server Configuration to configure an NTP server using the Active Directory DNS. If you need to configure an NTP server using a different address, then you should use the API. See the BlueXP automation docs for details.
-
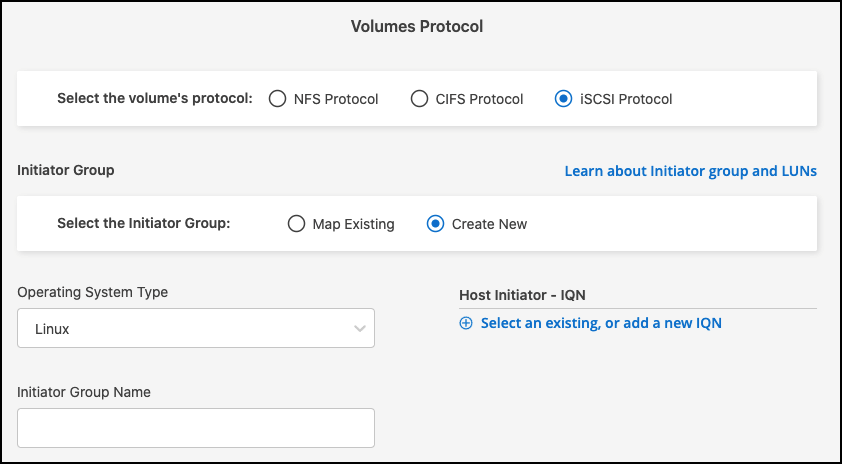
iSCSIYou can connect your LUN using an existing initiator group or by creating a new one. To map an existing initiator group, select your operating system and one or more initiator groups.
To create a new initiator group:
-
Select Create new.
-
Select your operating system.
-
Click to add one or more host iSCSI qualified names (IQN). You can select existing IQNs or add new IQNs. For details on how to find the IQN for a volume, see Connect a host to a LUN.
-
Enter an Initiator Group Name.
-
-
-
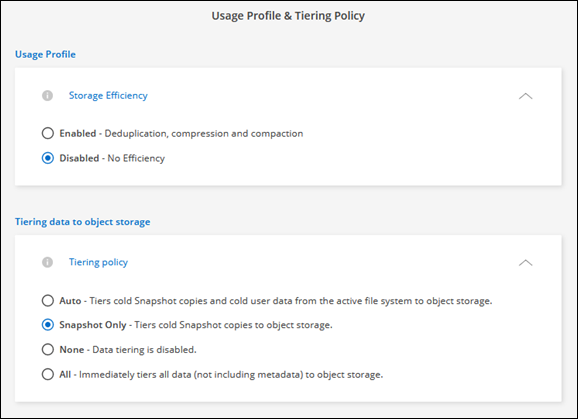
Usage Profile and Tiering
-
By default, Storage Efficiency is disabled. You can change this setting to enable deduplication and compression.
-
By default, Tiering Policy is set to Snapshot Only. You can select a different tiering policy based on your needs.
-
If you selected optimization (FlexGroup), you must specify the number of constituents to distribute volume data across. We strongly recommend using an even number of constituents to ensure even data distribution.
-
-
Review: Review your volume configuration. Click Previous to change settings or Add to create the volume.
The new volume is added to the working environment.
Mount volumes
Access mounting instructions from within BlueXP so you can mount the volume to a host.
You can mount volumes by opening the working environment and selecting the Volumes tab or simply using working environment Details panel from the Canvas. This task describes adding volumes using the Details panel.
-
Select the FSx for ONTAP working environment on the Canvas.
-
In the Details panel, use the three dots icon (
) to open the options menu. Click View Volumes.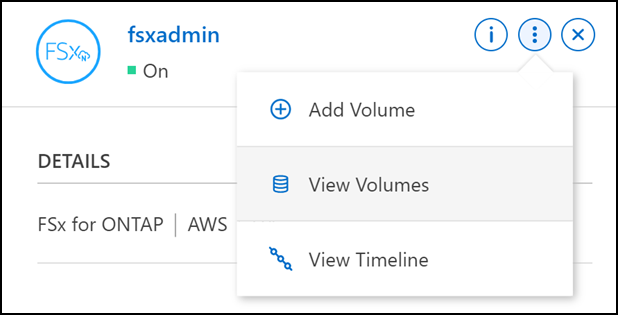
-
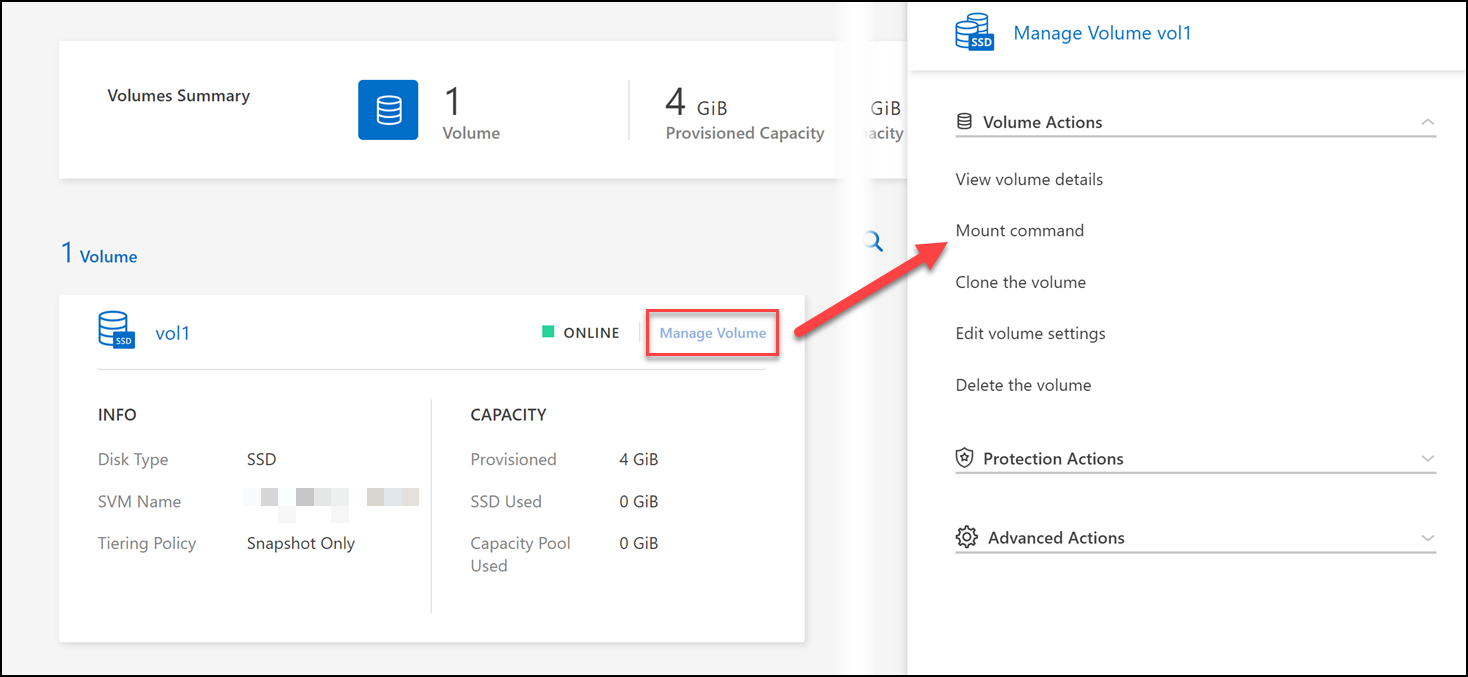
Use Manage Volumes to open the Volume Actions menu. Click Mount command and follow the instructions to mount the volume.
Your volume is now mounted to the host.