

 Get started
Configure BlueXP ransomware protection settings
 Suggest changes
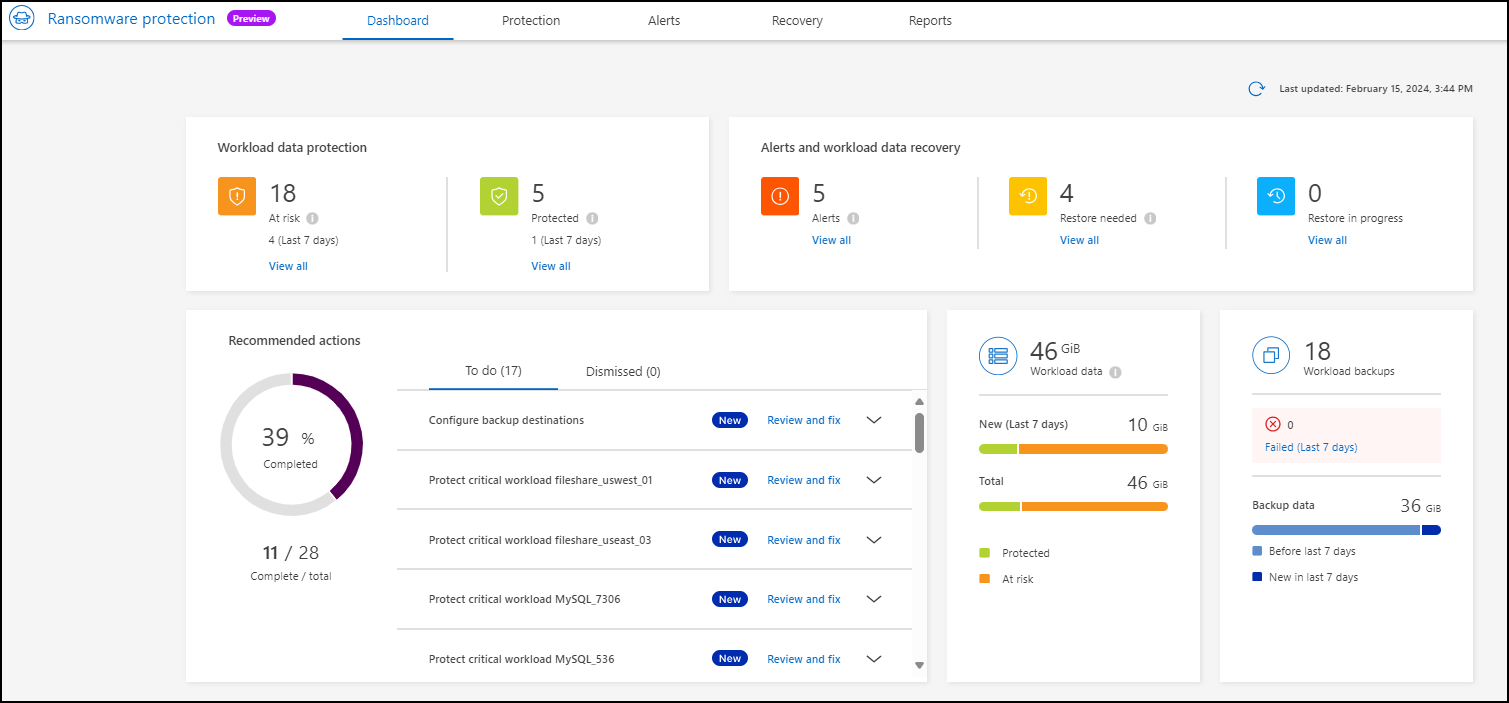
You can configure a backup destination or enable threat detection by reviewing recommendations on the Dashboard.
Enabling threat detection automatically sends data to a security and event management system (SIEM) for threat analysis and detection.
Add a backup destination
BlueXP ransomware protection can identify workloads that do not have any backups yet and also workloads that do not have any backup destinations assigned yet.
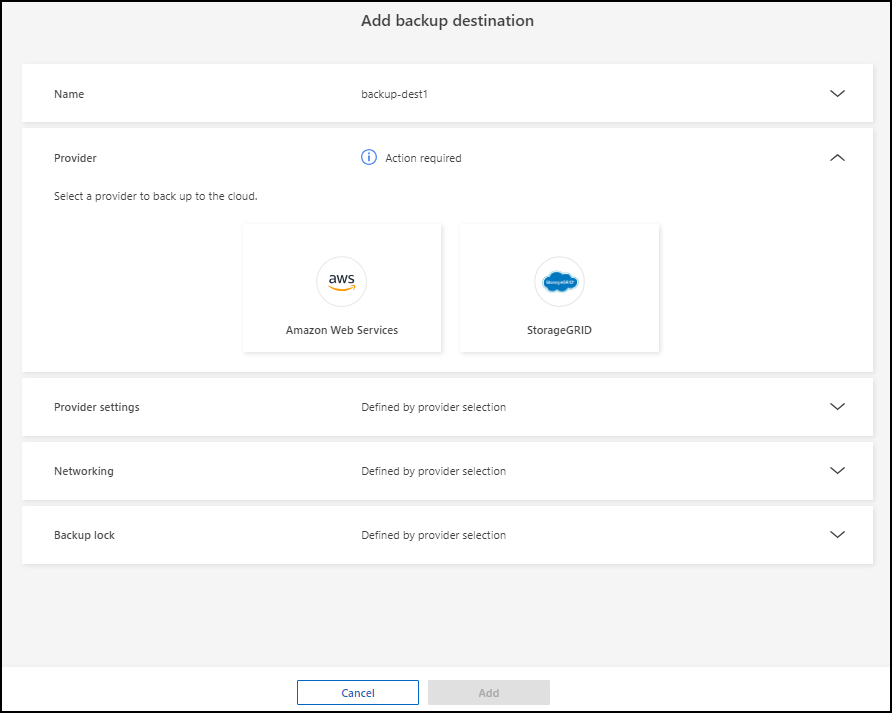
To protect those workloads, you should add a backup destination. You can choose one of the following backup destinations:
-
NetApp StorageGRID
-
Amazon Web Services (AWS)
You can add a backup destination based on a recommended action from the Dashboard.
Access Backup Destination options from the Dashboard's recommended actions
The Dashboard provides many recommendations. One recommendation might be to configure a backup destination.
-
From the BlueXP left navigation, select Protection > Ransomware protection.
-
Review the Dashboard's Recommended actions pane.
-
From the Dashboard, select Review and fix for the recommendation of "Configure backup destinations."
-
Continue with instructions depending on the backup provider.
Add StorageGRID as a backup destination
To set up NetApp StorageGRID as a backup destination, enter the following information.
-
In the Settings > Backup destinations page, select Add.
-
Enter a name for the backup destination.
-
Select StorageGRID.
-
Select the Down arrow next to each setting and enter or select values:
-
Provider settings:
-
Create a new bucket or bring your own bucket that will store the backups.
-
StorageGRID gateway node fully qualified domain name, port, StorageGRID access key and secret key credentials.
-
-
Networking: Choose the IPspace.
-
The IPspace is the cluster where the volumes you want to back up reside. The intercluster LIFs for this IPspace must have outbound internet access.
-
-
Backup lock: Choose whether you want the service to protect backups from being modified or deleted. This option uses the NetApp DataLock technology. Each backup will be locked during the retention period, or for a minimum of 30 days, plus a buffer period of up to 14 days.

If you configure the backup lock setting now, you cannot change the setting later after the backup destination is configured. -
Compliance mode: Users cannot overwrite or delete protected backup files during the retention period.
-
-
-
Select Add.
The new backup destination is added to the list of backup destinations.

Add Amazon Web Services as a backup destination
To set up AWS as a backup destination, enter the following information.
For details about managing your AWS storage in BlueXP, refer to Manage your Amazon S3 buckets.
-
In the Settings > Backup destinations page, select Add.
-
Enter a name for the backup destination.
-
Select Amazon Web Services.
-
Select the Down arrow next to each setting and enter or select values:
-
Provider settings:
-
Create a new bucket, select an existing bucket if one already exists in BlueXP, or bring your own bucket that will store the backups.
-
AWS account, region, access key and secret key for AWS credentials
-
-
Encryption: If you are creating a new S3 bucket, enter encryption key information given to you from the provider. If you chose an existing bucket, encryption information is already available.
Data in the bucket is encrypted with AWS-managed keys by default. You can continue to use AWS-managed keys, or you can manage the encryption of your data using your own keys.
-
Networking: Choose the IPspace and whether you'll be using a Private Endpoint.
-
The IPspace is the cluster where the volumes you want to back up reside. The intercluster LIFs for this IPspace must have outbound internet access.
-
Optionally, choose whether you'll use an AWS private endpoint (PrivateLink) that you previously configured.
If you want to use AWS PrivateLink, refer to AWS PrivateLink for Amazon S3.
-
-
Backup lock: Choose whether you want the service to protect backups from being modified or deleted. This option uses the NetApp DataLock technology. Each backup will be locked during the retention period, or for a minimum of 30 days, plus a buffer period of up to 14 days.
If you configure the backup lock setting now, you cannot change the setting later after the backup destination is configured. -
Governance mode: Specific users (with s3:BypassGovernanceRetention permission) can overwrite or delete protected files during the retention period.
-
Compliance mode: Users cannot overwrite or delete protected backup files during the retention period.
-
-
-
Select Add.
The new backup destination is added to the list of backup destinations.

Enable threat detection
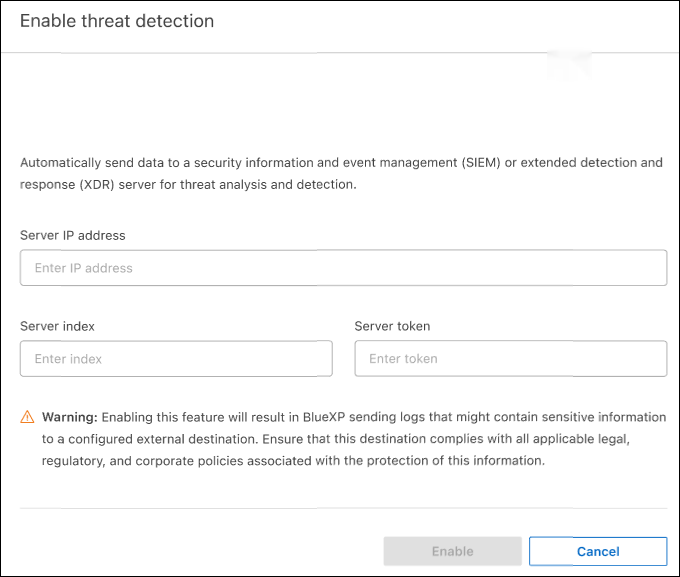
You can automatically send data to a security and event management system (SIEM) for threat analysis and detection.
-
From the BlueXP left navigation, select Protection > Ransomware protection.
-
Review the Dashboard's Recommended actions pane.
-
From the Dashboard, select Review and fix for the recommendation of "Enable threat detection."
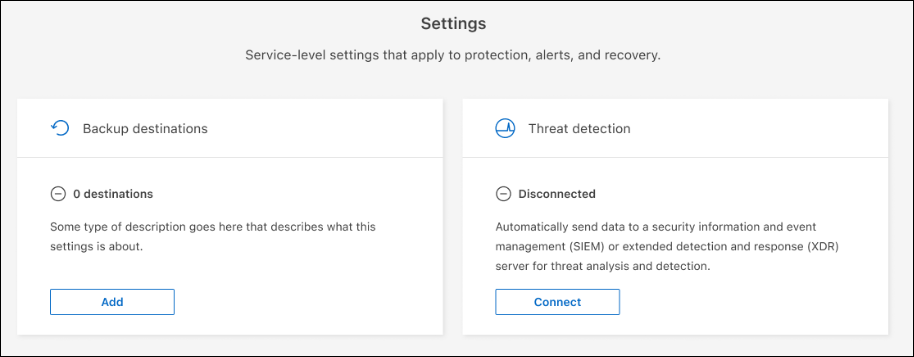
The Settings page appears.
-
In the Settings page, select Connect in the Threat detection pane.
-
Enter SIEM server details to enable threat detection.
-
Select Enable.
The Threat detection pane on the Settings page shows "Connected."