

 Release notes
Creating a sync relationship
 Suggest changes
When you create a sync relationship, the Cloud Sync service copies files from the source to the target. After the initial copy, the service syncs any changed data every 24 hours.
The steps below provide an example that shows how to set up a sync relationship from an NFS server to an S3 bucket.
-
Go to NetApp Cloud Central.
-
Sign up or log in and then start a free trial of Cloud Sync.
-
After you log in, review details about using the service after the free trial ends, and then click OK.
-
On the Select Source & Target page, choose a source and target.
The following steps provide an example of how to create a sync relationship from an NFS server to an S3 bucket.

-
Review the details about how the service works and then click Continue.
-
On the NFS Server page, enter the IP address or fully qualified domain name of the NFS server that you want to sync to AWS.
-
On the Data Broker page, follow the prompts to create a data broker virtual machine in AWS, Azure, or Google Cloud Platform, or to install the data broker software an existing Linux host.
For more details, refer to the following pages:
-
After you install the data broker, click Continue.
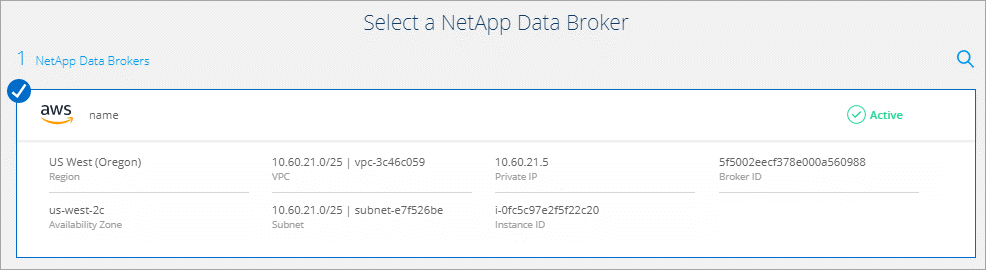
The following image shows a successfully deployed data broker in AWS:
-
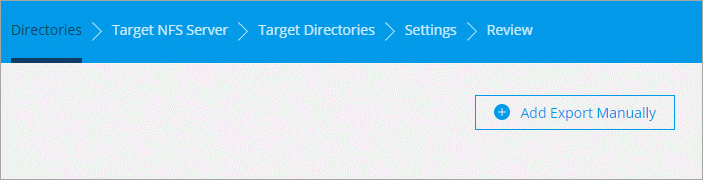
On the Directories page, select a top-level directory or subdirectory.
If Cloud Sync is unable to retrieve the exports, click Add Export Manually and enter the name of an NFS export.

If you want to sync more than one directory on the NFS server, then you must create additional sync relationships after you are done. -
On the AWS S3 Bucket page, select a bucket:
-
Drill down to select an existing folder within the bucket or to select a new folder that you create inside the bucket.
-
Click Add to the list to select an S3 bucket that is not associated with your AWS account. Specific permissions must be applied to the S3 bucket.
-
-
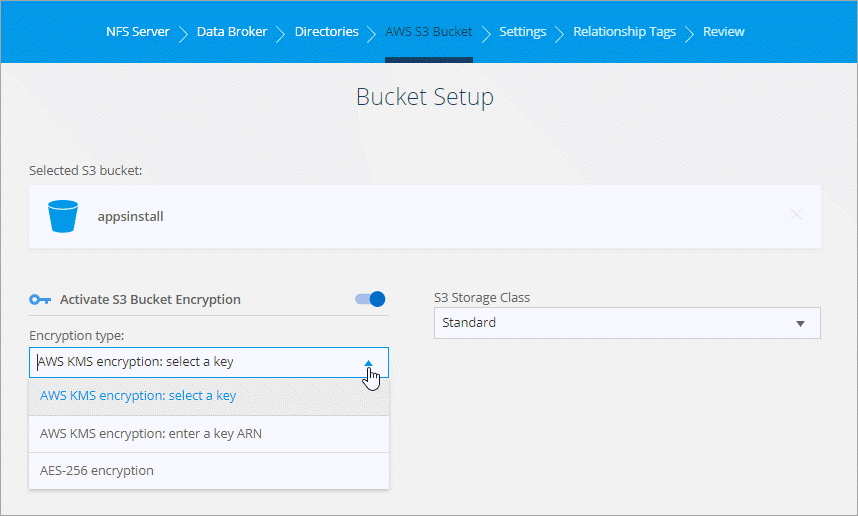
On the Bucket Setup page, set up the bucket:
-
Choose whether to enable S3 bucket encryption and then select an AWS KMS key, enter the ARN of a KMS key, or select AES-256 encryption.
-
Select an S3 storage class. View the supported storage classes.
-
-
On the Settings page, define how source files and folders are synced and maintained in the target location:
- Schedule
-
Choose a recurring schedule for future syncs or turn off the sync schedule. You can schedule a relationship to sync data as often as every 1 minute.
- Retries
-
Define the number of times that Cloud Sync should retry to sync a file before skipping it.
- Recently Modified Files
-
Choose to exclude files that were recently modified prior to the scheduled sync.
- Delete Files on Source
-
Choose to delete files from the source location after Cloud Sync copies the files to the target location. This option includes the risk of data loss because the source files are deleted after they're copied.
If you enable this option, you also need to change a parameter in the local.json file on the data broker. Open the file and change the parameter named workers.transferrer.delete-on-source to true.
- Delete Files on Target
-
Choose to delete files from the target location, if they were deleted from the source. The default is to never deletes files from the target location.
- Object tagging
-
When AWS S3 is the target in a sync relationship, Cloud Sync tags S3 objects with metadata that’s relevant to the sync operation. You can disable tagging of S3 objects, if it’s not desired in your environment. There’s no impact to Cloud Sync if you disable tagging—-Cloud Sync just stores the sync metadata in a different way.
- File Types
-
Define the file types to include in each sync: files, directories, and symbolic links.
- Exclude File Extensions
-
Specify file extensions to exclude from the sync by typing the file extension and pressing Enter. For example, type log or .log to exclude *.log files. A separator isn't required for multiple extensions. The following video provides a short demo:
- File Size
-
Choose to sync all files regardless of their size or just files that are in a specific size range.
- Date Modified
-
Choose all files regardless of their last modified date, files modified after a specific date, before a specific date, or between a time range.
-
On the Relationship Tags page, enter up to 9 relationship tags and then click Continue.
The Cloud Sync service assigns the tags to each object that it syncs to the S3 bucket.
-
Review the details of the sync relationship and then click Create Relationship.
-
After the Cloud Sync service successfully creates the relationship, click View in Dashboard to view details about the data sync relationship.
Result
Cloud Sync starts syncing data between the source and target.