Release notes
Enable Astra Control Provisioner
 Suggest changes
Astra Trident versions 23.10 and later include the option to use Astra Control Provisioner, which enables licensed Astra Control users to access advanced storage provisioning functionality. Astra Control Provisioner provides this extended functionality in addition to standard Astra Trident CSI-based functionality. You can use this procedure to enable and install Astra Control Provisioner.
Your Astra Control Service subscription automatically includes the license for Astra Control Provisioner use.
In coming Astra Control updates, Astra Control Provisioner will replace Astra Trident as storage provisioner and orchestrator and be mandatory for Astra Control use. Because of this, it's strongly recommended that Astra Control users enable Astra Control Provisioner. Astra Trident will continue to remain open source and be released, maintained, supported, and updated with new CSI and other features from NetApp.
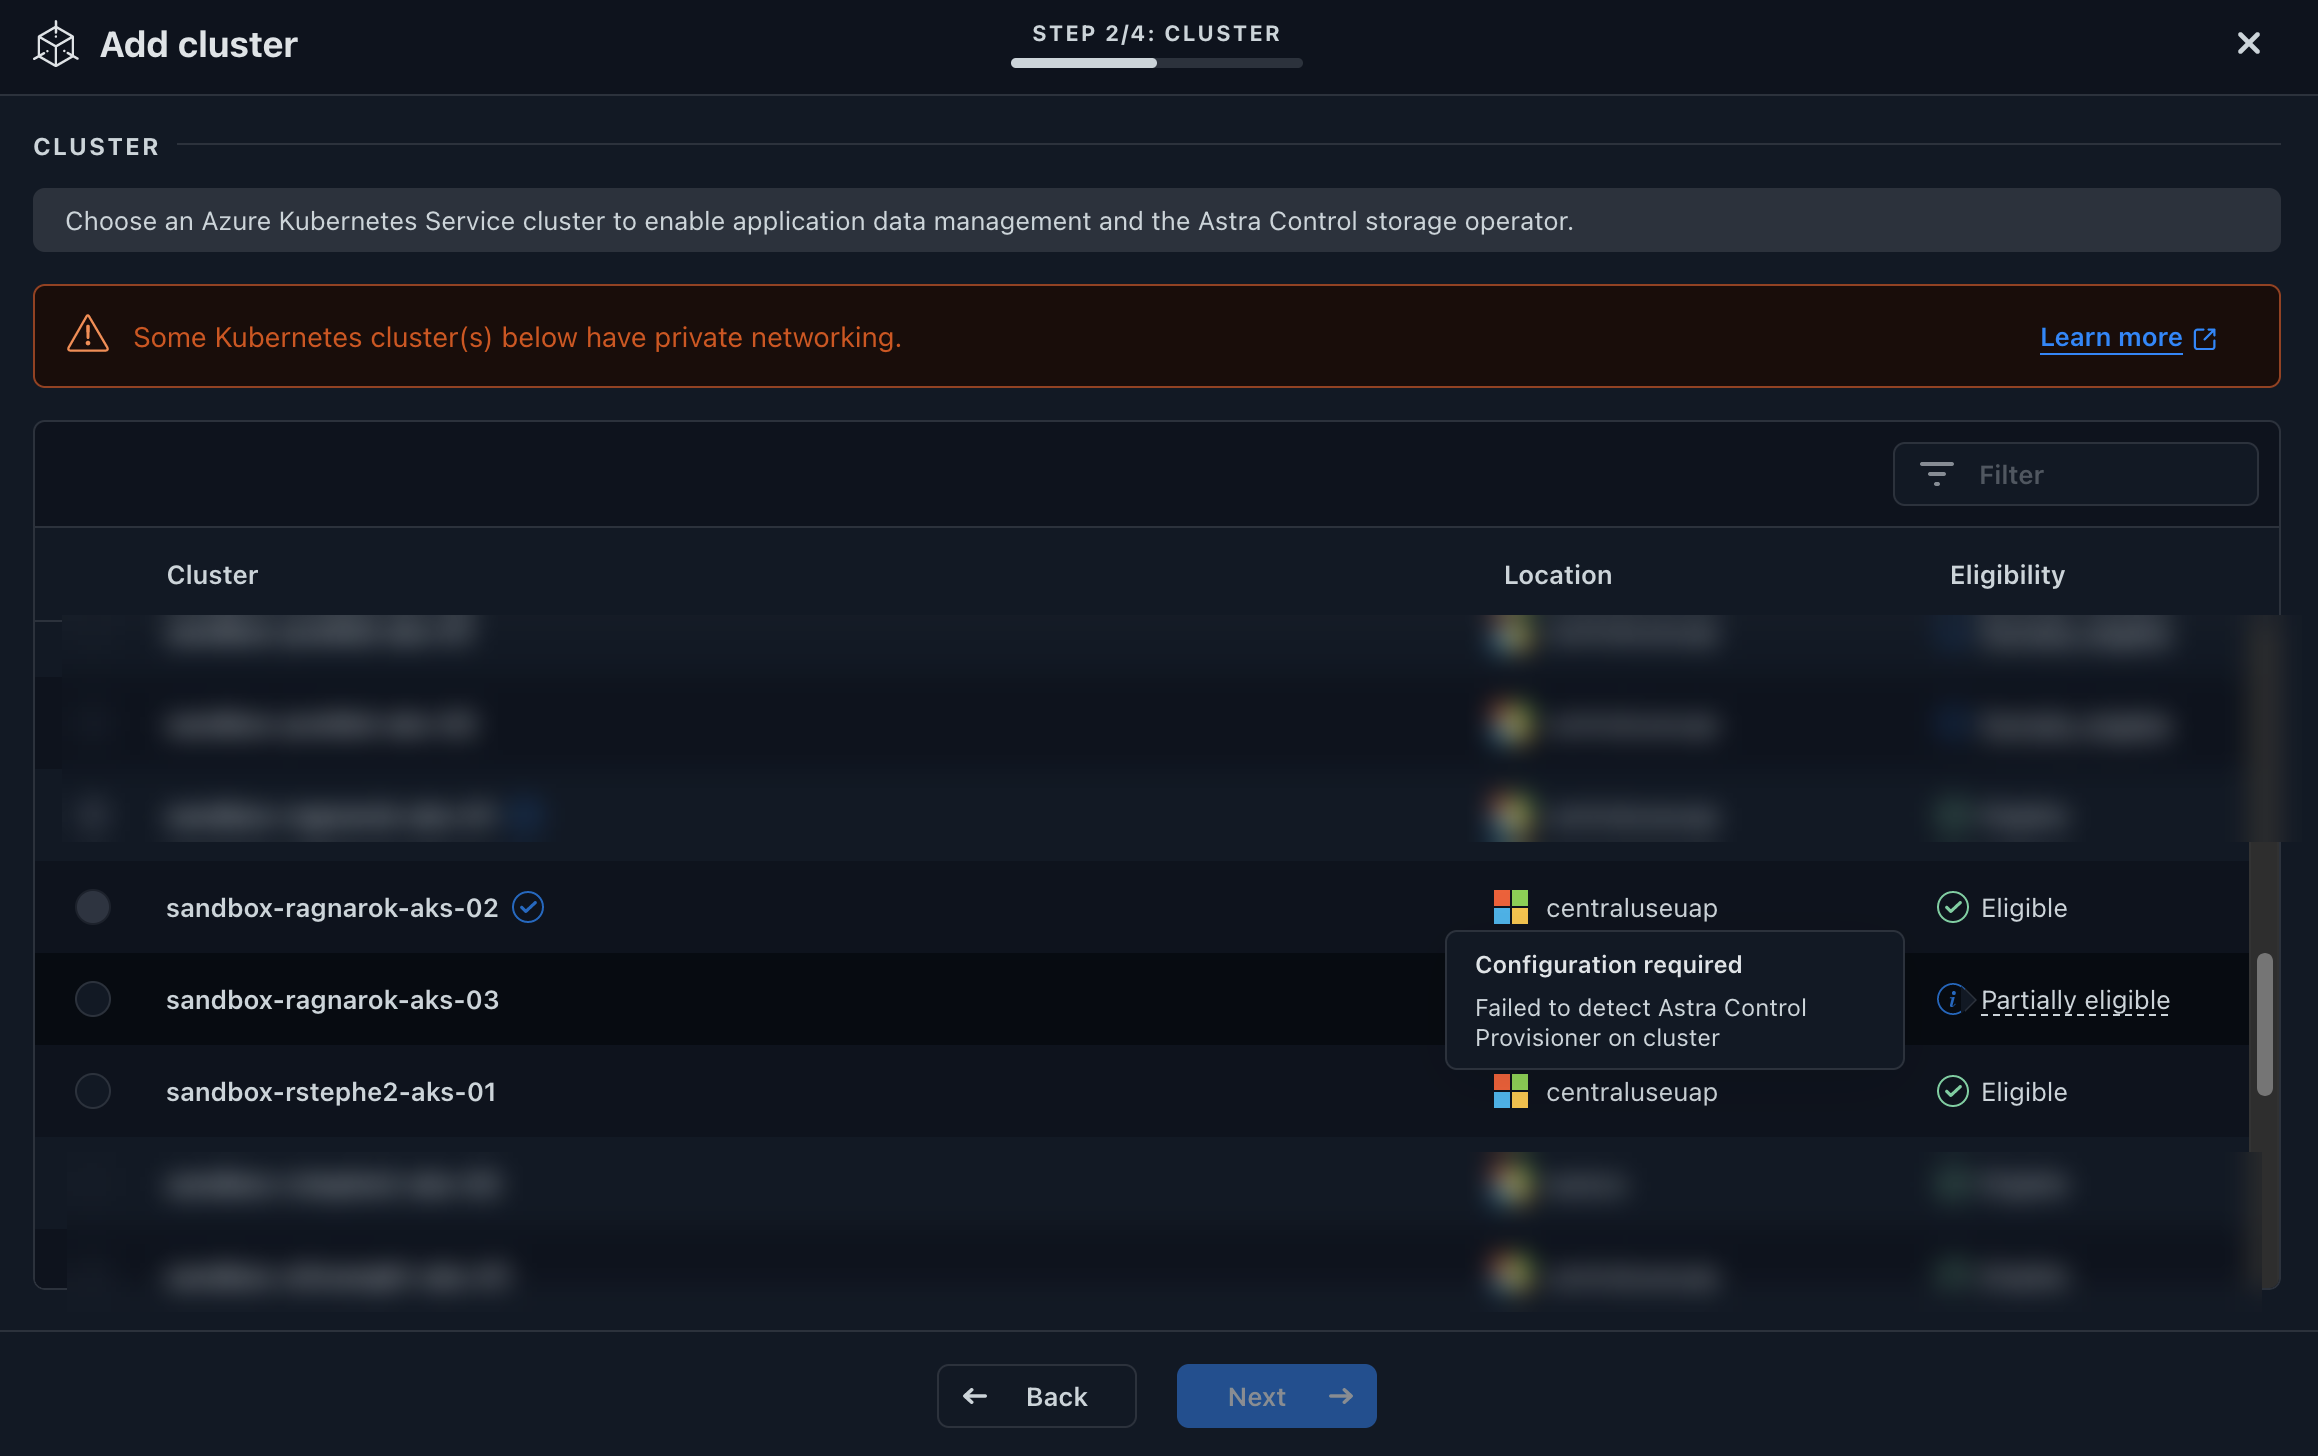
If you add a cluster to Astra Control Service that does not have Astra Trident previously installed, the cluster will be marked as Eligible. After you add the cluster to Astra Control, Astra Control Provisioner will be automatically enabled.
If your cluster is not marked Eligible, it will be marked Partially eligible because of one of the following:
-
It's using an older version of Astra Trident
-
It's using an Astra Trident 23.10 that does not yet have the provisioner option enabled
-
It's a cluster type that does not allow automatic enablement
For Partially eligible cases, use these instructions to manually enable Astra Control Provisioner for your cluster.
If you have an existing Astra Trident without Astra Control Provisioner and want to enable Astra Control Provisioner, do the following first:
-
If you have Astra Trident installed, confirm that its version is within a four-release window: You can perform a direct upgrade to Astra Trident 24.02 with Astra Control Provisioner if your Astra Trident is within a four-release window of version 24.02. For example, you can directly upgrade from Astra Trident 23.04 to 24.02.
-
Confirm that your cluster has an AMD64 system architecture: The Astra Control Provisioner image is provided in both AMD64 and ARM64 CPU architectures, but only AMD64 is supported by Astra Control.
-
Access the NetApp Astra Control image registry:
-
Log on to the Astra Control Service UI and record your Astra Control account ID.
-
Select the figure icon at the top right of the page.
-
Select API access.
-
Write down your account ID.
-
-
From the same page, select Generate API token and copy the API token string to the clipboard and save it in your editor.
-
Log into the Astra Control registry using your preferred method:
-
-
(Custom registries only) Follow these steps to move the image to your custom registry. If you aren't using a registry, follow the Trident operator steps in the next section.

You can use Podman instead of Docker for the following commands. If you are using a Windows environment, PowerShell is recommended. Docker
-
Pull the Astra Control Provisioner image from the registry:
The image pulled will not support multiple platforms and will only support the same platform as the host that pulled the image, such as Linux AMD64. Example:
docker pull cr.astra.netapp.io/astra/trident-acp:24.02.0 --platform linux/amd64
-
Tag the image:
-
Push the image to your custom registry:
-
-
Determine if the original Astra Trident installation method used an operator (either manually or with Helm) or
tridentctl. -
Enable Astra Control Provisioner in Astra Trident using the installation method you used originally:
Astra Trident operator-
Complete these steps if you have not yet installed Astra Trident or if you removed the operator from your original Astra Trident deployment:
-
Create the CRD:
-
Create the trident namespace (
kubectl create namespace trident) or confirm that the trident namespace still exists (kubectl get all -n trident). If the namespace has been removed, create it again.
-
-
Update Astra Trident to 24.02.0:
For clusters running Kubernetes 1.24 or earlier, use bundle_pre_1_25.yaml. For clusters running Kubernetes 1.25 or later, usebundle_post_1_25.yaml. -
Verify Astra Trident is running:
Response:
NAME      AGE
trident   21m
-
If you have a registry that uses secrets, create a secret to use to pull the Astra Control Provisioner image:
-
Edit the TridentOrchestrator CR and make the following edits:
-
Set a custom registry location for the Astra Trident image or pull it from the Astra Control registry (
tridentImage: <my_custom_registry>/trident:24.02.0ortridentImage: netapp/trident:24.02.0). -
Enable Astra Control Provisioner (
enableACP: true). -
Set the custom registry location for the Astra Control Provisioner image or pull it from the Astra Control registry (
acpImage: <my_custom_registry>/trident-acp:24.02.0oracpImage: cr.astra.netapp.io/astra/trident-acp:24.02.0). -
If you established image pull secrets earlier in this procedure, you can set them here (
imagePullSecrets: - <secret_name>). Use the same name secret name you established in the previous steps.
apiVersion: trident.netapp.io/v1
kind: TridentOrchestrator
metadata:
  name: trident
spec:
  debug: true
  namespace: trident
  tridentImage: <registry>/trident:24.02.0
  enableACP: true
  acpImage: <registry>/trident-acp:24.02.0
  imagePullSecrets:
  - <secret_name>
-
-
Save and exit the file. The deployment process will begin automatically.
-
Verify the operator, deployment, and replicasets are created.

There should only be one instance of the operator in a Kubernetes cluster. Do not create multiple deployments of the Astra Trident operator. -
Verify the
trident-acpcontainer is running and thatacpVersionis24.02.0with a status ofInstalled:Response:
status:
  acpVersion: 24.02.0
  currentInstallationParams:
    ...
    acpImage: <registry>/trident-acp:24.02.0
    enableACP: "true"
    ...
  ...
  status: Installed
Astra Control Provisioner functionality is enabled and you can use any features available for the version you are running.
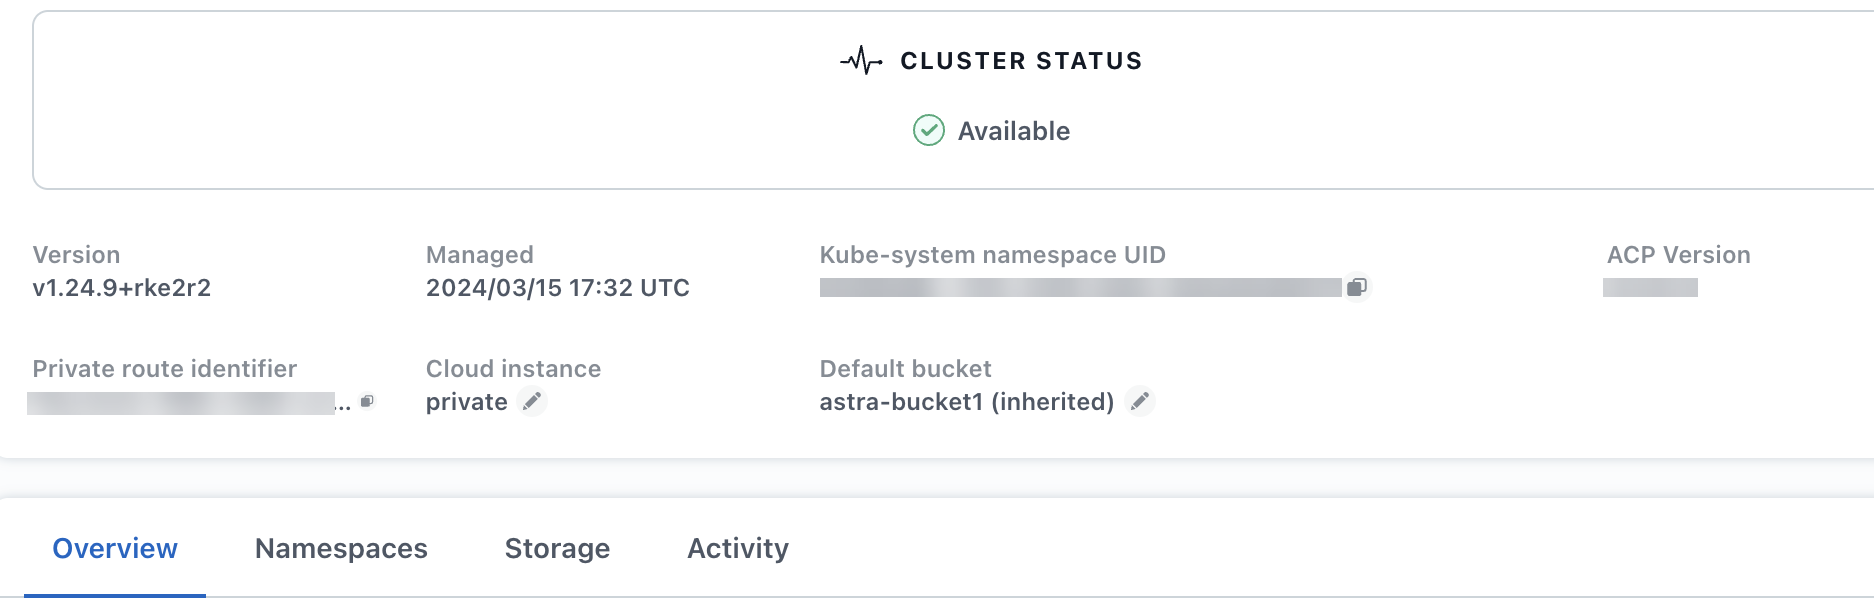
After Astra Control Provisioner is installed, the cluster hosting the provisioner in the Astra Control UI will show an ACP version rather than Trident version field and current installed version number.