

Install Trident
 Suggest changes
Learn about how to install Trident after you install Rancher on NetApp HCI. Trident is a storage orchestrator, which integrates with Docker and Kubernetes, as well as platforms built on these technologies, such as Red Hat OpenShift, Rancher, and IBM Cloud Private. The goal of Trident is to make the provisioning, connection, and consumption of storage transparent and frictionless for the applications. Trident is a fully supported open source project maintained by NetApp. Trident enables you to create, manage, and interact with persistent storage volumes in the standard Kubernetes format that you are familiar with.

|
For more information about Trident, see the Trident documentation. |
-
You have installed Rancher on NetApp HCI.
-
You have deployed your user clusters.
-
You have configured your user cluster networks for Trident. See Enable Trident support for user clusters for instructions.
-
You have completed the necessary prerequisite steps for work node preparation for Trident. See the Trident documentation.
The Trident installer catalog is installed as part of the Rancher installation using NetApp Hybrid Cloud Control. In this task, you use the installer catalog to install and configure Trident.
As part of the Rancher installation, NetApp provides a node template. If you are not planning to use the node template that NetApp provides, and you want to provision on RHEL or CentOS, there might be additional requirements. If you change your worker node to RHEL or CentOS, there are several prerequisites that should be met. See the Trident documentation.
-
From the Rancher UI, select a project for your user cluster.
For information about projects and namespaces, see the Rancher documentation. -
Select Apps, and select Launch.

-
On the Catalog page, select the Trident installer.

On the page that opens, you can select the Detailed Descriptions arrow to learn more about the Trident app and also to find the link to the Trident documentation. -
Select the Configurations Options arrow, and enter the credentials and storage configuration information.
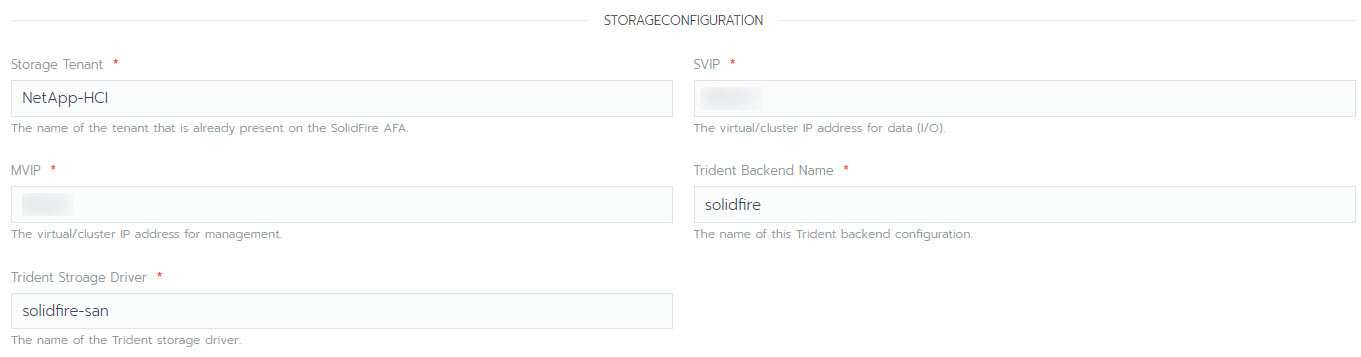
The default storage tenant is NetApp HCI. You can change this value. You can also change the backend name. However, do not change the default storage driver value, which is solidfire-san. -
Select Launch.
This installs the Trident workload on the trident namespace.
-
Select Resources > Workloads, and verify that the trident namespace includes the following components:
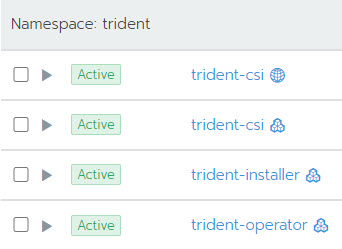
-
(Optional) Select Storage for the user cluster to see the storage classes that you can use for your persistent volumes.
The three storage classes are solidfire-gold, solidfire-silver, and solidfire-bronze. You can make one of these storage classes the default by selecting the icon under the Default column.