Deploy Rancher on NetApp HCI
 Suggest changes


To use Rancher on your NetApp HCI environment, you first deploy Rancher on NetApp HCI.

|
Before starting the deployment, be sure to check the datastore free space and other requirements for Rancher on NetApp HCI. |

|
Rancher Support is not included in your NetApp Support Edge agreement. Contact NetApp Sales or your reseller for options. If you purchase Rancher Support from NetApp, you will receive an email with instructions. |
What happens when you deploy Rancher on NetApp HCI?
The deployment involves the following steps, each described further:
-
Use the NetApp Hybrid Cloud Control to initiate the deployment.
-
The Rancher deployment creates a management cluster, which includes three virtual machines.
Each virtual machine is assigned all Kubernetes roles for both the Control Plane and Worker. This means that the Rancher UI is available on each node.
-
The Rancher Control Plane (or Rancher Server) is also installed, using the NetApp HCI node template in Rancher for easier deployment. The Rancher Control Plane automatically works with the configuration used in the NetApp Deployment Engine, which was used to build the NetApp HCI infrastructure.
-
After deployment, you will receive an email from NetApp providing you with the option to register for NetApp Support on Rancher deployments on NetApp HCI.
-
After deployment, Dev and Ops teams can then deploy their user clusters, similar to any Rancher deployment.
Steps to deploy Rancher on NetApp HCI
Access the NetApp Hybrid Cloud Control
To begin the deployment, access the NetApp Hybrid Cloud Control.
-
Open the IP address of the management node in a web browser. For example:
https://<ManagementNodeIP>
-
Log in to NetApp Hybrid Cloud Control by providing the NetApp HCI storage cluster administrator credentials.
The NetApp Hybrid Cloud Control interface appears.
Deploy Rancher on NetApp HCI
-
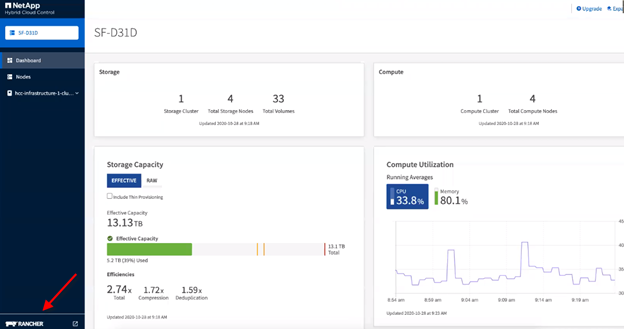
From the Hybrid Cloud Control, select the Rancher icon in the lower left of the navigation bar.

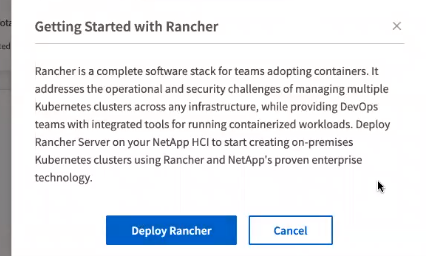
A popup window shows a message about getting started with Rancher.

-
Select Deploy Rancher.
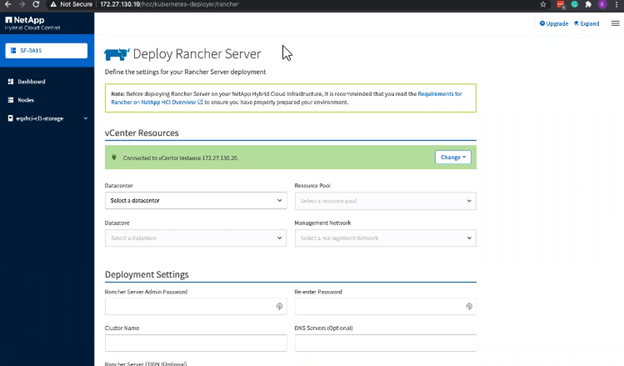
The Rancher UI appears.

Your vCenter credentials are collected based on your NetApp Deployment Engine installation.
-
Enter vCenter Resources information. Some fields are described next.
-
Datacenter: Select a datacenter. After you select the datacenter, all other fields are prepopulated, although you can change them.
-
Datastore: Select a datastore on the NetApp HCI storage nodes. This datastore should be resilient and accessible to all of the VMware hosts. Do not select a local datastore that is accessible to only one of the hosts.
-
Management network: This should be accessible from the management stations and from the virtual machine network where the user clusters will be hosted.
-
-
Enter Deployment Settings information:
-
DNS Servers: Optional. If you use load balancing, enter the internal DNS server information.
-
Rancher Server FQDN: To ensure that the Rancher Server remains available during node failures, provide a fully-qualified domain name (FQDN) that your DNS server can resolve to any of the IP addresses assigned to the Rancher Server cluster's nodes. This FQDN with the "https" prefix becomes the Rancher URL that you will use to access your Rancher implementation.
If no domain name is provided, wildcard DNS will be used instead and you will be able to access the Rancher Server using one of the URLs presented after the deployment completes.
-
-
Enter Advanced Settings information:
-
Assign Static IP Addresses: If you enable static IP addressing, provide starting IP addresses for three IPv4 addresses in sequence, one for each management cluster virtual machine. Rancher on NetApp HCI deploys three management cluster virtual machines.
-
Configure Proxy Server:
-
-
Review and select the checkbox for the Rancher End User License Agreement.
-
Review and select the checkbox to acknowledge information about Rancher software.
-
Select Deploy.
A bar indicates the deployment progress.
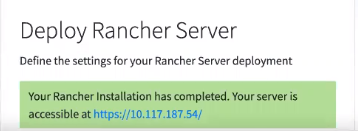
The Rancher deployment could take about 15 minutes. When the deployment is complete, Rancher displays a message about the completion and provides a Rancher URL.

-
Record that Rancher URL that Sdisplays at the end of the deployment. You will use this URL to access the Rancher UI.
Verify your deployment by using vCenter Server
In your vSphere client, you can see the Rancher management cluster, which includes the three virtual machines.

|
Once you have finished deployment, do not modify the configuration of the Rancher server virtual machine cluster or remove the virtual machines. Rancher on NetApp HCI relies on the deployed RKE management cluster configuration to function normally. |
What's next?
After deployment, you can do the following:


