

 Install a fabric-attached MetroCluster
Power off and power on a single site in a MetroCluster FC configuration
 Suggest changes
If you need to perform site maintenance or relocate a single site in a MetroCluster FC configuration, you must know how to power off and power on the site.
If you need to relocate and reconfigure a site (for example, if you need to expand from a four-node to an eight-node cluster), you cannot complete these tasks at the same time. This procedure only covers the steps that are required to perform site maintenance or to relocate a site without changing its configuration.
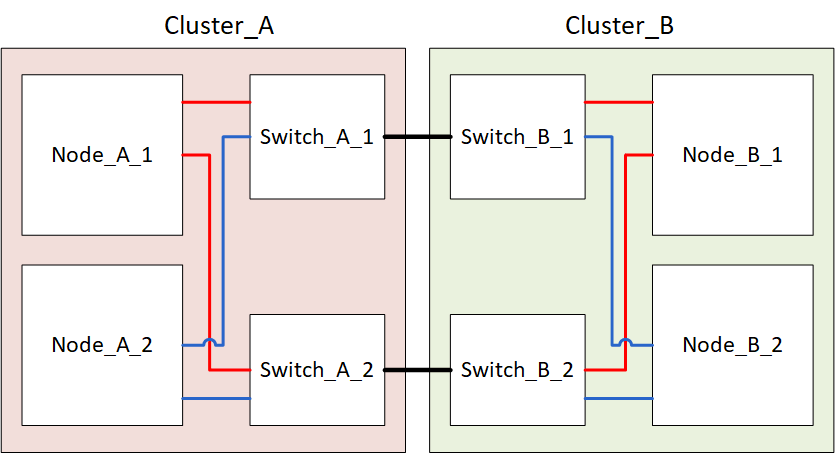
The following diagram shows a MetroCluster configuration. Cluster_B is powered off for maintenance.
Power off a MetroCluster site
You must power off a site and all of the equipment before site maintenance or relocation can begin.
All the commands in the following steps are issued from the site that remains powered on.
-
Before you begin, check that any non-mirrored aggregates at the site are offline.
-
Verify the operation of the MetroCluster configuration in ONTAP:
-
Check whether the system is multipathed:
node run -node node-name sysconfig -a -
Check for any health alerts on both clusters:
system health alert show -
Confirm the MetroCluster configuration and that the operational mode is normal:
metrocluster show -
Perform a MetroCluster check:
metrocluster check run -
Display the results of the MetroCluster check:
metrocluster check show -
Check for any health alerts on the switches (if present):
storage switch show -
Run Config Advisor.
-
After running Config Advisor, review the tool's output and follow the recommendations in the output to address any issues discovered.
-
-
From the site you want to remain up, implement the switchover:
metrocluster switchovercluster_A::*> metrocluster switchover
The operation can take several minutes to complete.
The unmirrored aggregates will only be online after a switchover if the remote disks in the aggregate are accessible. If the ISLs fail, the local node might be unable to access the data in the unmirrored remote disks. The failure of an aggregate can lead to a reboot of the local node.
-
Monitor and verify the completion of the switchover:
metrocluster operation showcluster_A::*> metrocluster operation show Operation: Switchover Start time: 10/4/2012 19:04:13 State: in-progress End time: - Errors: cluster_A::*> metrocluster operation show Operation: Switchover Start time: 10/4/2012 19:04:13 State: successful End time: 10/4/2012 19:04:22 Errors: - -
Move any volumes and LUNs that belong to unmirrored aggregates offline.
-
Move the volumes offline.
cluster_A::* volume offline <volume name>
-
Move the LUNs offline.
cluster_A::* lun offline lun_path <lun_path>
-
-
Move unmirrored aggregates offline:
storage aggregate offlinecluster_A*::> storage aggregate offline -aggregate <aggregate-name>
-
Depending on your configuration and ONTAP version, identify and move offline affected plexes that are located at the disaster site (Cluster_B).
You should move the following plexes offline:
-
Non-mirrored plexes residing on disks located at the disaster site.
If you do not move the non-mirrored plexes at the disaster site offline, an outage might occur when the disaster site is later powered off.
-
Mirrored plexes residing on disks located at the disaster site for aggregate mirroring. After they are moved offline, the plexes are inaccessible.
-
Identify the affected plexes.
Plexes that are owned by nodes at the surviving site consist of Pool1 disks. Plexes that are owned by nodes at the disaster site consist of Pool0 disks.
Cluster_A::> storage aggregate plex show -fields aggregate,status,is-online,Plex,pool
aggregate    plex  status        is-online pool
------------ ----- ------------- --------- ----
Node_B_1_aggr0 plex0 normal,active true     0
Node_B_1_aggr0 plex1 normal,active true     1

Node_B_2_aggr0 plex0 normal,active true     0
Node_B_2_aggr0 plex5 normal,active true     1

Node_B_1_aggr1 plex0 normal,active true     0
Node_B_1_aggr1 plex3 normal,active true     1

Node_B_2_aggr1 plex0 normal,active true     0
Node_B_2_aggr1 plex1 normal,active true     1

Node_A_1_aggr0 plex0 normal,active true     0
Node_A_1_aggr0 plex4 normal,active true     1

Node_A_1_aggr1 plex0 normal,active true     0
Node_A_1_aggr1 plex1 normal,active true     1

Node_A_2_aggr0 plex0 normal,active true     0
Node_A_2_aggr0 plex4 normal,active true     1

Node_A_2_aggr1 plex0 normal,active true     0
Node_A_2_aggr1 plex1 normal,active true     1
14 entries were displayed.

Cluster_A::>
The affected plexes are those that are remote to cluster A. The following table shows whether the disks are local or remote relative to cluster A:
Node
Disks in pool
Should the disks be set offline?
Example of plexes to be moved offline
Node _A_1 and Node _A_2
Disks in pool 0
No. Disks are local to cluster A.
-
Disks in pool 1
Yes. Disks are remote to cluster A.
Node_A_1_aggr0/plex4
Node_A_1_aggr1/plex1
Node_A_2_aggr0/plex4
Node_A_2_aggr1/plex1
Node _B_1 and Node _B_2
Disks in pool 0
Yes. Disks are remote to cluster A.
Node_B_1_aggr1/plex0
Node_B_1_aggr0/plex0
Node_B_2_aggr0/plex0
Node_B_2_aggr1/plex0
Disks in pool 1
No. Disks are local to cluster A.
-
-
Move the affected plexes offline:
storage aggregate plex offlinestorage aggregate plex offline -aggregate Node_B_1_aggr0 -plex plex0

Perform this step for all plexes that have disks that are remote to Cluster_A.
-
-
Persistently offline the ISL switch ports according to the switch type.
Switch type
Action
For Brocade FC switches…
-
Use the
portcfgpersistentdisable <port>command to persistently disable the ports as shown in the following example. This must be done on both switches at the surviving site.Switch_A_1:admin> portcfgpersistentdisable 14 Switch_A_1:admin> portcfgpersistentdisable 15 Switch_A_1:admin>
-
Verify that the ports are disabled using the
switchshowcommand shown in the following example:Switch_A_1:admin> switchshow switchName: Switch_A_1 switchType: 109.1 switchState: Online switchMode: Native switchRole: Principal switchDomain: 2 switchId: fffc02 switchWwn: 10:00:00:05:33:88:9c:68 zoning: ON (T5_T6) switchBeacon: OFF FC Router: OFF FC Router BB Fabric ID: 128 Address Mode: 0 Index Port Address Media Speed State Proto ============================================== ... 14 14 020e00 id 16G No_Light FC Disabled (Persistent) 15 15 020f00 id 16G No_Light FC Disabled (Persistent) ... Switch_A_1:admin>
For Cisco FC switches…
-
Use the
interfacecommand to persistently disable the ports. The following example shows ports 14 and 15 being disabled:Switch_A_1# conf t Switch_A_1(config)# interface fc1/14-15 Switch_A_1(config)# shut Switch_A_1(config-if)# end Switch_A_1# copy running-config startup-config
-
Verify that the switch port is disabled using the
show interface briefcommand as shown in the following example:Switch_A_1# show interface brief Switch_A_1
-
-
Power off the equipment at the disaster site.
The following equipment must be turned off in the order shown:
-
MetroCluster FC switches
-
Storage controllers - the storage controllers should currently be at the
LOADERprompt, you must power them off completely. -
Storage shelves
-
ATTO FibreBridges (if present)
-
Relocating the powered-off site of the MetroCluster
After the site is powered off, you can begin maintenance work. The procedure is the same whether the MetroCluster components are relocated within the same data center or relocated to a different data center.
-
The hardware should be cabled in the same way as the previous site.
-
If the Inter-Switch Link (ISL) speed, length, or number has changed, they all need to be reconfigured.
-
Verify that the cabling for all components is carefully recorded so that it can be correctly reconnected at the new location.
-
Physically relocate all the hardware, storage controllers, FC switches, FibreBridges, and storage shelves.
-
Configure the ISL ports and verify the intersite connectivity.
-
Power on the FC switches.
Do not power up any other equipment. -
Enable the ports.
Enable the ports according to the correct switch types in the following table:
Switch type
Command
For Brocade FC switches…
-
Use the
portcfgpersistentenable <port number>command to persistently enable the port. This must be done on both switches at the surviving site.The following example shows ports 14 and 15 being enabled on Switch_A_1.
switch_A_1:admin> portcfgpersistentenable 14
switch_A_1:admin> portcfgpersistentenable 15
switch_A_1:admin>
-
Verify that the switch port is enabled:
switchshowThe following example shows that ports 14 and 15 are enabled:
switch_A_1:admin> switchshow
switchName:	Switch_A_1
switchType:	109.1

switchState:	Online
switchMode:	Native
switchRole:	Principal
switchDomain:	2
switchId:	fffc02
switchWwn:	10:00:00:05:33:88:9c:68
zoning:		ON (T5_T6)
switchBeacon:	OFF
FC Router:	OFF
FC Router BB Fabric ID:	128
Address Mode:	0

Index Port Address Media Speed State     Proto
==============================================
 ...
 14  14   020e00   id    16G   Online      FC  E-Port  10:00:00:05:33:86:89:cb "Switch_A_1"
 15  15   020f00   id    16G   Online      FC  E-Port  10:00:00:05:33:86:89:cb "Switch_A_1" (downstream)
 ...
switch_A_1:admin>
For Cisco FC switches…
-
Enter the
interfacecommand to enable the port.The following example shows ports 14 and 15 being enabled on Switch_A_1.
 switch_A_1# conf t
 switch_A_1(config)# interface fc1/14-15
 switch_A_1(config)# no shut
 switch_A_1(config-if)# end
 switch_A_1# copy running-config startup-config
-
Verify that the switch port is enabled:
show interface briefswitch_A_1# show interface brief switch_A_1#
-
-
-
Use tools on the switches (as they are available) to verify the intersite connectivity.
You should only proceed if the links are correctly configured and stable. -
Disable the links again if they are found to be stable.
Disable the ports based on whether you are using Brocade or Cisco switches as shown in the following table:
Switch type
Command
For Brocade FC switches…
-
Enter the
portcfgpersistentdisable <port_number>command to persistently disable the port.This must be done on both switches at the surviving site. The following example shows ports 14 and 15 being disabled on Switch_A_1:
switch_A_1:admin> portpersistentdisable 14 switch_A_1:admin> portpersistentdisable 15 switch_A_1:admin>
-
Verify that the switch port is disabled:
switchshowThe following example shows that ports 14 and 15 are disabled:
switch_A_1:admin> switchshow switchName: Switch_A_1 switchType: 109.1 switchState: Online switchMode: Native switchRole: Principal switchDomain: 2 switchId: fffc02 switchWwn: 10:00:00:05:33:88:9c:68 zoning: ON (T5_T6) switchBeacon: OFF FC Router: OFF FC Router BB Fabric ID: 128 Address Mode: 0 Index Port Address Media Speed State Proto ============================================== ... 14 14 020e00 id 16G No_Light FC Disabled (Persistent) 15 15 020f00 id 16G No_Light FC Disabled (Persistent) ... switch_A_1:admin>
For Cisco FC switches…
-
Disable the port using the
interfacecommand.The following example shows ports fc1/14 and fc1/15 being disabled on Switch A_1:
switch_A_1# conf t switch_A_1(config)# interface fc1/14-15 switch_A_1(config)# shut switch_A_1(config-if)# end switch_A_1# copy running-config startup-config
-
Verify that the switch port is disabled using the
show interface briefcommand.switch_A_1# show interface brief switch_A_1#
-
Powering on the MetroCluster configuration and returning to normal operation
After maintenance has been completed or the site has been moved, you must power on the site and reestablish the MetroCluster configuration.
All the commands in the following steps are issued from the site that you power on.
-
Power on the switches.
You should power on the switches first. They might have been powered on during the previous step if the site was relocated.
-
Reconfigure the Inter-Switch Link (ISL) if required or if this was not completed as part of the relocation.
-
Enable the ISL if fencing was completed.
-
Verify the ISL.
-
-
Disable the ISLs on the FC switches.
-
Power on the storage controllers and wait until you see the
LOADERprompt. The controllers must not be fully booted.If auto boot is enabled, press
Ctrl+Cto stop the controllers from automatically booting. -
Power on the shelves and allow enough time for them to power on completely.
-
Power on the FibreBridge bridges.
-
On the FC switches, verify that the ports connecting the bridges are coming online.
You can use a command such as
switchshowfor Brocade switches, andshow interface brieffor Cisco switches. -
Verify that the shelves and disks on the bridges are clearly visible.
You can use a command such as
sastargetson the ATTO CLI.
-
-
Enable the ISLs on the FC switches.
Enable the ports based on whether you are using Brocade or Cisco switches as shown in the following table:
Switch type
Command
For Brocade FC switches…
-
Enter the
portcfgpersistentenable <port>command to persistently enable the ports. This must be done on both switches at the surviving site.The following example shows ports 14 and 15 being enabled on Switch_A_1:
Switch_A_1:admin> portcfgpersistentenable 14 Switch_A_1:admin> portcfgpersistentenable 15 Switch_A_1:admin>
-
Verify that the switch port is enabled using the
switchshowcommand:switch_A_1:admin> switchshow switchName: Switch_A_1 switchType: 109.1 switchState: Online switchMode: Native switchRole: Principal switchDomain: 2 switchId: fffc02 switchWwn: 10:00:00:05:33:88:9c:68 zoning: ON (T5_T6) switchBeacon: OFF FC Router: OFF FC Router BB Fabric ID: 128 Address Mode: 0 Index Port Address Media Speed State Proto ============================================== ... 14 14 020e00 id 16G Online FC E-Port 10:00:00:05:33:86:89:cb "Switch_A_1" 15 15 020f00 id 16G Online FC E-Port 10:00:00:05:33:86:89:cb "Switch_A_1" (downstream) ... switch_A_1:admin>
For Cisco FC switches…
-
Use the
interfacecommand to enable the ports.The following example shows port fc1/14 and fc1/15 being enabled on Switch A_1:
switch_A_1# conf t switch_A_1(config)# interface fc1/14-15 switch_A_1(config)# no shut switch_A_1(config-if)# end switch_A_1# copy running-config startup-config
-
Verify that the switch port is disabled:
 switch_A_1# show interface brief
 switch_A_1#
-
-
Verify that the storage is visible from the surviving site. Bring the offline plexes back online. This restarts the resync operations and reestablishes the SyncMirror.
-
Reestablish the MetroCluster configuration.
Follow the instructions in Verifying that your system is ready for a switchback to perform healing and switchback operations according to your MetroCluster configuration.