

Restore SQL Server database backups
 Suggest changes
You can use SnapCenter to restore backed-up SQL Server databases. Database restoration is a multiphase process that copies all of the data and log pages from a specified SQL Server backup to a specified database.
About this task
-
You can restore the backed-up SQL Server databases to a different SQL Server instance on the same host where the backup was created.
You can use SnapCenter to restore the backed-up SQL Server databases to an alternate path so that you do not replace a production version.
-
SnapCenter can restore databases in a Windows cluster without taking the SQL Server cluster group offline.
-
If a cluster failure (a cluster group move operation) occurs during a restore operation (for example, if the node that owns the resources goes down), you must reconnect to the SQL Server instance, and then restart the restore operation.
-
You cannot restore the database when the users or the SQL Server Agent jobs are accessing the database.
-
You cannot restore system databases to an alternate path.
-
Most of the fields on the Restore wizard pages are self-explanatory. The following information describes fields for which you might need guidance.
Steps
-
In the left navigation pane, click Resources, and then select the appropriate plug-in from the list.
-
In the Resources page, select either Database or Resource Group from the View list.
-
Select the database or the resource group from the list.
The topology page is displayed.
-
From the Manage Copies view, select Backups from the storage system.
-
Select the backup from the table, and then click the
 icon.
icon.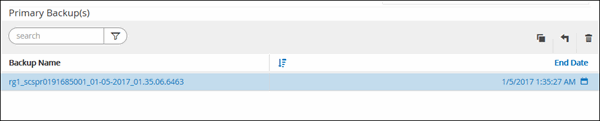
-
In the Restore Scope page, select one of the following options:
Option Description Restore the database to the same host where the backup was created
Select this option if you want to restore the database to the same SQL server where the backups are taken.
Restore the database to an alternate host
Select this option if you want the database to be restored to a different SQL server in the same or different host where backups are taken.
Select a host name, provide a database name (optional), select an instance, and specify the restore paths.

The file extension provided in the alternate path must be same as the file extension of the original database file. If the Restore the database to an alternate host option is not displayed in the Restore Scope page, clear the browser cache.
Restore the database using existing database files
Select this option if you want the database to be restored to an alternate SQL Server in the same or different host where backups are taken.
Database files should be already present on the given existing file paths. Select a host name, provide a database name (optional), select an instance, and specify the restore paths.
-
In the Recovery Scope page, select one of the following options:
Option Description None
Select None when you need to restore only the full backup without any logs.
All log backups
Select All log backups up-to-the-minute backup restore operation to restore all of the available log backups after the full backup.
By log backups until
Select By log backups to perform a point-in-time restore operation, which restores the database based on backup logs until the backup log with the selected date.
By specific date until
Select By specific date until to specify the date and time after which transaction logs are not applied to the restored database.
This point-in-time restore operation halts the restoration of transaction log entries that were recorded after the specified date and time.
Use custom log directory
If you have selected All log backups, By log backups, or By specific date until and the logs are located at a custom location, select Use custom log directory, and then specify the log location.
The custom log directory is not supported for availability group database. -
In the Pre Ops page, perform the following steps:
-
In the Pre Restore Options page, select one of the following options:
-
Select Overwrite the database with same name during restore to restore the database with the same name.
-
Select Retain SQL database replication settings to restore the database and retain the existing replication settings.
-
Select Create transaction log backup before restore to create a transaction log before the restore operation begins.
-
Select Quit restore if transaction log backup before restore fails to abort the restore operation if the transaction log backup fails.
-
-
Specify optional scripts to run before performing a restore job.
For example, you can run a script to update SNMP traps, automate alerts, send logs, and so on.
-
-
In the Post Ops page, perform the following steps:
-
In the Choose database state after restore completes section, select one of the following options:
-
Select Operational, but unavailable for restoring additional transaction logs if you are restoring all of the necessary backups now.
This is the default behavior, which leaves the database ready for use by rolling back the uncommitted transactions. You cannot restore additional transaction logs until you create a backup.
-
Select Non-operational, but available for restoring additional transactional logs to leave the database non-operational without rolling back the uncommitted transactions.
Additional transaction logs can be restored. You cannot use the database until it is recovered.
-
Select Read-only mode, available for restoring additional transactional logs to leave the database in read-only mode.
This option undoes uncommitted transactions, but saves the undone actions in a standby file so that recovery effects can be reverted.
If the Undo directory option is enabled, more transaction logs are restored. If the restore operation for the transaction log is unsuccessful, the changes can be rolled back. The SQL Server documentation contains more information.
-
-
Specify optional scripts to run after performing a restore job.
For example, you can run a script to update SNMP traps, automate alerts, send logs, and so on.
-
-
In the Notification page, from the Email preference drop-down list, select the scenarios in which you want to send the emails.
You must also specify the sender and receiver email addresses, and the subject of the email.
-
Review the summary, and then click Finish.
-
Monitor the restore process by using the Monitor > Jobs page.
Find more information