

Configuring BlueXP Backup and Recovery for SAP HANA
 Suggest changes
This section describes how to setup the working environment, how to configure SnapCenter, and how to configure and activate SAP HANA backup within BlueXP.
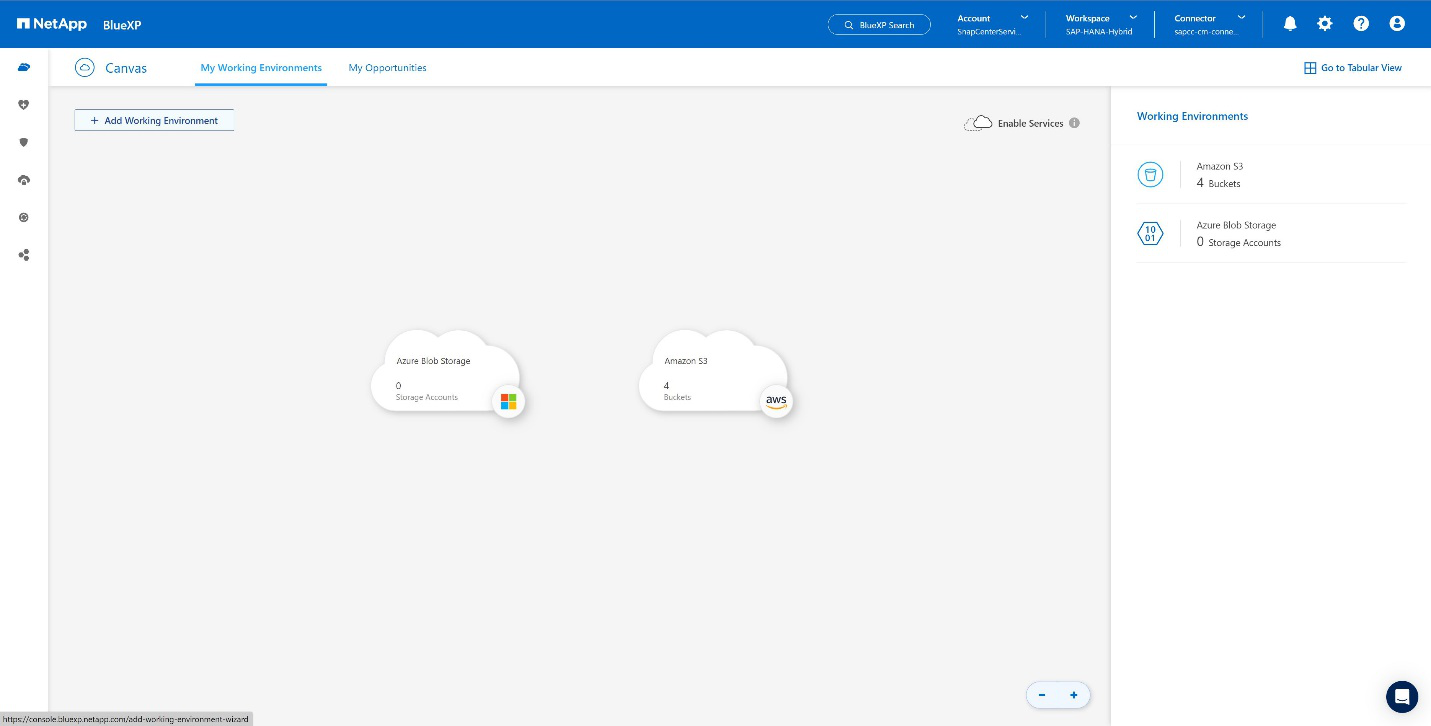
Create working environment for BlueXP
Add the on-premises storage system to you work environment.
-
At the left menu choose Storage → Canvas → My Working Environment.
-
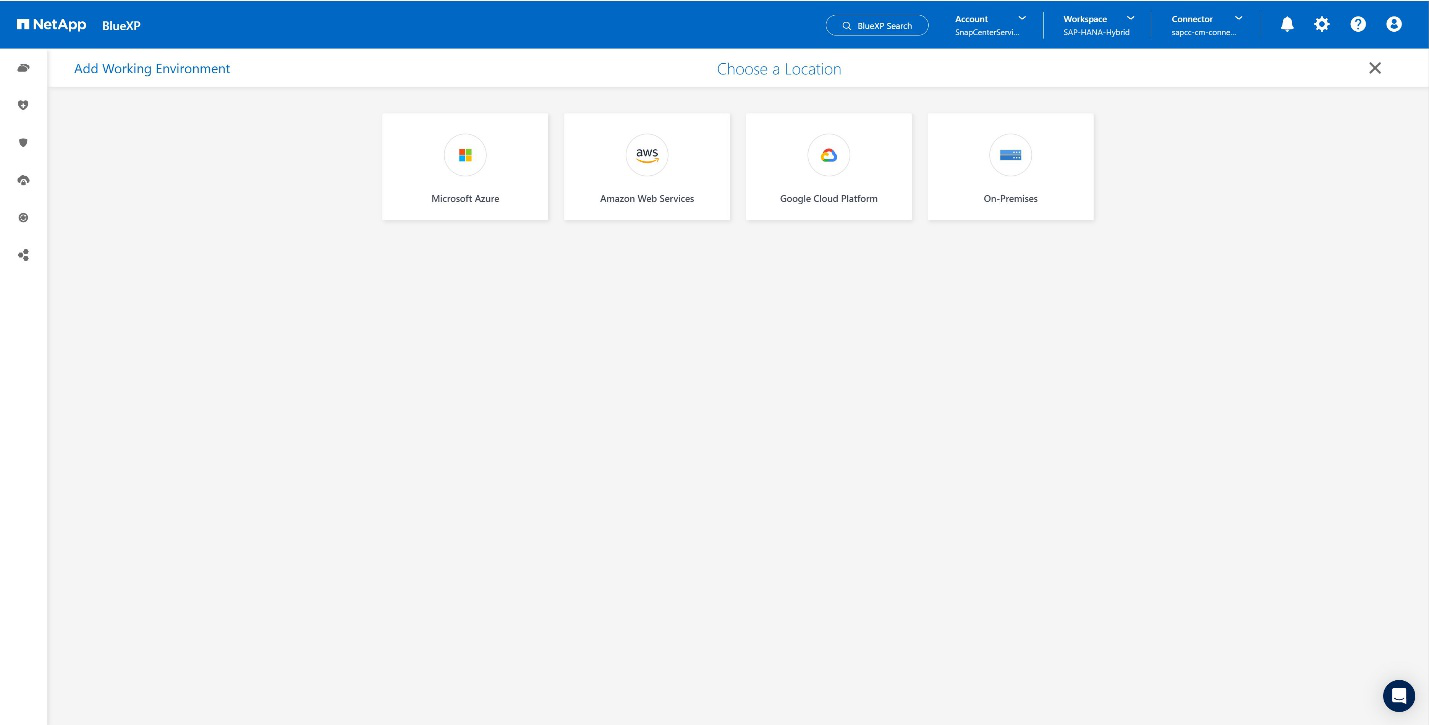
Press + Add Working Environment.
-
Choose On-Premises.
-
Choose Discover On-Premises ONTAP.

-
Add the IP address of the ONTAP cluster and the password and press Discover.

-
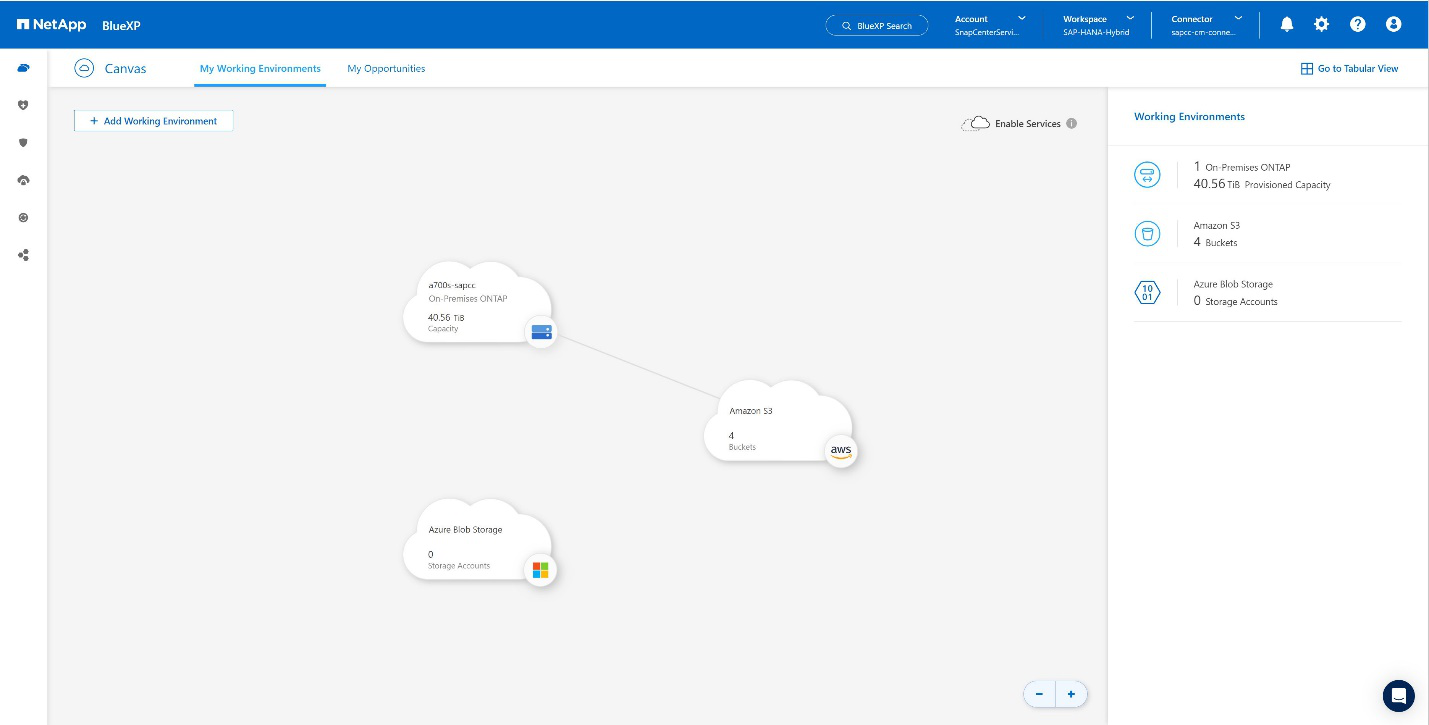
The ONTAP cluster is now available.
Create a relationship between the on-premises storage system and an object storage bucket
The relationship between the on-premises storage and the S3 bucket is done by creating a backup for a volume or by activating a backup of an application. If an existing site-to-site VPN shall be used for transferring the data from on-premises to S3, a volume backup needs to be used for creating the relationship between the on-premises storage and S3 bucket as VPC endpoints need to be used.
At creation of this documentation the application backup workflow doesn't offer to choose VPC endpoints to access S3 buckets.
Refer to Gateway endpoints for Amazon S3 - Amazon Virtual Private Cloud how to setup VPC endpoints for S3 within your VPC.
To create a first volume backup, perform the following steps:
-
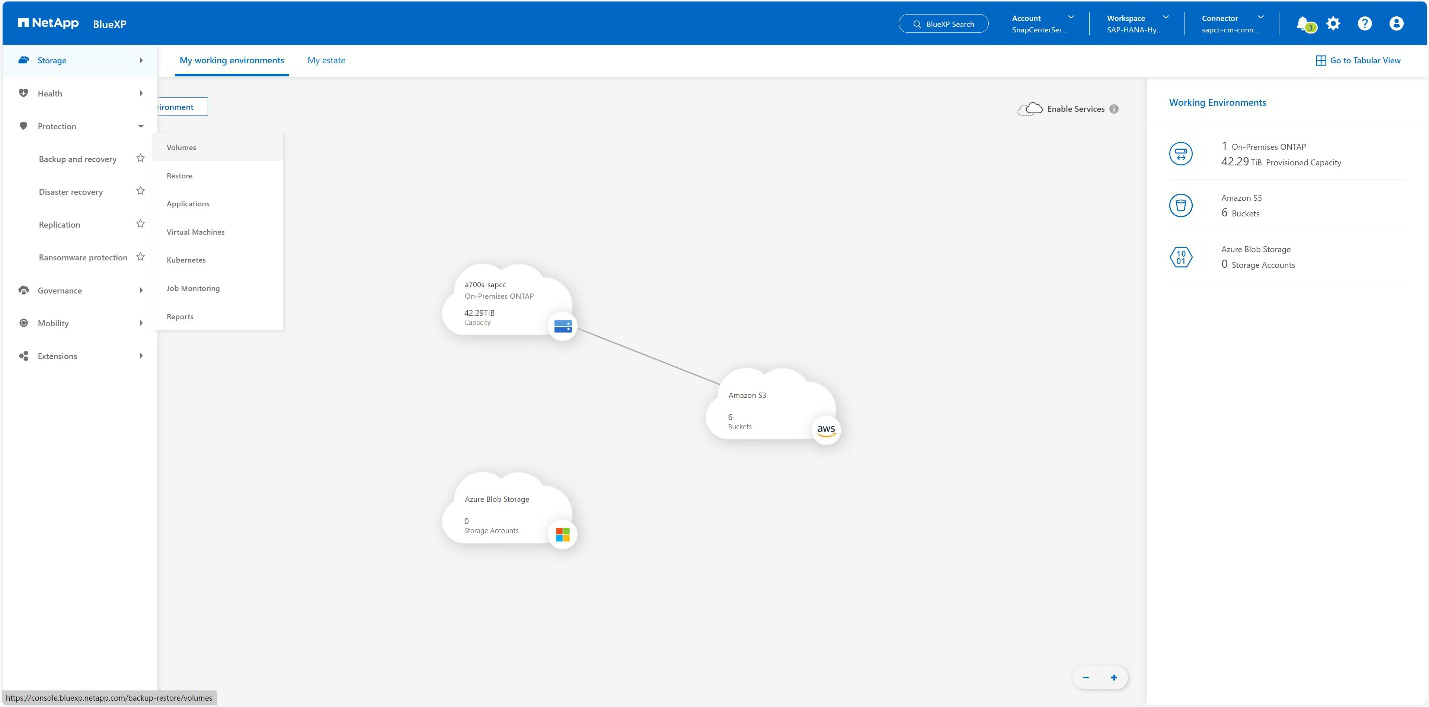
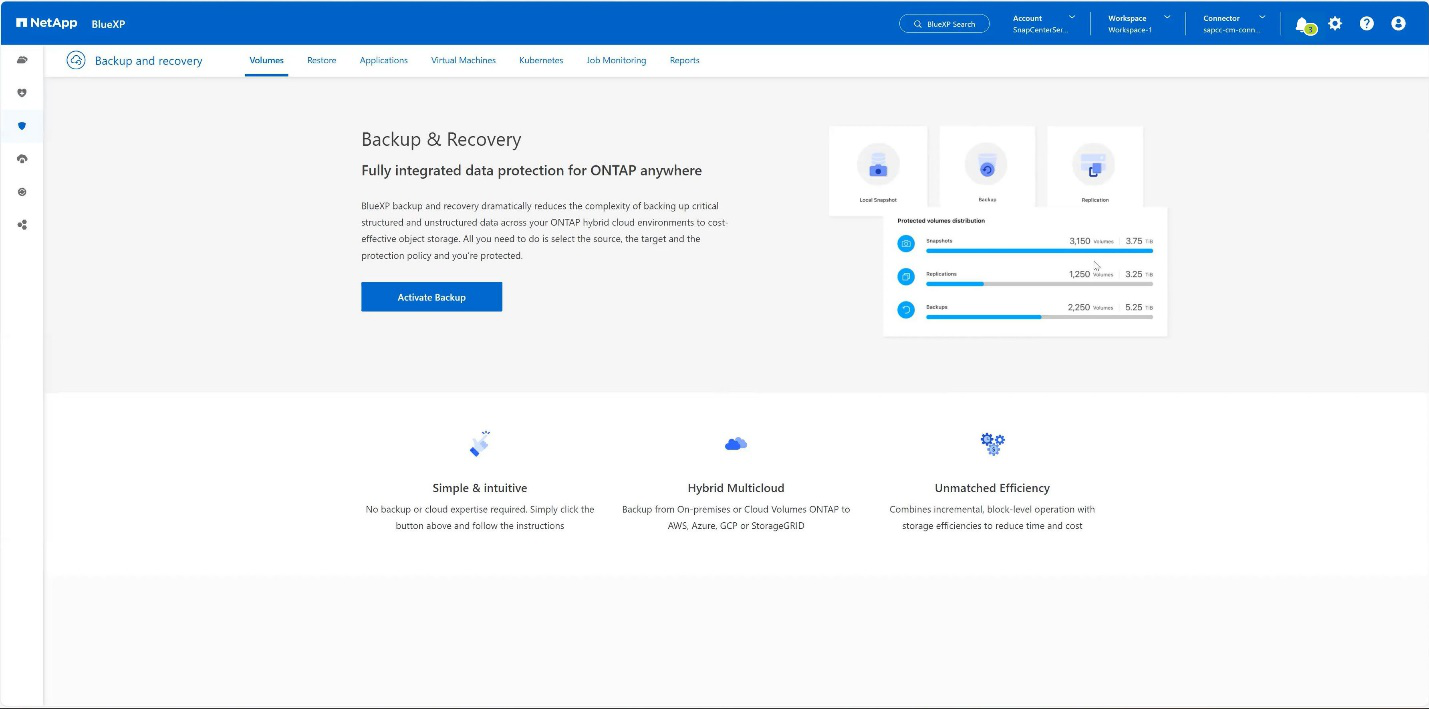
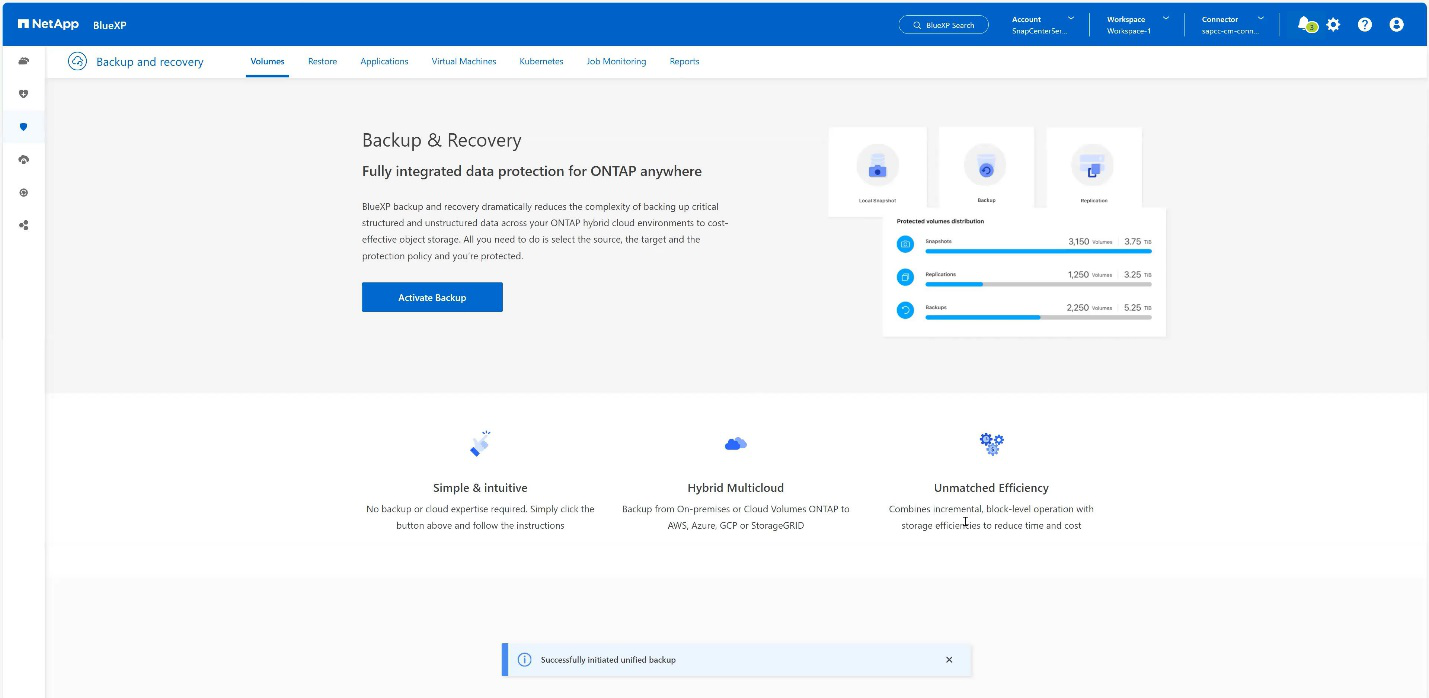
Navigate via Protection to Backup and recovery and choose Volumes.
-
Press the Activate Backup button.
-
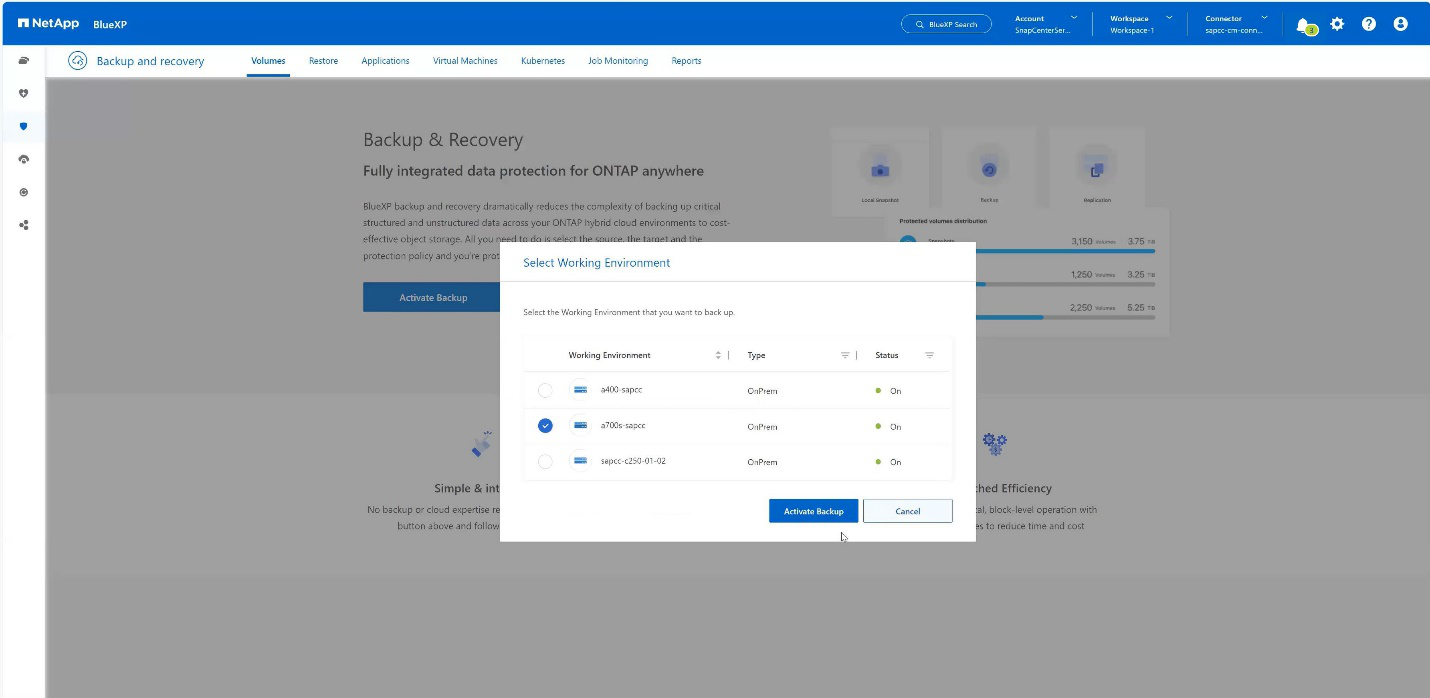
Choose the desired on-premises storage system and click Activate Backup.
-
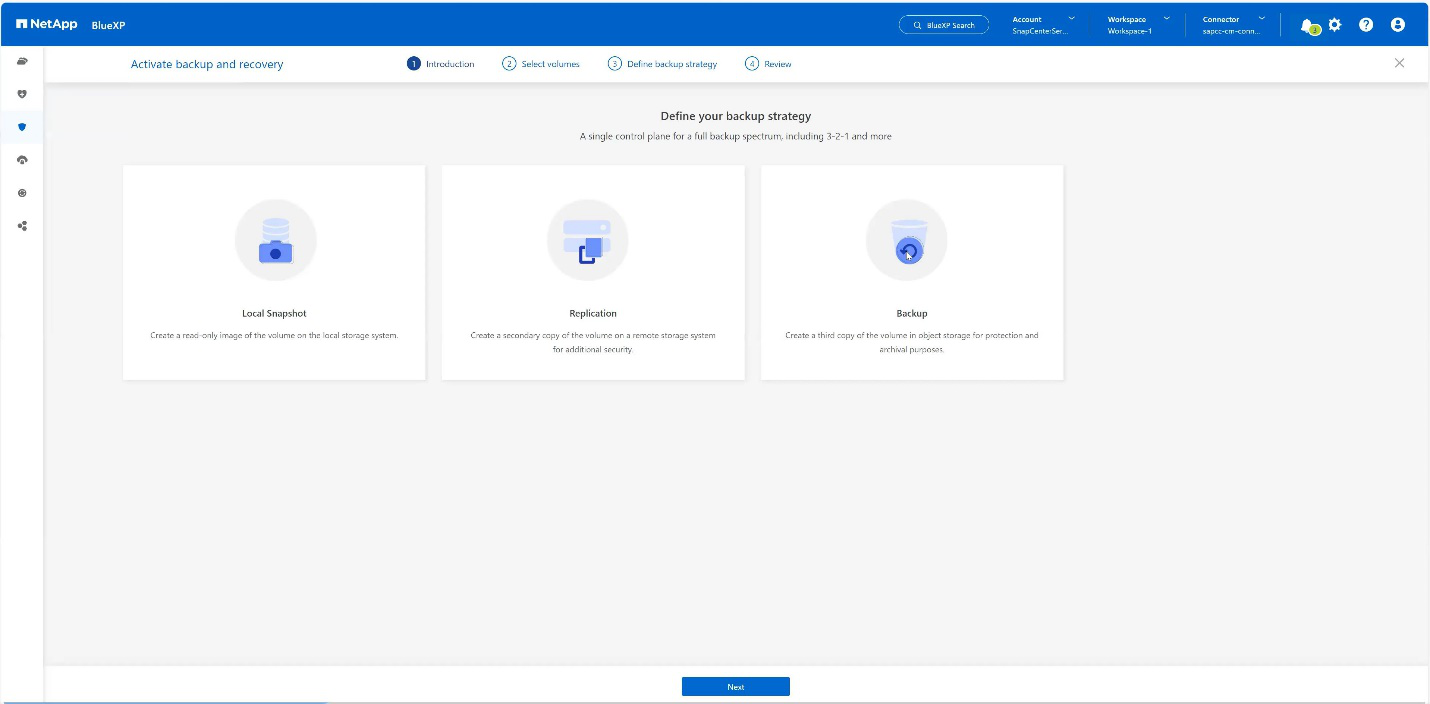
Choose Backup.
-
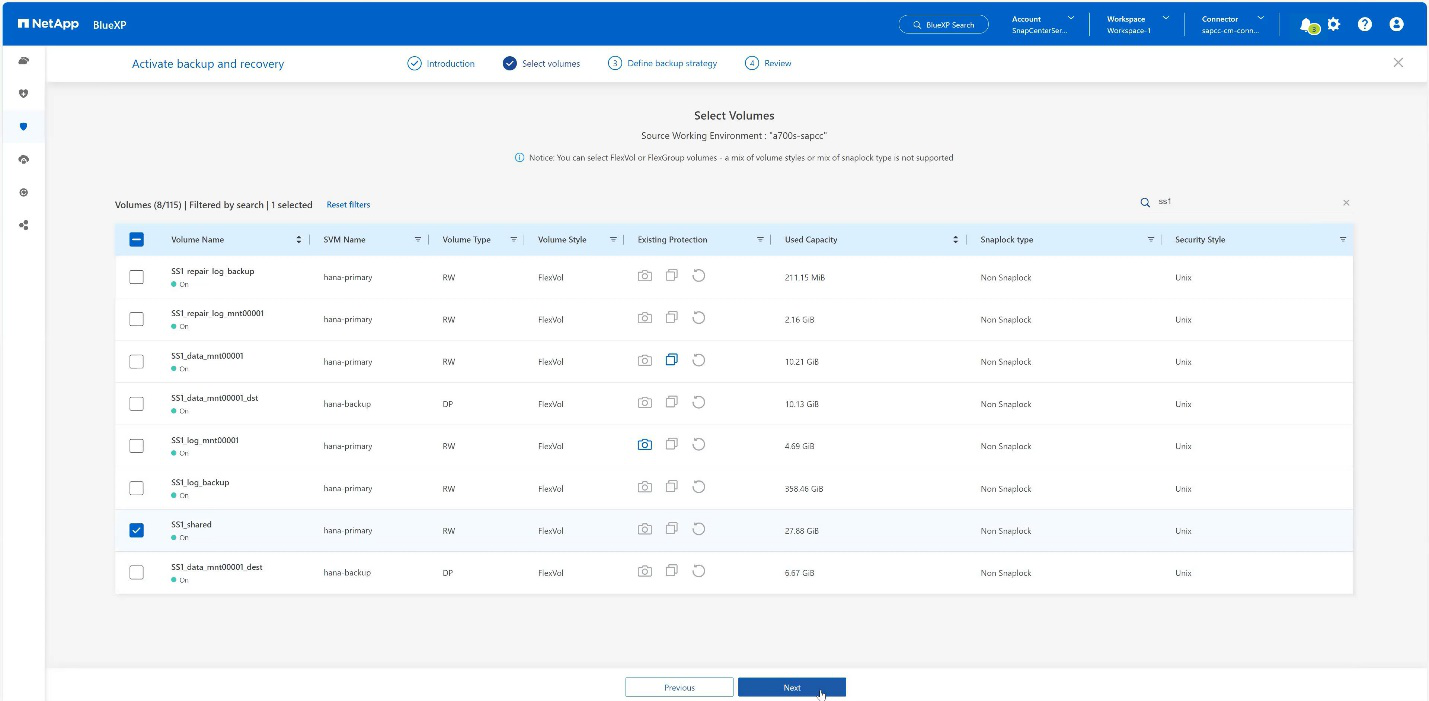
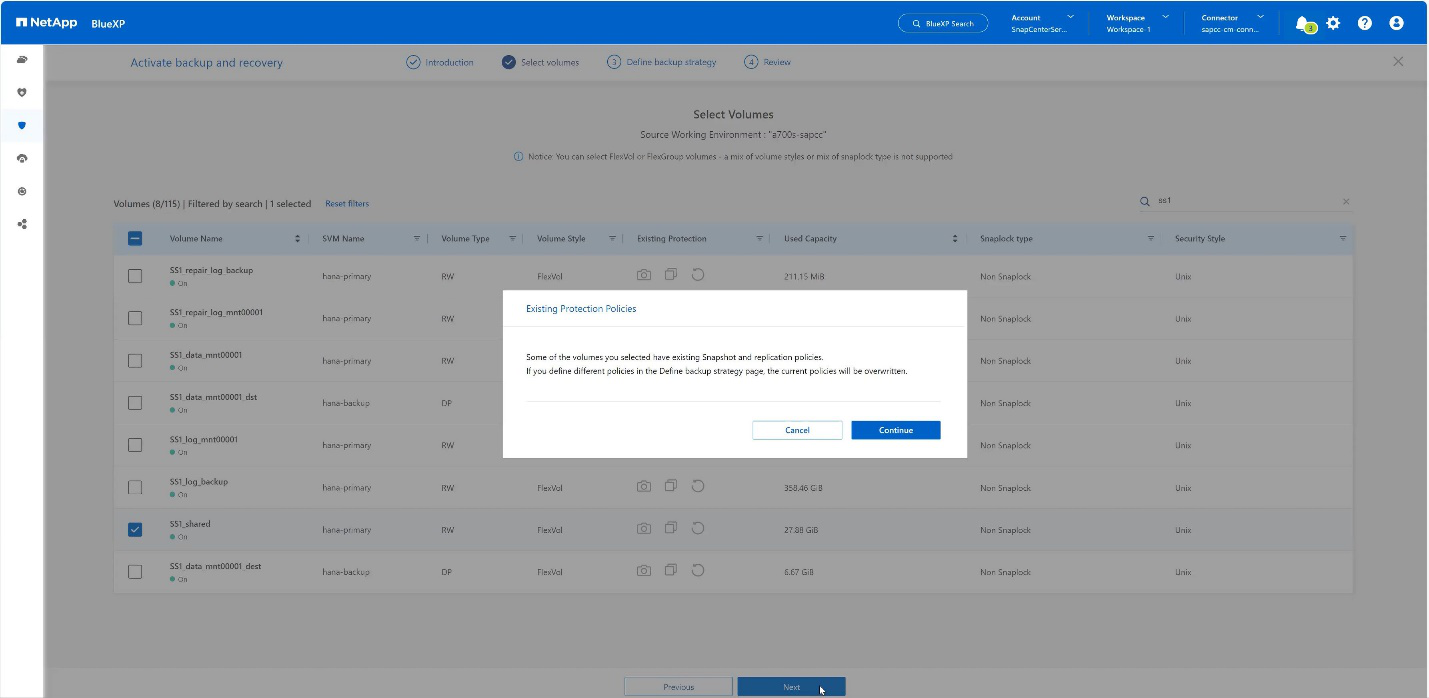
Choose a volume which is stored at the same SVM as your SAP HANA data files and press Next. In this example the volume for /hana/shared has been chosen.
-
Continue, if an existing policy exists.
-
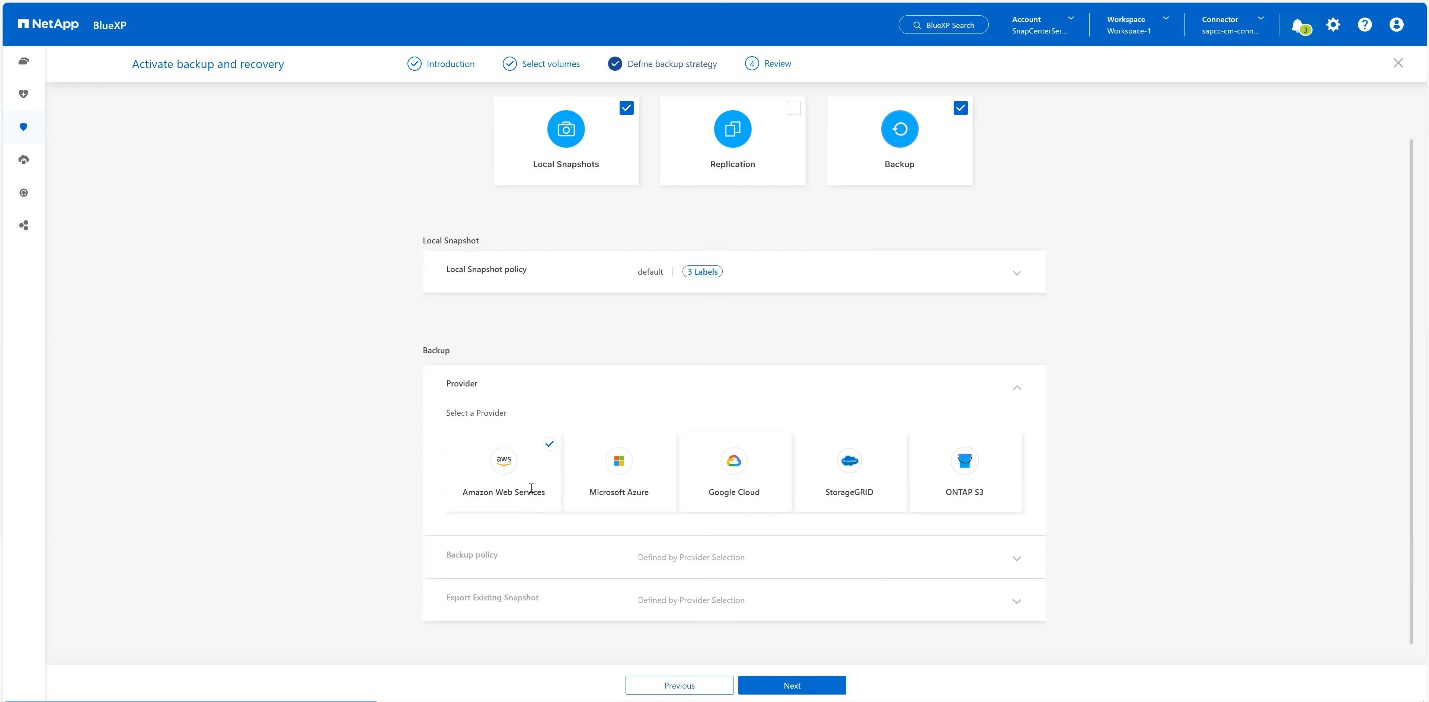
Check the Backup Option and choose your desired Backup Provider. In this example AWS.
Keep the option checked for already existing policies.
Uncheck options you do not want to use.
-
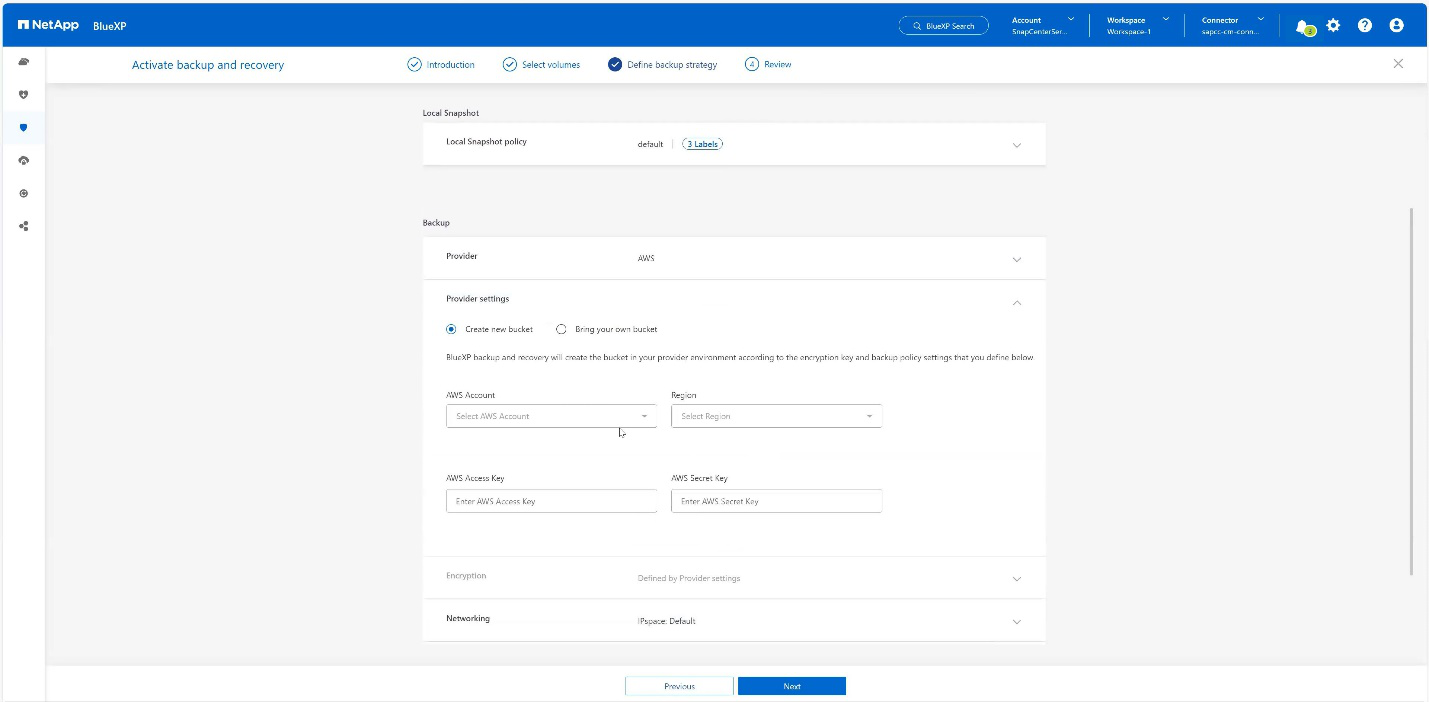
Create a new bucket or choose an existing one. Provide your AWS account settings, the regio, your access key, and the secret key. Press Next.
-
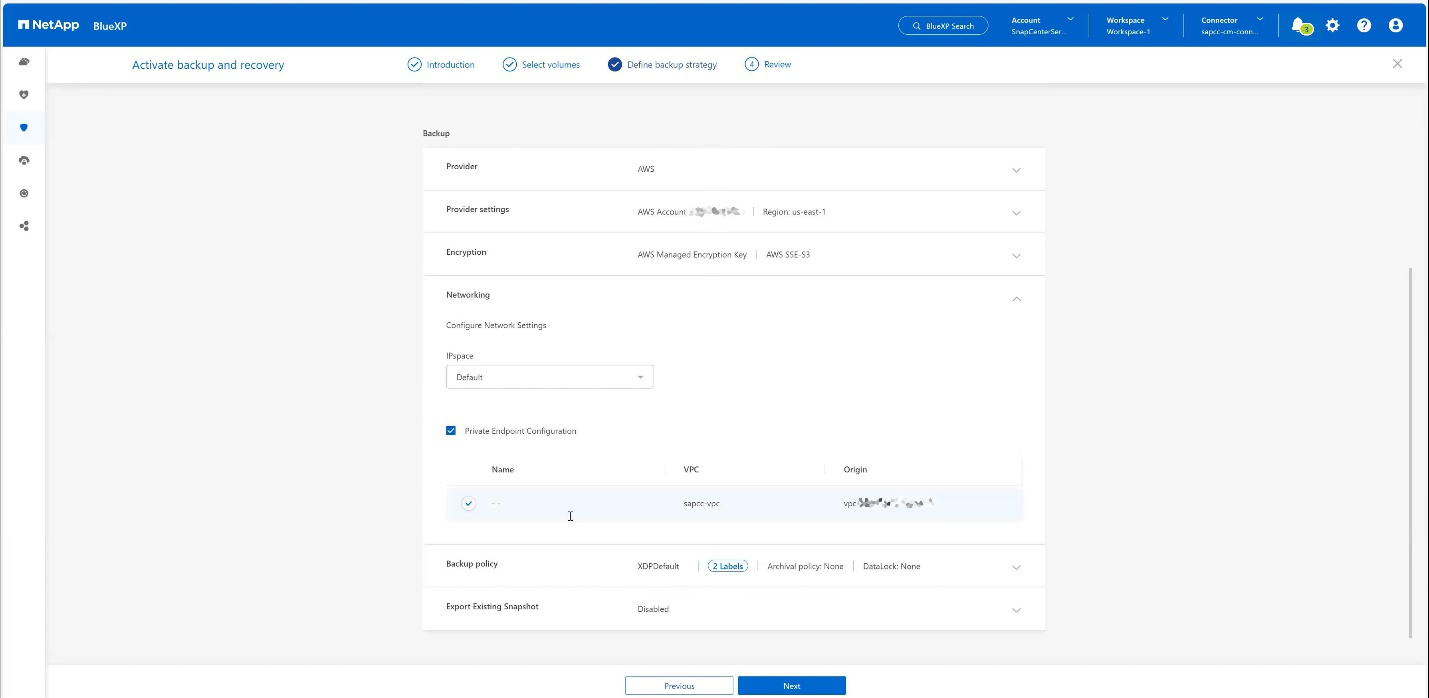
Choose the correct IPspace of your on-premises storage system, select Privat Endpoint Configuration and choose the VPC endpoint for the S3. Press Next.
-
Review your configuration and press Activate Backup.
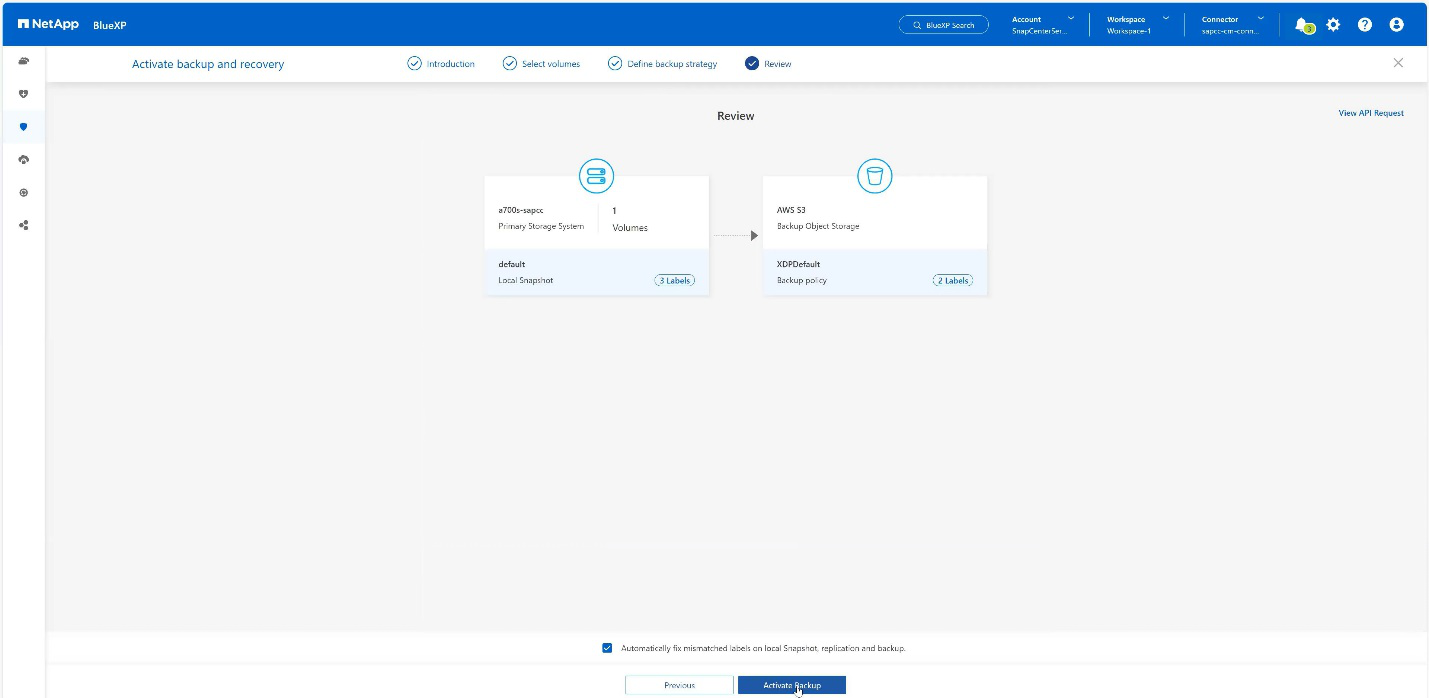
-
The backup has been successfully initiated.
Configure the SAP HANA system resource at SnapCenter
-
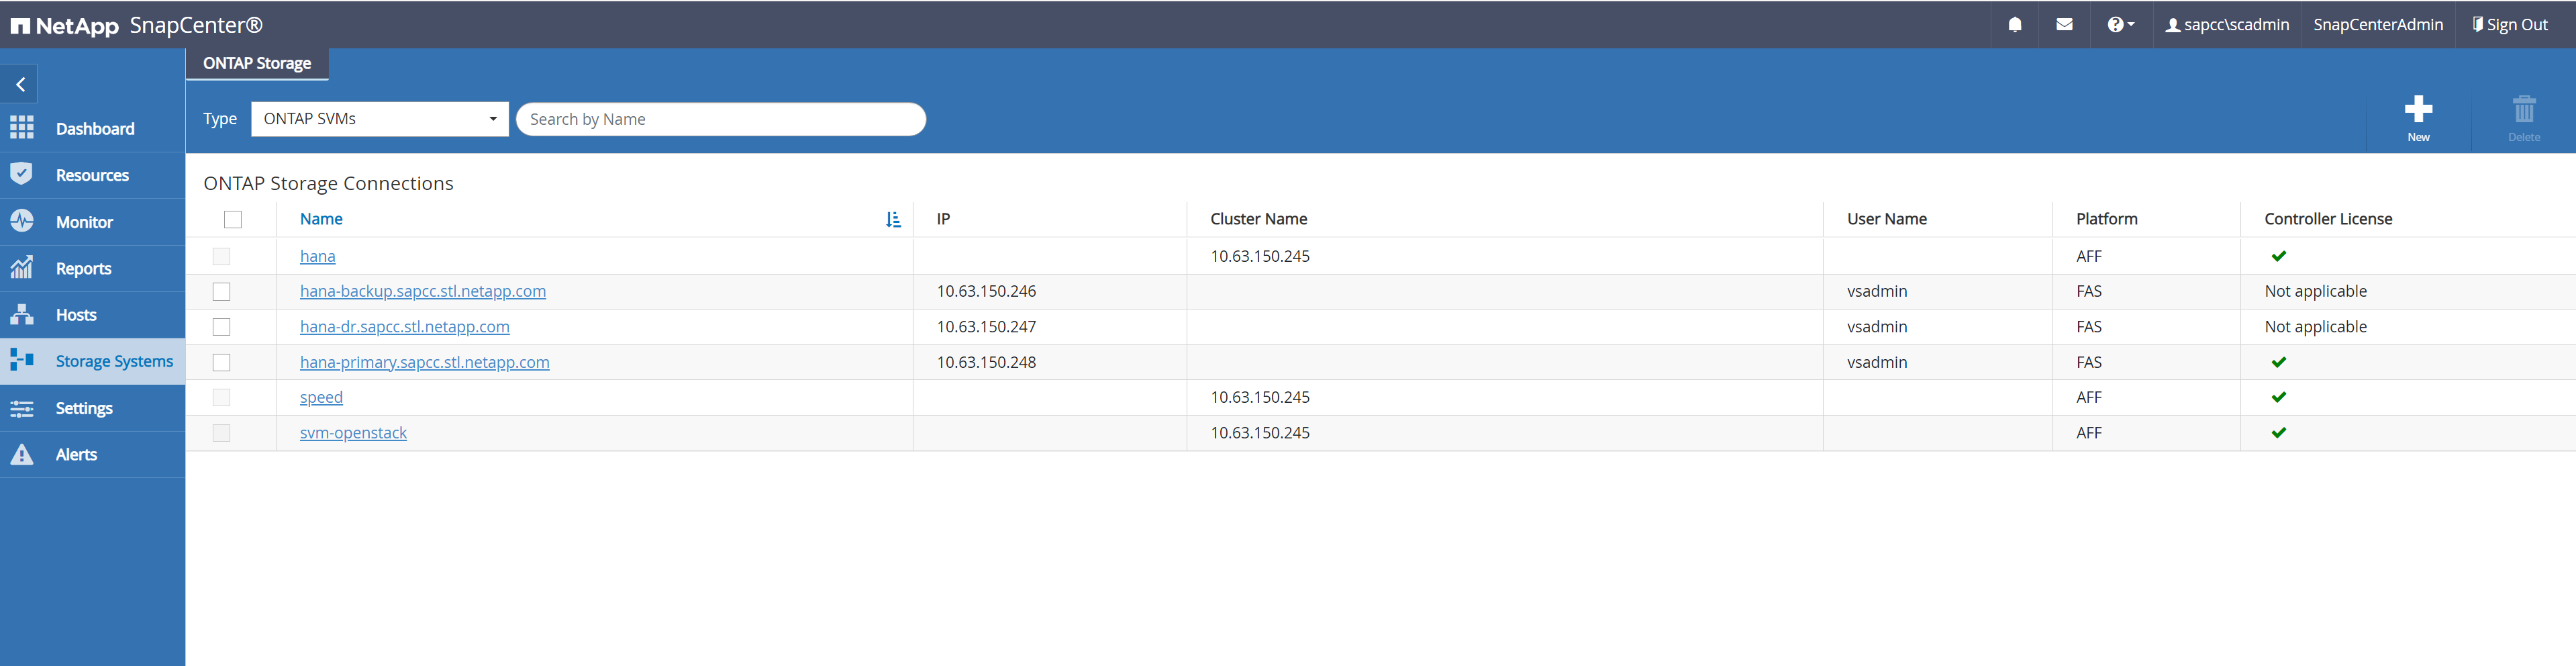
Check, if the SVM (hana in this example) where your SAP HANA system is stored has been added via the cluster. If only the SVM has been added, add the cluster.
-
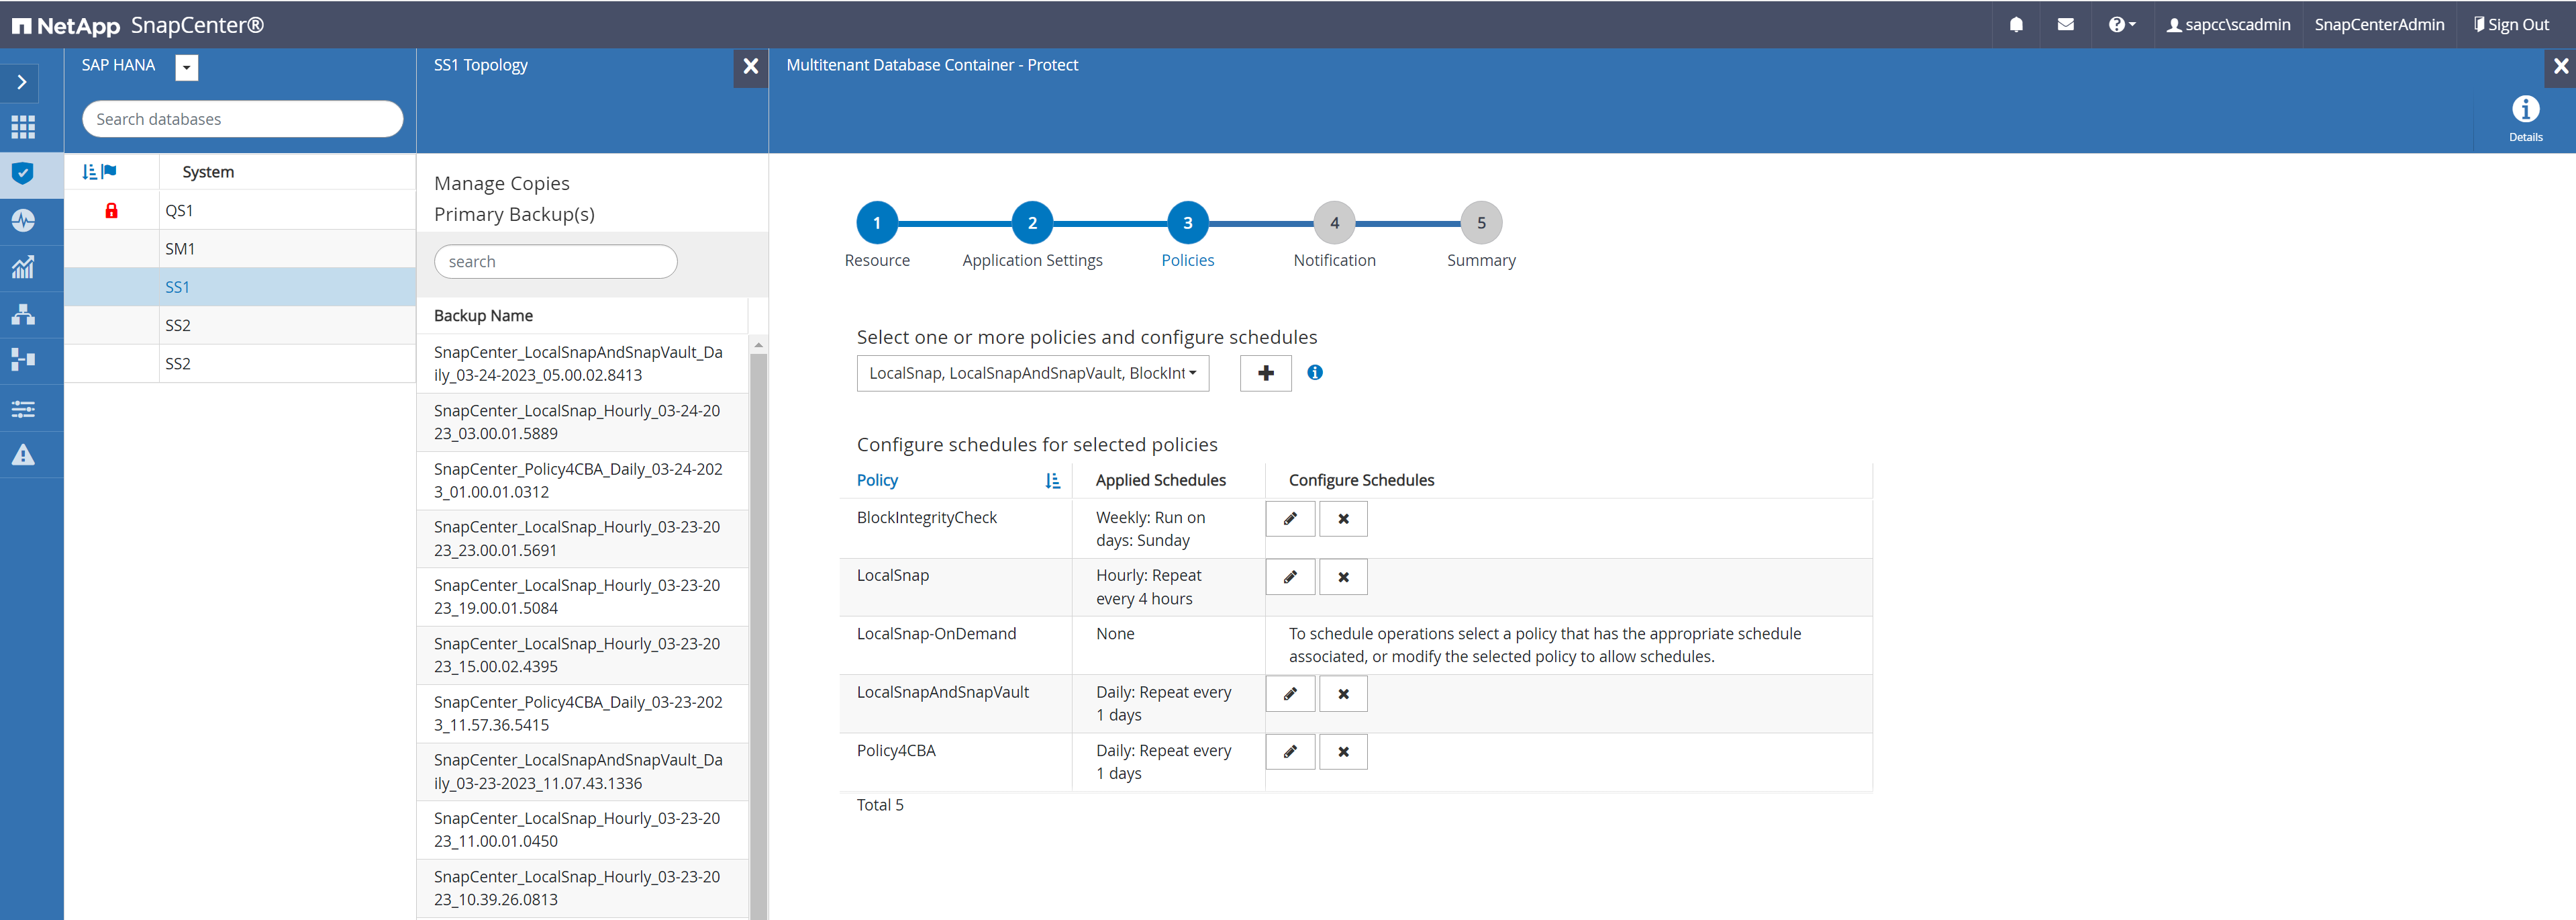
Define a schedule policy with either daily, weekly, or monthly schedule type.
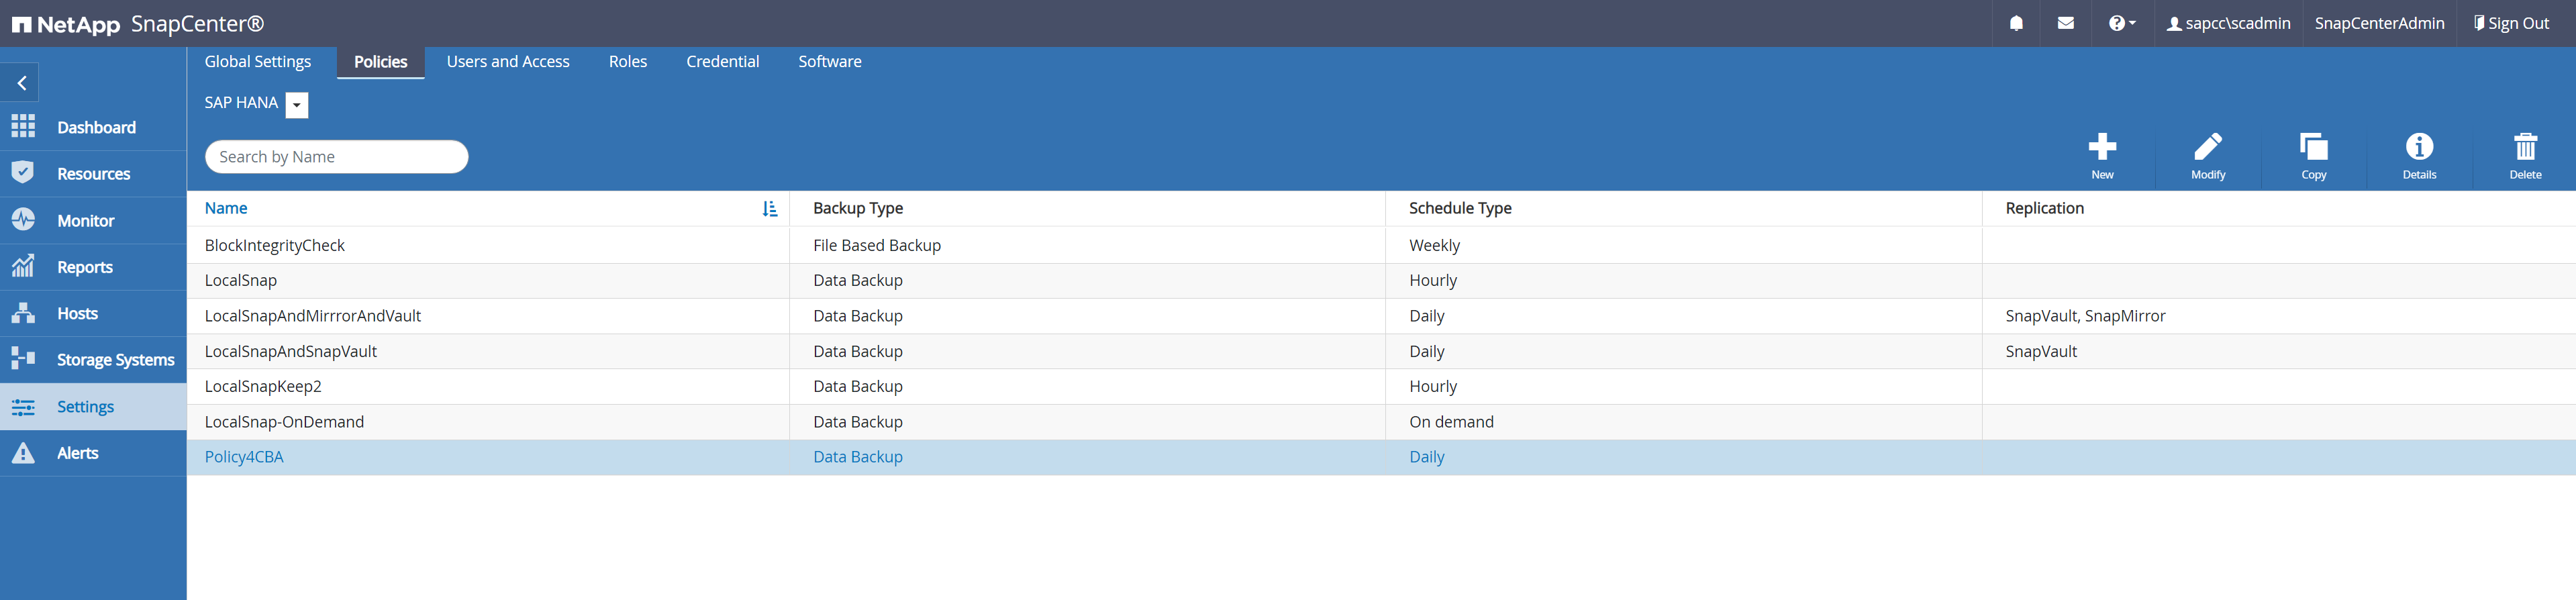
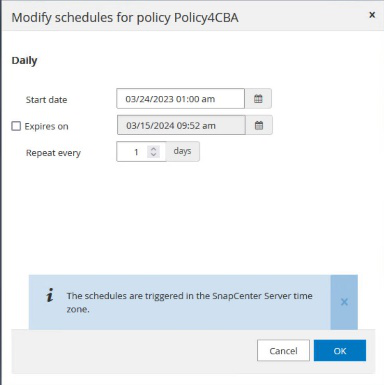
-
Add the new policy to your SAP HANA system and assign a daily schedule.
-
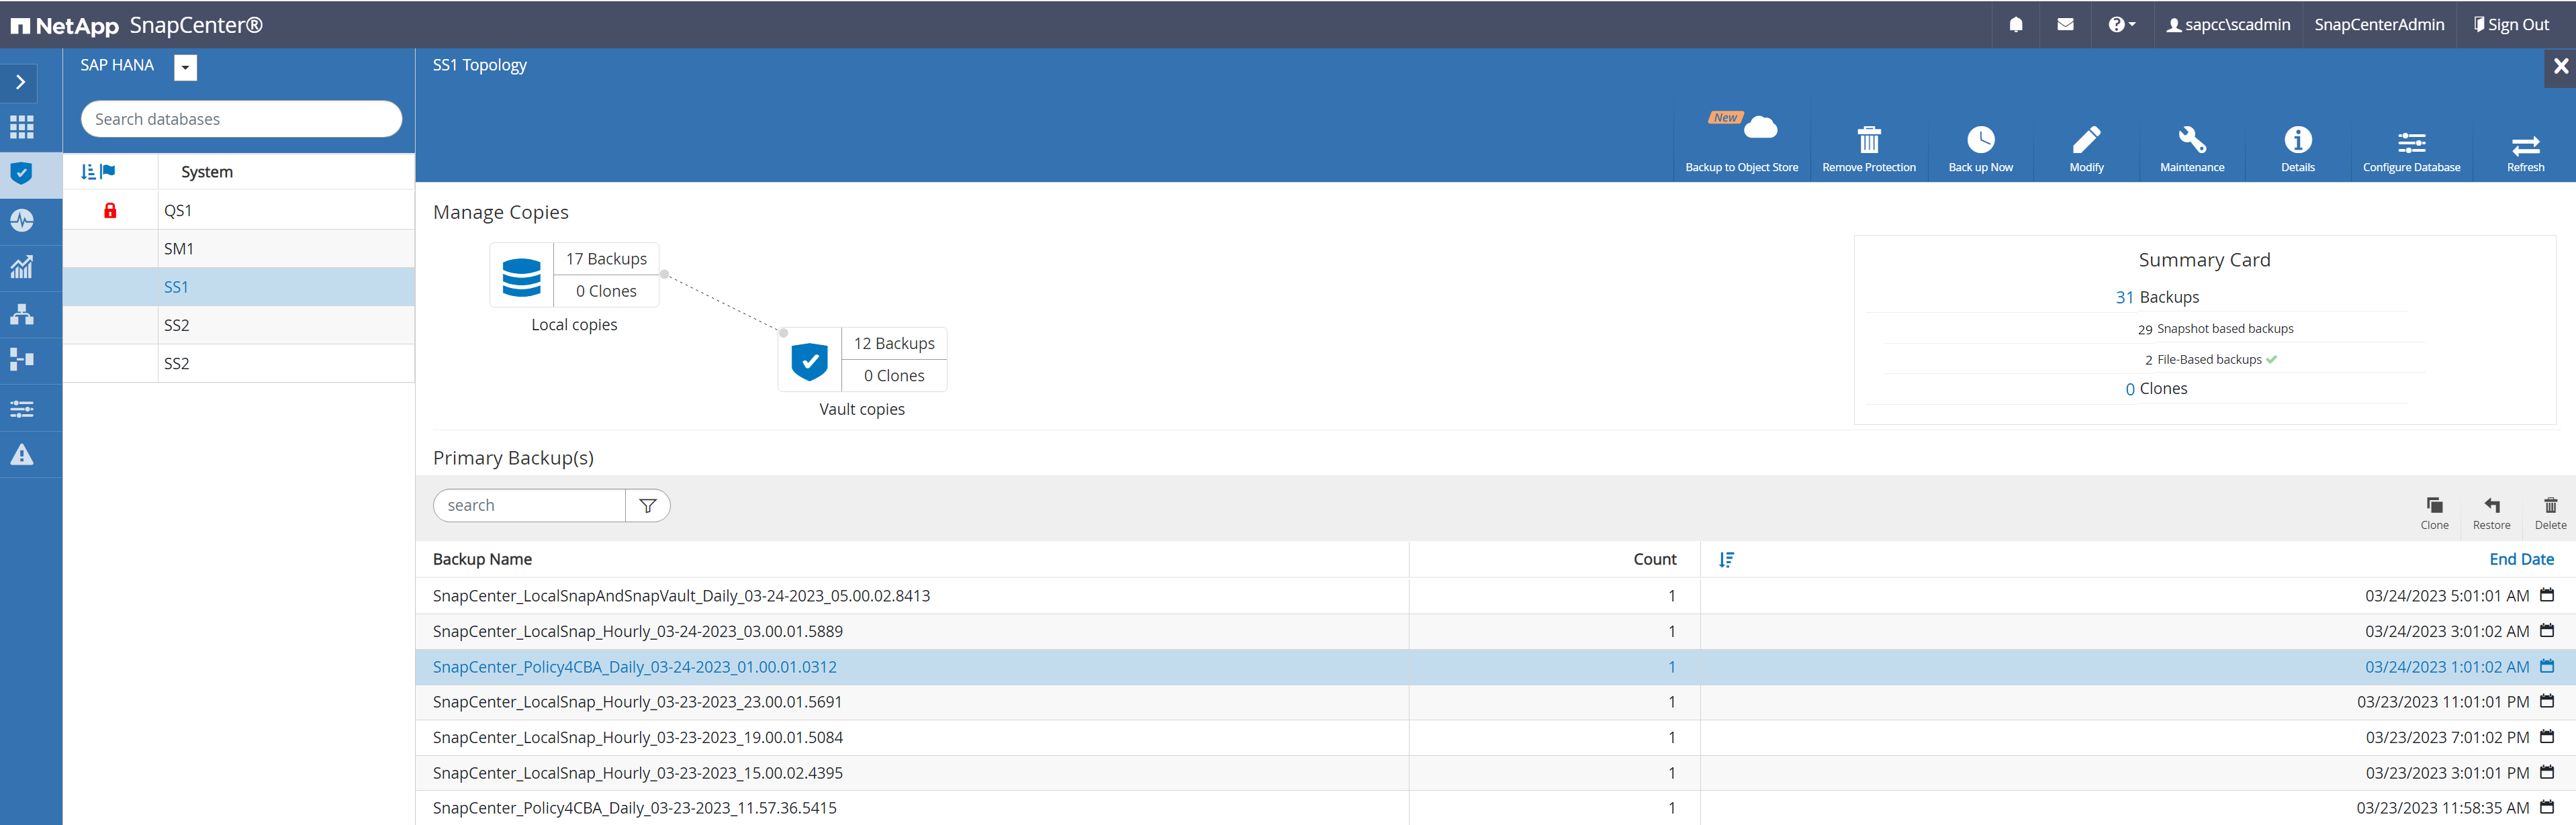
Once configured new backups with this policy will be available after the policy has been executed according to the schedule defined.
Adding SnapCenter to the BlueXP Working Environment
-
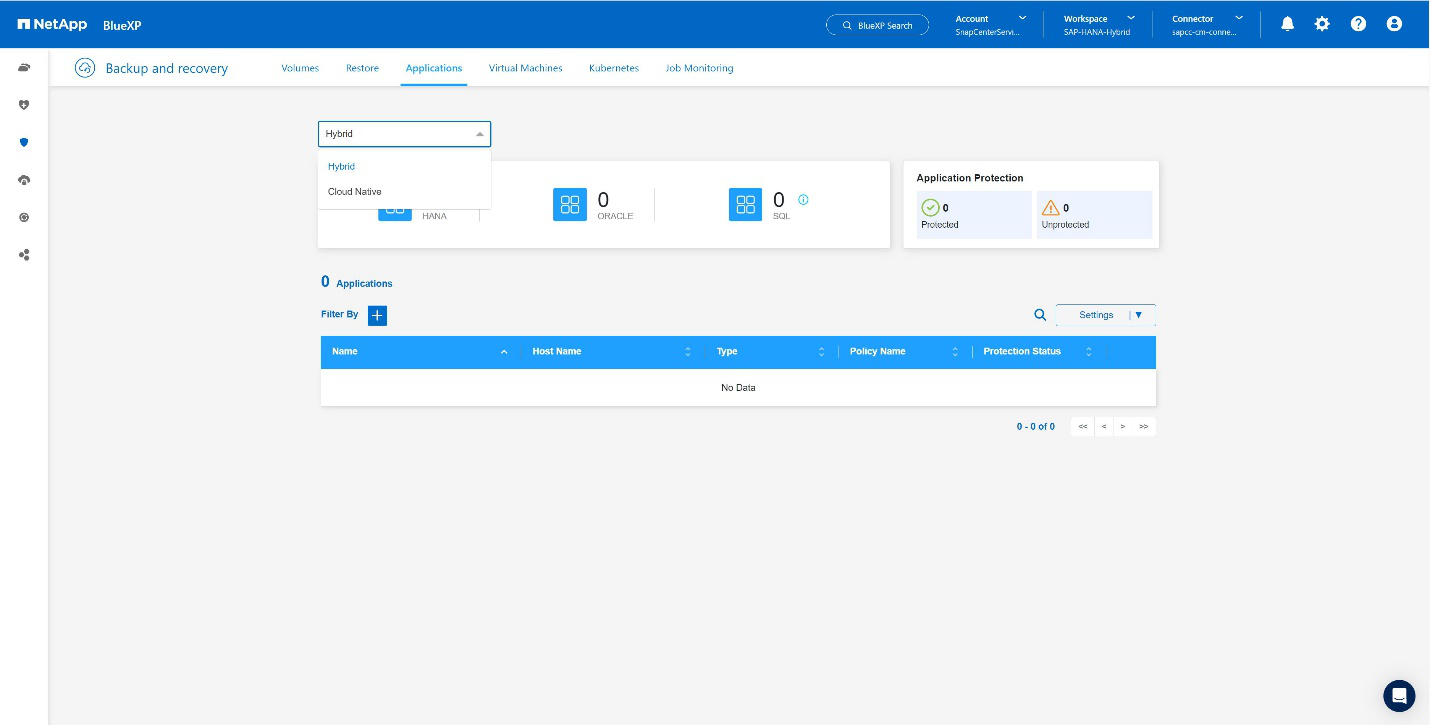
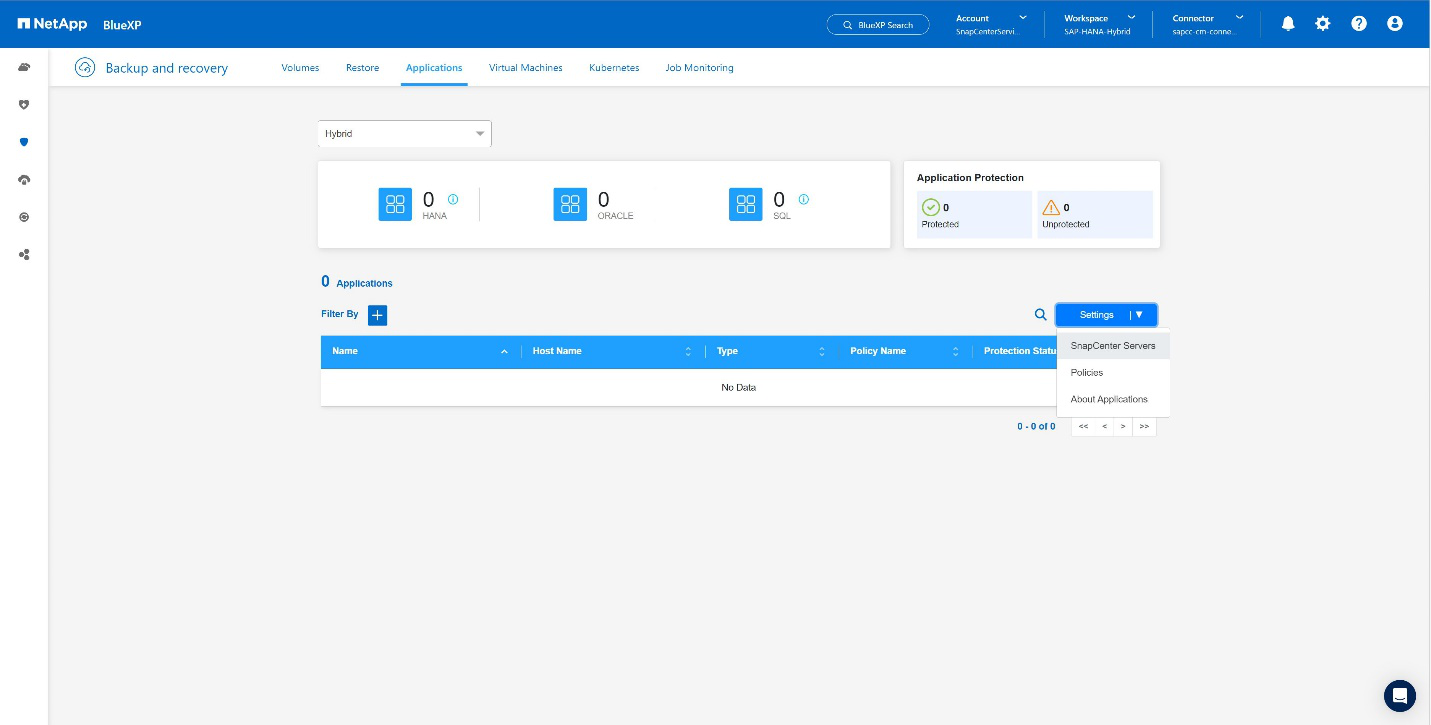
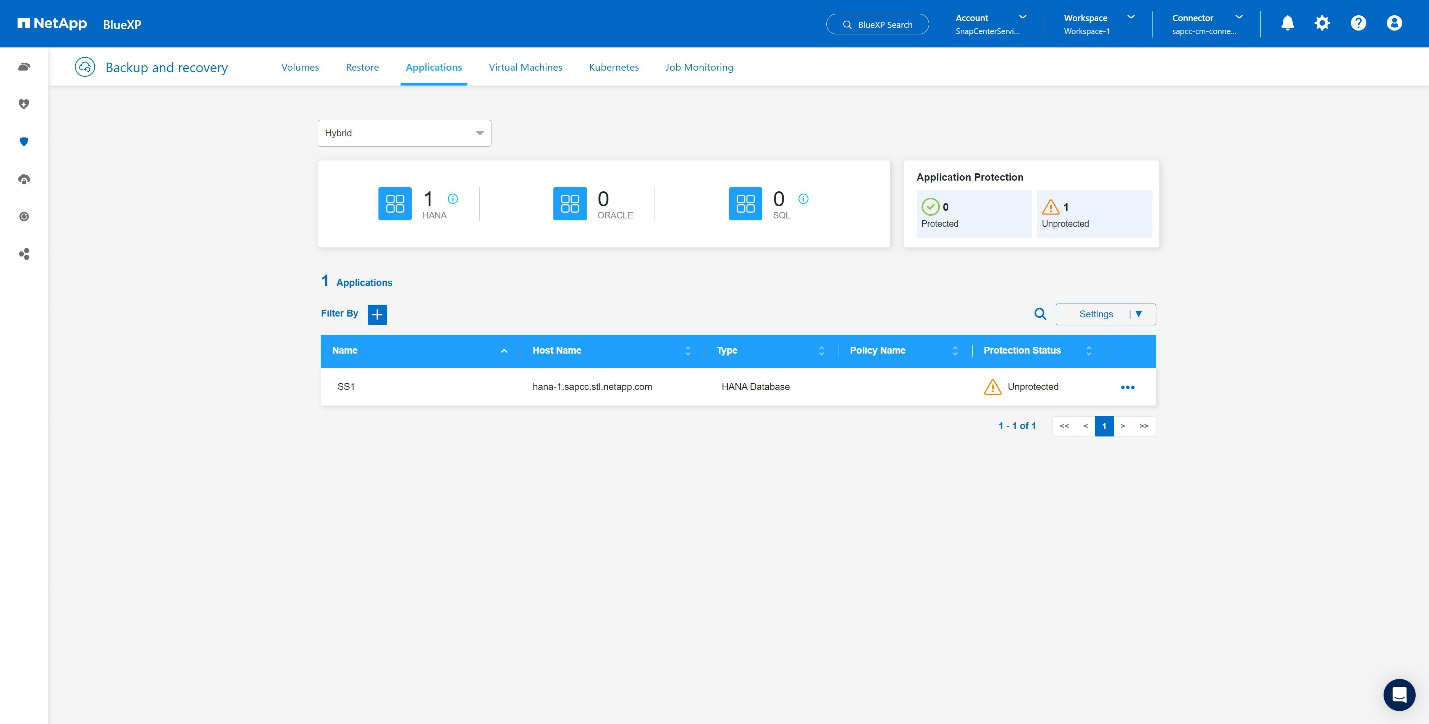
At the left menu choose Protection → Backup and recovery → Applications.
-
Choose Hybrid from the pulldown menu.
-
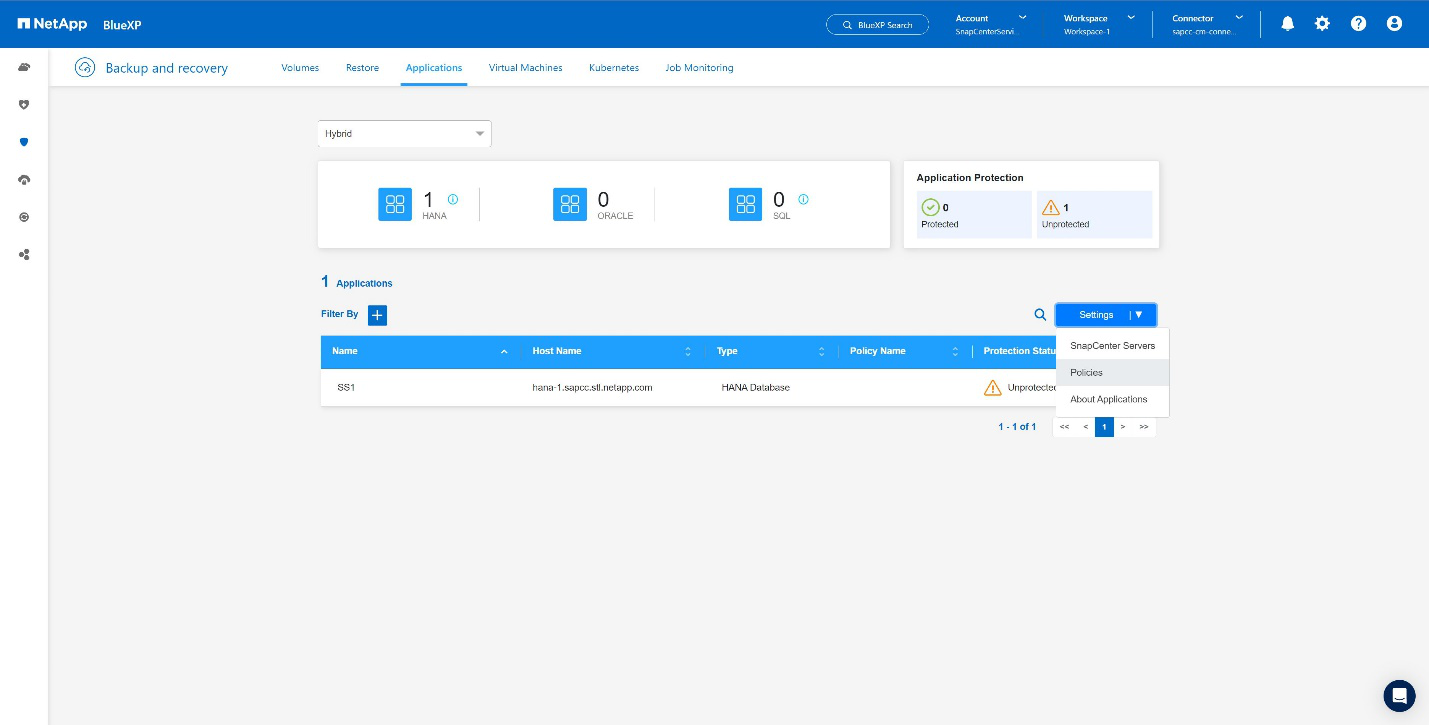
Choose SnapCenter Servers at the Settings menu.
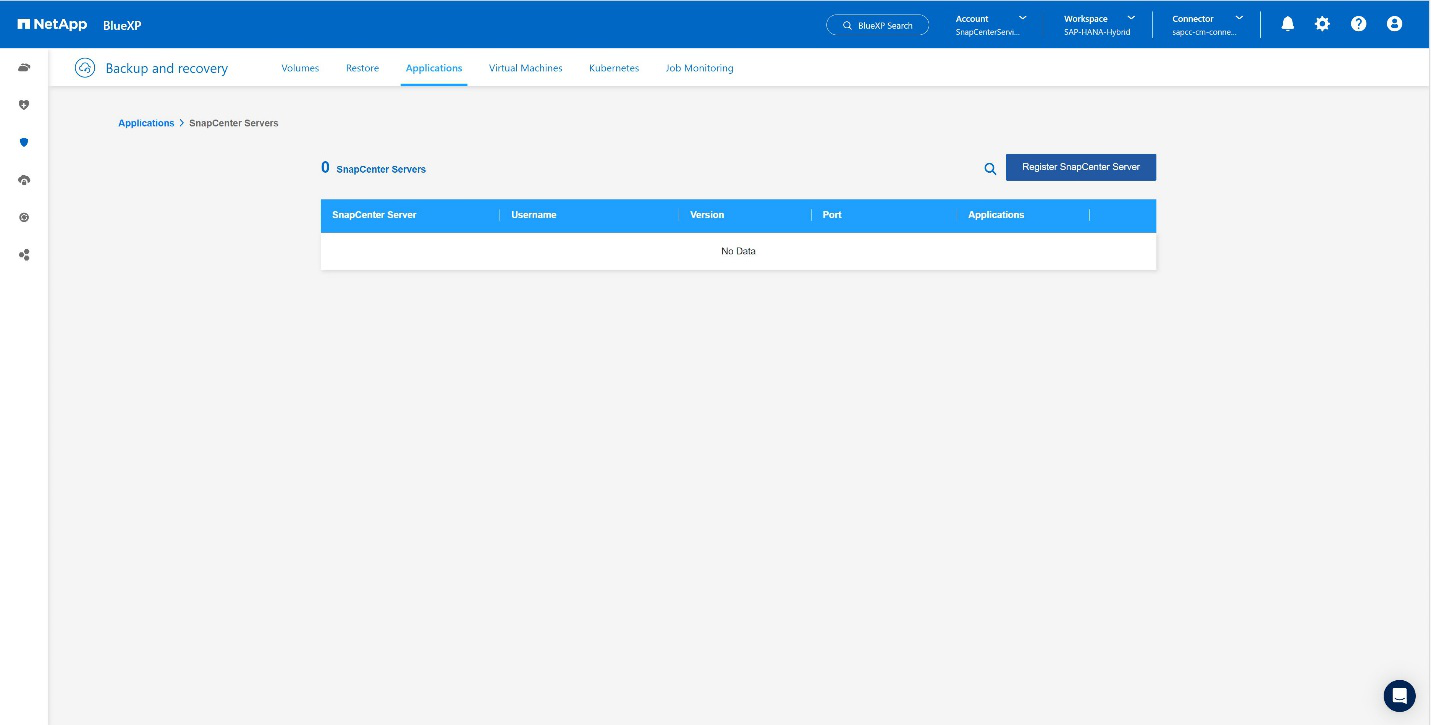
-
Register the SnapCenter Server.
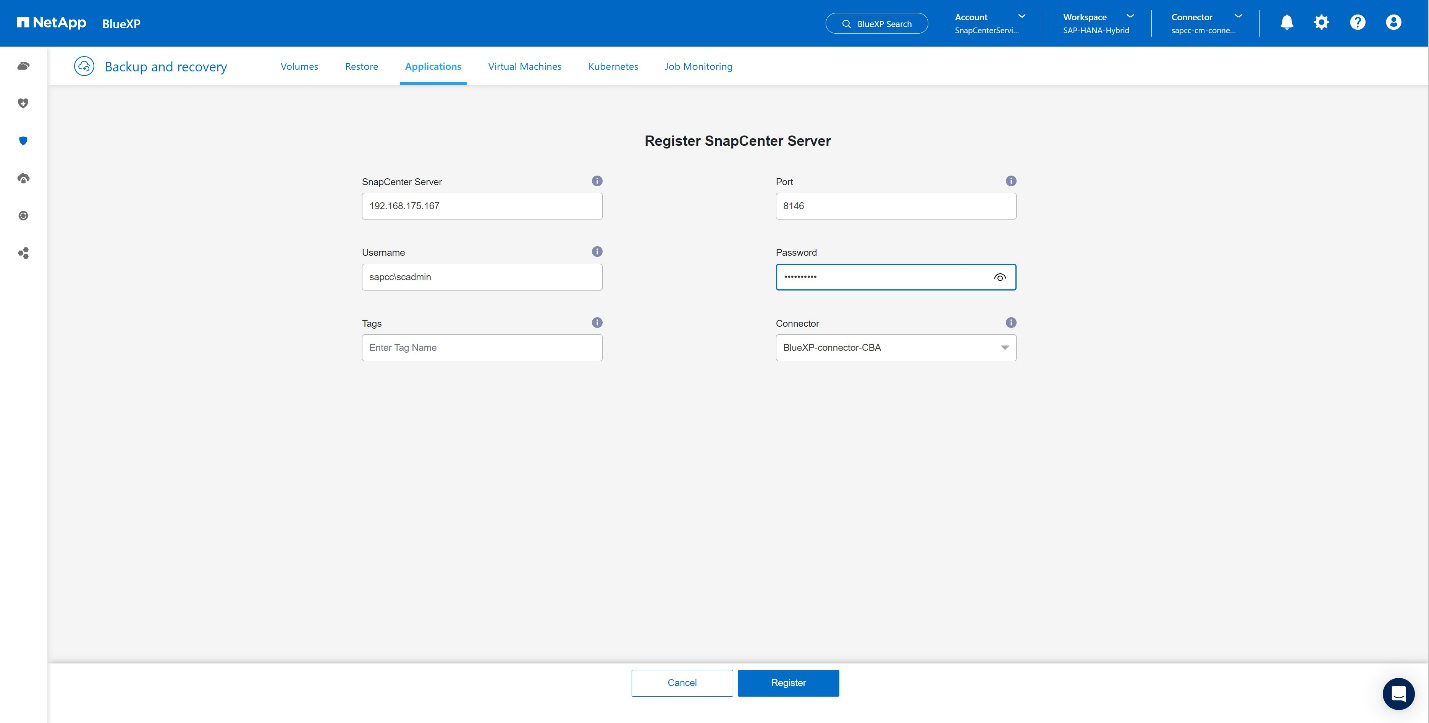
-
Add the SnapCenter Server credentials.
-
The SnapCenter Servers has been added and data will discovered.
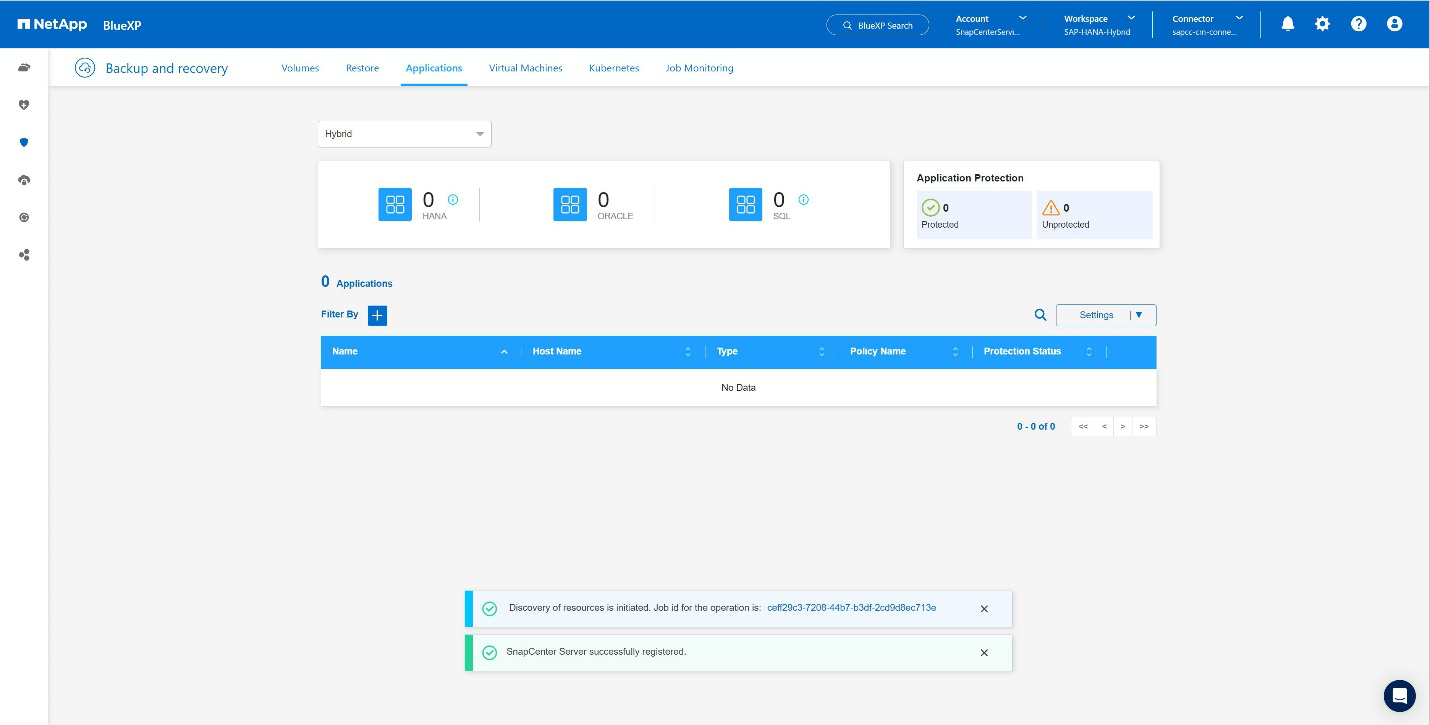
-
Once the discovery job has been finished the SAP HANA system will be available.
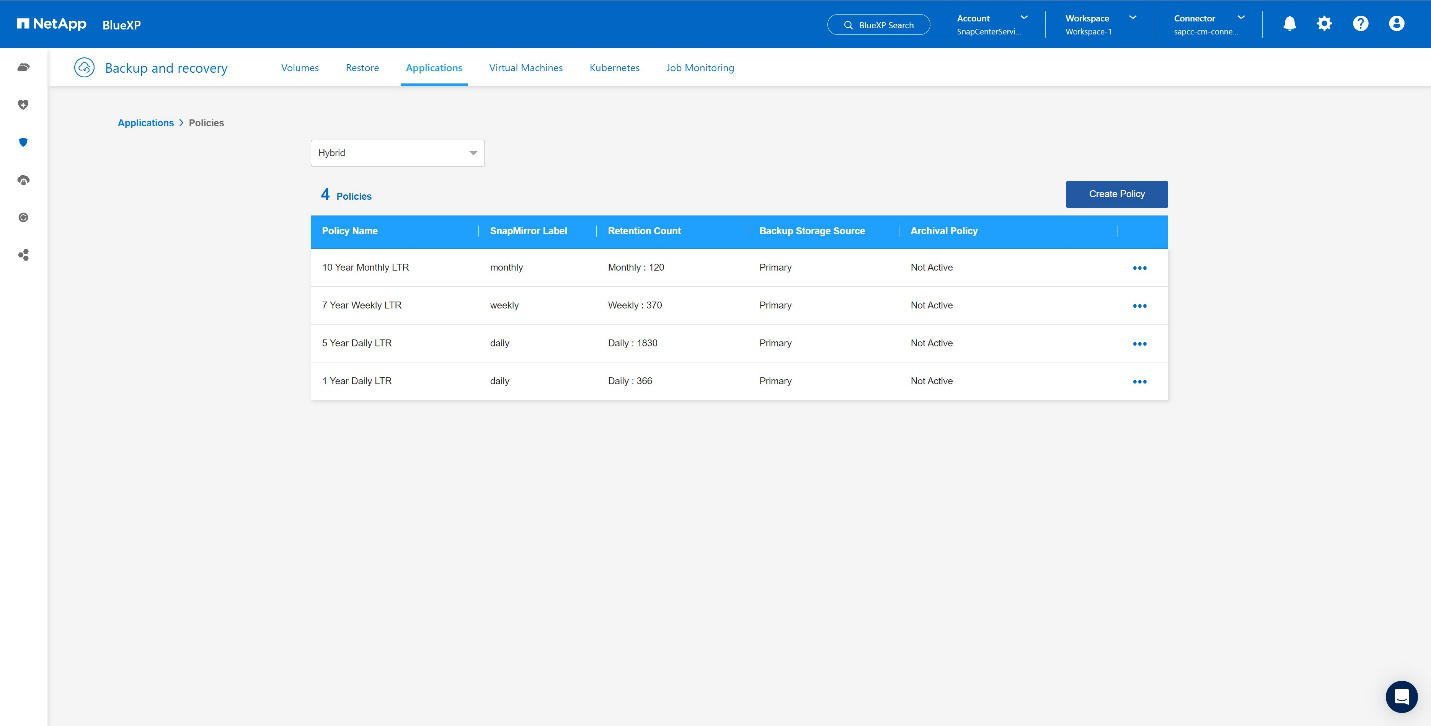
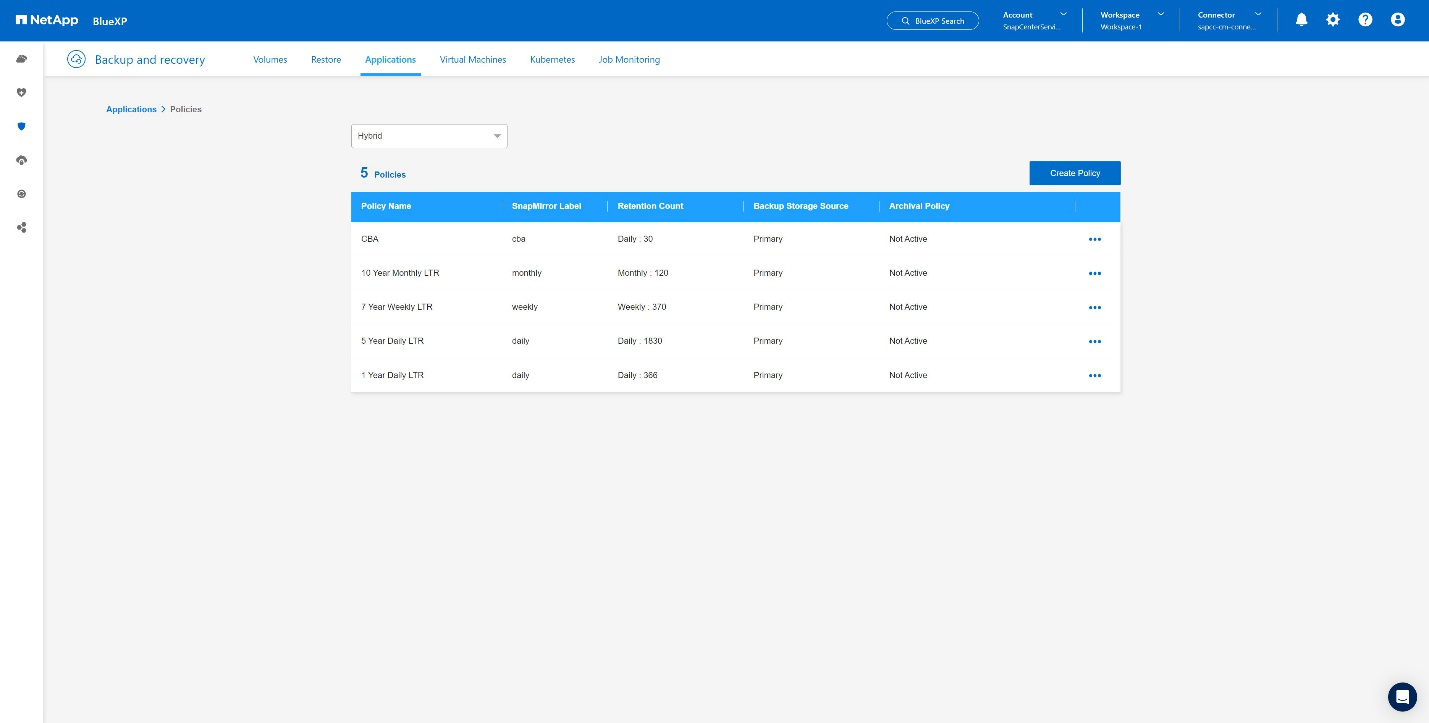
Creating a Backup Policy for Application Backup
-
Choose Policies within the settings menu.
-
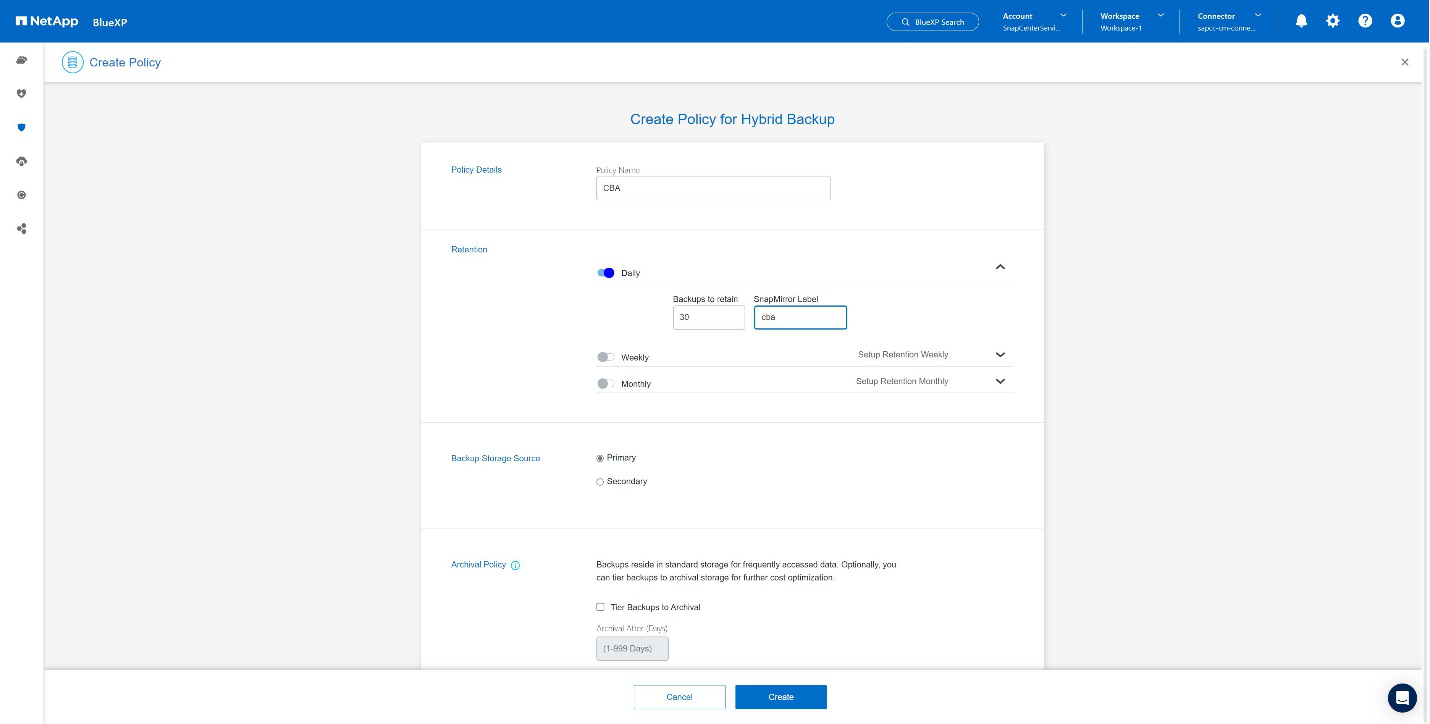
Create a new policy, if desired by click Create Policy.
-
Provide the policy name, desired SnapMirror label, choose your desired options,and press Create.
-
The new policy is available.
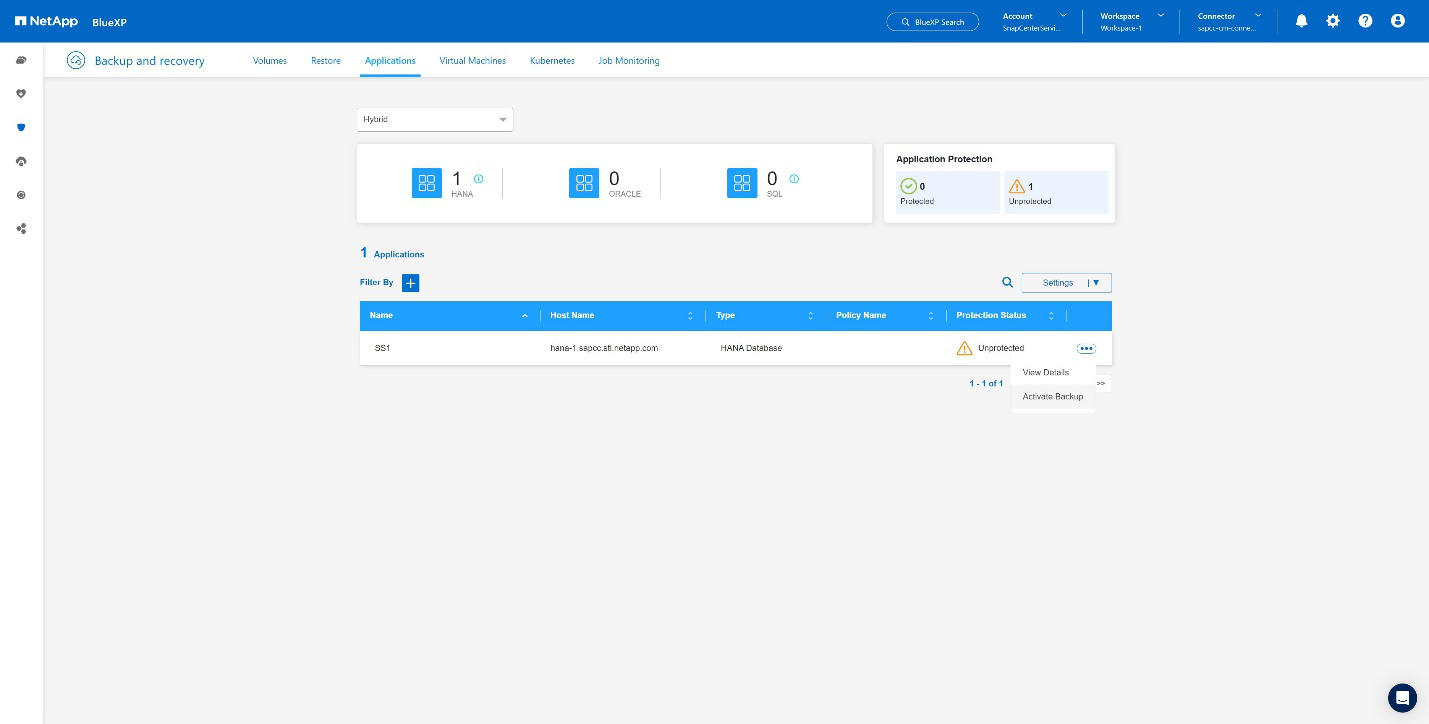
Protecting the SAP HANA database with Cloud Backup for Applications
-
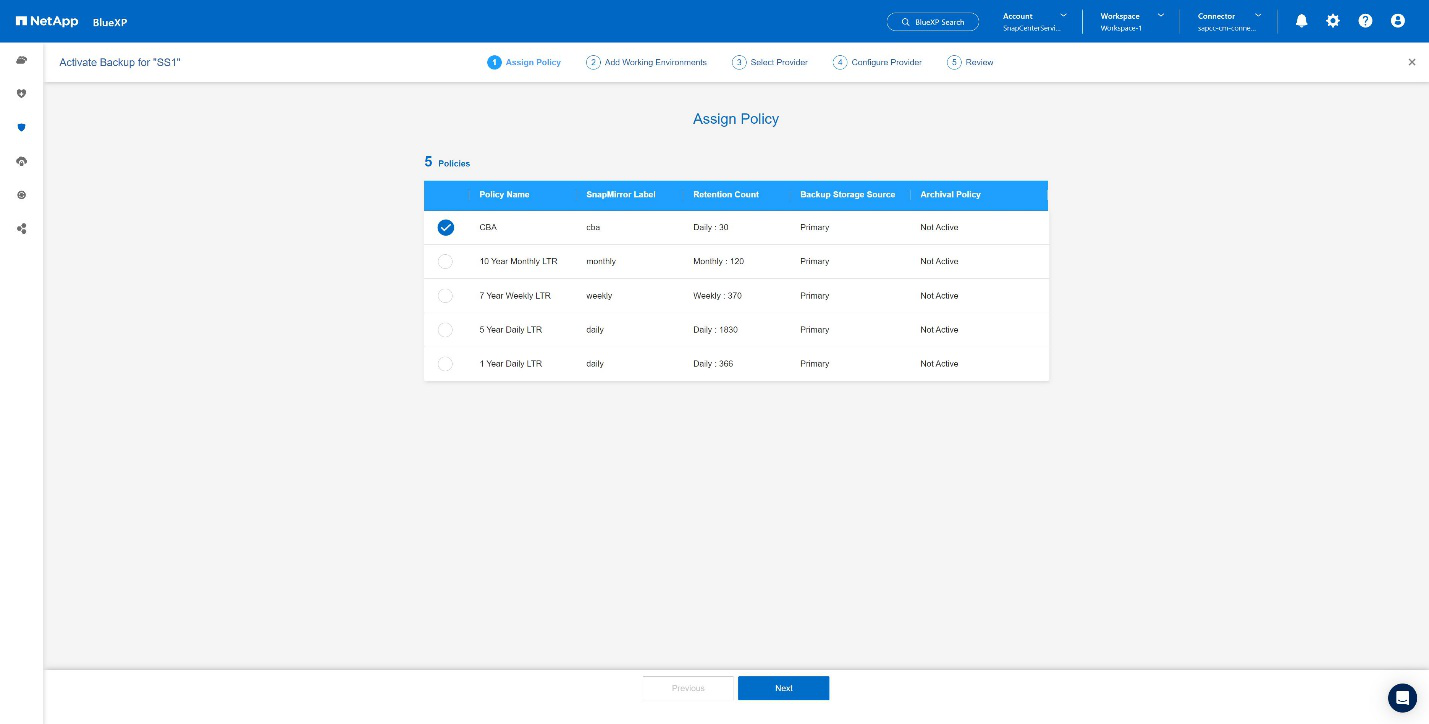
Choose Activate Backup for the SAP HANA system.
-
Choose the previously created policy and click Next.
-
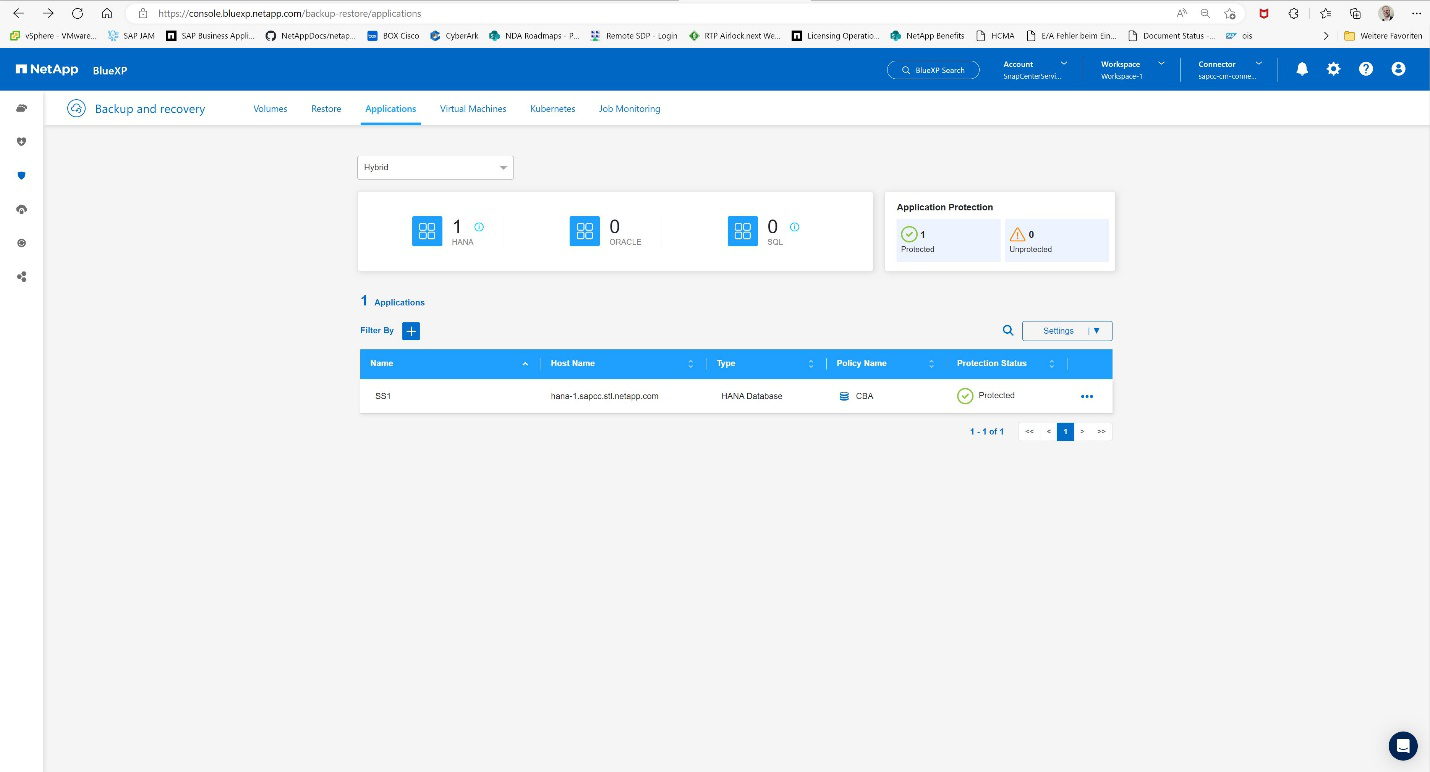
As the storage system and the connector have configured upfront the backup will be activated.

-
Once the job has been completed the System will be listed.
-
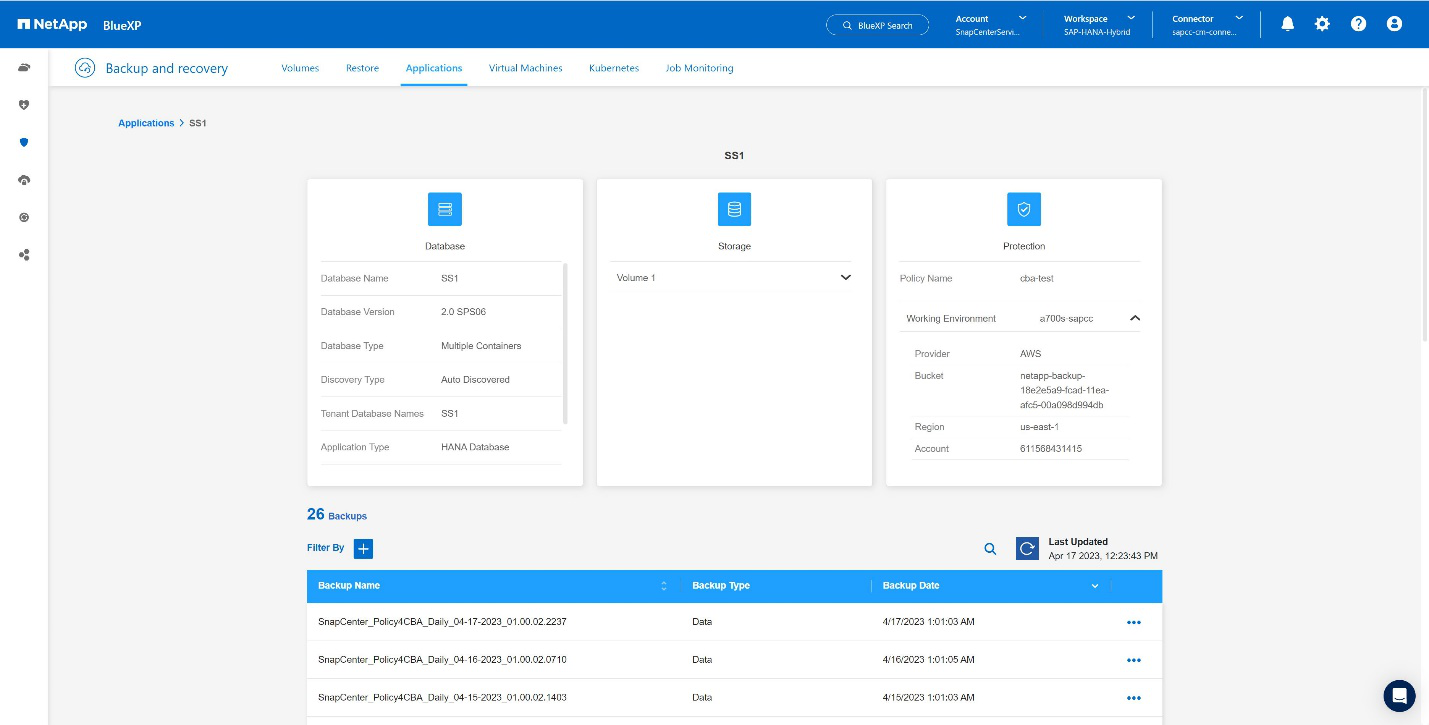
After some time the backups will be listed at the detail view of the SAP HANA System.
A daily backup will be listed the next day.
In some environments it might the necessary to remove any existing schedule settings of the snapmirror source. To do so execute the following command at the source ONTAP system: snapmirror modify -destination-path <hana-cloud-svm>:<SID_data_mnt00001>_copy -schedule "" .