

Manually Installing Acquisition Unit Software
 Suggest changes
By default, Data Infrastructure Insights updates Acquisition Unit (AU) software automatically as updates are deployed. However, in a secure controlled environments, automatic updating may not be possible or desired. In these cases, Data Infrastructure Insights can be configured for AU software to be updated manually, providing more control over the software installed on your tenant.
To manually download and install the AU software, perform the following steps. Data Infrastructure Insights provides a helpful Swagger documentation page that you can use for many of these steps, or you can use your own API script/commands. Go to Admin > API Access and click the “API Documentation” link.
The process is similar for Linux and Windows.
Performing a NEW AU install on Linux:
-
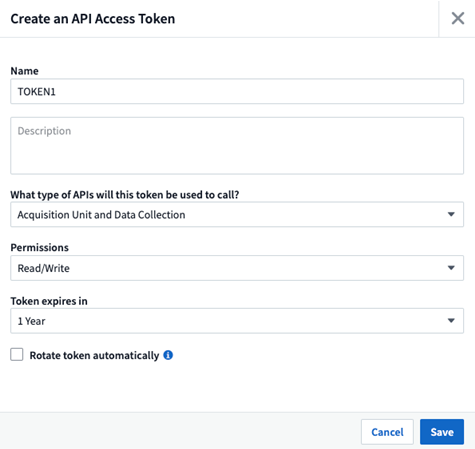
In Data Infrastructure Insights, create an API Token.
-
Navigate to Admin > API Access and select +API Access Token.
-
Set a Name and Description that are easy to identify
-
Type: Choose Acquisition Unit and Data Collection
-
Permissions: Read/Write
-
Select desired Expiry and Auto-Renew values
-
-
Click Save
-
Copy the generated API Access token. This step must be performed before you can close the window.
-
-
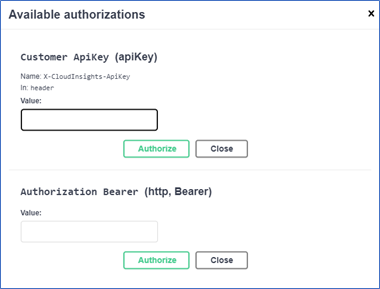
In Swagger (Admin > API Access > API Documentation), use the token to Authorize Data Infrastructure Insights APIs
-
Click Authorize at the top right of the Swagger screen
-
Paste the copied token from above to the Customer APIKey field
-
Click Authorize
-
Close the window
-
-
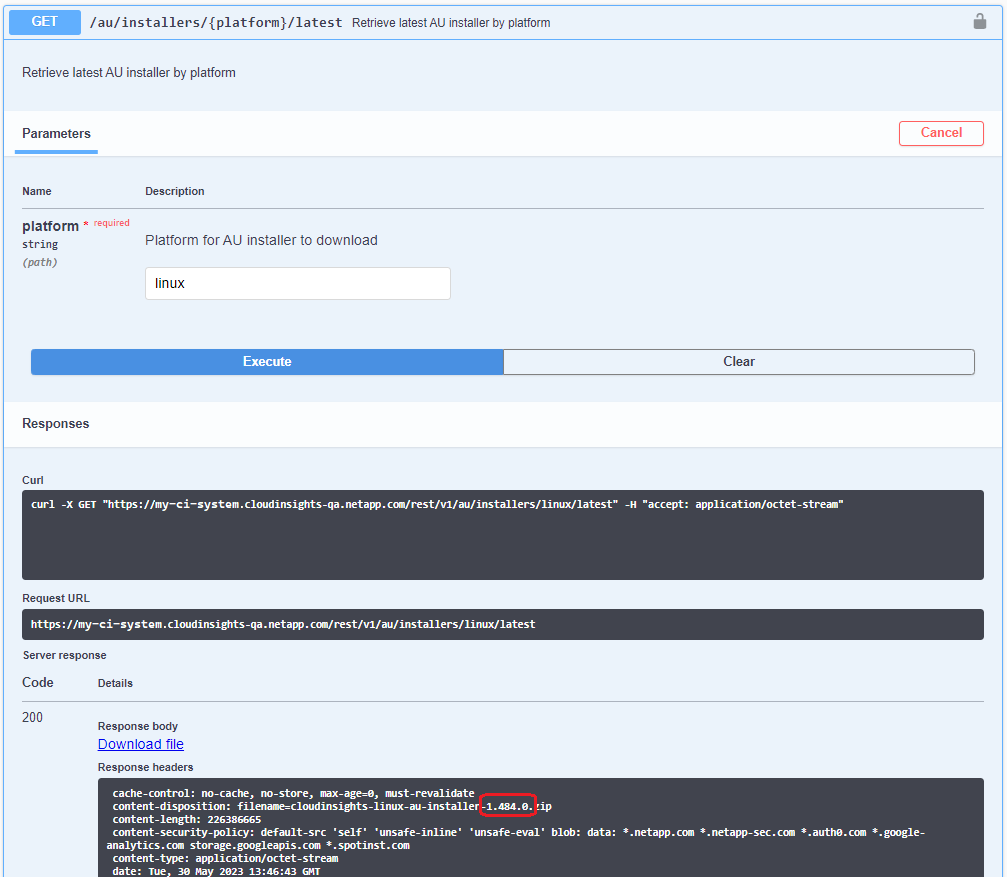
Download the AU Installer using the /au/installers/{platform}/latest or /au/installers/{platform}/{version} API:
-
Platform: linux
-
Version: <version> (latest or specified)
-

|
If you are not downloading the latest version, confirm with NetApp the AU version to be specified for download. |
-
Click Download File. If you are performing these steps on a system other than the AU system, copy the downloaded file to the AU system.
-
Alternatively, you can run the resulting CURL Command on the AU system:
curl -X GET "<tenant>/rest/v1/au/installers/linux/<AU version>" -H "accept: application/octet-stream" -H "X-CloudInsights-ApiKey: <token>"
-
At this point, the installer file should be present on the AU system.

|
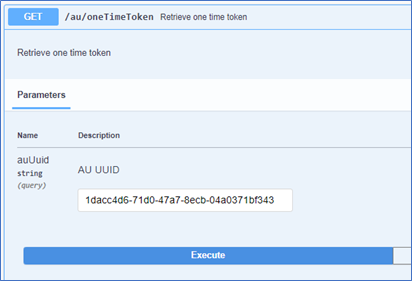
The next steps require the use of a temporary token. Do not use the API Access token you created above. |
-
In the Data Infrastructure Insights API Swagger, create a one-time token using the /au/oneTimeToken API.
-
Copy the resulting one-use token.
-

-
On the machine where the AU is going to be installed, navigate to the folder containing the downloaded installer file. The commands below require the user to have root permissions.
-
Unzip the installer file
-
Change directory to the resulting installer folder
-
Export the one-time token and the installer version to environment variables by executing the following:
export TOKEN=<One-Time Token>
-
Run the following to install CI with a custom user and group:
./cloudinsights-install.sh <custom user> <custom group>
Note: If you do not wish to use a custom user and group, you can use the default “cisys” user and group. In this case, run the install command above but do not specify the user and group.
-
At this point, the AU software is installed on the system and is accessible by the custom user and group. However, you do not have the ability to add data collectors. To do this manually, read the following instructions. If you only want to install a patch, see the Patch section below.
Manually Installing Data Collectors
Download the latest datasources.war using the /collector/patch/datasourceswar/latest API:
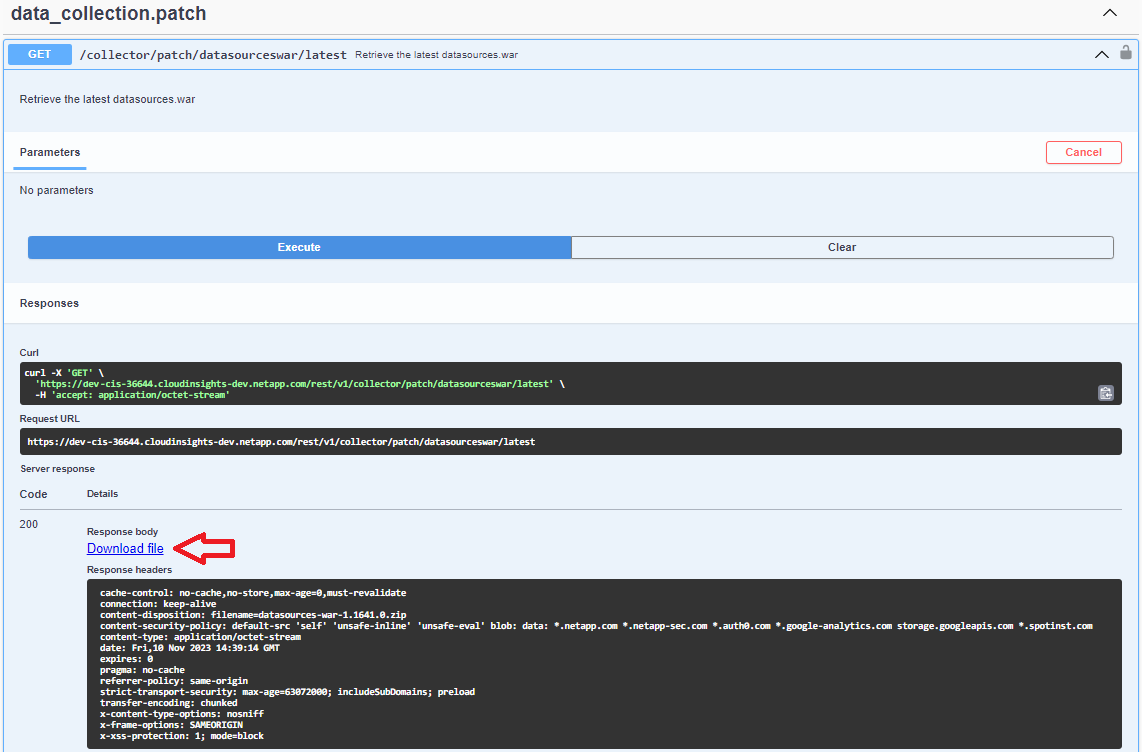
Note: If you are not downloading the latest version, confirm with NetApp the version to be specified for download.
Click Download File. If you are performing these steps on a system other than the AU system, copy the downloaded datasources.war zip bundle to the AU system.
Make sure datasources.war zip bundle is copied to the following directory : /var/lib/netapp/cloudinsights/acq/download
Navigate to /var/lib/netapp/cloudinsights/acq/download directory for datasources.war and verify the zip file there:
-
You must switch to (or logout root and login with) the custom user for the next steps.
su <custom user>
Note: If you are using the default “cisys” user and group, you do not need to perform this step.
Note: Custom user can be any user who is a member of a custom group you have provided to cloudinsights-install.sh during AU install, and can be the same or different from the custom user you provided during AU install.
-
Perform the following:
chmod 770 /var/lib/netapp/cloudinsights/acq/download/datasources-war-<version>.zip
ls -al /var/lib/netapp/cloudinsights/acq/download
…
drwxrwx--- 2 test-user2 test-group-1  4096 Feb 16 10:10 datasources-war-<version>.zip
…
Note: If using the “cisys” user and group, those will be displayed in the output above.
Note: If you plan to install using different custom users, ensure group permissions are set to read and write for both owner and group (chmod 660 …)
-
Restart the AU. In Data Infrastructure Insights, navigate to Observability > Collectors and select the Acquisition Units tab. Choose Restart from the “three dots” menu to the right of the AU.
Downloading a Patch
Download the patch using the /collector/patch/file/{version} API:
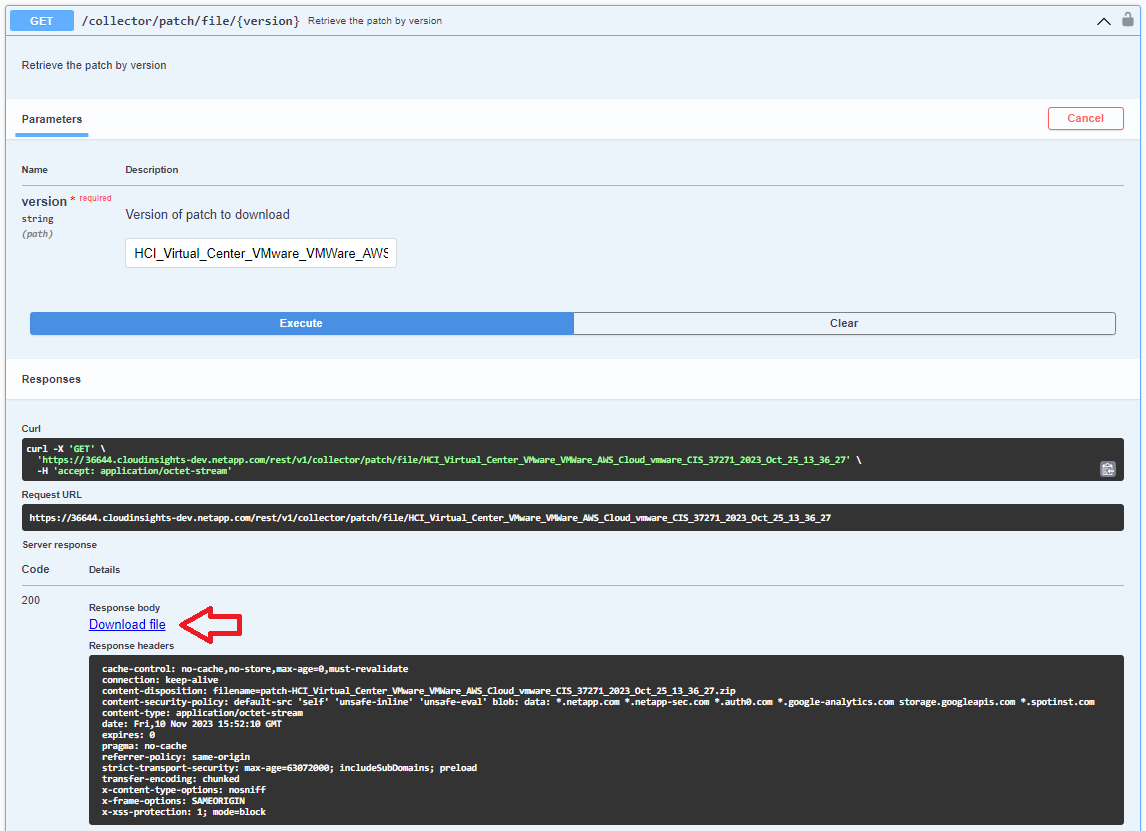
Note: confirm with NetApp the version to be specified for download.
Click Download File. If you are performing these steps on a system other than the AU system, copy the downloaded patch zip bundle to the AU system.
Make sure patch zip bundle is copied to the following directory : /var/lib/netapp/cloudinsights/acq/download
Navigate to /var/lib/netapp/cloudinsights/acq/download directory for the patch and verify the .zip file there:
-
You must switch to (or logout root and login with) the custom user for the next steps.
su <custom user>
Note: If you are using the default “cisys” user and group, you do not need to perform this step.
Note: Custom user can be any user who is a member of a custom group you have provided to cloudinsights-install.sh during AU install, and can be the same or different from the custom user you provided during AU install.
-
Perform the following:
chmod 770 /var/lib/netapp/cloudinsights/acq/download/<patch_file_name>.zip
ls -al /var/lib/netapp/cloudinsights/acq/download
…
drwxrwx--- 2 test-user2 test-group-1  4096 Feb 16 10:10 <patch_file_name>.zip
…
Note: If using the “cisys” user and group, those will be displayed in the output above.
Note: If you plan to install using different custom users, ensure group permissions are set to read and write for both owner and group (chmod 660 …)
-
Restart the AU. In Data Infrastructure Insights, navigate to Observability > Collectors and select the Acquisition Units tab. Choose Restart from the “three dots” menu to the right of the AU.
External Key Retrieval
If you provide a UNIX shell script, it can be executed by the acquisition unit to retrieve the private key and the public key from your key management system.
To retrieve the key, Data Infrastructure Insights will execute the script, passing in two parameters: key id and key type. Key id can be used to identify the key in your key management system. Key type is either "public" or "private". When the key type is "public", the script must return the public key. When the key type is "private", the private key must be returned.
To send the key back to the acquisition unit, the script must print the key to standard output. The script must print only the key to standard output; no other text must be printed to standard output. Once the requested key is printed to the standard output, the script must exit with an exit code of 0; any other return code is considered an error.
The script must be registered with the acquisition unit using the SecurityAdmin tool, which will execute the script along with the acquisition unit. The script must have read and execute permission for the root and "cisys" user. If the shell script is modified after registering, the modified shell script must be re-registered with the acquisition unit.
input parameter: key id |
Key identifier used to identify the key in the customers key management system. |
input parameter: key type |
public or private. |
output |
The requested key must be printed to the standard output. 2048 bit RSA key is currently supported. Keys must be encoded and printed in the following format - |
exit code |
Exit code of zero for success. All other exit values are considered failure. |
script permissions |
Script must have read and execute permission for the root and "cisys" user. |
logs |
Script executions are logged. Logs can be found in - |