3. Deploy NetApp HCI with the NetApp Deployment Engine
 Suggest changes
NDE delivers a simple and streamlined deployment experience for the NetApp HCI solution. A detailed guide to using NDE 1.6 to deploy your NetApp HCI system can be found here.
These steps begin after the nodes have been racked, and cabled, and the IPMI port has been configured on each node using the console. To Deploy the NetApp HCI solution using NDE, complete the following steps:
-
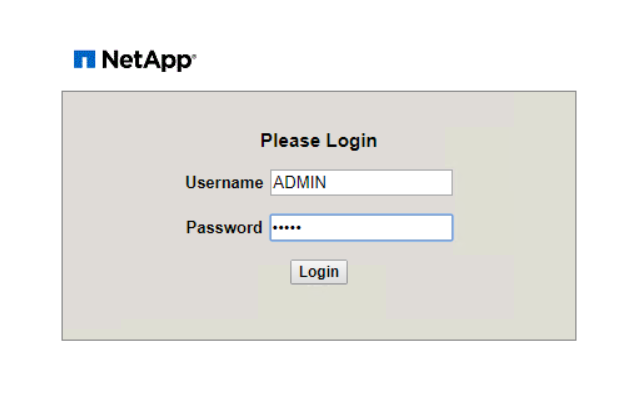
Access the out-of-band management console for one of the storage nodes in the cluster and log in with the default credentials ADMIN/ADMIN.
-
Click the Remote Console Preview image in the center of the screen to download a JNLP file launched by Java Web Start, which launches an interactive console to the system.
-
With the virtual console launched, a user can log in to the HCI storage node using the ADMIN/ADMIN username and password combination.
-
The Bond1G interface must have an IP, a netmask, and a gateway set statically; its VLAN set to 3480; and DNS servers defined for the environment.

Select an IP that is within the subnet you intend to use for in-band management but not an IP you would like to use in production. NDE reconfigures the node with a production IP after initial access.
This task must only be performed on the first storage node. Afterward, the other nodes in the infrastructure are discovered by the Automatic Private IP Address (APIPA) addresses assigned to each storage interface when left unconfigured. -
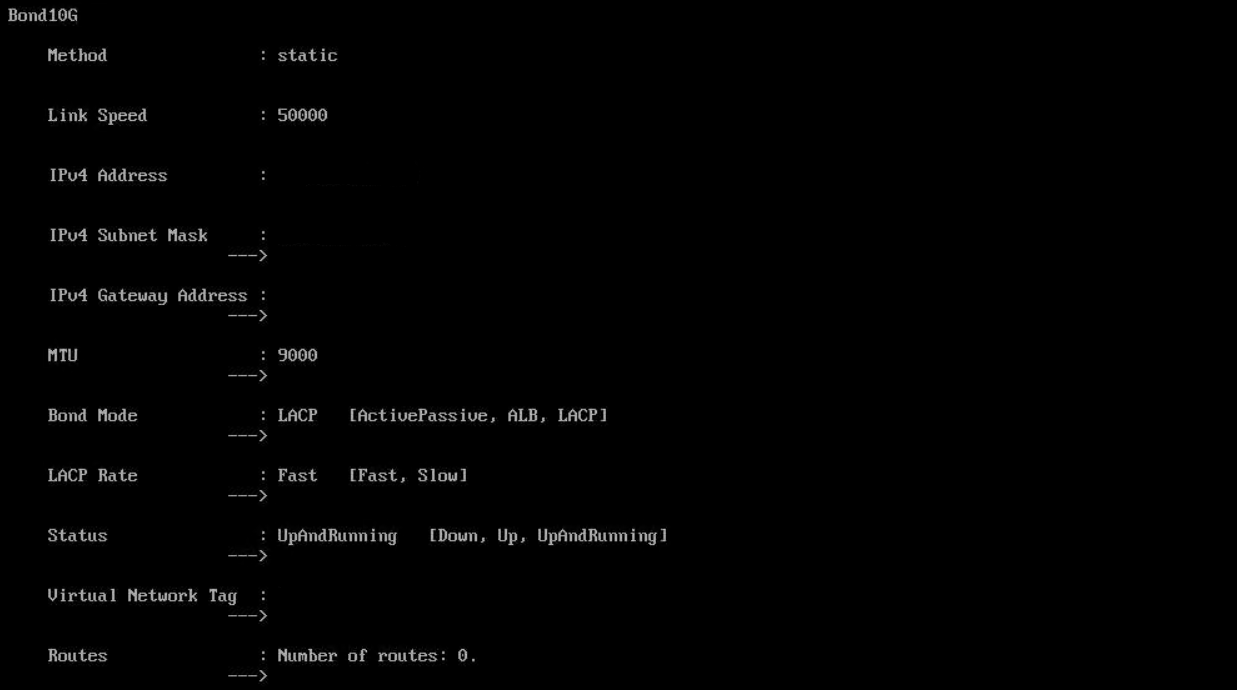
The Bond 10G interface must have its MTU setting changed to enable jumbo frames and its bond mode changed to LACP.
Configure each of the four storage nodes in the NetApp HCI solution this way. The NDE process is then able to discover all the nodes in the solution and configure them. You do not need to modify the Bond10g interfaces on the two compute nodes. -
After completion, open a web browser and visit the IP address you configured for the management port to start NetApp HCI configuration with NDE.
-
On the Welcome to NetApp HCI page, click the Get Started button.
-
Check each associated box on the Prerequisites page and click Continue.
-
The next page presents End User Licenses for NetApp HCI and VMware vSphere. If you accept the terms, click I Accept at the end of each agreement and then click Continue.
-
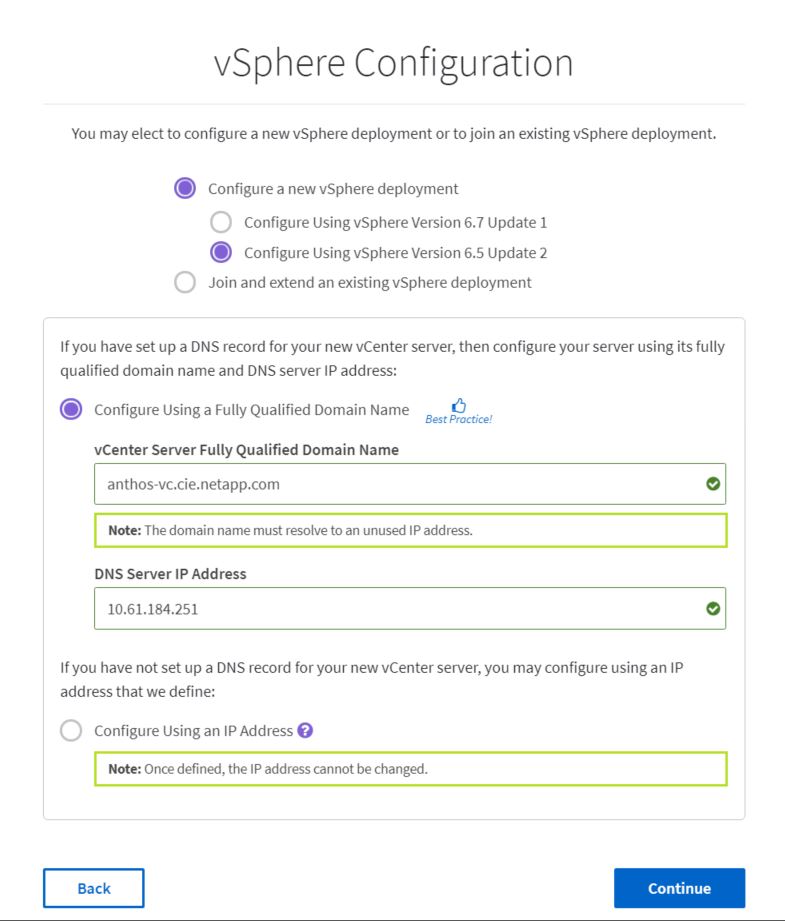
Click Configure a New vSphere Deployment, select vSphere 6.5U2, and enter the Fully Qualified Domain Name (FQDN) of your vCenter Server. Then click Continue.
-
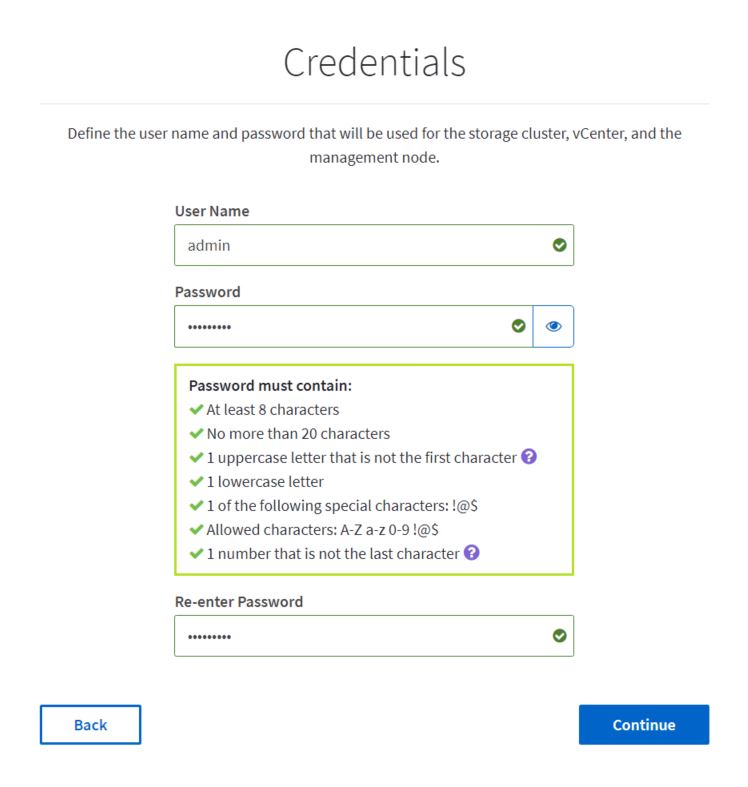
NDE asks for the credentials to be used in the environment. This is used for VMware vSphere, the NetApp Element storage cluster, and the NetApp Mnode, which provides management functionality for the cluster. When you are finished, click Continue.
-
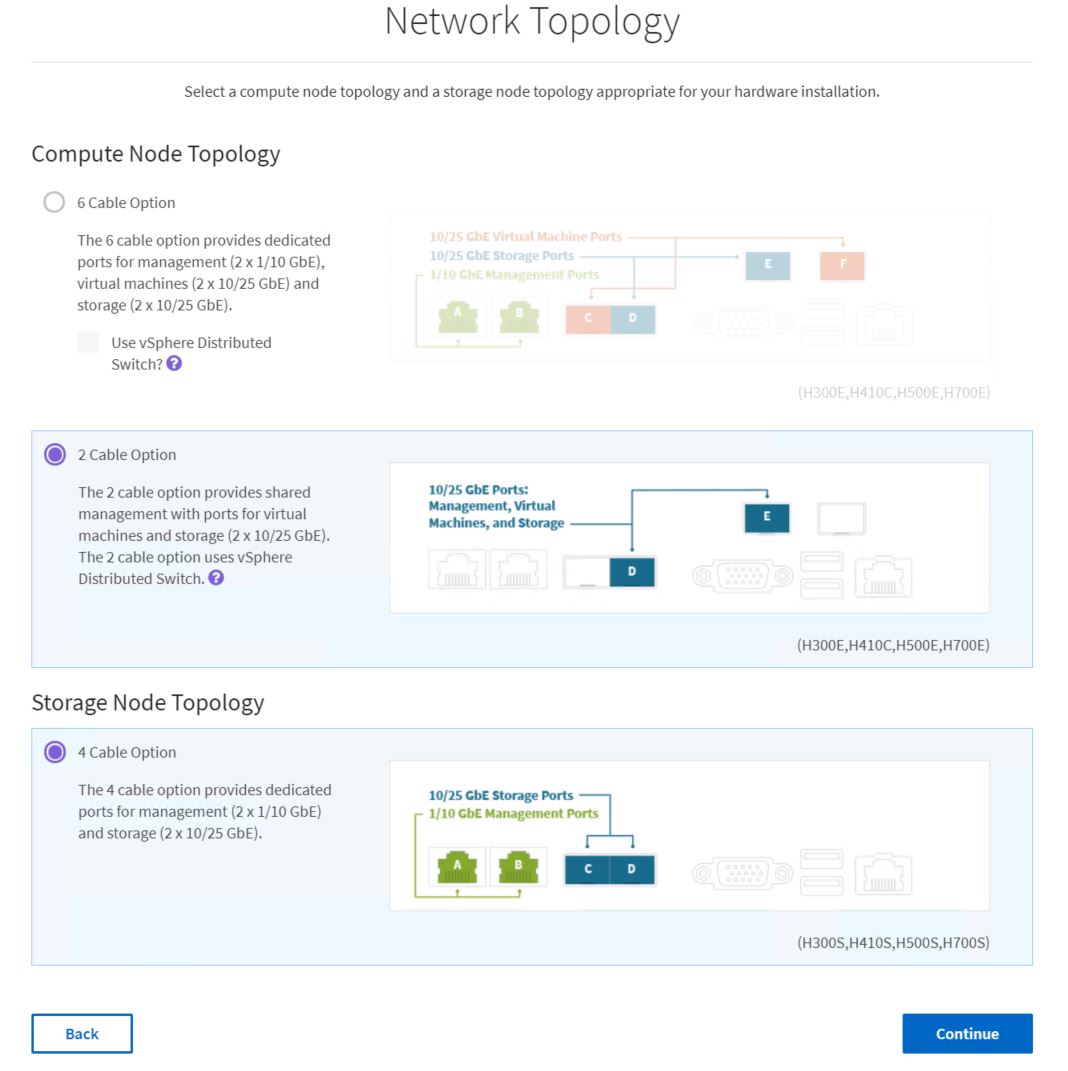
NDE then prompts for the network topology used to cable the NetApp HCI environment. The validated solution in this document has been deployed using the two-cable option for the compute nodes, and the four-cable option for the storage nodes. Click Continue.
-
The next page presented by NDE is the inventory of the environment as discovered by the APIPA addressed on the storage network. The storage node that is currently running NDE is already selected with a green check mark. Select the corresponding boxes to add additional nodes to the NetApp HCI environment. Click Continue.
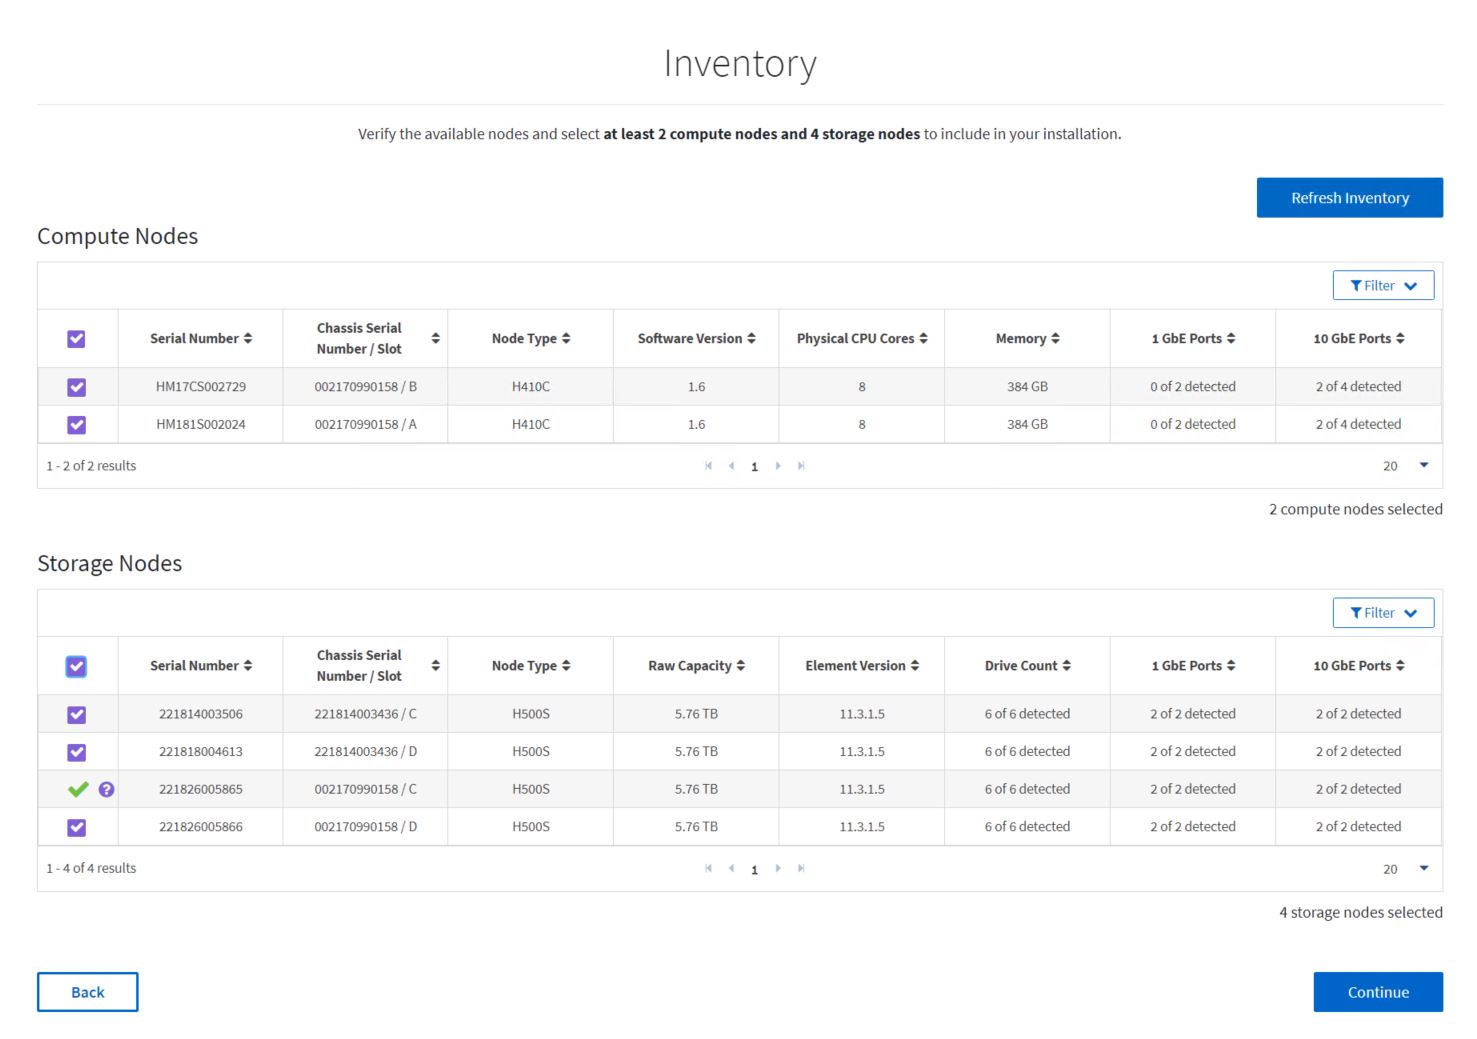
If there are any nodes missing from the inventory screen, wait a few minutes and click Refresh Inventory. If the node still fails to appear, additional investigation of environment networking might be required. -
You must next configure the permanent network settings for the NetApp HCI deployment. The first page configures infrastructure services (DNS and NTP), vCenter networking, and Mnode networking.

-
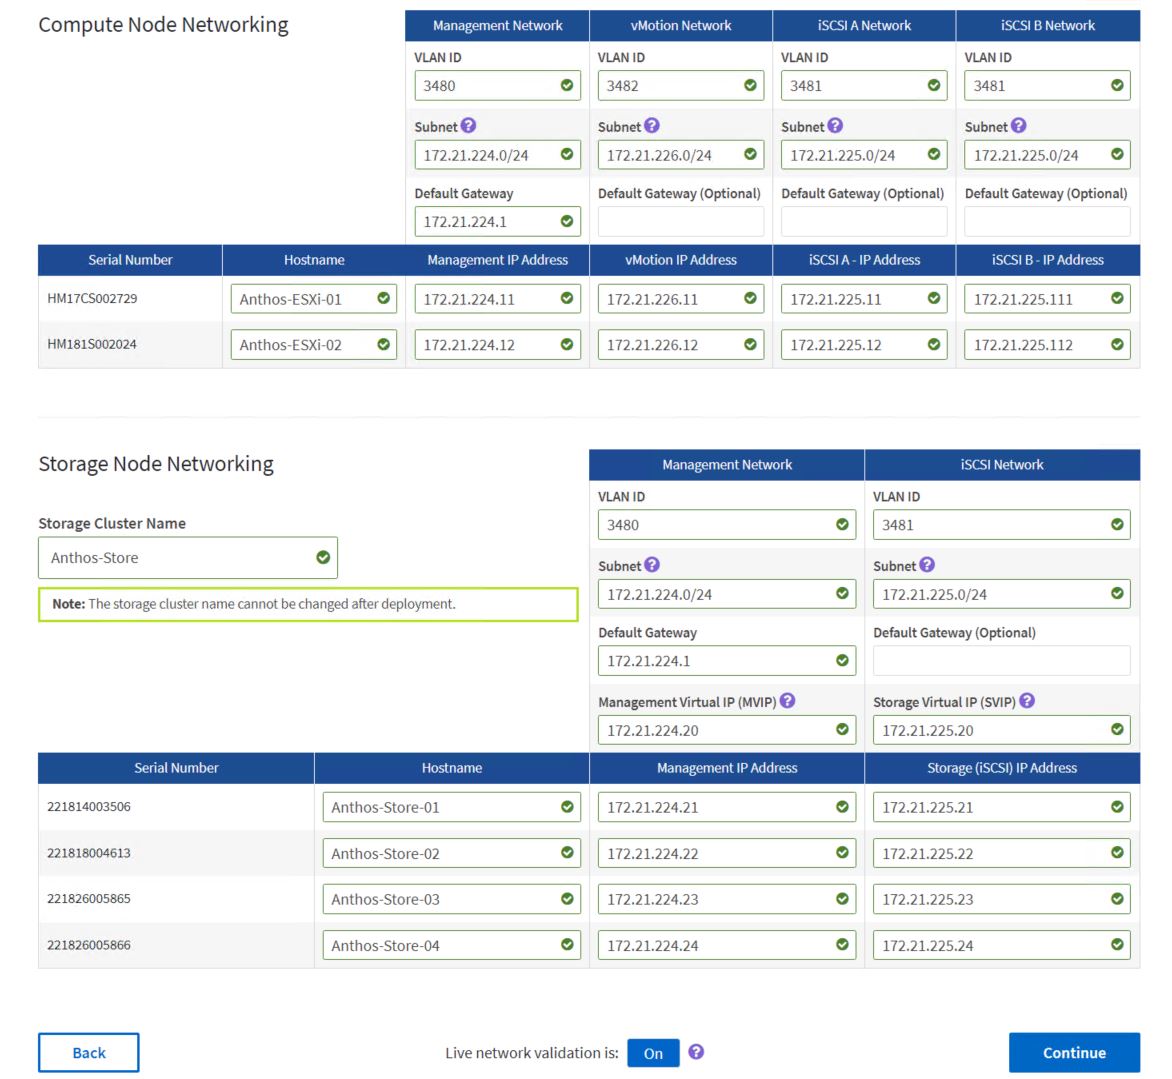
The next page allows you to configure each node in the environment. For the compute nodes, it allows you to configure the host name, management network, vMotion network, and storage network. For the storage nodes, name the storage cluster and configure the management and storage networks being used for each node. Click Continue.
-
On the next page, review all the settings that have been defined for the environment by expanding each section, and, if necessary, click Edit to make corrections. There is also a check box on this page that enables or disables the Mnode from sending real-time health and diagnostics information to NetApp Active IQ. If all the information is correct, click Start Deployment.
If you want to enable Active IQ, verify that your management network can reach the internet. If NDE is unable to reach Active IQ, the deployment can fail. -
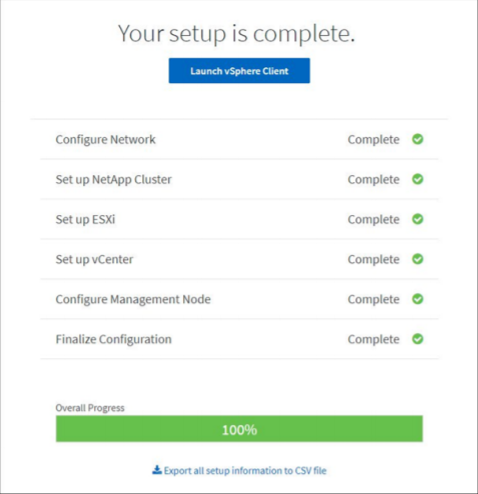
A summary page appears along with a progress bar for each component of the NetApp HCI solution, as well as the overall solution. When complete, you are presented with an option to launch the vSphere client and begin working with your environment.