Data protection
 Suggest changes
This page shows the data protection options for Managed Red Hat OpenShift on AWS (ROSA) clusters using Astra Control Service. Astra Control Service (ACS) provides an easy-to-use graphical user-interface with which you can add clusters, define applications running on them, and perform application aware data management activities. ACS functions can also be accessed using an API that allows for automation of workflows.
Powering Astra Control (ACS or ACC) is NetApp Trident. Trident integrates several types of Kubernetes clusters such as Red Hat OpenShift, EKS, AKS, SUSE Rancher, Anthos etc., with various flavors of NetApp ONTAP storage such as FAS/AFF, ONTAP Select, CVO, Google Google Cloud NetApp Volumes, Azure NetApp Files and Amazon FSx ONTAP.
This section provides details for the following data protection options using ACS:
-
A video showing Backup and Restore of a ROSA application running in one region and restoring to another region.
-
A video showing Snapshot and Restore of a ROSA application.
-
Step-by-step details of installing a ROSA cluster, Amazon FSx ONTAP, using NetApp Trident to integrate with storage backend, installing a postgresql application on ROSA cluster, using ACS to create a snapshot of the application and restoring the application from it.
-
A blog showing step-by-step details of creating and restoring from a snapshot for a mysql application on a ROSA cluster with FSx ONTAP using ACS.
Backup/Restore from Backup
The following video shows the backup of a ROSA application running in one region and restoring to another region.
Snapshot/Restore from snapshot
The following video shows taking a snapshot of a ROSA application and restoring from the snapshot after.
Blog
Step-by-Step Details to create snapshot and restore from it
Prerequisite setup
-
IAM user with appropriate permissions to create and access ROSA cluster
-
OpenShift CLI(oc)
-
VPC with subnets and appropriate gateways and routes
-
ROSA Cluster installed into the VPC
-
Amazon FSx ONTAP created in the same VPC
-
Access to the ROSA cluster from OpenShift Hybrid Cloud Console
Next Steps
-
Create an admin user and login to the cluster.
-
Create a kubeconfig file for the cluster.
-
Install Trident on the cluster.
-
Create a backend, storage class and snapshot class configuration using the Trident CSI provisioner.
-
Deploy a postgresql application on the cluster.
-
Create a database and add a record.
-
Add the cluster into ACS.
-
Define the application in ACS.
-
Create a snapshot using ACS.
-
Delete the database in the postgresql application.
-
Restore from a snapshot using ACS.
-
Verify your app has been restored form the snapshot.
1. Create an admin user and login to the cluster
Access the ROSA cluster by creating an admin user with the following command : (You need to create an admin user only if you did not create one at the time of installation)
rosa create admin --cluster=<cluster-name>
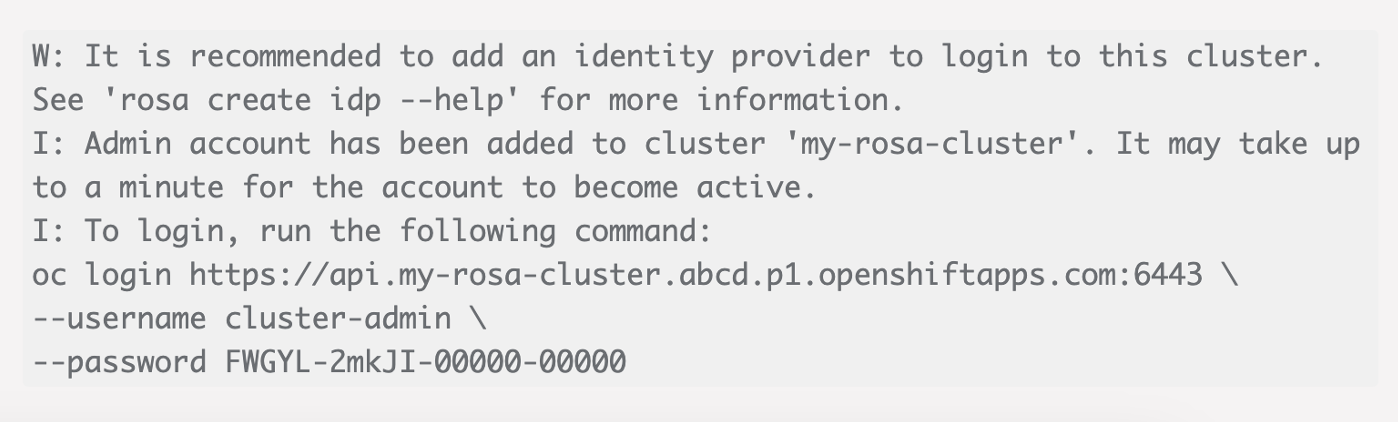
The command will provide an output that will look like the following. Login to the cluster using the oc login command provided in the output.

|
You can also login to the cluster using a token. If you already created an admin-user at the time of cluster creation, you can login to the cluster from the Red Hat OpenShift Hybrid Cloud console with the admin-user credentials. Then by clicking on the top right corner where it displays the name of the logged in user, you can obtain the oc login command (token login) for the command line.
|
2. Create a kubeconfig file for the cluster
Follow the procedures here to create a kubeconfig file for the ROSA cluster. This kubeconfig file will be used later when you add the cluster into ACS.
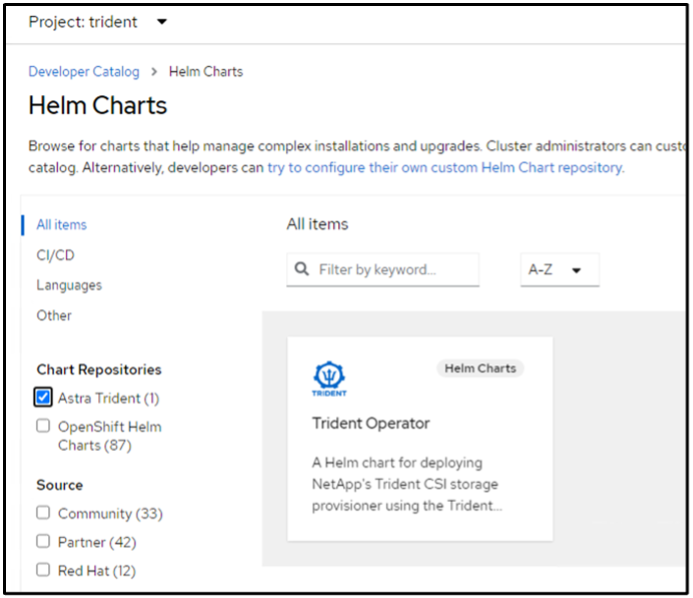
3. Install Trident on the cluster
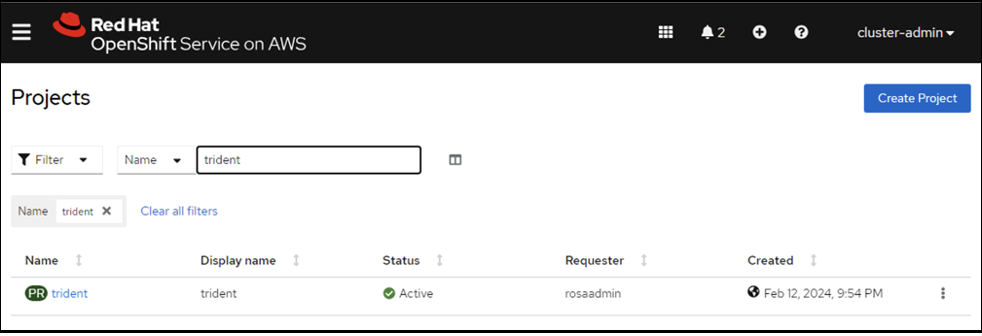
Install Trident (latest version) on the ROSA cluster. To do this, you can follow any one of the procedures given here. To install Trident using helm from the console of the cluster, first create a project called Trident.
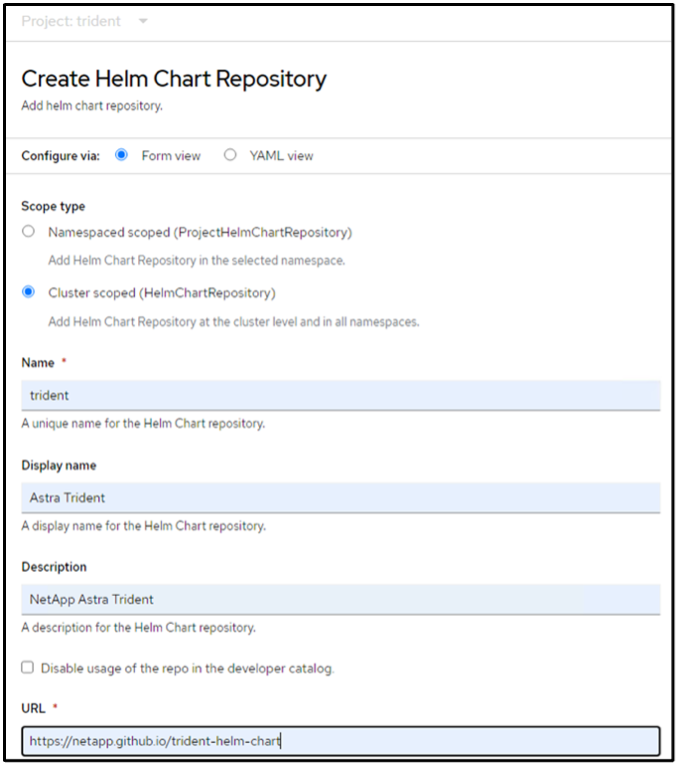
Then from the Developer view, create a Helm chart repository. For the URL field use 'https://netapp.github.io/trident-helm-chart'. Then create a helm release for Trident operator.
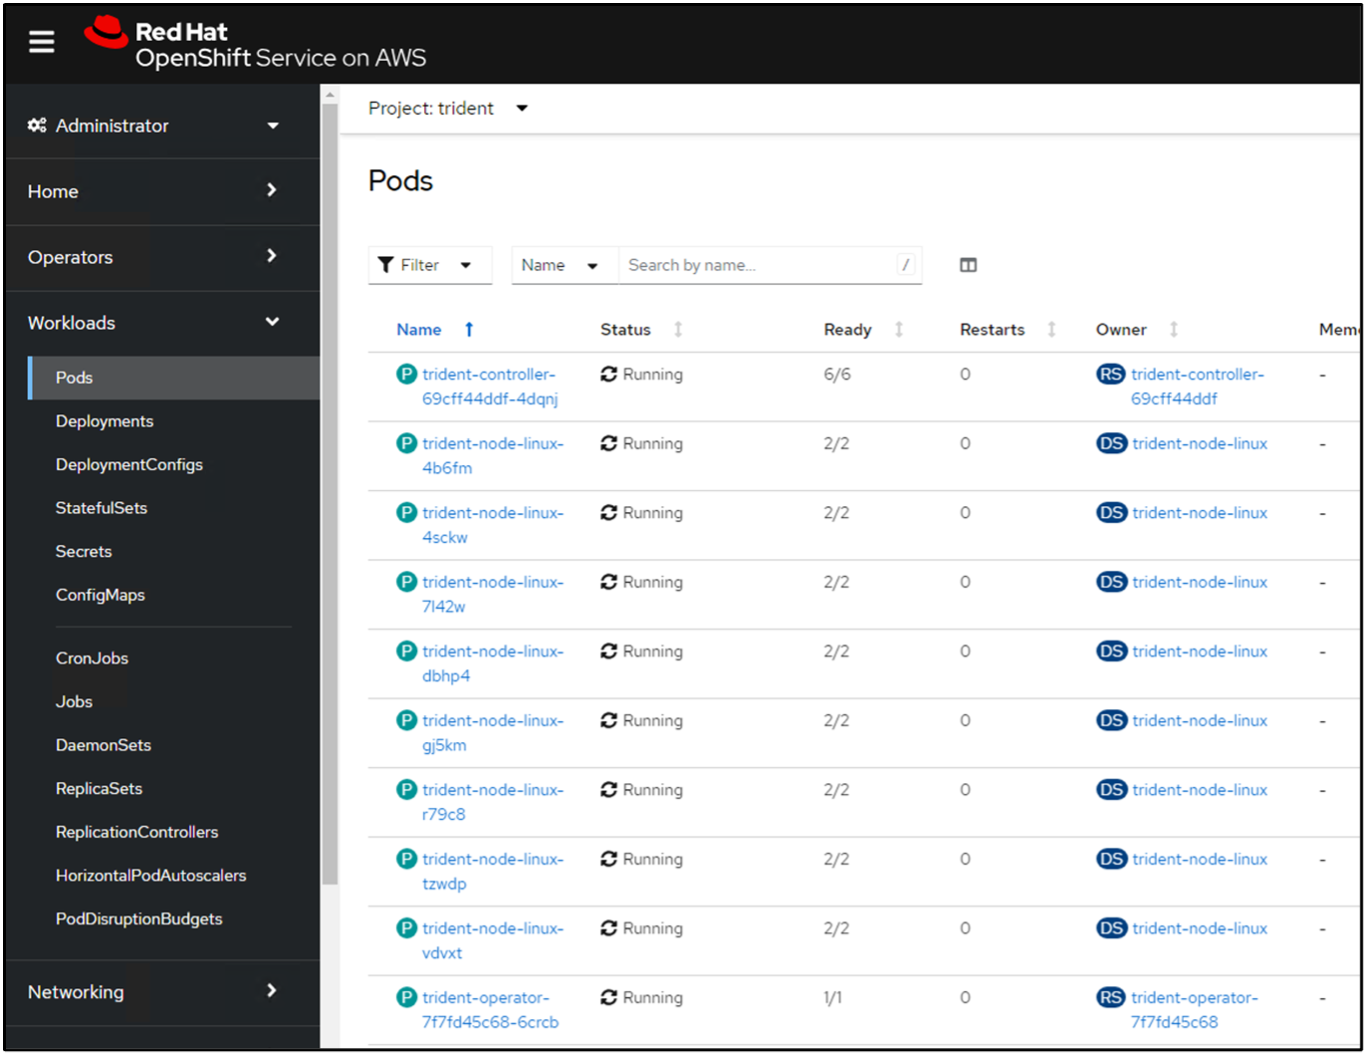
Verify all trident pods are running by going back to the Administrator view on the console and selecting pods in the trident project.
4. Create a backend, storage class and snapshot class configuration using the Trident CSI provisioner
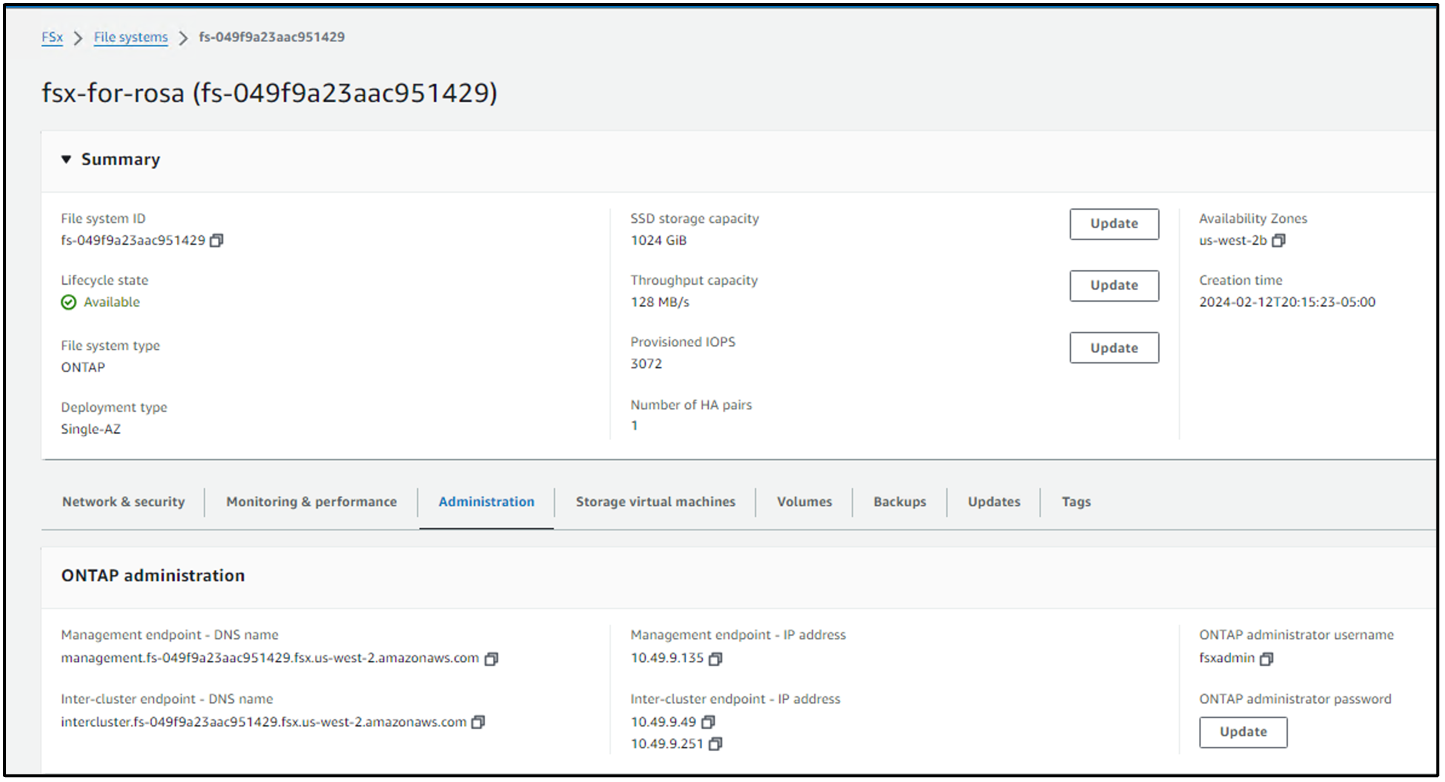
Use the yaml files shown below to create a trident backend object, storage class object and the Volumesnapshot object. Be sure to provide the credentials to your Amazon FSx ONTAP file system you created, the management LIF and the vserver name of your file system in the configuration yaml for the backend. To get those details, go to the AWS console for Amazon FSx and select the file system, navigate to the Administration tab. Also, click on update to set the password for the fsxadmin user.
|
|
You can use the command line to create the objects or create them with the yaml files from the hybrid cloud console. |
Trident Backend Configuration
apiVersion: v1
kind: Secret
metadata:
  name: backend-tbc-ontap-nas-secret
type: Opaque
stringData:
  username: fsxadmin
  password: <password>
---
apiVersion: trident.netapp.io/v1
kind: TridentBackendConfig
metadata:
  name: ontap-nas
spec:
  version: 1
  storageDriverName: ontap-nas
  managementLIF: <management lif>
  backendName: ontap-nas
  svm: fsx
  credentials:
    name: backend-tbc-ontap-nas-secret
Storage Class
apiVersion: storage.k8s.io/v1
kind: StorageClass
metadata:
  name: ontap-nas
provisioner: csi.trident.netapp.io
parameters:
  backendType: "ontap-nas"
  media: "ssd"
  provisioningType: "thin"
  snapshots: "true"
allowVolumeExpansion: true
snapshot class
apiVersion: snapshot.storage.k8s.io/v1
kind: VolumeSnapshotClass
metadata:
name: trident-snapshotclass
driver: csi.trident.netapp.io
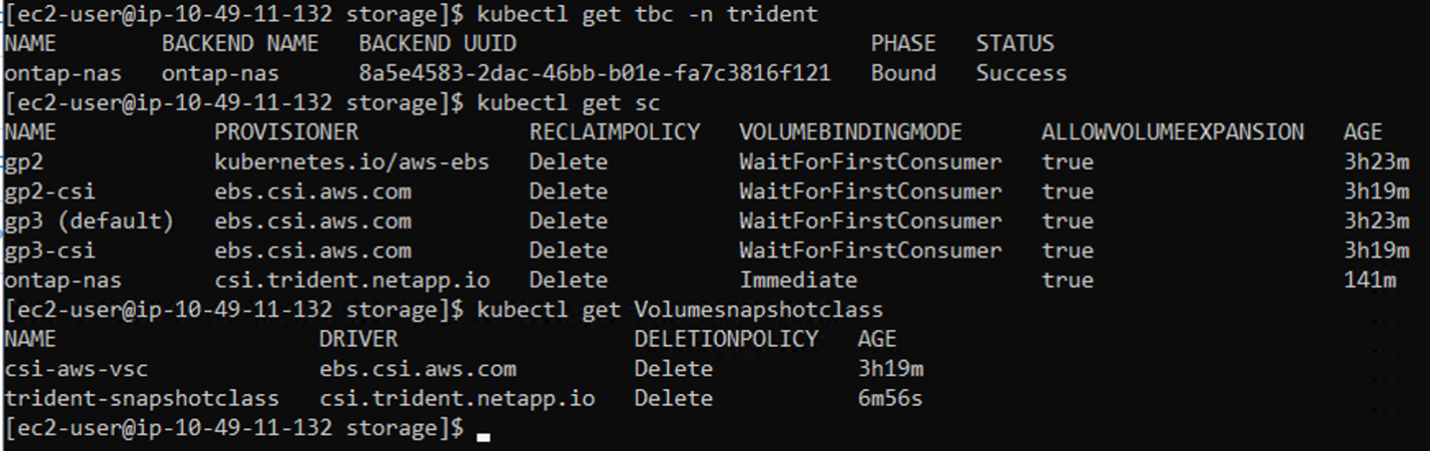
deletionPolicy: DeleteVerify that the backend, storage class and the trident-snapshotclass objects are created by issuing the commands shown below.
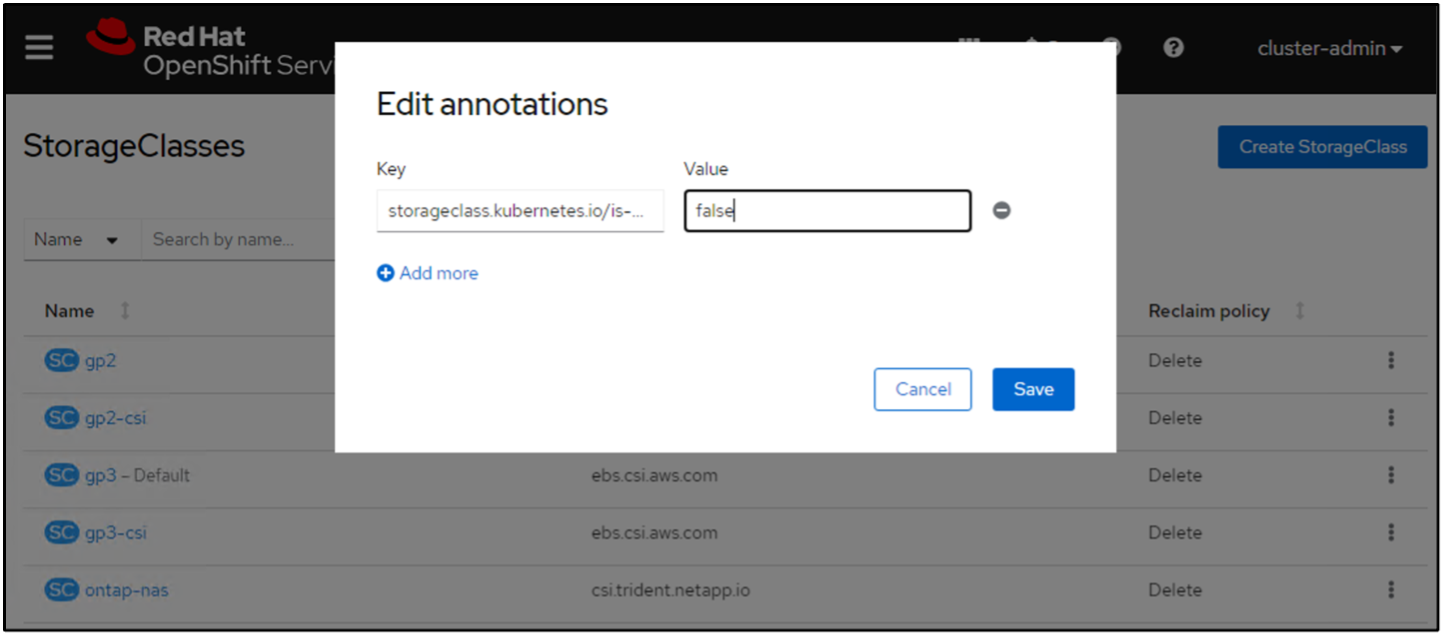
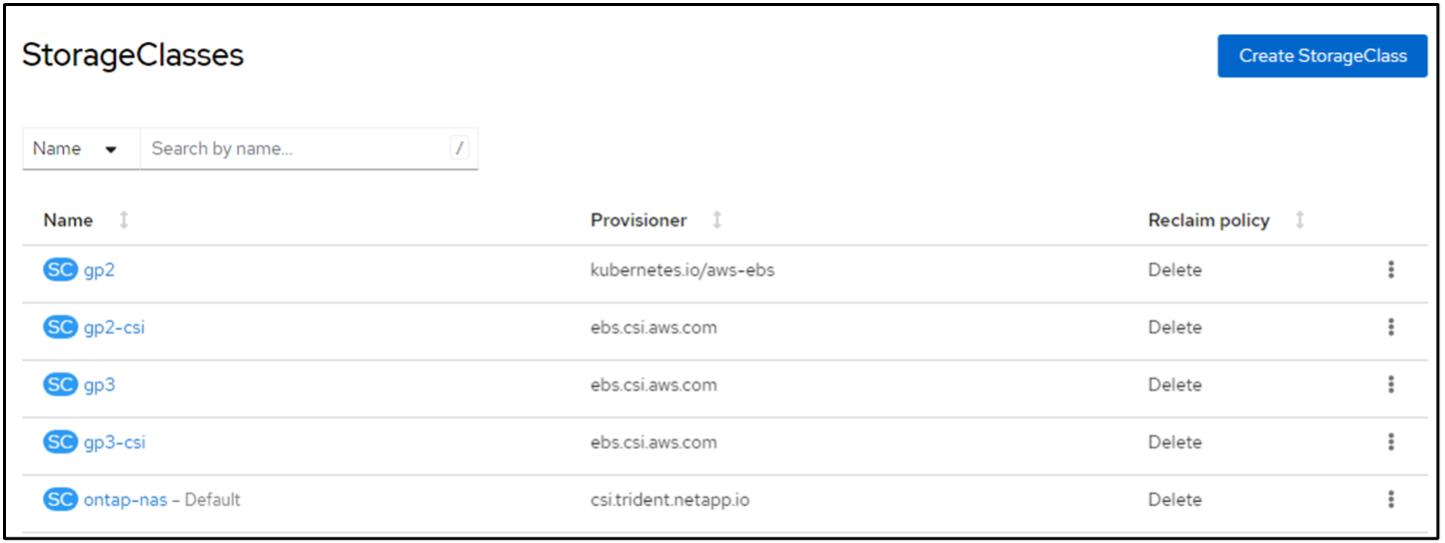
At this time, an important modification you need to make is to set ontap-nas as the default storage class instead of gp3 so that the postgresql app you deploy later can use the default storage class. In the Openshift console of your cluster, under Storage select StorageClasses. Edit the annotation of the current default class to be false and add the annotation storageclass.kubernetes.io/is-default-class set to true for the ontap-nas storage class.
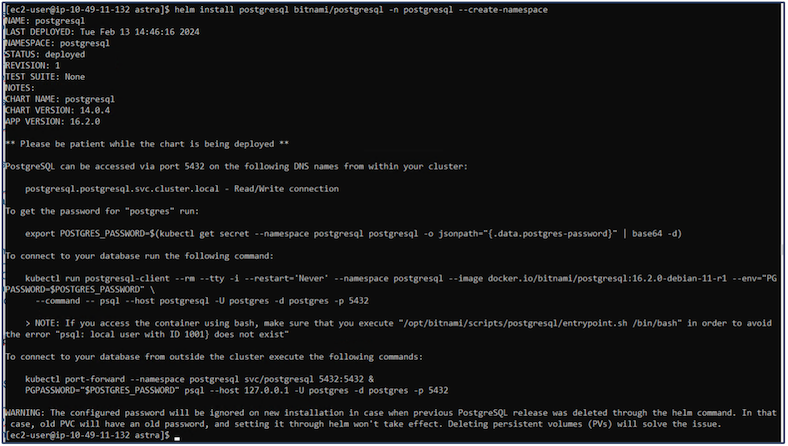
5. Deploy a postgresql application on the cluster
You can deploy the application from the command line as follows:
helm install postgresql bitnami/postgresql -n postgresql --create-namespace
|
|
If you do not see the application pods running, then there might be an error caused due to security context constraints. Fix the error by editing the runAsUser and fsGroup fields in statefuleset.apps/postgresql object with the uid that is in the output of the oc get project command as shown below.
|
postgresql app should be running and using persistent volumes backed by Amazon FSx ONTAP storage.


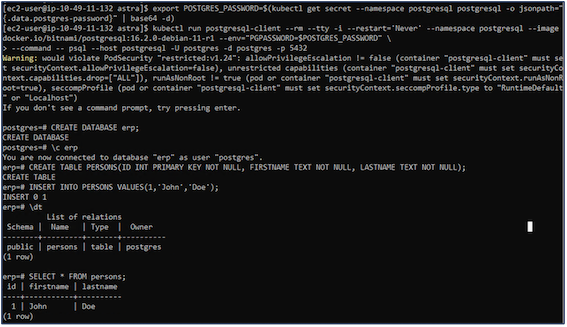
6. Create a database and add a record
7. Add the cluster into ACS
Log in to ACS. Select cluster and click on Add. Select other and upload or paste the kubeconfig file.

Click Next and select ontap-nas as the default storage class for ACS. Click Next, review the details and Add the cluster.

8. Define the application in ACS
Define the postgresql application in ACS. From the landing page, select Applications, Define and fill in the appropriate details. Click Next a couple of times, Review the details and click Define. The application gets added to ACS.
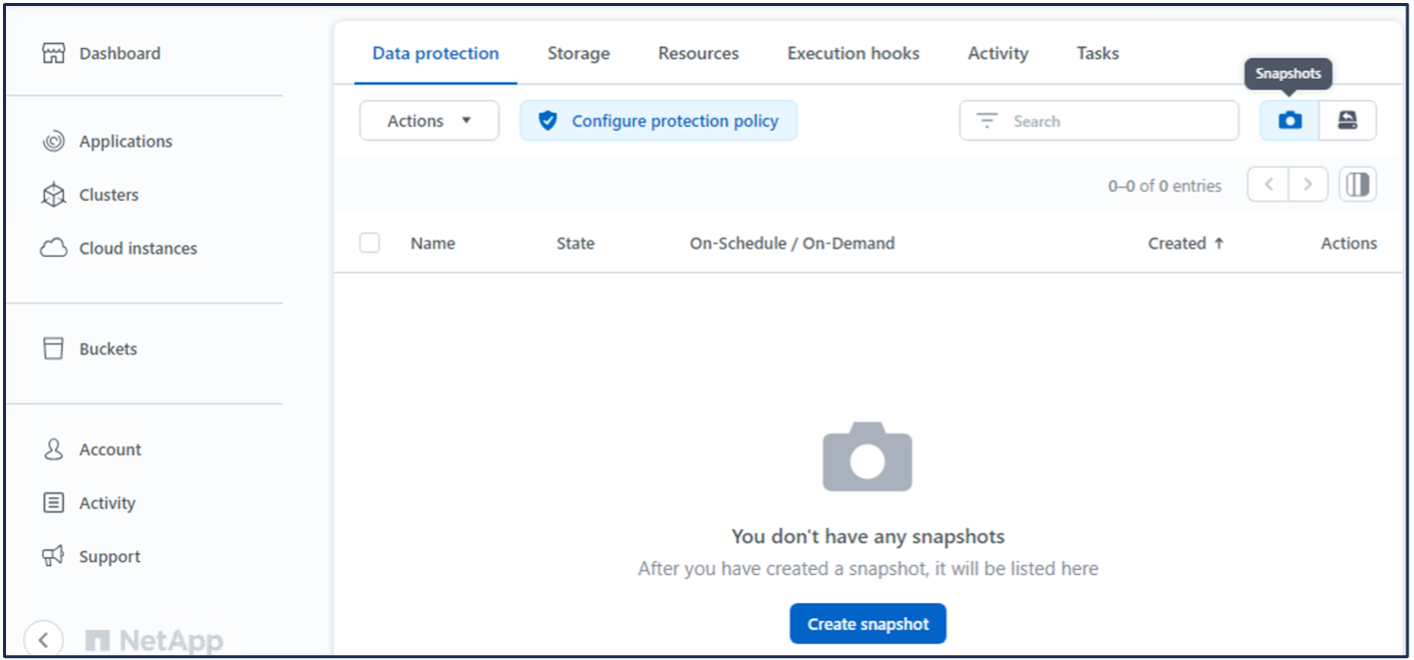
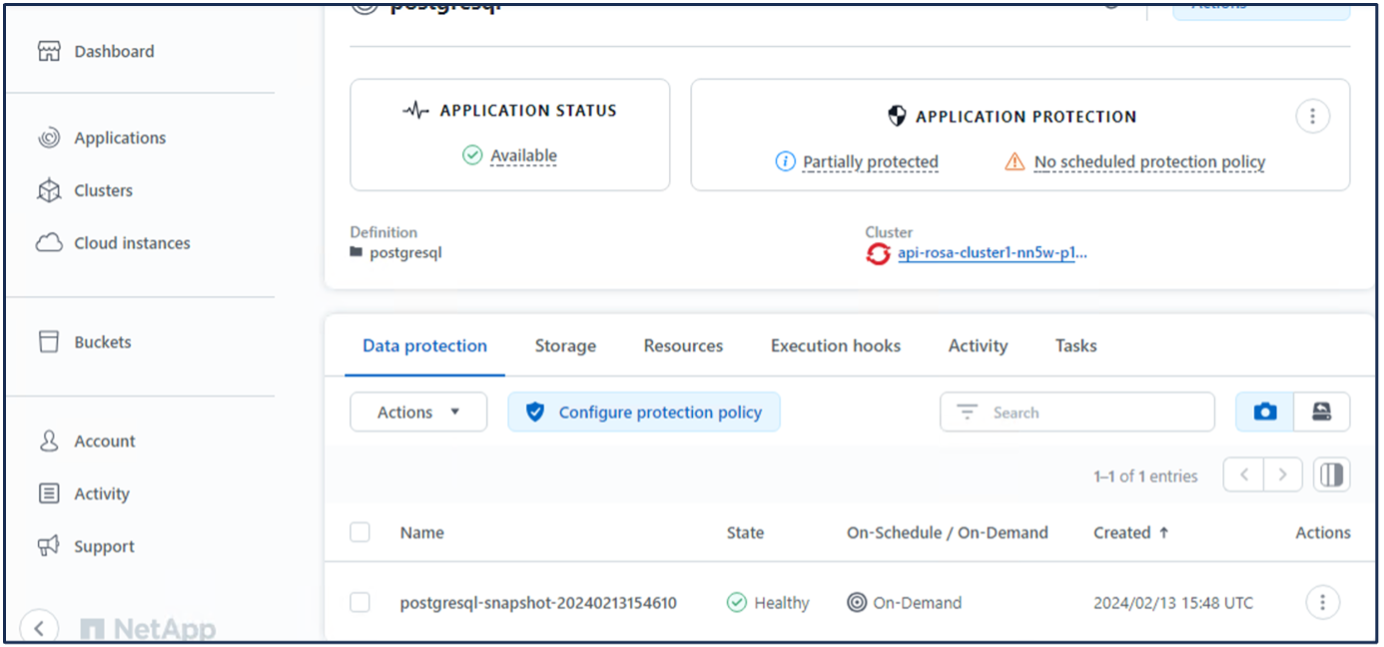
9. Create a snapshot using ACS
There are many ways to create a snapshot in ACS. You can select the application and create a snapshot from the page that shows the details of the application. You can click on Create snapshot to create an on-demand snapshot or configure a protection policy.
Create an on-demand snapshot by simply clicking on Create snapshot, providing a name, reviewing the details, and clicking on Snapshot. The snapshot state changes to Healthy after the operation is completed.
10. Delete the database in the postgresql application
Log back into postgresql, list the available databases, delete the one you created previously and list again to ensure that the database has been deleted.

11. Restore from a snapshot using ACS
To restore the application from a snapshot, go to ACS UI landing page, select the application and select Restore. You need to pick a snapshot or a backup from which to restore. (Typically, you would have multiple created based on a policy that you have configured). Make appropriate choices in the next couple of screens and then click on Restore. The application status moves from Restoring to Available after it has been restored from the snapshot.


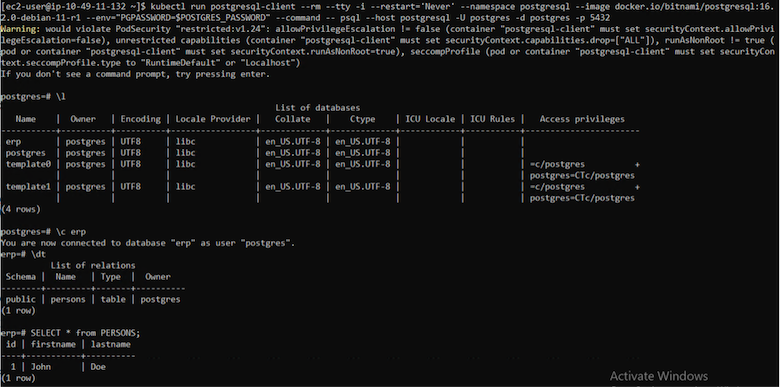
12. Verify your app has been restored from the snapshot
Login to the postgresql client and you should now see the table and the record in the table that you previously had. That's it. Just by clicking a button, your application has been restored to a previous state. That is how easy we make it for our customers with Astra Control.