

 인공 지능
인공 지능
NetApp Astra Control 개요
 변경 제안
변경 제안
NetApp Astra Control Center는 사내 환경에 구축되어 NetApp 데이터 보호 기술을 기반으로 하는 상태 저장 Kubernetes 워크로드를 위한 풍부한 스토리지 및 애플리케이션 인식 데이터 관리 서비스 세트를 제공합니다.
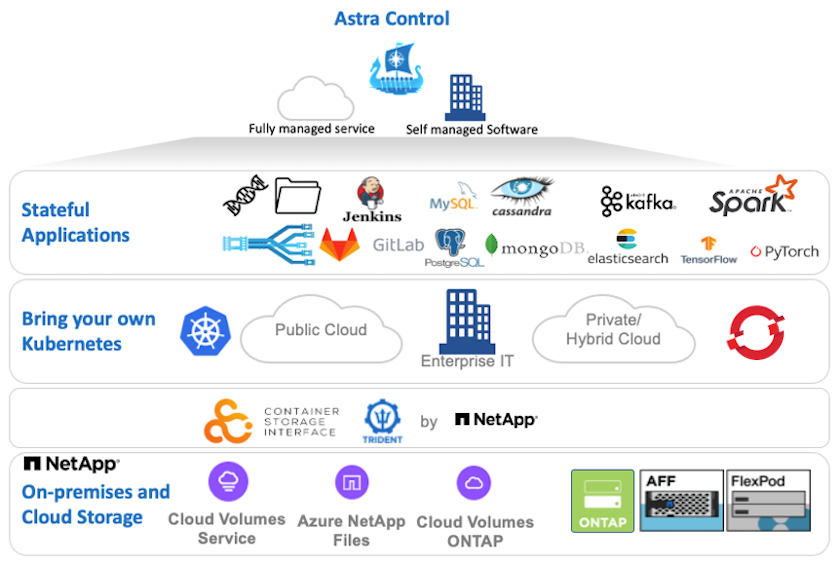
NetApp Astra Control Center는 NetApp ONTAP 스토리지 시스템에 스토리지 클래스 및 스토리지 백엔드를 사용하여 구축 및 구성된 Astra Trident 스토리지 오케스트레이터가 있는 VMware Tanzu 클러스터에 설치할 수 있습니다.
Astra Trident에 대한 자세한 내용은 을 참조하십시오 "이 문서는 여기 에서 확인할 수 있습니다".
클라우드 연결 환경에서 Astra Control Center는 Cloud Insights를 사용하여 고급 모니터링 및 원격 측정 기능을 제공합니다. Cloud Insights 연결이 없을 경우 제한된 모니터링 및 원격 측정(7일 메트릭)을 사용할 수 있으며 개방형 메트릭 엔드포인트를 통해 Kubernetes 기본 모니터링 툴(Prometheus 및 Grafana)으로 내보낼 수 있습니다.
Astra Control Center는 NetApp AutoSupport 및 Active IQ 에코시스템에 완전히 통합되어 사용자를 지원하고, 문제 해결을 지원하며, 사용 통계를 표시합니다.
Astra Control Center의 유료 버전 외에 90일 평가판 라이센스도 제공됩니다. 평가판 버전은 이메일과 Community Slack 채널을 통해 지원됩니다. 고객은 제품 내 지원 대시보드에서 이러한 리소스, 기타 기술 자료 문서 및 문서를 사용할 수 있습니다.
Astra 포트폴리오에 대한 자세한 내용은 를 참조하십시오 "Astra 웹 사이트".
Astra Control Center 자동화
Astra Control Center에는 프로그래밍 방식의 액세스를 위한 완전한 기능의 REST API가 있습니다. 사용자는 프로그래밍 언어 또는 유틸리티를 사용하여 Astra Control REST API 끝점과 상호 작용할 수 있습니다. 이 API에 대한 자세한 내용은 설명서를 참조하십시오 "여기".
Astra Control REST API와 상호 작용하기 위해 미리 만들어진 소프트웨어 개발 툴킷을 찾고 있다면 NetApp에서 다운로드할 수 있는 Astra Control Python SDK와 함께 툴킷을 제공합니다 "여기".
프로그래밍이 현재 상황에 맞지 않고 구성 관리 툴을 사용하려는 경우 NetApp에서 게시하는 Ansible 플레이북을 클론 복제 및 실행할 수 있습니다 "여기".
Astra Control Center 설치 필수 구성 요소
Astra Control Center를 설치하려면 다음과 같은 필수 구성 요소가 필요합니다.
-
관리 클러스터 또는 TKGS 또는 TKGI에서 관리하는 하나 이상의 Tanzu Kubernetes 클러스터 TKG 워크로드 클러스터 1.4+ 및 TKGI 사용자 클러스터 1.12.2+가 지원됩니다.
-
Astra Trident는 각 Tanzu Kubernetes 클러스터에 이미 설치 및 구성되어 있어야 합니다.
-
ONTAP 9.5 이상을 실행 중인 NetApp ONTAP 스토리지 시스템 하나 이상

사이트에 각 Tanzu Kubernetes를 설치하여 영구 스토리지용 전용 SVM을 사용하는 것이 모범 사례입니다. 다중 사이트 배포에는 추가 스토리지 시스템이 필요합니다. -
Trident 스토리지 백엔드는 ONTAP 클러스터에서 지원하는 SVM을 사용하여 각 Tanzu Kubernetes 클러스터에서 구성해야 합니다.
-
스토리지 프로비저닝자로 Astra Trident가 있는 각 Tanzu Kubernetes 클러스터에 구성된 기본 StorageClass입니다.
-
로드 밸런싱을 위해 각 Tanzu Kubernetes 클러스터에 로드 밸런싱 장치를 설치하고 구성해야 하며, 이때 ingressType 'AccTraefik'를 사용하는 경우 Astra Control Center가 표시됩니다.
-
ingressType "Generic"을 사용하는 경우 Astra Control Center를 노출하기 위해 각 Tanzu Kubernetes 클러스터에 수신 컨트롤러를 설치하고 구성해야 합니다.
-
NetApp Astra Control Center 이미지를 호스팅하도록 프라이빗 이미지 레지스트리를 구성해야 합니다.
-
Astra Control Center가 설치되어 있는 Tanzu Kubernetes 클러스터에 대한 클러스터 관리자 액세스 권한이 있어야 합니다.
-
NetApp ONTAP 클러스터에 대한 관리 액세스 권한이 있어야 합니다.
-
RHEL 또는 Ubuntu 관리 워크스테이션.
Astra Control Center를 설치합니다
이 솔루션은 Ansible 플레이북을 사용하여 Astra Control Center를 설치하는 자동화된 절차를 설명합니다. Astra Control Center를 설치하기 위한 수동 절차를 찾고 있는 경우 자세한 설치 및 작동 설명서를 따르십시오 "여기".
-
Astra Control Center를 배포하는 Ansible 플레이북을 사용하려면 Ansible이 설치된 Ubuntu/RHEL 시스템이 있어야 합니다. 절차를 따르십시오 "여기" Ubuntu 및 RHEL의 경우
-
Ansible 콘텐츠를 호스팅하는 GitHub 저장소의 클론을 생성합니다.
git clone https://github.com/NetApp-Automation/na_astra_control_suite.git -
NetApp Support 사이트에 로그인하여 NetApp Astra Control Center의 최신 버전을 다운로드하십시오. 그렇게 하려면 NetApp 계정에 연결된 라이센스가 필요합니다. 타볼을 다운로드한 후 워크스테이션으로 전송합니다.
Astra Control 평가판 라이센스를 시작하려면 를 방문하십시오 "Astra 등록 사이트입니다". -
Astra Control Center가 설치될 사용자 또는 워크로드 Tanzu Kubernetes 클러스터에 대한 관리자 액세스 권한이 있는 kubecon무그림 파일을 만들거나 얻습니다.
-
디렉터리를 na_Astra_control_suite로 변경합니다.
cd na_astra_control_suite -
VAR/VAR.yml 파일을 편집하여 필요한 정보로 변수를 입력합니다.
#Define whether or not to push the Astra Control Center images to your private registry [Allowed values: yes, no] push_images: yes #The directory hosting the Astra Control Center installer installer_directory: /home/admin/ #Specify the ingress type. Allowed values - "AccTraefik" or "Generic" #"AccTraefik" if you want the installer to create a LoadBalancer type service to access ACC, requires MetalLB or similar. #"Generic" if you want to create or configure ingress controller yourself, installer just creates a ClusterIP service for traefik. ingress_type: "AccTraefik" #Name of the Astra Control Center installer (Do not include the extension, just the name) astra_tar_ball_name: astra-control-center-22.04.0 #The complete path to the kubeconfig file of the kubernetes/openshift cluster Astra Control Center needs to be installed to. hosting_k8s_cluster_kubeconfig_path: /home/admin/cluster-kubeconfig.yml #Namespace in which Astra Control Center is to be installed astra_namespace: netapp-astra-cc #Astra Control Center Resources Scaler. Leave it blank if you want to accept the Default setting. astra_resources_scaler: Default #Storageclass to be used for Astra Control Center PVCs, it must be created before running the playbook [Leave it blank if you want the PVCs to use default storageclass] astra_trident_storageclass: basic #Reclaim Policy for Astra Control Center Persistent Volumes [Allowed values: Retain, Delete] storageclass_reclaim_policy: Retain #Private Registry Details astra_registry_name: "docker.io" #Whether the private registry requires credentials [Allowed values: yes, no] require_reg_creds: yes #If require_reg_creds is yes, then define the container image registry credentials #Usually, the registry namespace and usernames are same for individual users astra_registry_namespace: "registry-user" astra_registry_username: "registry-user" astra_registry_password: "password" #Kuberenets/OpenShift secret name for Astra Control Center #This name will be assigned to the K8s secret created by the playbook astra_registry_secret_name: "astra-registry-credentials" #Astra Control Center FQDN acc_fqdn_address: astra-control-center.cie.netapp.com #Name of the Astra Control Center instance acc_account_name: ACC Account Name #Administrator details for Astra Control Center admin_email_address: admin@example.com admin_first_name: Admin admin_last_name: Admin -
Playbook을 실행하여 Astra Control Center를 구축합니다. 특정 구성에 대한 루트 권한이 Playbook에 필요합니다.
Playbook을 실행하는 사용자가 root 이거나 암호 없는 sudo가 구성된 경우 다음 명령을 실행하여 플레이북을 실행합니다.
ansible-playbook install_acc_playbook.yml사용자에게 암호 기반 sudo 액세스가 구성된 경우 다음 명령을 실행하여 플레이북을 실행한 다음 sudo 암호를 입력합니다.
ansible-playbook install_acc_playbook.yml -K
설치 후 단계
-
설치가 완료되는 데 몇 분 정도 걸릴 수 있습니다. NetApp-Astra-cc 네임스페이스의 모든 Pod와 서비스가 실행 중인지 확인합니다.
[netapp-user@rhel7 ~]$ kubectl get all -n netapp-astra-cc
-
설치가 완료되었는지 확인하려면 'acc-operator-controller-manager' 로그를 확인하십시오.
[netapp-user@rhel7 ~]$ kubectl logs deploy/acc-operator-controller-manager -n netapp-acc-operator -c manager -f
다음 메시지는 Astra Control Center가 성공적으로 설치되었음을 나타냅니다. {"level":"info","ts":1624054318.029971,"logger":"controllers.AstraControlCenter","msg":"Successfully Reconciled AstraControlCenter in [seconds]s","AstraControlCenter":"netapp-astra-cc/astra","ae.Version":"[22.04.0]"} -
Astra Control Center에 로그인하기 위한 사용자 이름은 CRD 파일에 제공된 관리자의 이메일 주소이며 암호는 Astra Control Center UUID에 추가된 문자열 ACC- 입니다. 다음 명령을 실행합니다.
[netapp-user@rhel7 ~]$ oc get astracontrolcenters -n netapp-astra-cc
NAME    UUID
astra   345c55a5-bf2e-21f0-84b8-b6f2bce5e95f
이 예에서 암호는 'ACC-345c55a5-bf2e-21f0-84b8-b6f2bce5e95f'입니다. -
ingressType이 AccTraefik인 경우 traefik 서비스 로드 밸런싱 장치 IP를 가져옵니다.
[netapp-user@rhel7 ~]$ oc get svc -n netapp-astra-cc | egrep 'EXTERNAL|traefik'

NAME                                       TYPE           CLUSTER-IP       EXTERNAL-IP     PORT(S)                                                                   AGE
traefik                                    LoadBalancer   172.30.99.142    10.61.186.181   80:30343/TCP,443:30060/TCP                                                16m
-
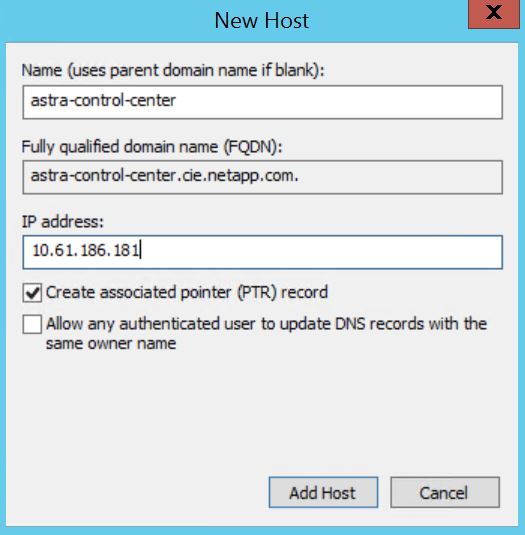
Astra Control Center CRD 파일에서 제공하는 FQDN을 가리키는 DNS 서버의 entry를 traefik 서비스의 'external-ip'에 추가한다.
-
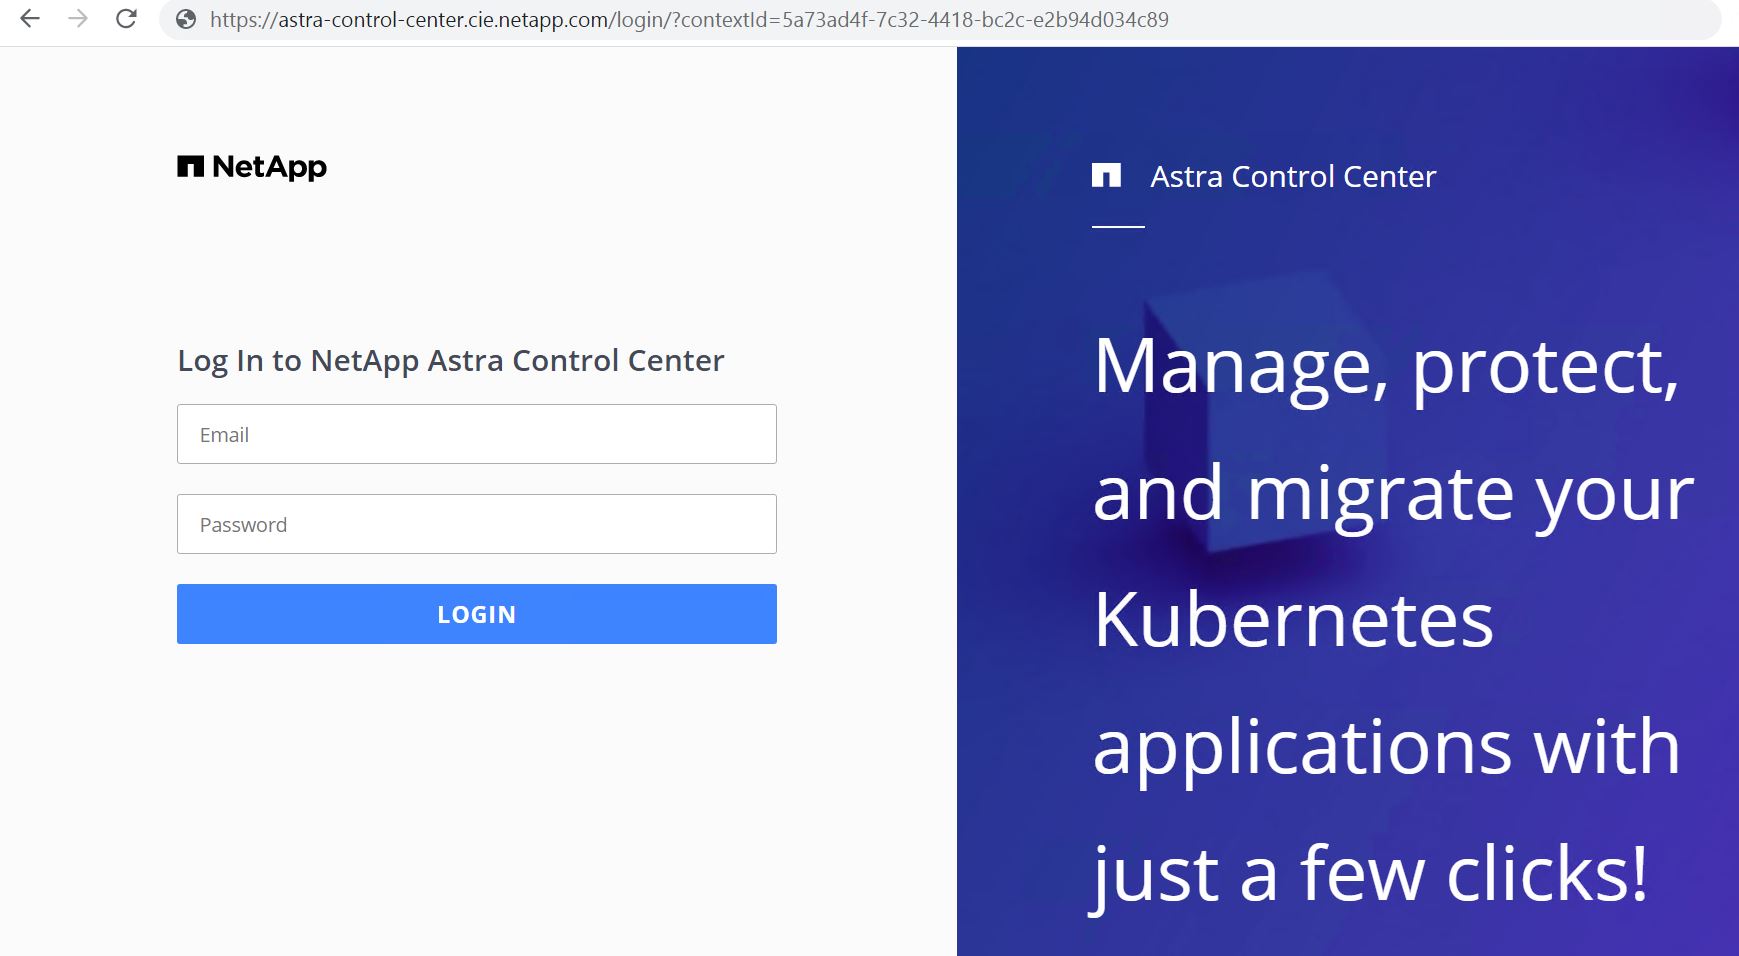
FQDN을 검색하여 Astra Control Center GUI에 로그인합니다.
-
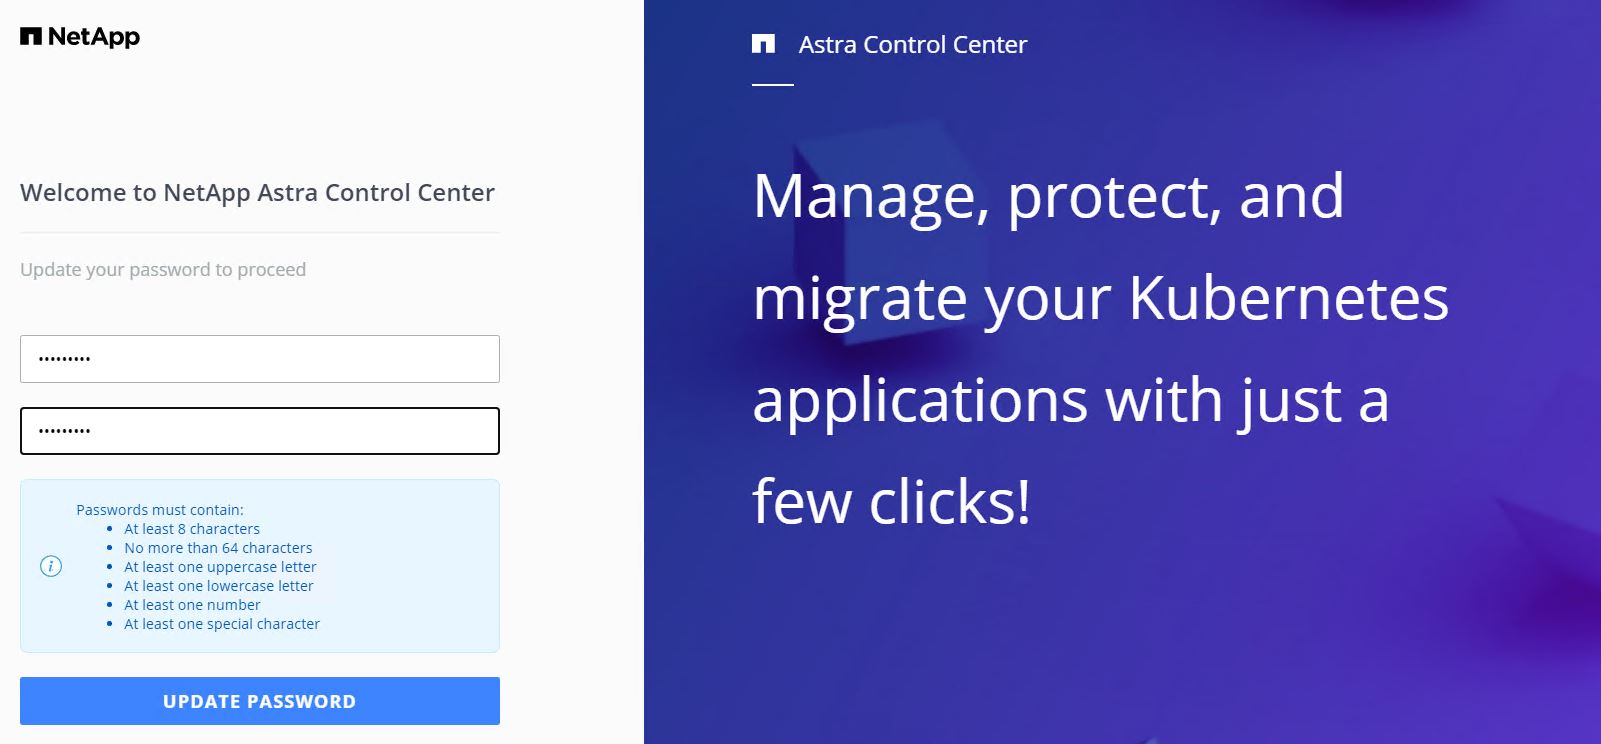
CRD에 제공된 관리자 이메일 주소를 사용하여 처음으로 Astra Control Center GUI에 로그인할 경우 비밀번호를 변경해야 합니다.
-
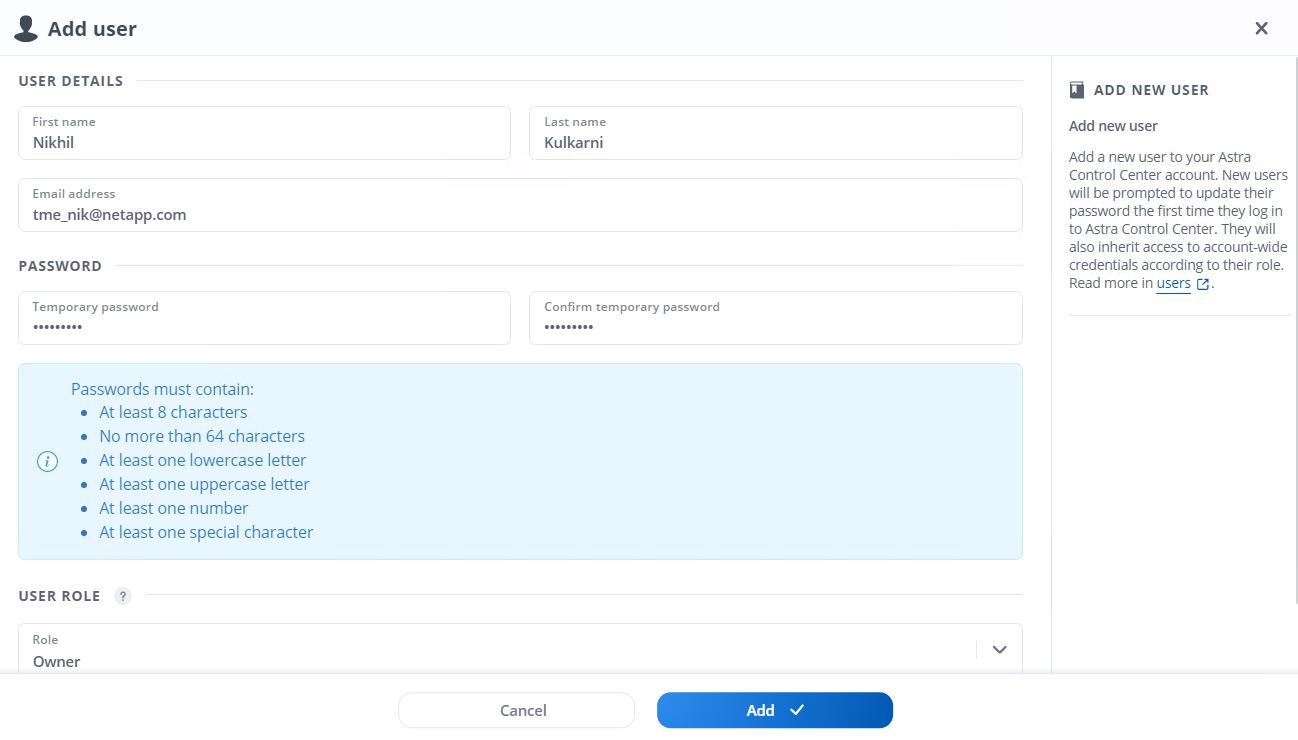
Astra Control Center에 사용자를 추가하려면 계정 > 사용자 로 이동하여 추가 를 클릭하고 사용자 세부 정보를 입력한 다음 추가 를 클릭합니다.
-
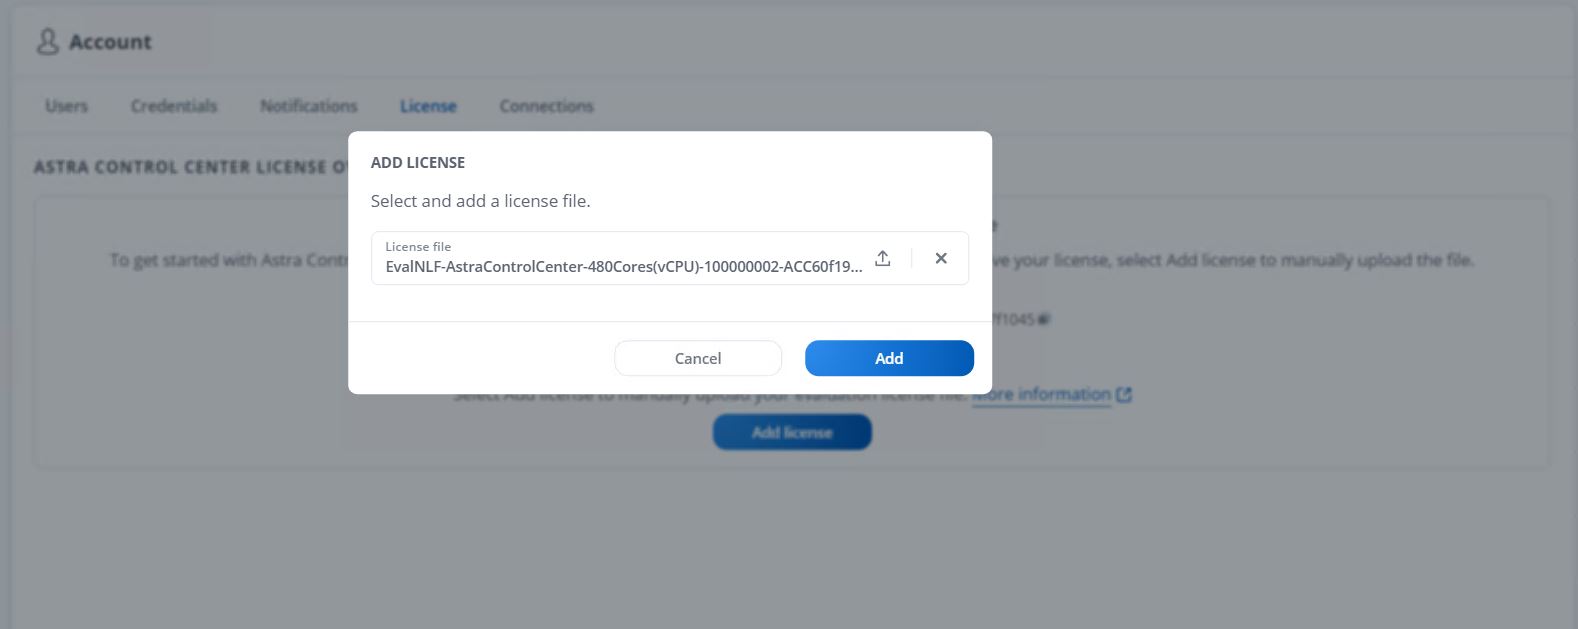
Astra Control Center를 사용하려면 모든 기능을 사용할 수 있는 라이센스가 필요합니다. 라이센스를 추가하려면 계정 > 라이센스 로 이동하고 라이센스 추가 를 클릭한 다음 라이센스 파일을 업로드합니다.
NetApp Astra Control Center의 설치 또는 구성 관련 문제가 발생할 경우 알려진 문제에 대한 기술 자료를 이용할 수 있습니다 "여기".