

Connect the power cables - E2860, E5760, and DE460
 Suggest changes
Learn how to attach the power cables and power on the drive shelves.
-
Install your hardware.
-
Take anti-static precautions.
This procedure applies to IOM12, IOM12B, and IOM12C drive shelves.

|
IOM12C modules are only supported on SANtricity OS 11.90R3 onward. Ensure your controller's firmware has been updated before installing or upgrading to an IOM12C. |
|
|
This procedure is for like-for-like shelf IOM hot-swaps or replacements. This means you can only replace an IOM12 module with another IOM12 module or replace an IOM12C module with another IOM12C module. (Your shelf can have two IOM12 modules or have two IOM12C modules.) |
-
Cable the shelves.
Cable the system according to your configuration.
If you need more cabling options than the examples provided below, see Cabling. You need the following cables:

SAS cables
-
Example A: Controller shelf with two DE460C disk shelves in a standard SAS configuration
-
Cable controller A to IOM A of the first drive shelf.
-
Cable IOM A of the first drive shelf to IOM A of the second drive shelf.
-
Cable IOM B of the first drive shelf to IOM B of the second drive shelf.
-
Cable controller B to IOM B of the second drive shelf.
-
-
Example B: Controller shelf with one DE460C disk shelf in a standard SAS configuration
-
Cable controller A to IOM A.
-
Cable controller B to IOM B.
-
-
-
Power the drive shelves.
You need the following cables:

Power cables

Confirm the drive shelf power switches are off. -
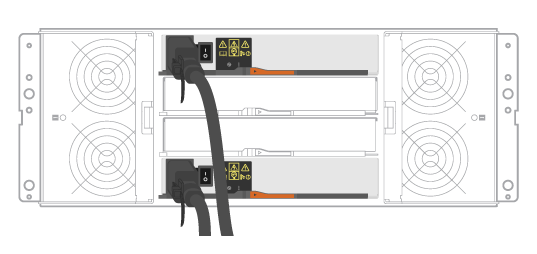
Connect the two power cables for each shelf to different power distribution units (PDUs) in the cabinet or rack.
-
If you have drive shelves, turn on their two power switches first. Wait 2 minutes before applying power to the controller shelf.
-
Turn on the two power switches on the controller shelf.
-
Check the LEDs and seven-segment display on each controller.
During boot, the seven-segment display shows the repeating sequence of OS, Sd, blank to indicate the controller is performing start-of-day processing. After the controller has booted up, the shelf ID is displayed.
Example: Power connections are on the rear of the shelf.
-