Complete storage system setup and configuration - E2860, E5760, and DE460
 Suggest changes
Learn how to cable the controllers to your network and complete storage system setup and configuration.
Step 1: Cable the data hosts
Cable the system according to your network topology.

|
If you are using AIX®, you must install the E-Series multipath driver on the host before connecting it to the array. |
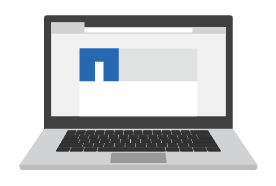
Option 1: Direct-attach topology
The following example shows cabling to the data hosts using a direct-attach topology.
|
|
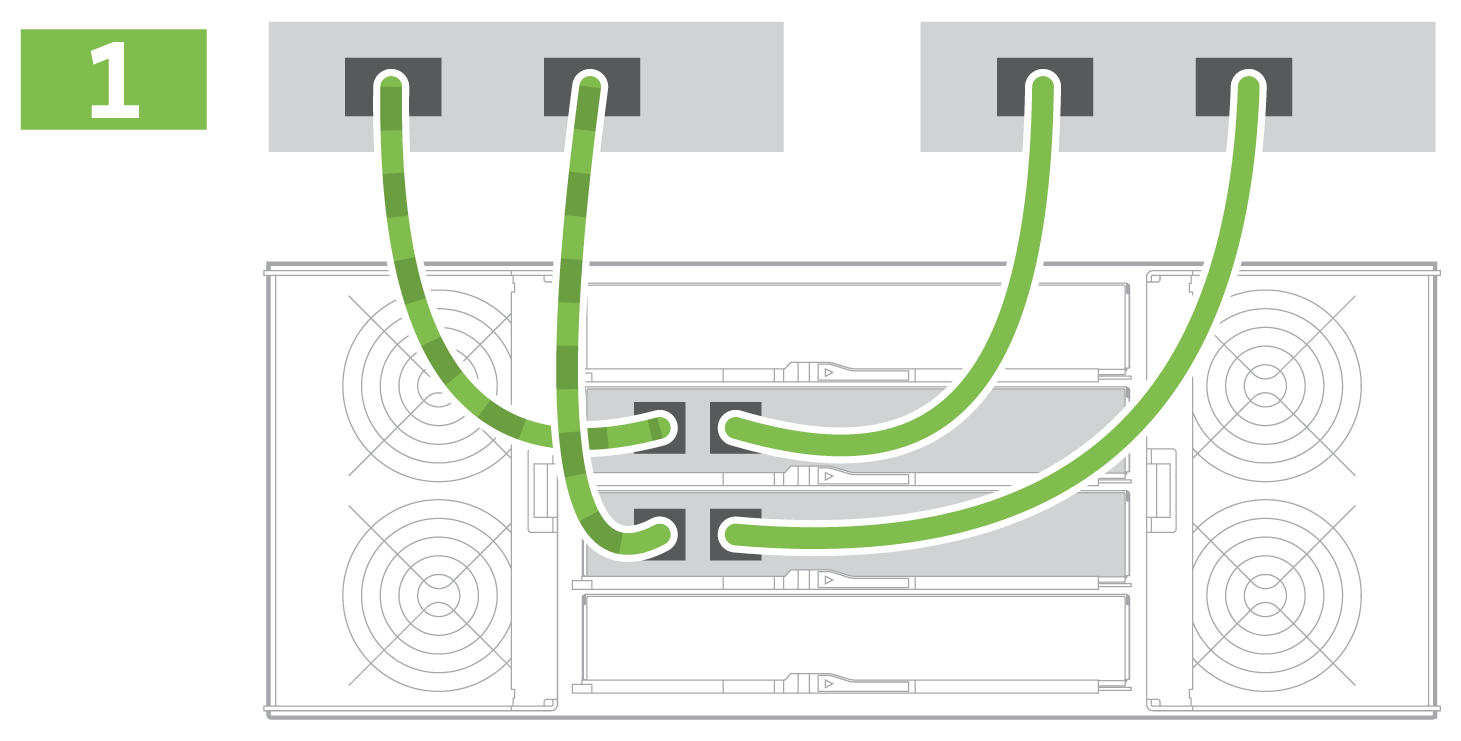
Option 2: Fabric topology
The following example shows cabling to the data hosts using a fabric topology.
|
|
Step 2: Connect and configure the management connection
You can configure the controller management ports using a DHCP server or a static IP address.
Option 1: DHCP server
Learn how to configure the management ports with a DHCP server.
-
Configure your DHCP server to associate an IP address, subnet mask, and gateway address as a permanent lease for each controller.
-
Obtain the assigned IP addresses to connect to the storage system from your network administrator.
-
Connect an Ethernet cable to each controller's management port, and connect the other end to your network.

Ethernet cables (if ordered)
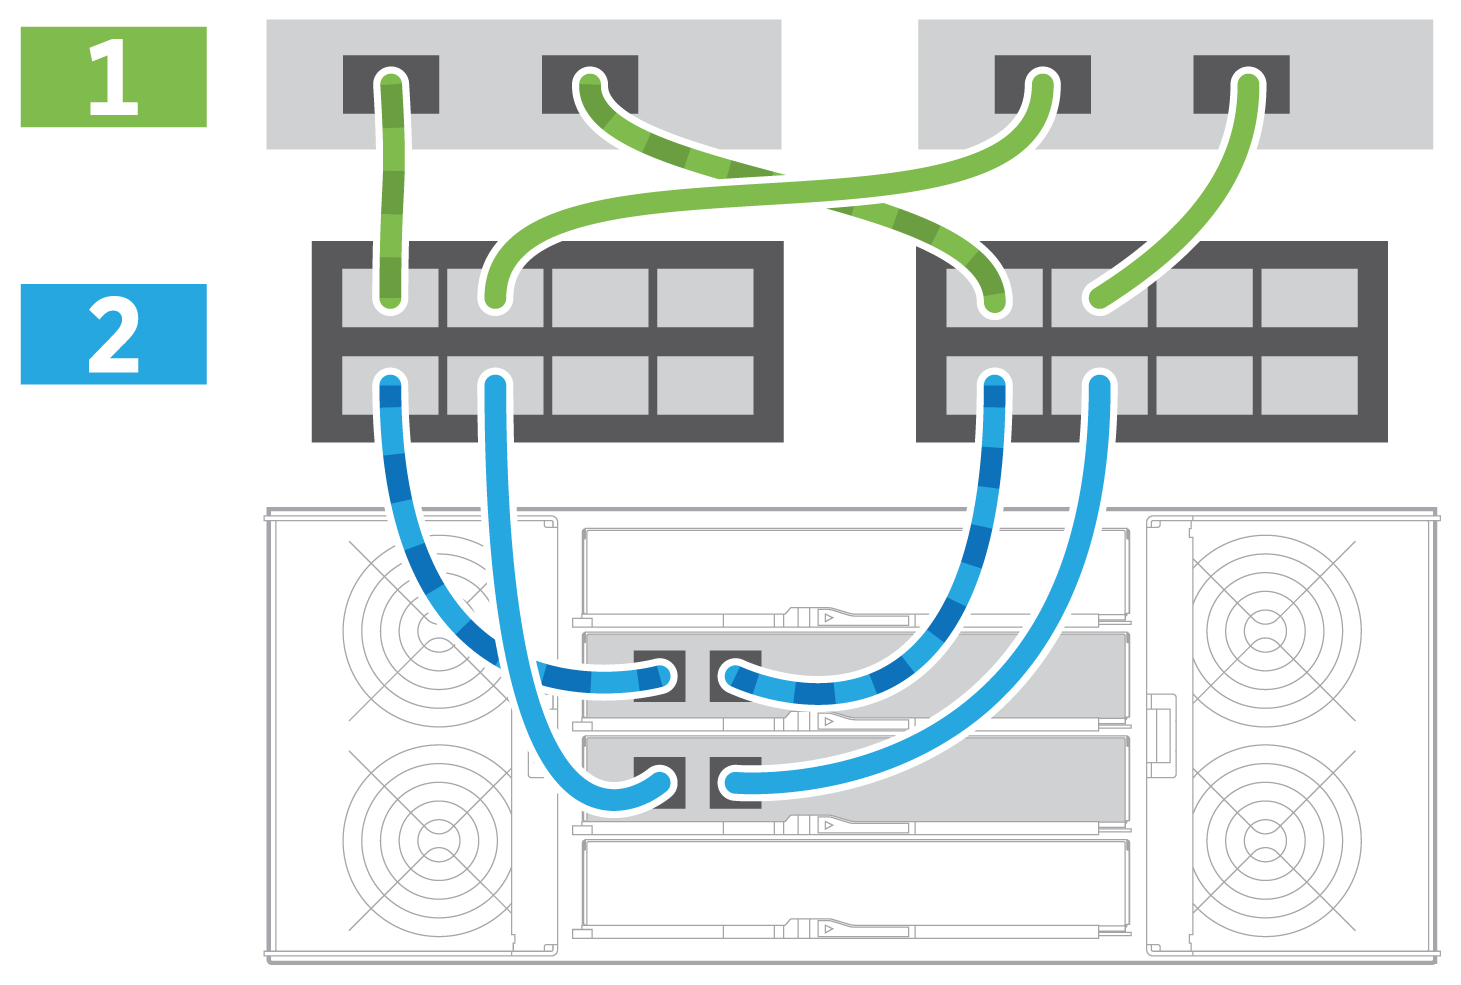
The following figures show examples of the controller's management port location:
E2800 controller P1 Management Port
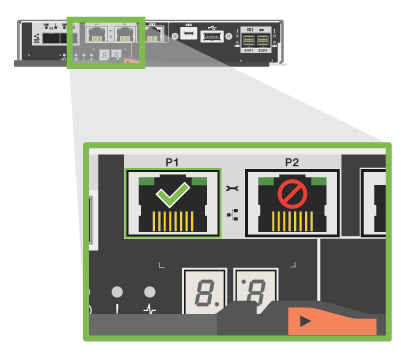
E5700 controller P1 Management Port
-
Open a browser and connect to the storage system using one of the controller IP addresses provided to you by your network administrator.
Option 2: Static IP address
Learn how to configure the management ports manually by entering the IP address and the subnet mask.
-
Obtain the controllers' IP address, subnet mask, gateway address, and DNS and NTP server information from your network administrator.
-
Make sure the laptop you are using is not receiving network configuration from a DHCP server.
-
Using an Ethernet cable, connect controller A's management port to the Ethernet port on a laptop.
Ethernet cables (if ordered)
The following figures show examples of the controller's management port location:
E2800 controller P1 Management Port
E5700 controller P1 Management Port
-
Open a browser and use the default IP address (169.254.128.101) to establish a connection to the controller. The controller sends back a self-signed certificate. The browser informs you that the connection is not secure.
For platforms running SANtricity 11.60 and greater, the default subnet mask is 255.255.0.0. -
Follow the browser's instructions to proceed and launch SANtricity System Manager.
If you are unable to establish a connection, verify that you are not receiving network configuration from a DHCP server. -
Set the storage system's password to login.
-
Use the network settings provided by your network administrator in the Configure Network Settings wizard to configure controller A's network settings, and then select Finish.
Because you reset the IP address, System Manager loses connection to the controller. -
Disconnect your laptop from the storage system, and connect the management port on controller A to your network.
-
Open a browser on a computer connected to your network, and enter controller A's newly configured IP address.
If you lose the connection to controller A, you can connect an ethernet cable to controller B to reestablish connection to controller A through controller B (169.254.128.102). -
Log in using the password you set previously.
The Configure Network Settings wizard will appear.
-
Use the network settings provided by your network administrator in the Configure Network Settings wizard to configure controller B's network settings, and then select Finish.
-
Connect controller B to your network.
-
Validate controller B's network settings by entering controller B's newly configured IP address in a browser.
If you lose the connection to controller B, you can use your previously validated connection to controller A to reestablish connection to controller B through controller A.
Step 3: Configure and manage your storage system
After you have installed your hardware, use the SANtricity software to configure and manage your storage system.
-
Configure your management ports.
-
Verify and record your password and IP addresses.
-
Use the SANtricity software to configure and manage your storage arrays.
-
In the simplest network configuration, connect your controller to a web browser and use SANtricity System Manager for managing a single E2800 or E5700 series storage array.
|
For accessing System Manager, use the same IP addresses that you used to configure your management ports. |