


Deploy Cloud Insights for FlexPod


 Suggest changes

 PDFs
PDFs
To deploy the solution, you must complete the following tasks:
-
Sign up for the Cloud Insights service
-
Create a VMware virtual machine (VM) to configure as an Acquisition Unit
-
Install the Red Hat Enterprise Linux (RHEL) host
-
Create an Acquisition Unit instance in the Cloud Insights Portal and install the software
-
Add the monitored storage system from the FlexPod Datacenter to Cloud Insights.
Sign up for the NetApp Cloud Insights service
To sign up for the NetApp Cloud Insights Service, complete the following steps:
-
Click the button in the center of the screen to start the 14-day free trial, or the link in the upper right corner to sign up or log in with an existing NetApp Cloud Central account.
Create a VMware virtual machine to configure as an acquisition unit
To create a VMware VM to configure as an acquisition unit, complete the following steps:
-
Launch a web browser and log in to VMware vSphere and select the cluster you want to host a VM.
-
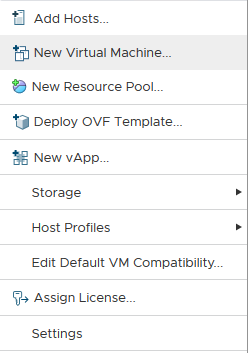
Right-click that cluster and select Create A Virtual Machine from the menu.
-
In the New Virtual Machine wizard, click Next.
-
Specify the name of the VM and select the data center that you want to install it to, then click Next.
-
On the following page, select the cluster, nodes, or resource group you would like to install the VM to, then click Next.
-
Select the shared datastore that hosts your VMs and click Next.
-
Confirm the compatibility mode for the VM is set to
ESXi 6.7 or laterand click Next. -
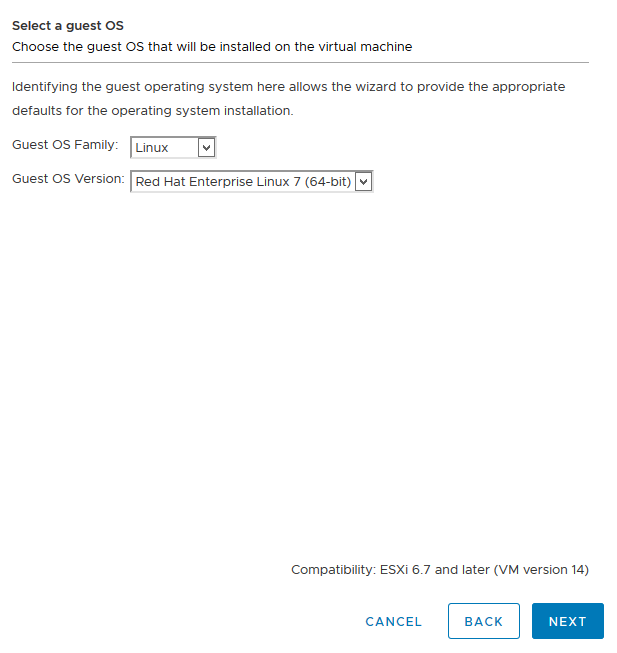
Select Guest OS Family Linux, Guest OS Version: Red Hat Enterprise Linux 7 (64-bit).
-
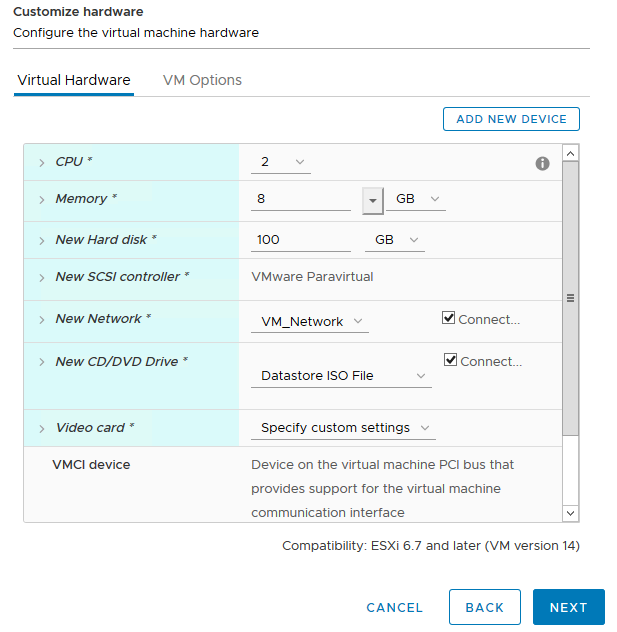
The next page allows for the customization of hardware resources on the VM. The Cloud Insights Acquisition Unit requires the following resources. After the resources are selected, click Next:
-
Two CPUs
-
8GB of RAM
-
100GB of hard disk space
-
A network that can reach resources in the FlexPod Datacenter and the Cloud Insights server through an SSL connection on port 443.
-
An ISO image of the chosen Linux distribution (Red Hat Enterprise Linux) to boot from.
-
-
To create the VM, on the Ready to Complete page, review the settings and click Finish.
Install Red Hat Enterprise Linux
To install Red Hat Enterprise Linux, complete the following steps:
-
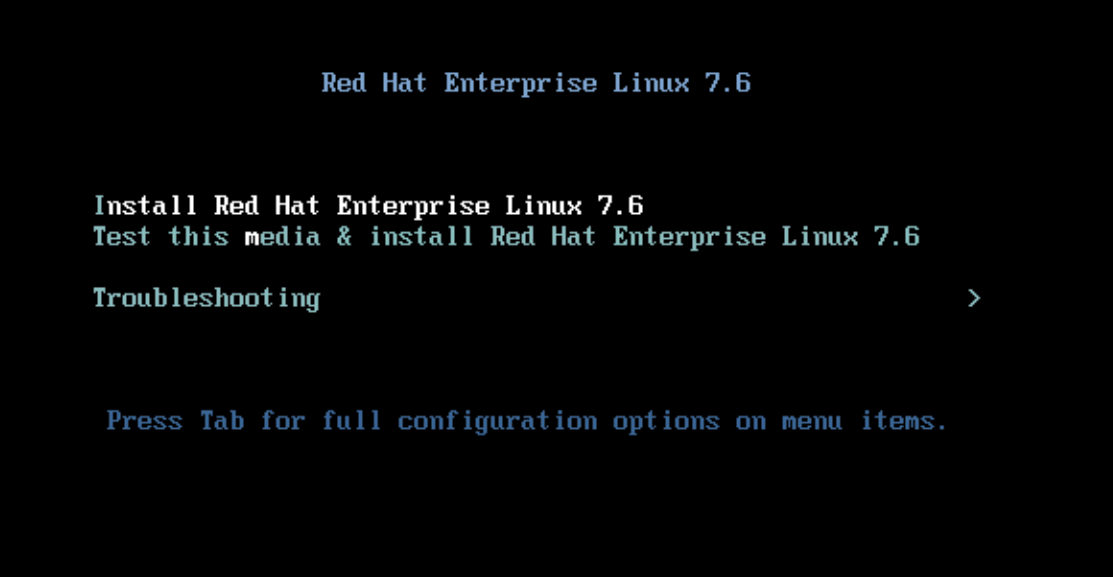
Power on the VM, click the window to launch the virtual console, and then select the option to Install Red Hat Enterprise Linux 7.6.
-
Select the preferred language and click Continue.
The next page is Installation Summary. The default settings should be acceptable for most of these options.
-
You must customize the storage layout by performing the following options:
-
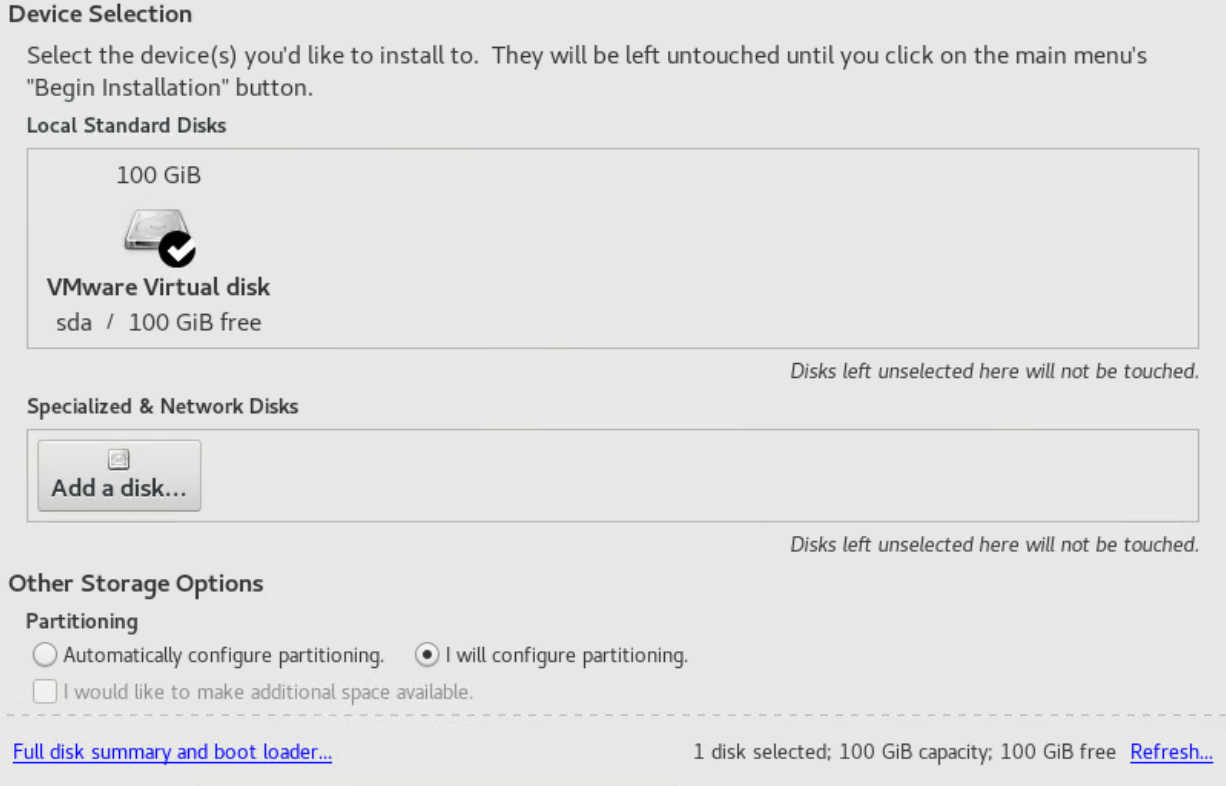
To customize the partitioning for the server, click Installation Destination.
-
Confirm that the VMware Virtual Disk of 100GiB is selected with a black check mark and select the I Will Configure Partitioning radio button.
-
Click Done.
A new menu displays enabling you to customize the partition table. Dedicate 25 GB each to
/opt/netappand/var/log/netapp. You can automatically allocate the rest of the storage to the system.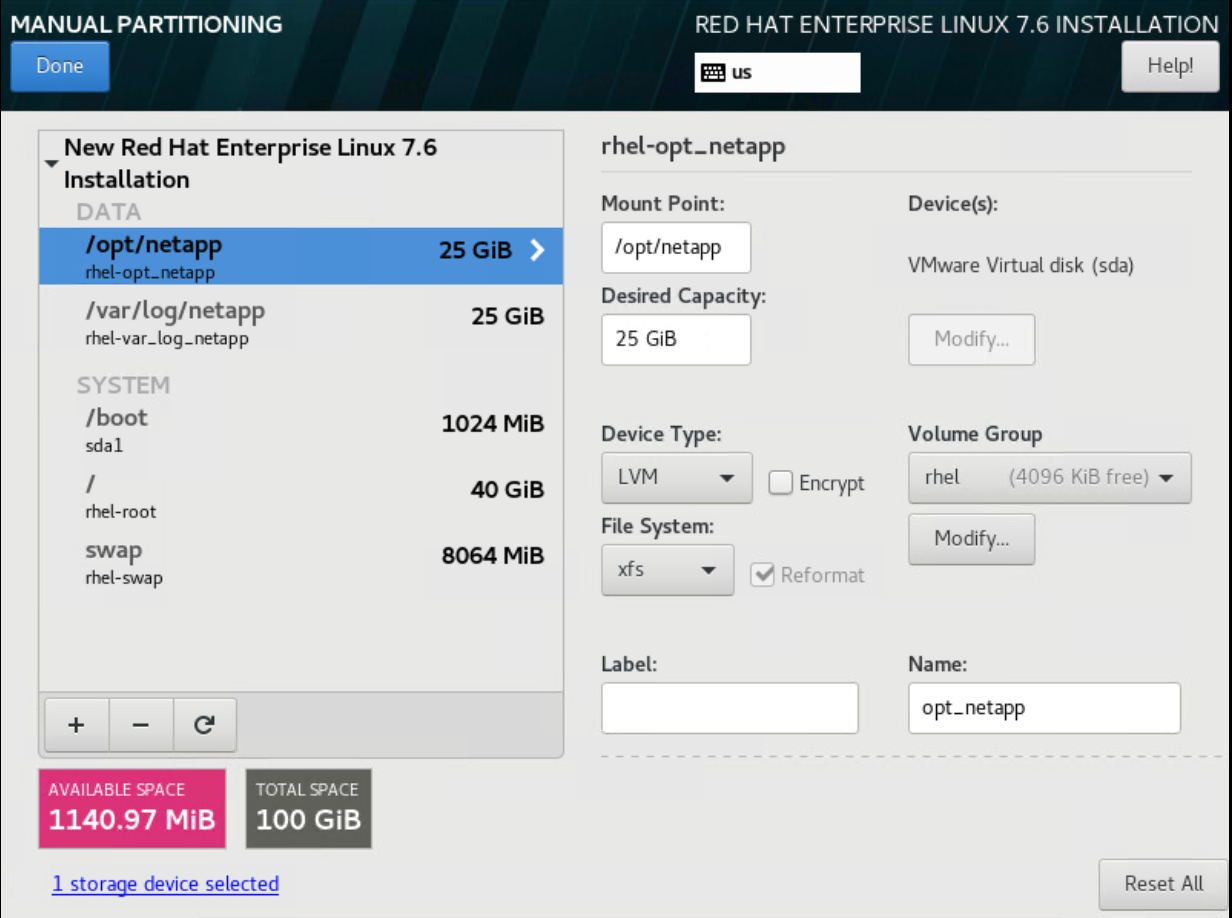
-
To return to Installation Summary, click Done.
-
-
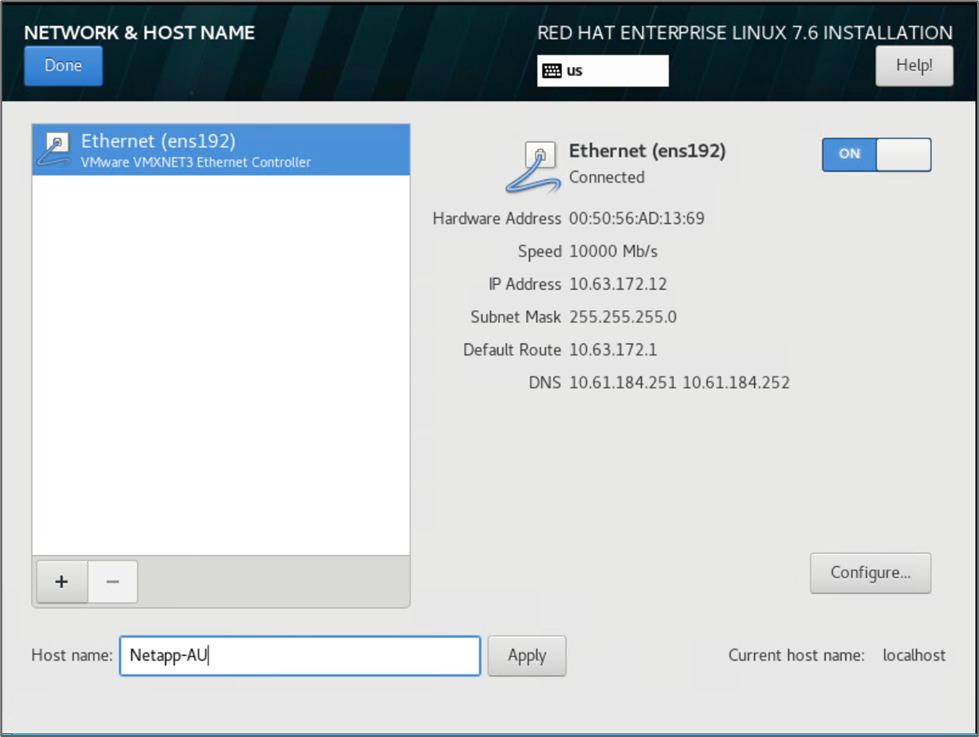
Click Network and Host Name.
-
Enter a host name for the server.
-
Turn on the network adapter by clicking the slider button. If Dynamic Host Configuration Protocol (DHCP) is configured on your network, you will receive an IP address. If it is not, click Configure, and manually assign an address.
-
. Click Done to return to Installation Summary.
-
-
On the Installation Summary page, click Begin Installation.
-
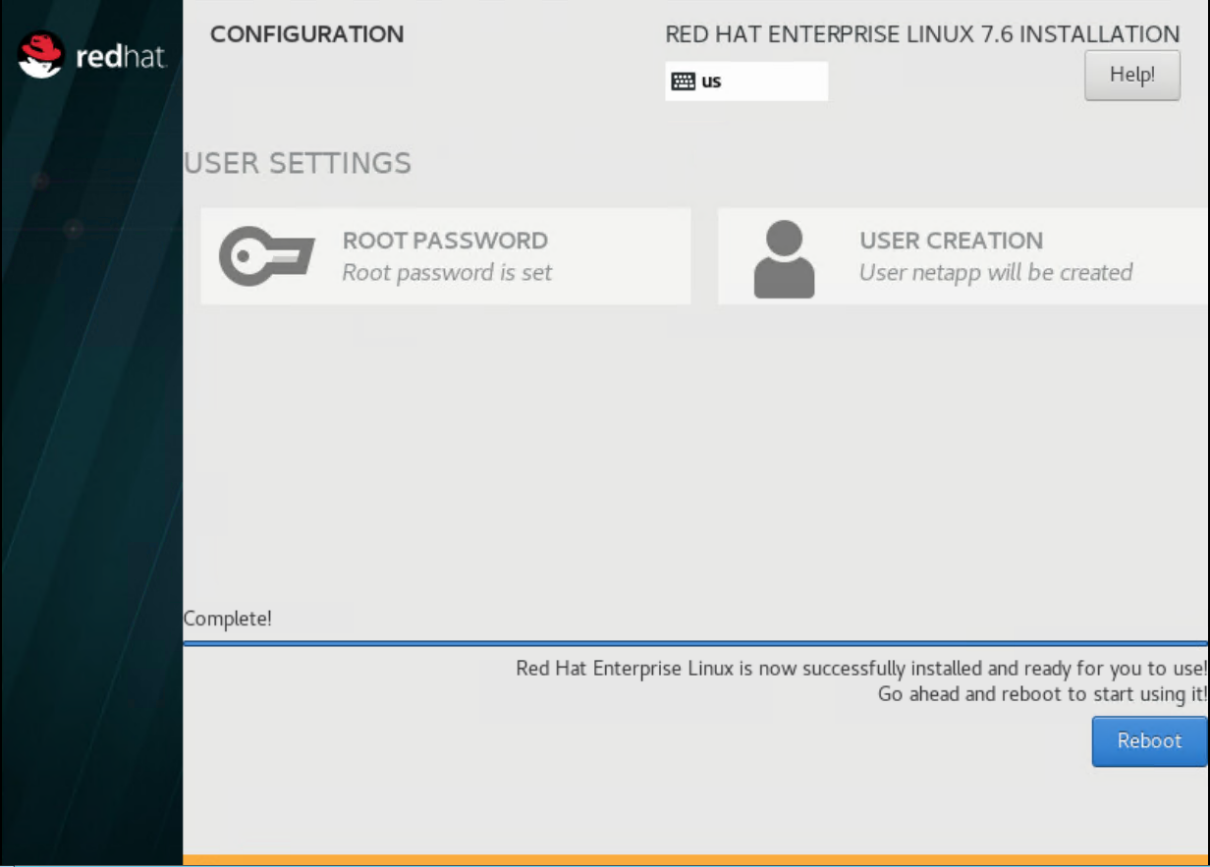
On the Installation Progress page, you can set the root password or create a local user account. When the installation finishes, click Reboot to restart the server.
-
After the system has rebooted, log in to your server and register it with Red Hat Subscription Manager.
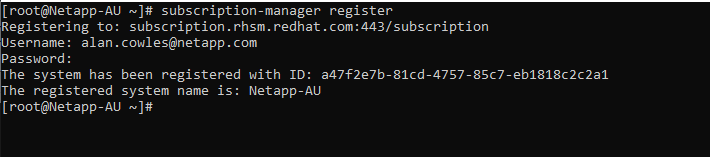
-
Attach an available subscription for Red Hat Enterprise Linux.

Create an acquisition unit instance in the Cloud Insights portal and install the software
To create an acquisition unit instance in the Cloud Insights portal and install the software, complete the following steps:
-
From the home page of Cloud Insights, hover over the Admin entry in the main menu to the left and select Data Collectors from the menu.
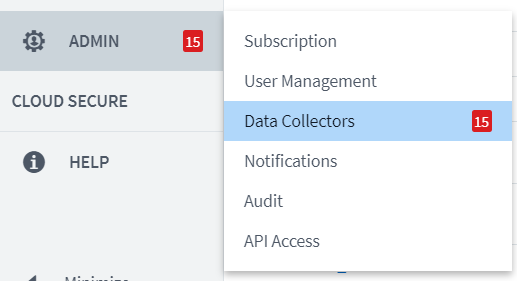
-
In the top center of the Data Collectors page, click the link for Acquisition Units.
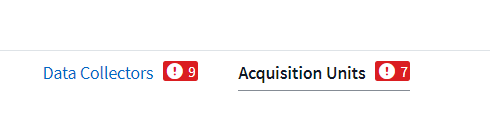
-
To create a new Acquisition Unit, click the button on the right.
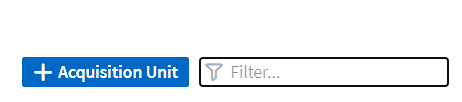
-
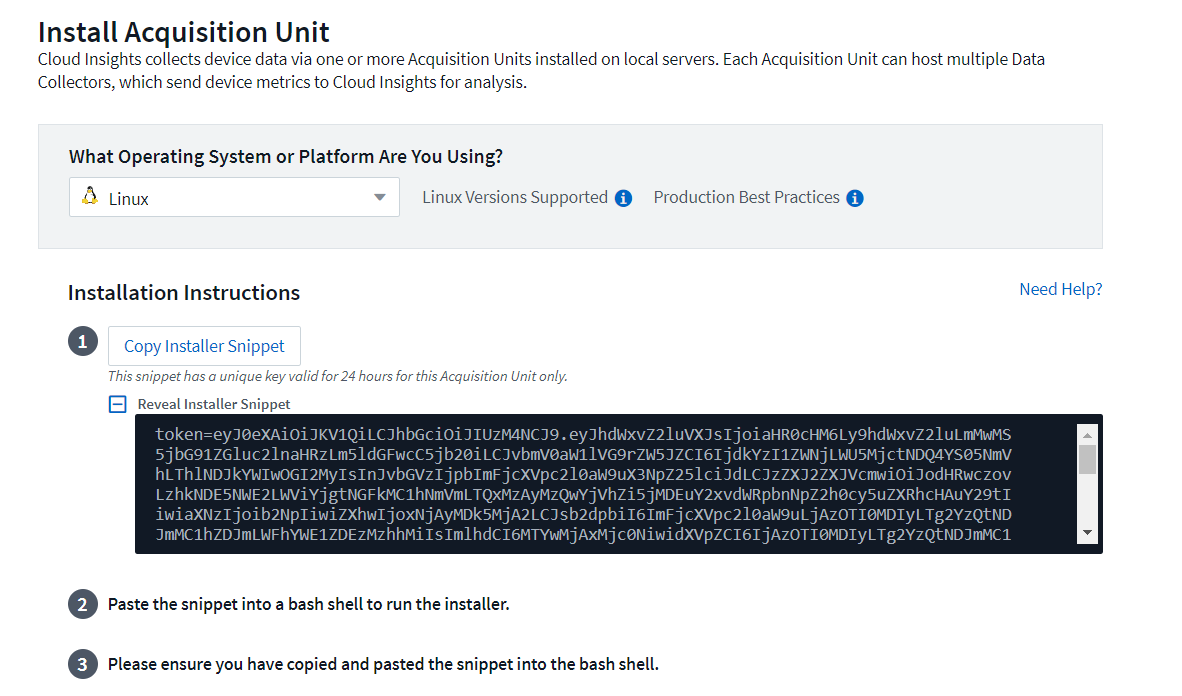
Select the operating system that you want to use to host your Acquisition Unit and follow the steps to copy the installation script from the web page.
In this example, it is a Linux server, which provides a snippet and a token to paste into the CLI on our host. The web page waits for the Acquisition Unit to connect.
-
Paste the snippet into the CLI of the Red Hat Enterprise Linux machine that was provisioned and click Enter.
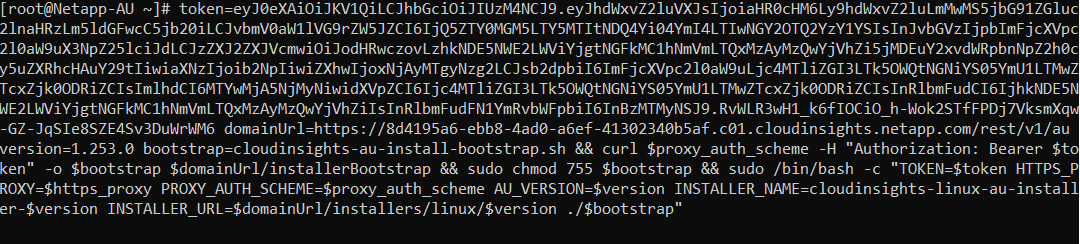
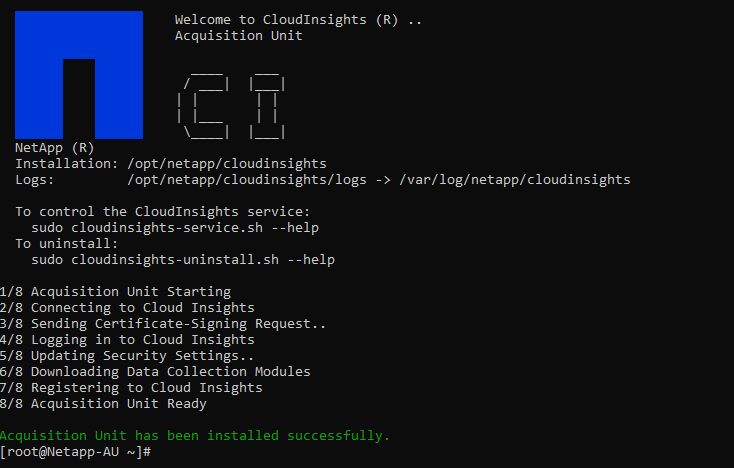
The installation program downloads a compressed package and begins the installation. When the installation is complete, you receive a message stating that the Acquisition Unit has been registered with NetApp Cloud Insights.
Add the monitored storage system from the FlexPod Datacenter to Cloud Insights
To add the ONTAP storage system from a FlexPod deployment, complete the following steps:
-
Return to the Acquisition Units page on Cloud Insights portal and find the listed newly registered unit. To display a summary of the unit, click the unit.

-
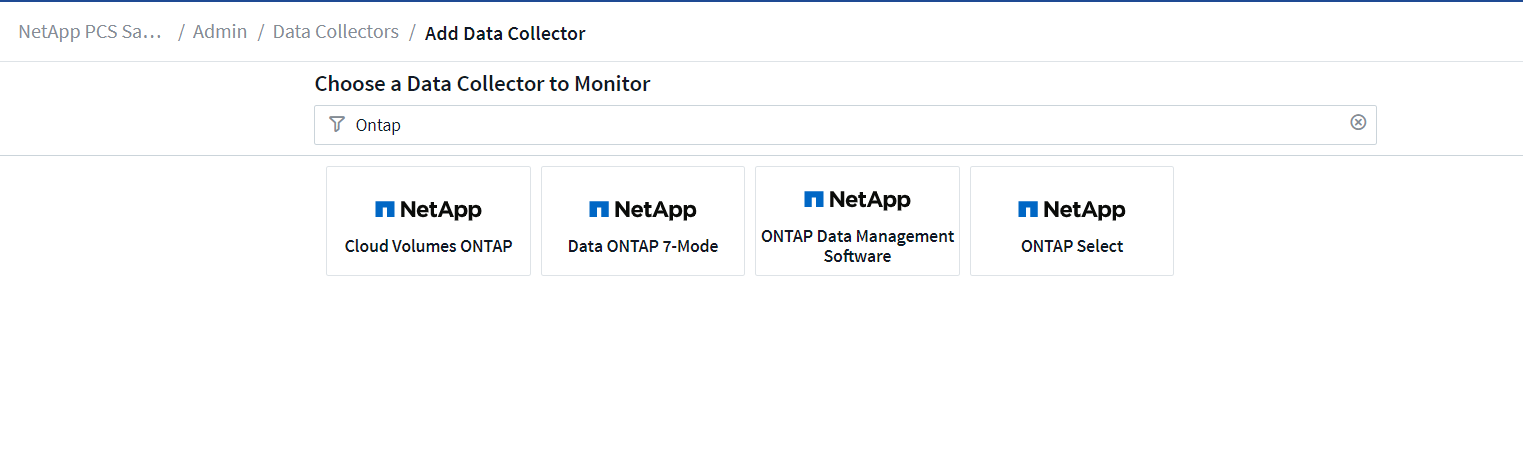
To start a wizard to add the storage system, on the Summary page, click the button for creating a data collector. The first page displays all the systems from which data can be collected. Use the search bar to search for ONTAP.
-
Select ONTAP Data Management Software.
A page displays that enables you to name your deployment and select the Acquisition Unit that you want to use. You can provide the connectivity information and credentials for the ONTAP system and test the connection to confirm.
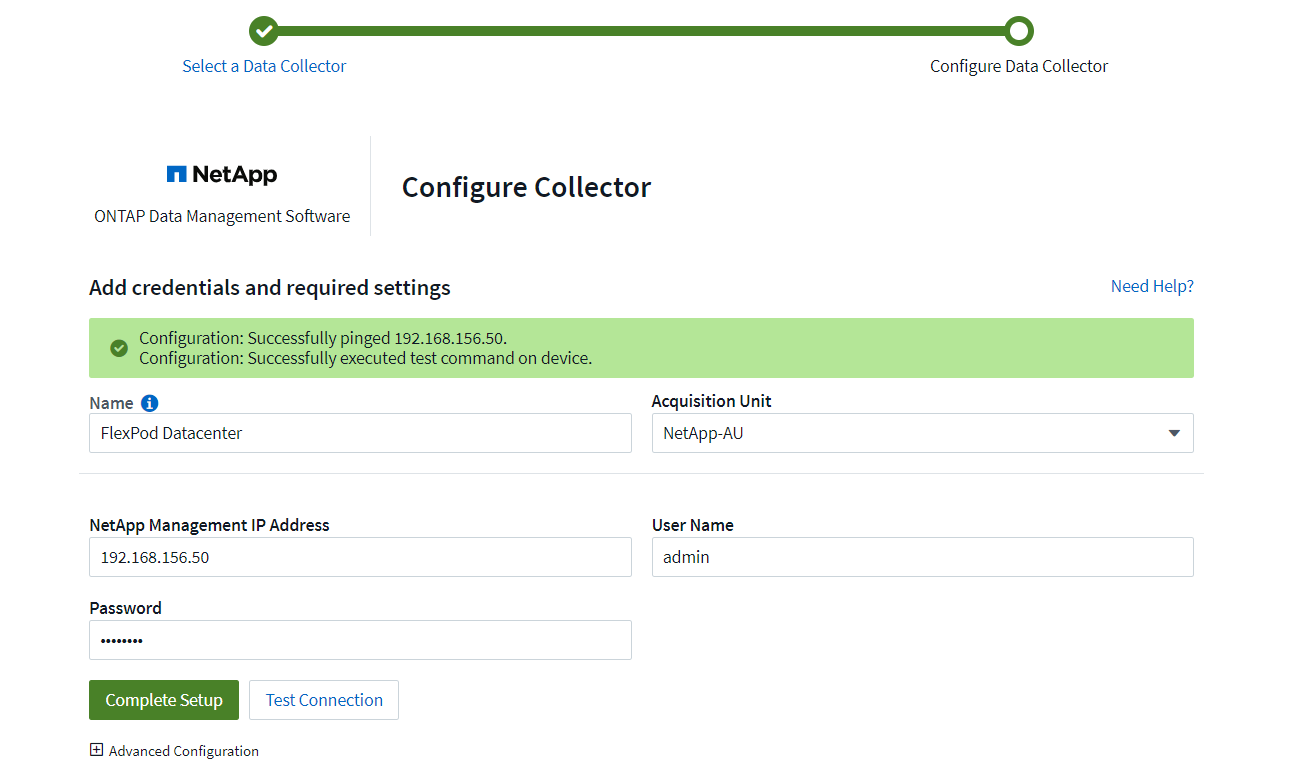
-
Click Complete Setup.
The portal returns to the Data Collectors page and the Data Collector begins its first poll to collect data from the ONTAP storage system in the FlexPod Datacenter.
