

VMware vSphere 6.7 deployment procedure
 Suggest changes
This section provides detailed procedures for installing VMware ESXi 6.7 in a FlexPod Express configuration. The deployment procedures that follow are customized to include the environment variables described in previous sections.
Multiple methods exist for installing VMware ESXi in such an environment. This procedure uses the virtual KVM console and virtual media features of the CIMC interface for Cisco UCS C-Series servers to map remote installation media to each individual server.

|
This procedure must be completed for Cisco UCS server A and Cisco UCS server B. |
This procedure must be completed for any additional nodes added to the cluster.
Log in to CIMC interface for Cisco UCS C-Series standalone servers
The following steps detail the method for logging in to the CIMC interface for Cisco UCS C-Series standalone servers. You must log in to the CIMC interface to run the virtual KVM, which enables the administrator to begin installation of the operating system through remote media.
All hosts
-
Navigate to a web browser and enter the IP address for the CIMC interface for the Cisco UCS C-Series. This step launches the CIMC GUI application.
-
Log in to the CIMC UI using the admin user name and credentials.
-
In the main menu, select the Server tab.
-
Click Launch KVM Console.

-
From the virtual KVM console, select the Virtual Media tab.
-
Select Map CD/DVD.
You might first need to click Activate Virtual Devices. Select Accept This Session if prompted. -
Browse to the VMware ESXi 6.7 installer ISO image file and click Open. Click Map Device.
-
Select the Power menu and choose Power Cycle System (Cold Boot). Click Yes.
Install VMware ESXi
The following steps describe how to install VMware ESXi on each host.
Download ESXi 6.7 Cisco custom image
-
Navigate to the Broadcom support portal download site for custom ISOs.
-
Click Go to Downloads next to the Cisco Custom Image for ESXi 6.7 GA Install CD.
-
Download the Cisco Custom Image for ESXi 6.7 GA Install CD (ISO).
All hosts
-
When the system boots, the machine detects the presence of the VMware ESXi installation media.
-
Select the VMware ESXi installer from the menu that appears.
The installer loads. This takes several minutes.
-
After the installer has finished loading, press Enter to continue with the installation.
-
After reading the end-user license agreement, accept it and continue with the installation by pressing F11.
-
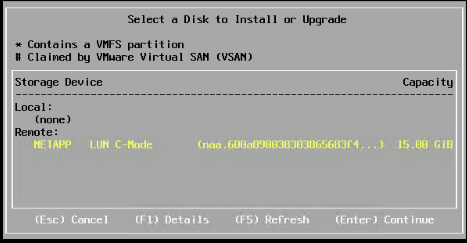
Select the NetApp LUN that was previously set up as the installation disk for ESXi, and press Enter to continue with the installation.
-
Select the appropriate keyboard layout and press Enter.
-
Enter and confirm the root password and press Enter.
-
The installer warns you that existing partitions are removed on the volume. Continue with the installation by pressing F11. The server reboots after the installation of ESXi.
Set up VMware ESXi host management networking
The following steps describe how to add the management network for each VMware ESXi host.
All hosts
-
After the server has finished rebooting, enter the option to customize the system by pressing F2.
-
Log in with root as the login name and the root password previously entered during the installation process.
-
Select the Configure Management Network option.
-
Select Network Adapters and press Enter.
-
Select the desired ports for vSwitch0. Press Enter.
Select the ports that correspond to eth0 and eth1 in CIMC. 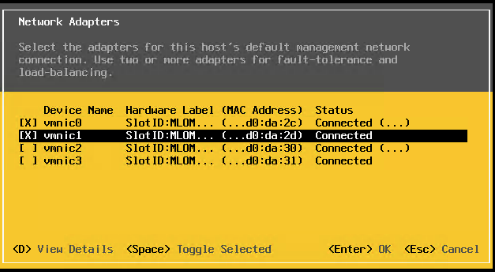
-
Select VLAN (optional) and press Enter.
-
Enter the VLAN ID
<<mgmt_vlan_id>>. Press Enter. -
From the Configure Management Network menu, select IPv4 Configuration to configure the IP address of the management interface. Press Enter.
-
Use the arrow keys to highlight Set Static IPv4 address and use the space bar to select this option.
-
Enter the IP address for managing the VMware ESXi host
<<esxi_host_mgmt_ip>>. -
Enter the subnet mask for the VMware ESXi host
<<esxi_host_mgmt_netmask>>. -
Enter the default gateway for the VMware ESXi host
<<esxi_host_mgmt_gateway>>. -
Press Enter to accept the changes to the IP configuration.
-
Enter the IPv6 configuration menu.
-
Use the space bar to disable IPv6 by unselecting the Enable IPv6 (restart required) option. Press Enter.
-
Enter the menu to configure the DNS settings.
-
Because the IP address is assigned manually, the DNS information must also be entered manually.
-
Enter the primary DNS server’s IP address
[nameserver_ip]. -
(Optional) Enter the secondary DNS server’s IP address.
-
Enter the FQDN for the VMware ESXi host name:
[esxi_host_fqdn]. -
Press Enter to accept the changes to the DNS configuration.
-
Exit the Configure Management Network submenu by pressing Esc.
-
Press Y to confirm the changes and reboot the server.
-
Log out of the VMware Console by pressing Esc.
Configure ESXi host
You need the information in the following table to configure each ESXi host.
| Detail | Value |
|---|---|
ESXi host name |
|
ESXi host management IP |
|
ESXi host management mask |
|
ESXi host management gateway |
|
ESXi host NFS IP |
|
ESXi host NFS mask |
|
ESXi host NFS gateway |
|
ESXi host vMotion IP |
|
ESXi host vMotion mask |
|
ESXi host vMotion gateway |
|
ESXi host iSCSI-A IP |
|
ESXi host iSCSI-A mask |
|
ESXi host iSCSI-A gateway |
|
ESXi host iSCSI-B IP |
|
ESXi host iSCSI-B mask |
|
ESXi host iSCSI-B gateway |
Log in to ESXi host
-
Open the host’s management IP address in a web browser.
-
Log in to the ESXi host using the root account and the password you specified during the install process.
-
Read the statement about the VMware Customer Experience Improvement Program. After selecting the proper response, click OK.
Configure iSCSI boot
-
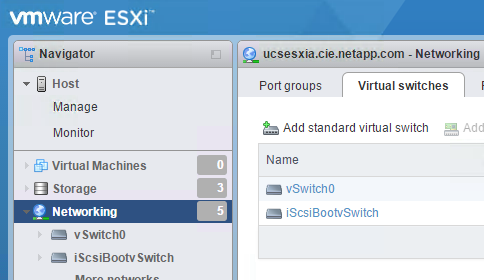
Select Networking on the left.
-
On the right, select the Virtual Switches tab.
-
Click iScsiBootvSwitch.
-
Select Edit settings.
-
Change the MTU to 9000 and click Save.
-
Click Networking in the left navigation pane to return to the Virtual Switches tab.
-
Click Add Standard Virtual Switch.
-
Provide the name
iScsiBootvSwitch-Bfor the vSwitch name.-
Set the MTU to 9000.
-
Select vmnic3 from the Uplink 1 options.
-
Click Add.
Vmnic2 and vmnic3 are used for iSCSI boot in this configuration. If you have additional NICs in your ESXi host, you might have different vmnic numbers. To confirm which NICs are used for iSCSI boot, match the MAC addresses on the iSCSI vNICs in CIMC to the vmnics in ESXi.
-
-
In the center pane, select the VMkernel NICs tab.
-
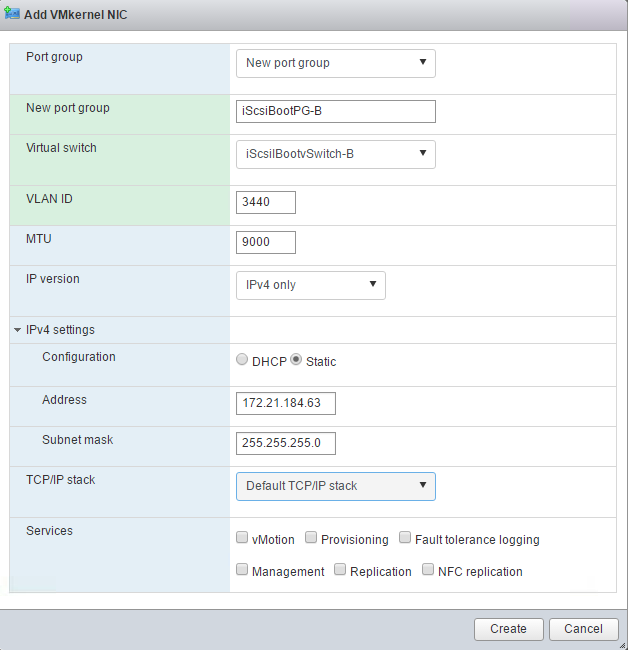
Select Add VMkernel NIC.
-
Specify a new port group name of
iScsiBootPG-B. -
Select iScsiBootvSwitch-B for the virtual switch.
-
Enter
<<iscsib_vlan_id>>for the VLAN ID. -
Change the MTU to 9000.
-
Expand IPv4 Settings.
-
Select Static Configuration.
-
Enter
<<var_hosta_iscsib_ip>>for Address. -
Enter
<<var_hosta_iscsib_mask>>for Subnet Mask. -
Click Create.
Set the MTU to 9000 on iScsiBootPG- A.
-
Configure iSCSI multipathing
To set up iSCSI multipathing on the ESXi hosts, complete the following steps:
-
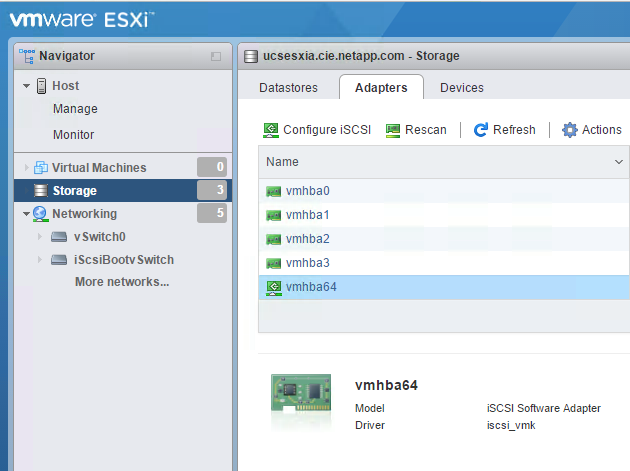
Select Storage in the left navigation pane. Click Adapters.
-
Select the iSCSI software adapter and click Configure iSCSI.
-
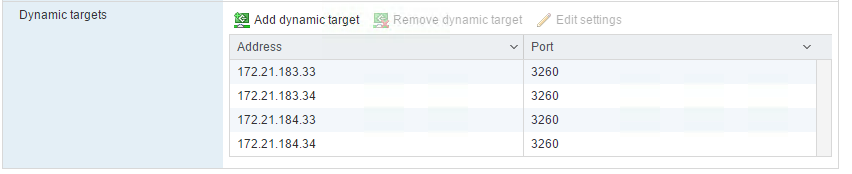
Under Dynamic Targets, click Add Dynamic Target.
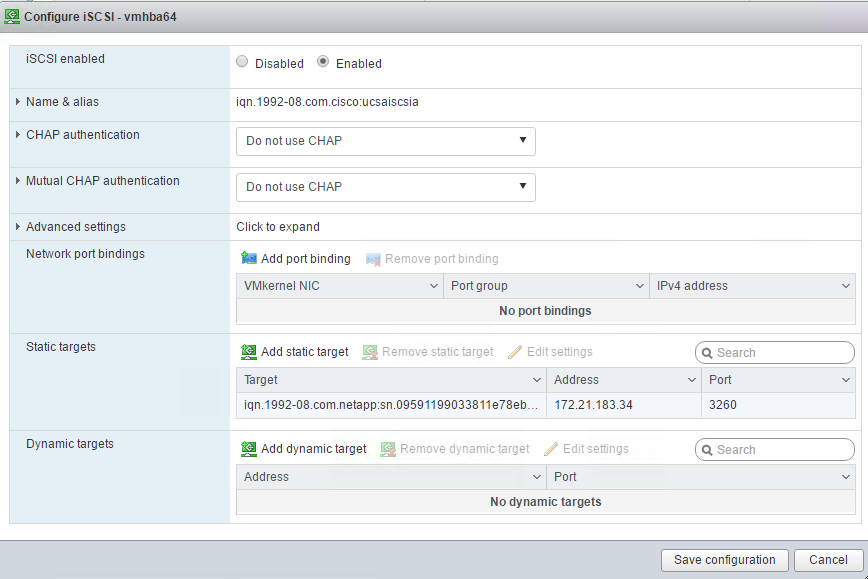
-
Enter the IP address
iscsi_lif01a.-
Repeat with the IP addresses
iscsi_lif01b,iscsi_lif02a, andiscsi_lif02b. -
Click Save Configuration.
-
|
|
You can find the iSCSI LIF IP addresses by running the `network interface show `command on the NetApp cluster or by looking at the Network Interfaces tab in OnCommand System Manager. |
Configure ESXi host
-
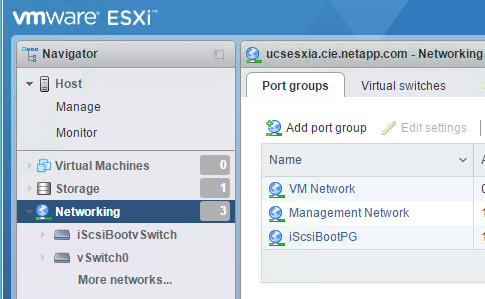
In the left navigation pane, select Networking.
-
Select vSwitch0.
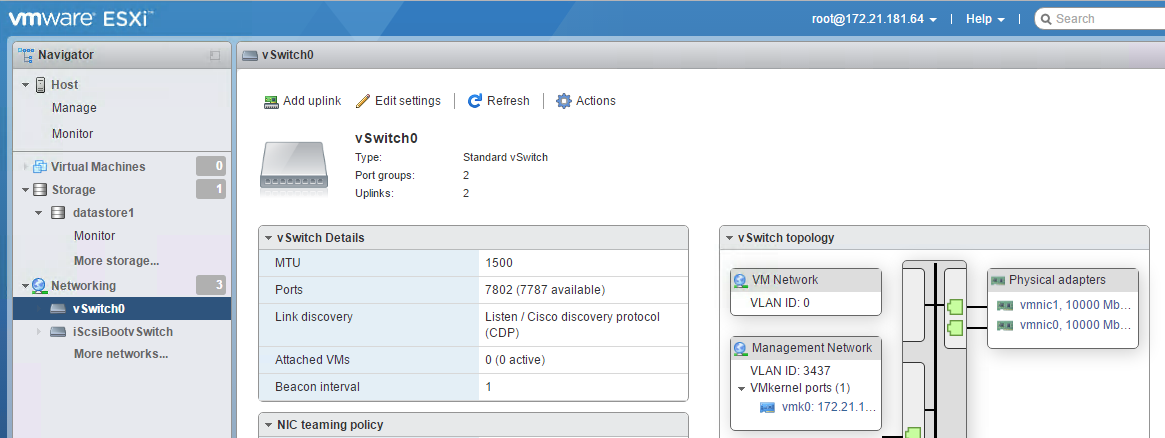
-
Select Edit Settings.
-
Change the MTU to 9000.
-
Expand NIC Teaming and verify that both vmnic0 and vmnic1 are set to active.
Configure port groups and VMkernel NICs
-
In the left navigation pane, select Networking.
-
Right-click the Port Groups tab.
-
Right-click VM Network and select Edit. Change the VLAN ID to
<<var_vm_traffic_vlan>>. -
Click Add Port Group.
-
Name the port group
MGMT-Network. -
Enter
<<mgmt_vlan>>for the VLAN ID. -
Make sure that vSwitch0 is selected.
-
Click Add.
-
-
Click the VMkernel NICs tab.

-
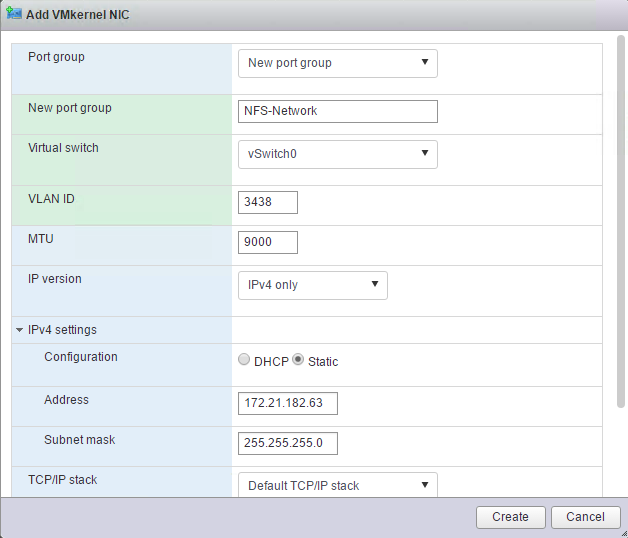
Select Add VMkernel NIC.
-
Select New Port Group.
-
Name the port group
NFS-Network. -
Enter
<<nfs_vlan_id>>for the VLAN ID. -
Change the MTU to 9000.
-
Expand IPv4 Settings.
-
Select Static Configuration.
-
Enter
<<var_hosta_nfs_ip>>for Address. -
Enter
<<var_hosta_nfs_mask>>for Subnet Mask. -
Click Create.
-
-
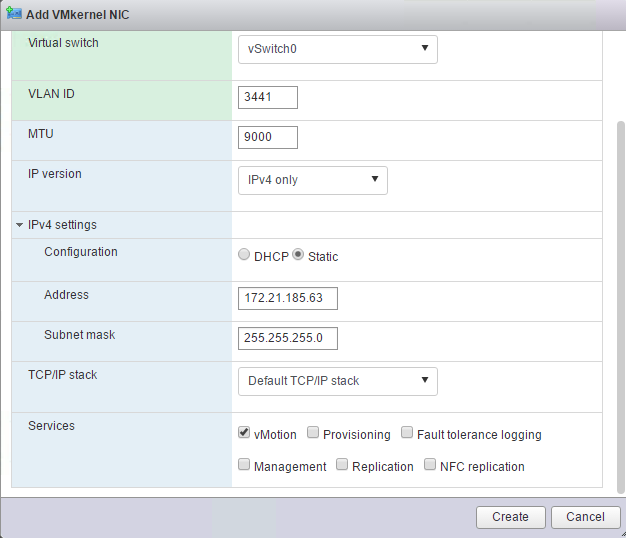
Repeat this process to create the vMotion VMkernel port.
-
Select Add VMkernel NIC.
-
Select New Port Group.
-
Name the port group vMotion.
-
Enter
<<vmotion_vlan_id>>for the VLAN ID. -
Change the MTU to 9000.
-
Expand IPv4 Settings.
-
Select Static Configuration.
-
Enter
<<var_hosta_vmotion_ip>>for Address. -
Enter
<<var_hosta_vmotion_mask>>for Subnet Mask. -
Make sure that the vMotion checkbox is selected after IPv4 Settings.
There are many ways to configure ESXi networking, including by using the VMware vSphere distributed switch if your licensing allows it. Alternative network configurations are supported in FlexPod Express if they are required to meet business requirements.
-
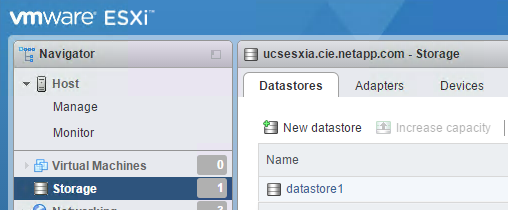
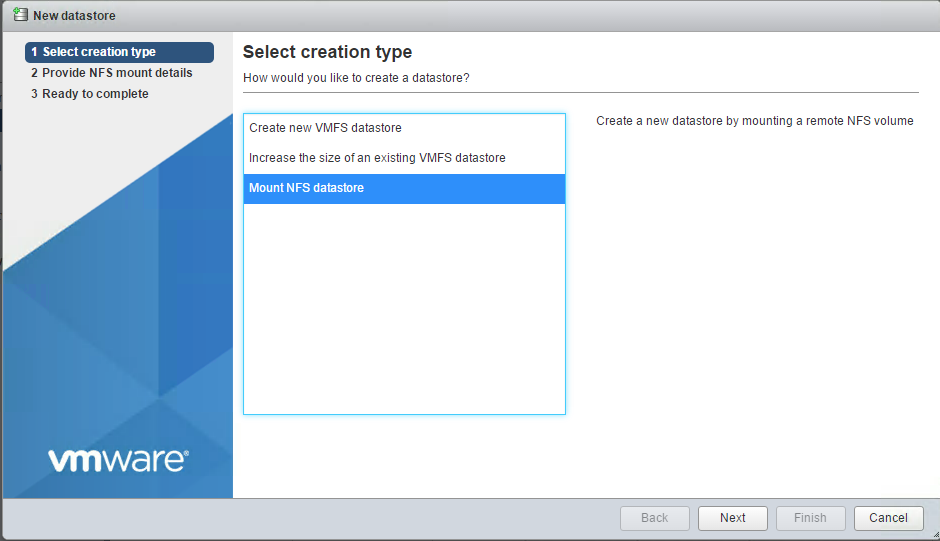
Mount first datastores
The first datastores to be mounted are the infra_datastore_1 datastore for virtual machines and the infra_swap datastore for virtual machine swap files.
-
Click Storage in the left navigation pane, and then click New Datastore.
-
Select Mount NFS Datastore.
-
Next, enter the following information in the Provide NFS Mount Details page:
-
Name:
infra_datastore_1 -
NFS server:
<<var_nodea_nfs_lif>> -
Share: /infra_datastore_1
-
Make sure that NFS 3 is selected.
-
-
Click Finish. You can see the task completing in the Recent Tasks pane.
-
Repeat this process to mount the infra_swap datastore:
-
Name:
infra_swap -
NFS server:
<<var_nodea_nfs_lif>> -
Share:
/infra_swap -
Make sure that NFS 3 is selected.
-
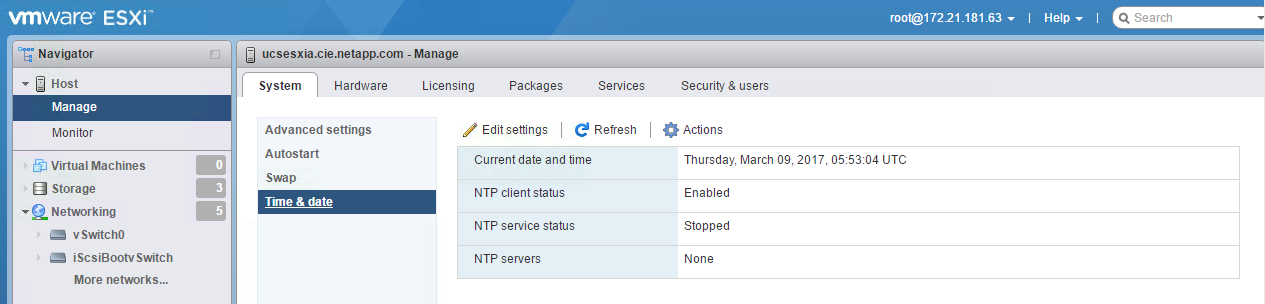
Configure NTP
To configure NTP for an ESXi host, complete the following steps:
-
Click Manage in the left navigation pane. Select System in the right pane and then click Time & Date.
-
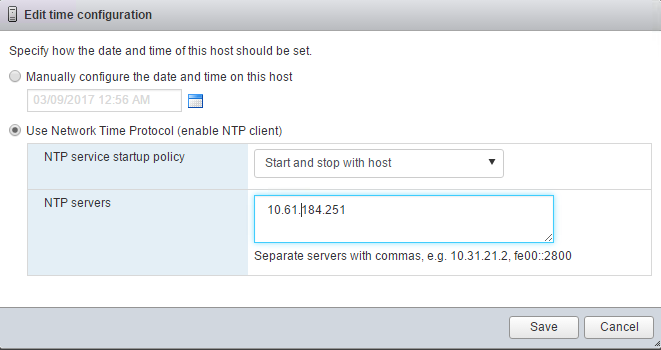
Select Use Network Time Protocol (Enable NTP Client).
-
Select Start and Stop with Host as the NTP service startup policy.
-
Enter
<<var_ntp>>as the NTP server. You can set multiple NTP servers. -
Click Save.
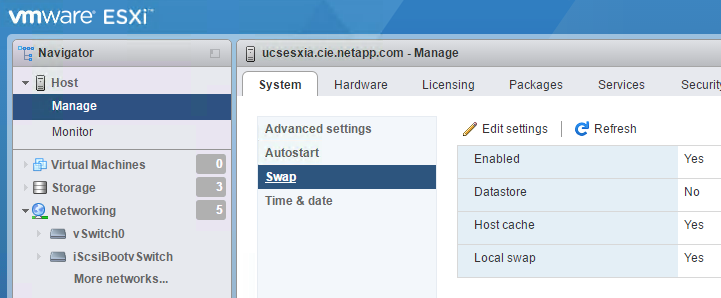
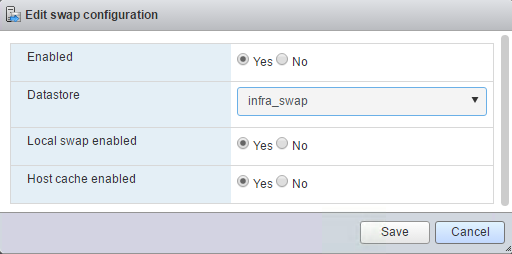
Move the virtual machine swap-file location
These steps provide details for moving the virtual machine swap-file location.
-
Click Manage in the left navigation pane. Select system in the right pane, then click Swap.
-
Click Edit Settings. Select infra_swap from the Datastore options.
-
Click Save.
Install the NetApp NFS Plug-in 1.0.20 for VMware VAAI
To install the NetApp NFS Plug-in 1.0.20 for VMware VAAI, complete the following steps.
-
Enter the following commands to verify that VAAI is enabled:
esxcfg-advcfg -g /DataMover/HardwareAcceleratedMove
esxcfg-advcfg -g /DataMover/HardwareAcceleratedInit
If VAAI is enabled, these commands produce the following output:
~ #  esxcfg-advcfg -g /DataMover/HardwareAcceleratedMove
Value of HardwareAcceleratedMove is 1
~ # esxcfg-advcfg -g /DataMover/HardwareAcceleratedInit
Value of HardwareAcceleratedInit is 1
-
If VAAI is not enabled, enter the following commands to enable VAAI:
esxcfg-advcfg -s 1 /DataMover/HardwareAcceleratedInit
esxcfg-advcfg -s 1 /DataMover/HardwareAcceleratedMove
These commands produce the following output:
~ # esxcfg-advcfg -s 1 /Data Mover/HardwareAcceleratedInit
Value of HardwareAcceleratedInit is 1
~ #  esxcfg-advcfg -s 1 /DataMover/HardwareAcceleratedMove
Value of HardwareAcceleratedMove is 1
-
Download the NetApp NFS Plug-in for VMware VAAI:
-
Go to the software download page.
-
Scroll down and click NetApp NFS Plug-in for VMware VAAI.
-
Select the ESXi platform.
-
Download either the offline bundle (.zip) or online bundle (.vib) of the most recent plug-in.
-
-
Install the plug-in on the ESXi host by using the ESX CLI.
-
Reboot the ESXI host.
