

Before you begin
 Suggest changes
To monitor and orchestrate NetApp storage from Cisco Intersight, you need NetApp Active IQ Unified Manager and Cisco Intersight Assist Virtual Appliance installed in the vCenter environment.
Install or Upgrade NetApp Active IQ Unified Manager
Install or upgrade to Active IQ Unified Manager (latest version is required, currently 9.14RC1) if you have not done so. For instructions, go to the NetApp Active IQ Unified Manager Documentation.
Install Cisco Intersight Assist Virtual Appliance
Ensure that you meet the Cisco Intersight Virtual Appliance Licensing, System, and Network requirements.
Steps
-
Create a Cisco Intersight Account.
Visit https://intersight.com/ to create your Intersight account. You must have a valid Cisco ID to create a Cisco Intersight account. -
Download the Cisco Intersight Virtual Appliance at software.cisco.com. For more information, go to the Intersight Appliance Install and Upgrade Guide.
-
Deploy the OVA. DNS and NTP are required to deploy the OVA.
-
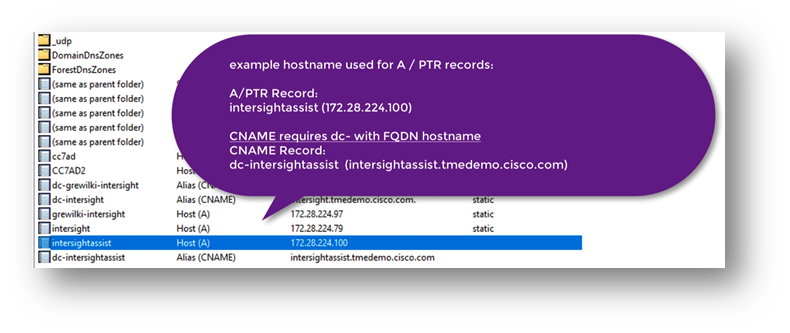
Configure DNS with A/PTR and CNAME Alias records prior to deploying the OVA. See the example below.
-
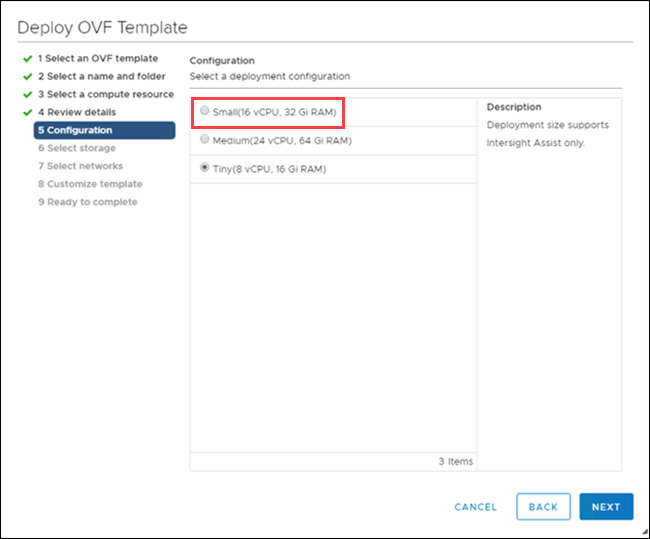
Choose the appropriate configuration size (Tiny, Small, or Medium) based on your OVA deployment requirements for Intersight Virtual Appliance.
TIP: For a two-node ONTAP cluster with a large number of storage objects, NetApp recommends that you use the Small (16 vCPU, 32 Gi RAM) option.
-
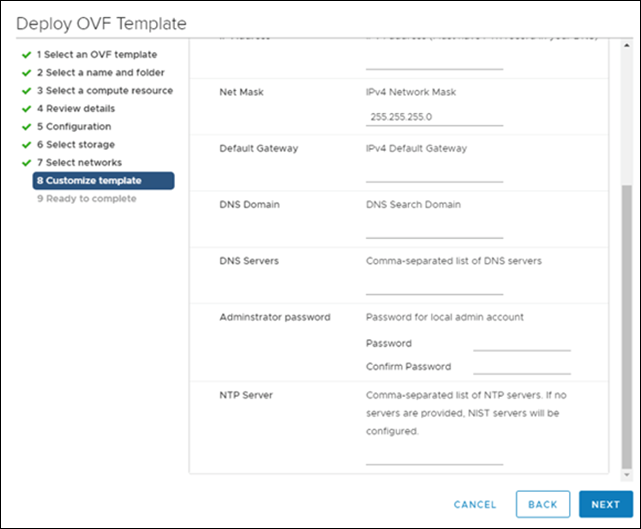
On the Customize Template page, customize the deployment properties of the OVF template. The administrator password is used for the local users: admin(
webUI/cli/ssh).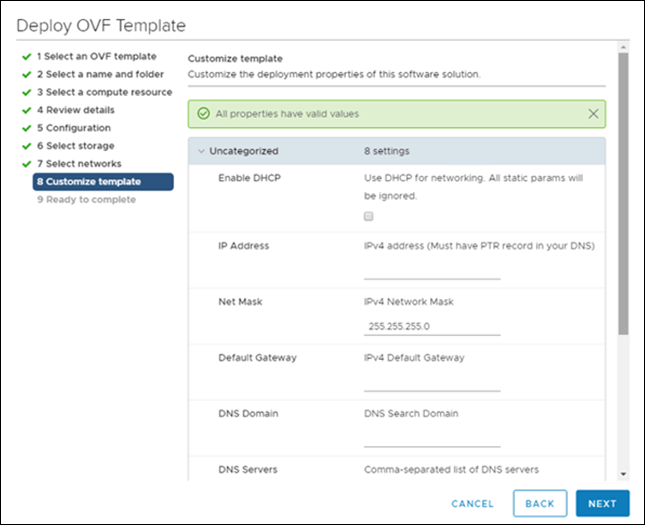
-
Click Next.
-
-
Post-deploy the Intersight Assist Appliance.
-
Navigate to
https://<FQDN-of-your-appliance>;to complete the post-install setup of your appliance.The installation process automatically begins. Installation can take up to one hour depending on bandwidth to Intersight.com. It can also take several seconds for the secure site to be operational after the VM powers on.
-
During the post-deployment process, select the following option:
-
Intersight Assist. This deployment enables SaaS model to connect to Cisco Intersight.

When selecting Intersight Assist, take note of the device ID and claim code before you continue. 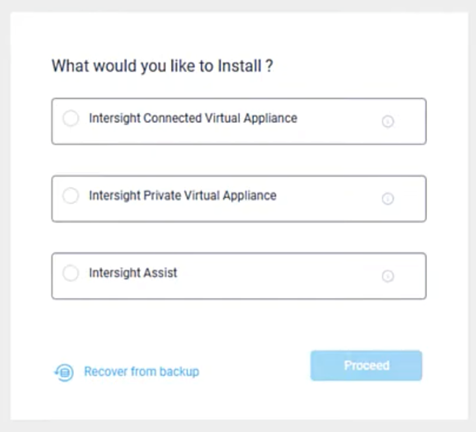
-
-
Click Proceed.
-
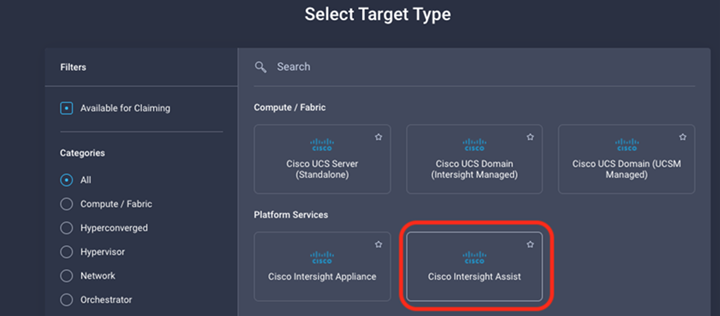
Select Intersight Assist and complete the following steps:
-
Navigate to your SaaS Intersight account at https://intersight.com.
-
Click Targets, Cisco Intersight Assist, and then Start.
-
Claim the Cisco Intersight Assist appliance by copying and pasting the device ID and claim code from your newly deployed Intersight Assist virtual appliance.
-
Return to the Cisco Intersight Assist appliance and click Continue. You might need to refresh the browser.
The download and installation process begins. The binaries are transferred from Intersight Cloud to your on-prem appliance. Completion time varies depending on your bandwidth to the Intersight Cloud.
-
-