

Solution validation
 Suggest changes
In this section, we revisit the solution with a sample data-replication workflow and take a few measurements to verify the integrity of data replication from the NetApp ONTAP instance running in FlexPod to NetApp Cloud Volumes ONTAP running on Google Cloud.
We used the Cisco Intersight workflow orchestrator in this solution and will continue to use this for our use case.
Notably, the limited set of Cisco Intersight workflows used in this solution do not represent the full set of workflows that Cisco Intersight is equipped with. You can create custom workflows based on your specific requirements and have them triggered from Cisco Intersight.
To perform the validation of a successful DR scenario, first move data from a volume in ONTAP that is part of FlexPod to Cloud Volumes ONTAP using SnapMirror. Then you can attempt to access the data from the Google cloud compute instance followed by a data integrity check.
The following high-level steps are used to verify the success criteria of this solution:
-
Generate an SHA256 checksum on the sample dataset that is present in an ONTAP volume in FlexPod.
-
Set up a volume SnapMirror relationship between ONTAP in FlexPod and Cloud Volumes ONTAP.
-
Replicate the sample dataset from FlexPod to Cloud Volumes ONTAP.
-
Break the SnapMirror relationship and promote the volume in Cloud Volumes ONTAP to production.
-
Map the Cloud Volumes ONTAP volume with the dataset to a compute instance in Google Cloud.
-
Generate an SHA256 checksum on the sample dataset in Cloud Volumes ONTAP.
-
Compare the checksum on the source and destination; presumably, the checksums on both sides match.
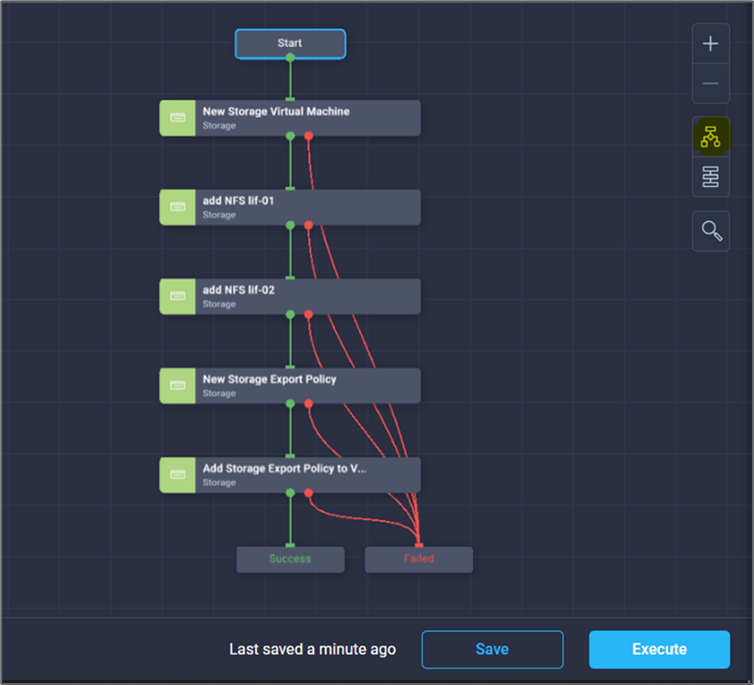
To execute the on-premises workflow, complete the following steps:
-
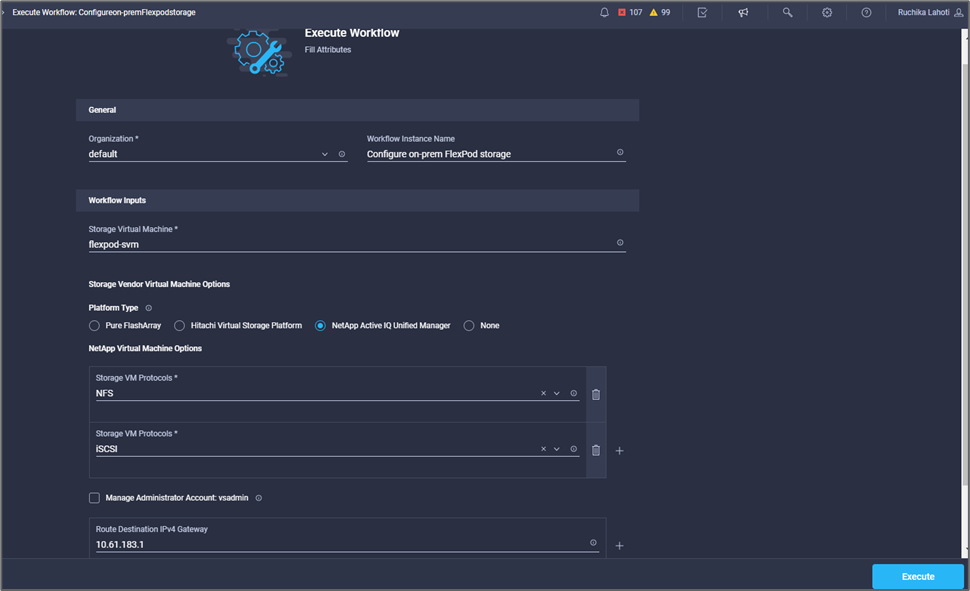
Create a workflow in Intersight for on-premises FlexPod.
-
Provide the required inputs and execute the workflow.
-
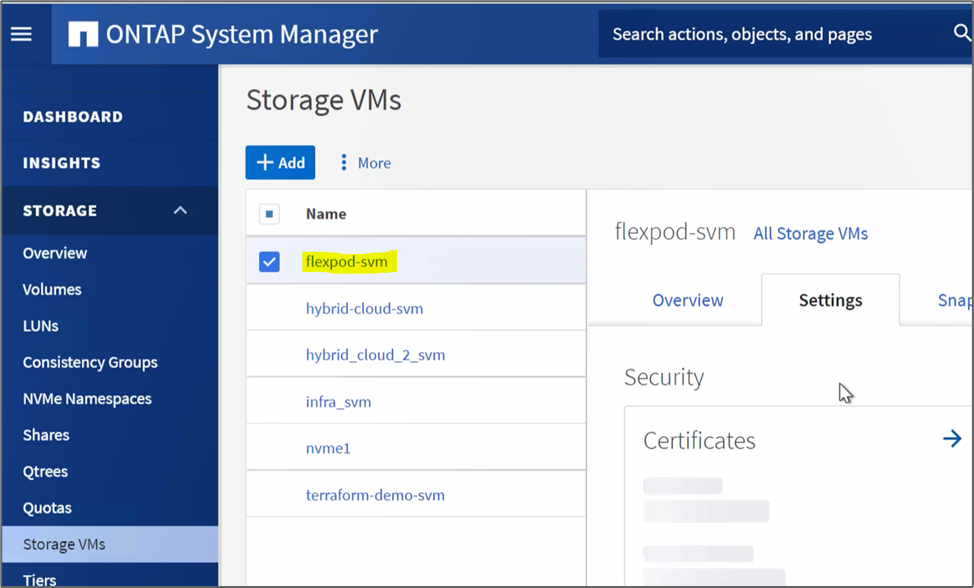
Verify the newly created SVM in the system manager.
-
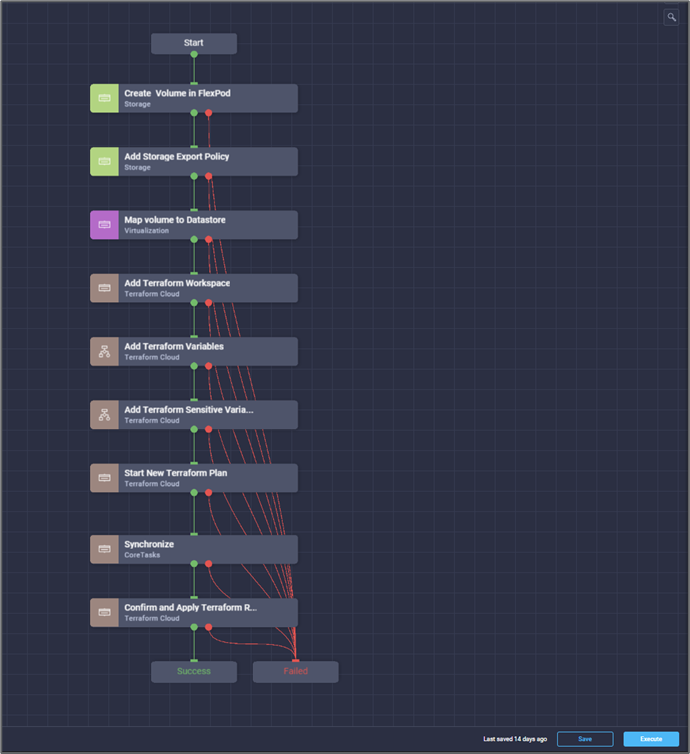
Create and execute another disaster recovery workflow to create a volume in on-prem FlexPod and establish a SnapMirror relationship between this volume in FlexPod and Cloud Volumes ONTAP.
-
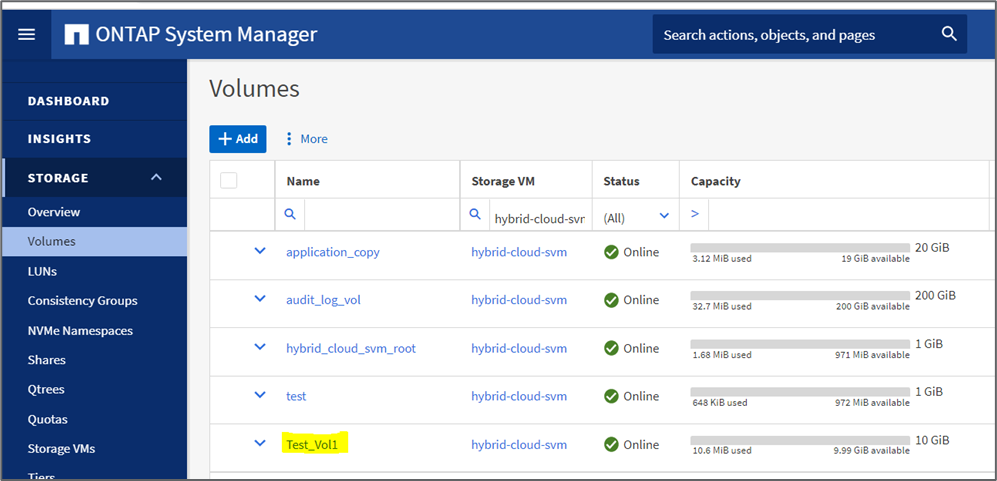
Verify the newly created volume in ONTAP system manager.
-
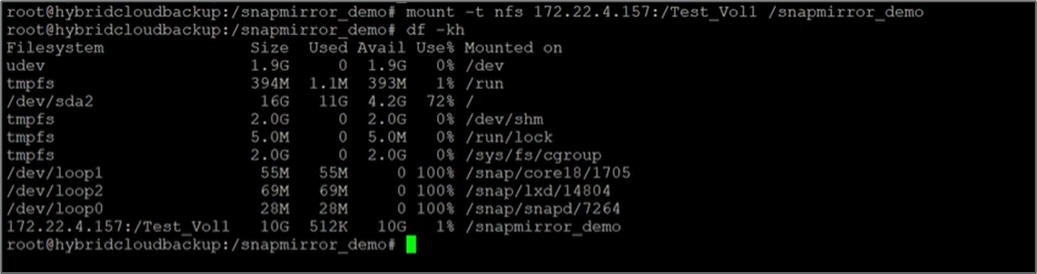
Mount the same NFS volume to an on-premises virtual machine, then copy the sample dataset and perform the checksum.

-
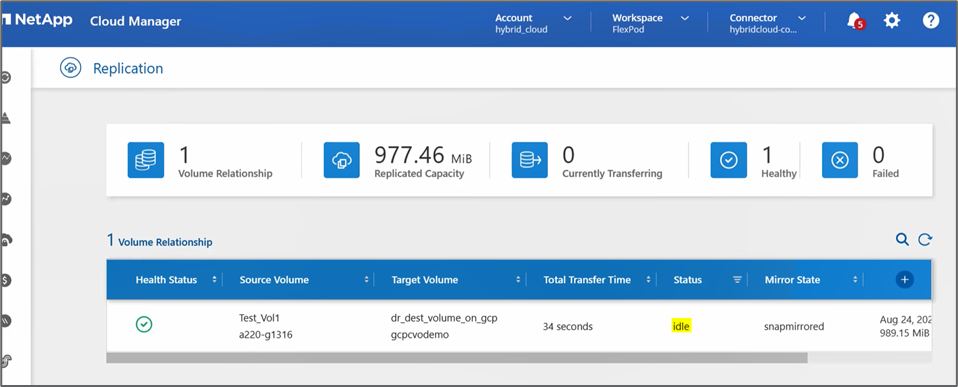
Check the replication status in Cloud Manager. The data transfer can take few minutes based on the size of the data. After it is completed, you can see the SnapMirror status as Idle.
-
When the data transfer is complete, simulate a disaster on the source side by stopping the SVM that hosts the
Test_vol1volume.After the SVM has been stopped, the
Test_vol1volume is not visible in the Cloud Manager.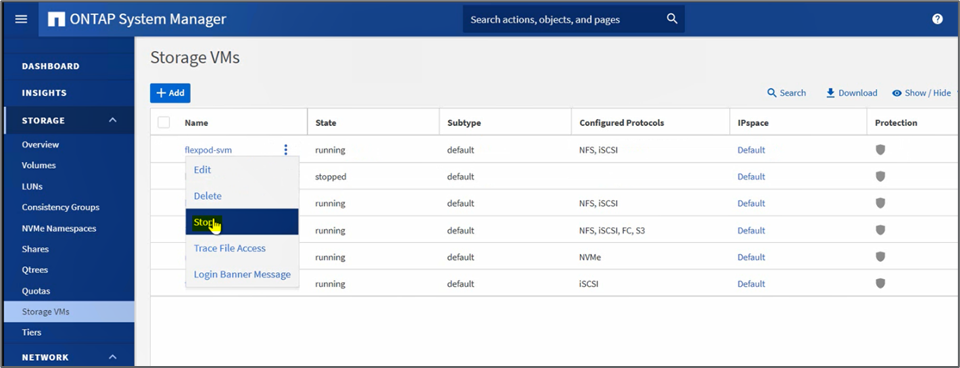
-
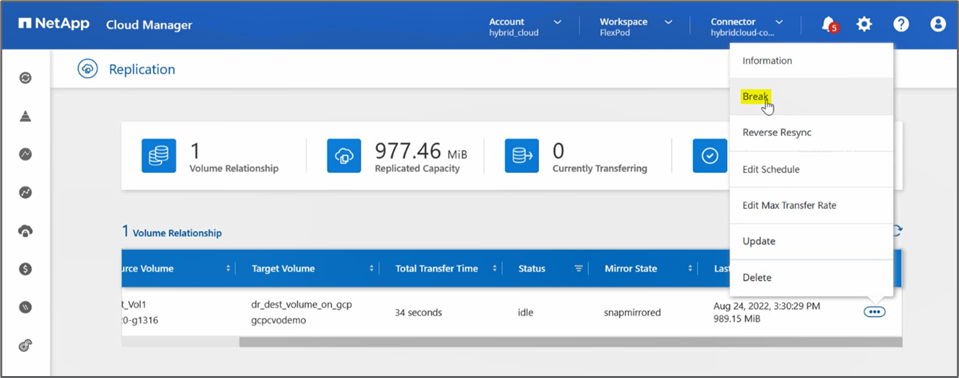
Break the replication relationship and promote the Cloud Volumes ONTAP destination volume to production.

-
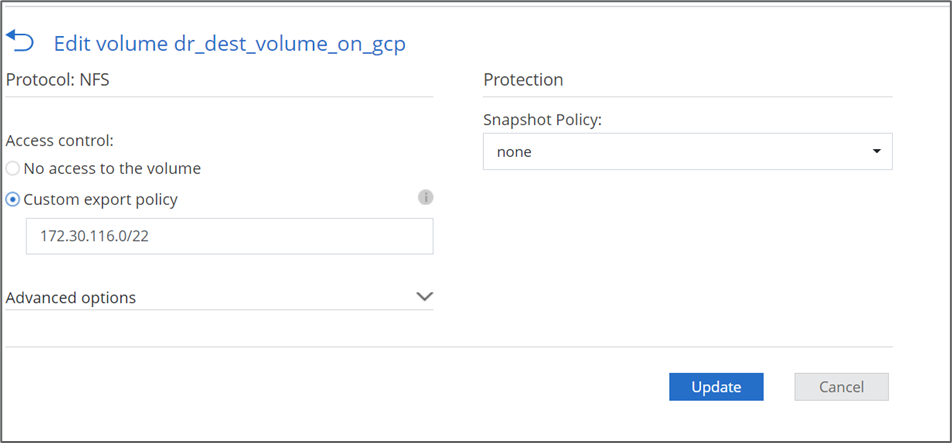
Edit the volume and enable client access by associating it with an export policy.
-
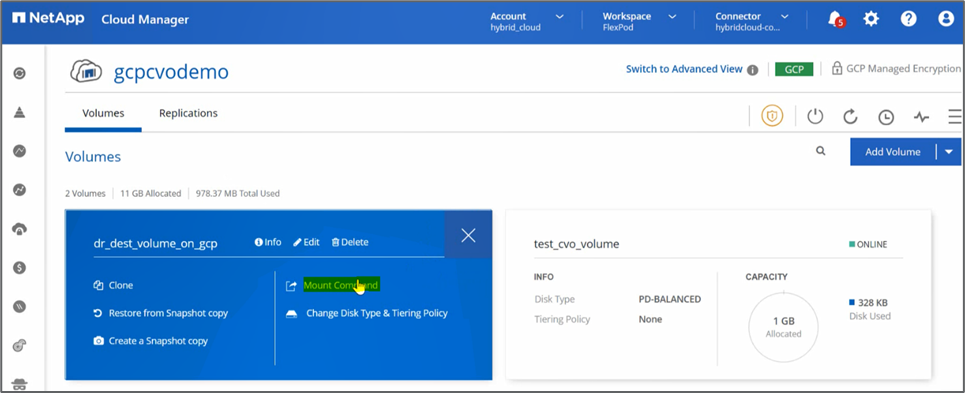
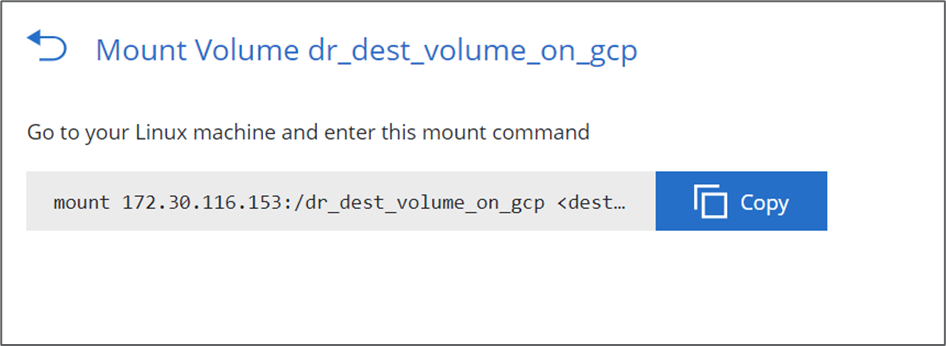
Obtain the ready-to-use mount command for the volume.
-
Mount the volume to a compute instance, verify that the data is present in the destination volume, and generate the SHA256 checksum of the
sample_dataset_2GBfile.
-
Compare the checksum values at both the source (FlexPod) and the destination (Cloud Volumes ONTAP).
-
The checksums match to the source and destination.
You can confirm that the data replication from the source to the destination was completed successfully and the data integrity was maintained. This data can now be safely consumed by the applications to serve clients while the source site goes through restoration.