Restoring and recovering databases from secondary storage
 Suggest changes
You can restore and recover the database from the secondary storage.
-
Within SAP HANA Studio, select Recover for the SAP HANA system.
The SAP HANA system will be shut down.
-
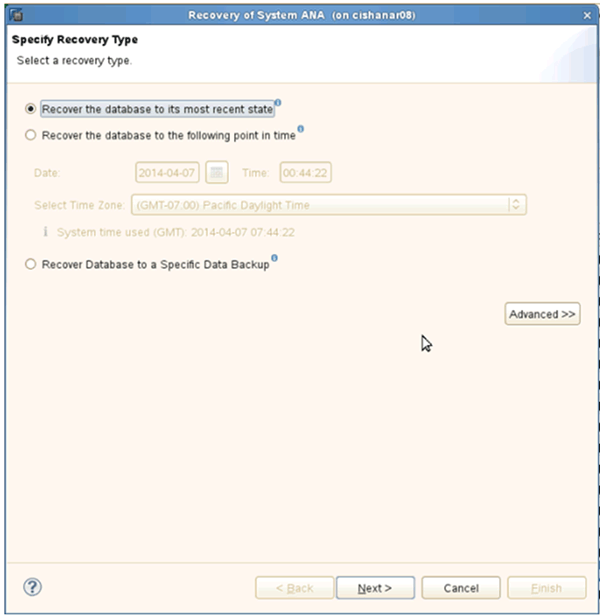
Select the recovery type and click Next.
-
Provide log backup locations and click Next.
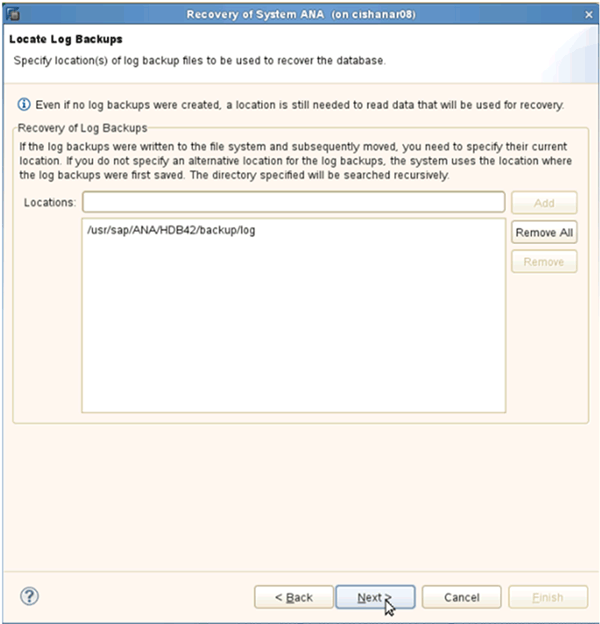
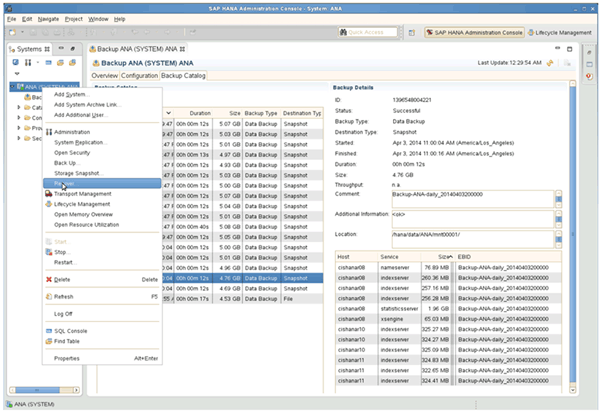
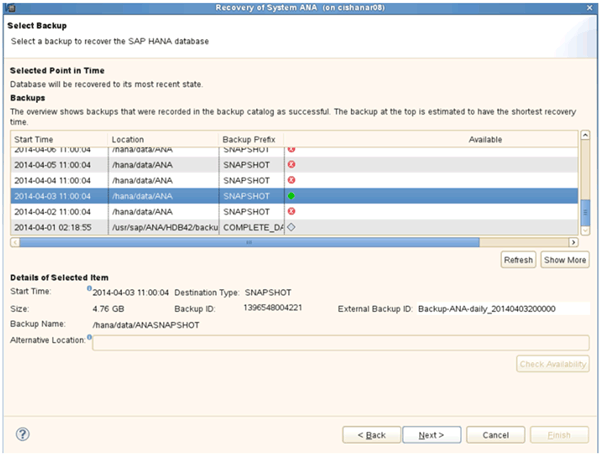
The list of available backups appear based on the content of the backup catalog.
-
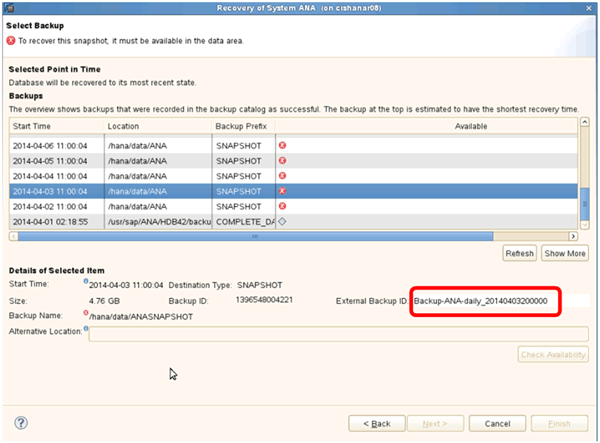
Select the required backup and write down external backup ID.
-
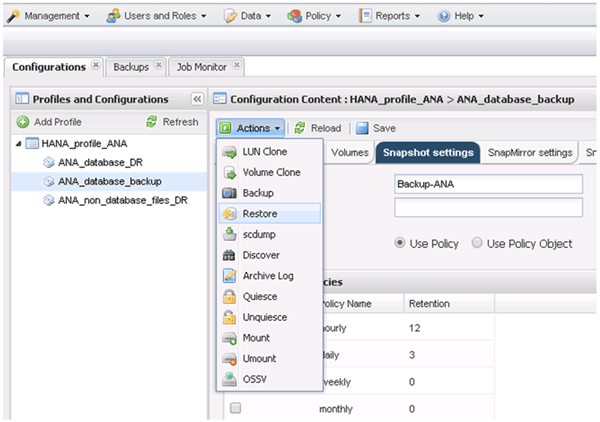
Go to the Snap Creator GUI.
-
Select the SAP HANA system, and then click Actions > Restore.
The Welcome screen appears.

-
Click Next.
-
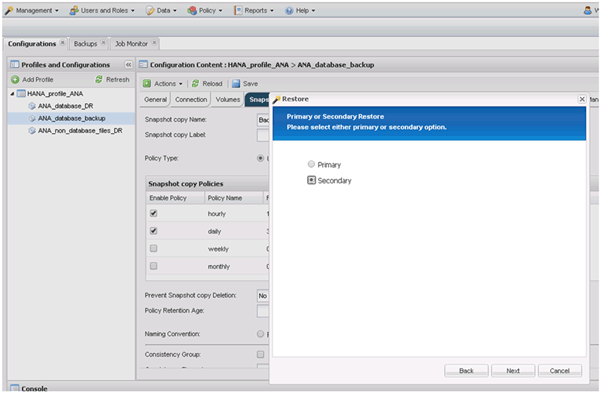
Select Secondary and click Next.
-
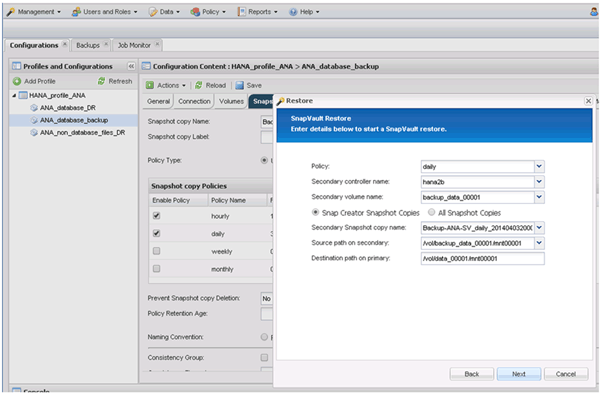
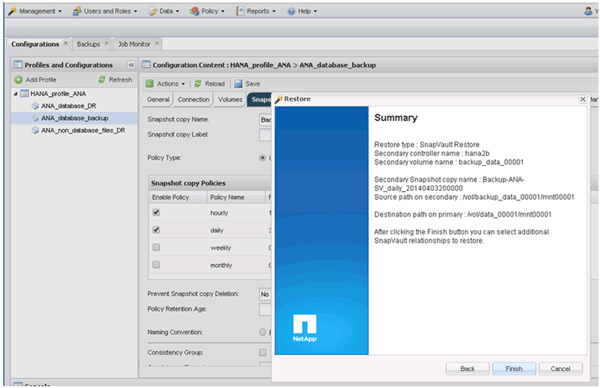
Enter the required information. The Snapshot name correlates with the backup ID that has been selected in SAP HANA Studio.
-
Select Finish.
-
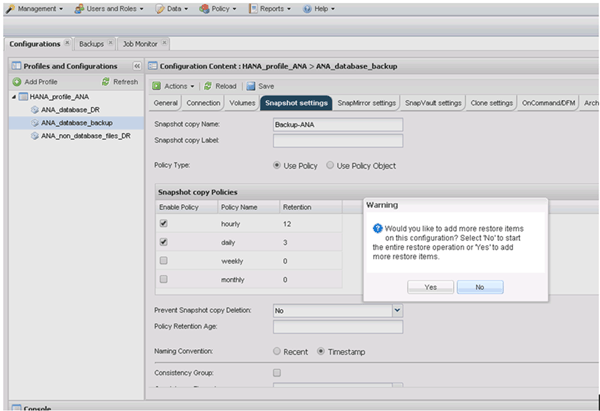
Click Yes to add more items to restore.
-
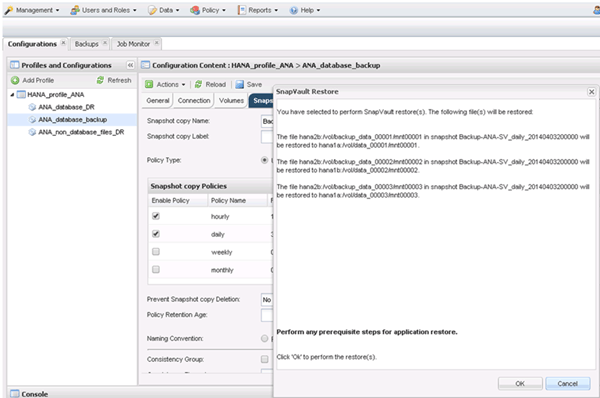
Provide the required information for all volumes that need to be restored. In the setup data_00001, data_00002, and data_00003 need to be selected for the restore process.
-
When all volumes are selected, select OK to start the restore process.
Wait until the restore process is finished.
-
On each database node remount all data volumes to clean “Stale NFS Handles.”
In the example, all three volumes need to be remounted at each database node.
mount -o remount /hana/data/ANA/mnt00001
mount -o remount /hana/data/ANA/mnt00002
mount -o remount /hana/data/ANA/mnt00003
-
Go to SAP HANA Studio and click Refresh to update the backup list.
-
The backup that has been restored with Snap Creator is shown with a green icon in the list of backups. Select the backup and click Next.
-
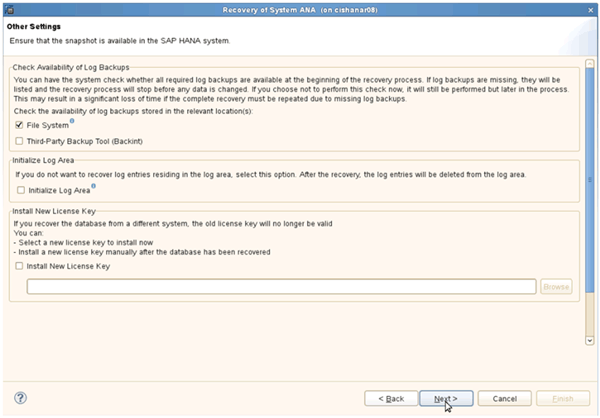
Select other settings as required and click Next.
-
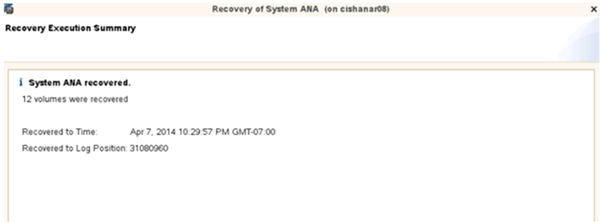
Click Finish.
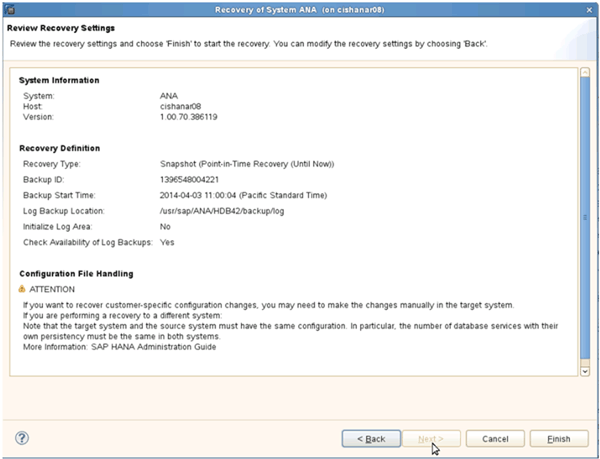
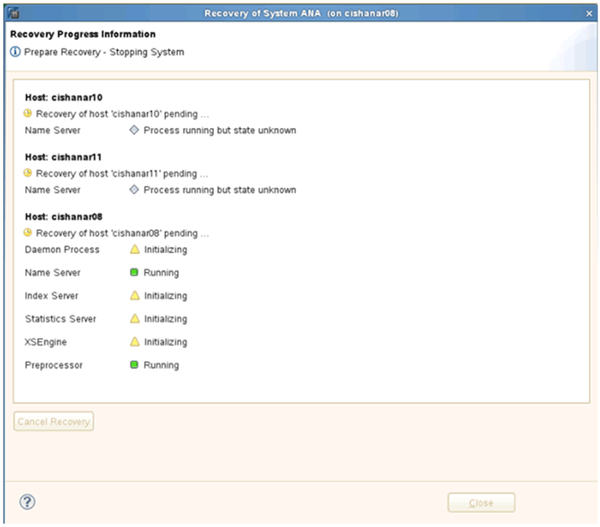
The recovery process begins.
-
After the recovery process is finished, resume the SnapVault Relationships, if required.