

 Artificial Intelligence
 Suggest changes
Migrate VMs to ONTAP Datastores
Author: Suresh Thoppay
VMware vSphere by Broadcom supports VMFS, NFS, and vVol datastores for hosting virtual machines. Customers have the option to create those datastores with hyper converged infrastructures or with centralized shared storage systems. Customers often see the value with hosting on ONTAP based storage systems to provide space efficient snapshots and clones of Virtual machines, flexiblity to choose various deployment models across the datacenters and clouds, operational efficiency with monitoring and alerting tools, security, governance and optional compliance tools to inspect VM data, etc,.
VMs hosted on ONTAP datastores can be protected using SnapCenter Plugin for VMware vSphere (SCV). SCV creates storage based snapshots and also replicates to remote ONTAP storage system. Restores can be performed either from Primary or Secondary storage systems.
Customers has flexibility to choose Cloud Insights or Aria Operations or combination of both or other third party tools that use ONTAP api to troubleshoot, performance monitoring, reporting and alert notification features.
Customers can easily provision datastore using ONTAP Tools vCenter Plug-in or its API and VMs can be migrated to ONTAP datastores even while it is powered on.

|
Some VMs which are deployed with external management tool like Aria Automation, Tanzu (or other Kubernetes flavors) are usually depends on VM storage policy. If migrating between the datastores within same VM storage policy, it should be of less impact for the applications. Check with Application owners to properly migrate those VMs to new datastore. vSphere 8 introduced vMotion notification to prepare application for the vMotion. |
Network Requirements
VM migration with vMotion
It is assumed that dual storage network is already in place for the ONTAP datastore to provide connectivity, fault tolerance and performance boost.
Migration of VMs across the vSphere hosts are also handled by the VMKernel interface of the vSphere host. For hot migration (powered on VMs), VMKernel interface with vMotion enabled service is used and for cold migration (powered off VMs), VMKernel interface with Provisioning service enabled is consumed to move the data. If no valid interface was found, it will use the management interface to move the data which may not be desirable for certain use cases.
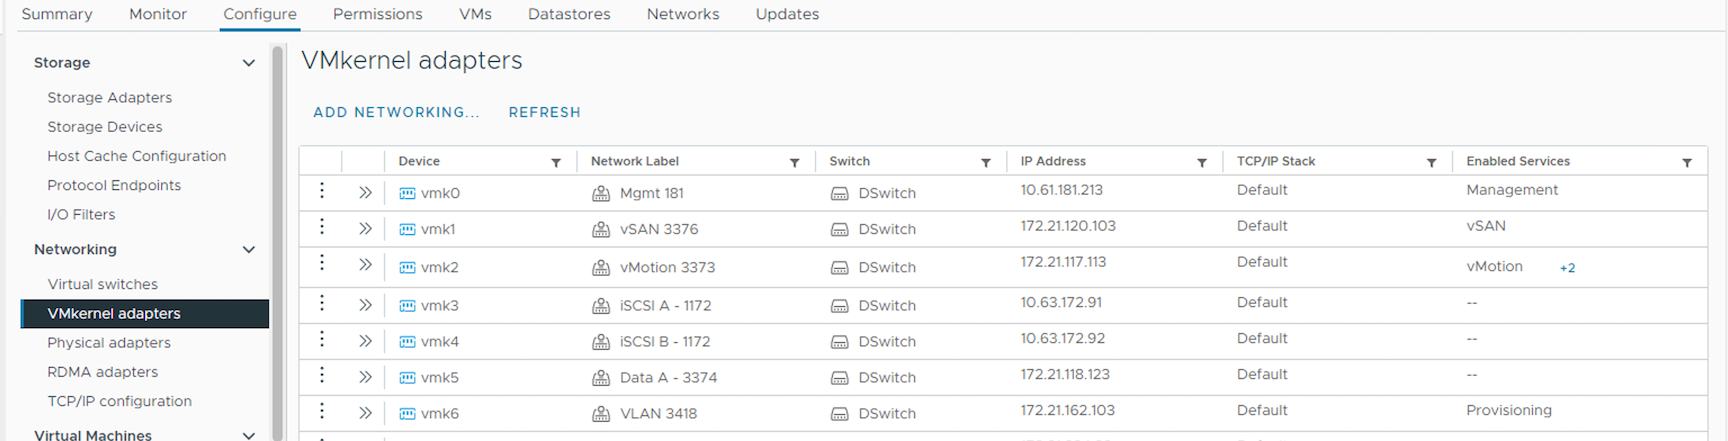
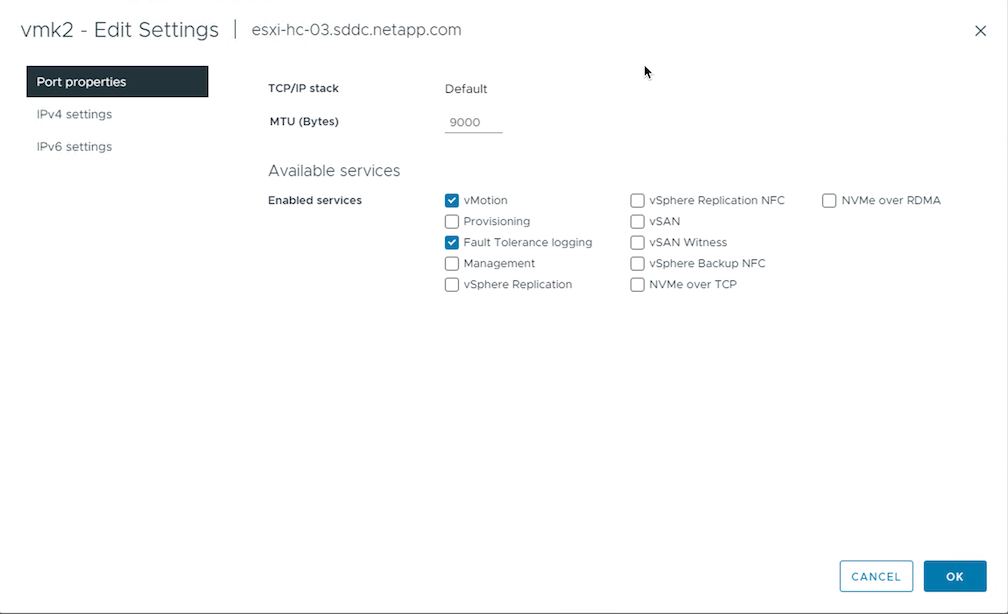
When you edit the VMKernel interface, here is the option to enable the required services.

|
Ensure at least two high-speed active uplink nics are available for the portgroup used by vMotion and Provisioning VMkernel interfaces. |
VM Migration Scenarios
vMotion is often used to migrate the VMs irrespective of its power state. Additional considerations and migration procedure for specific scenarios is available below.
|
|
Understand VM Conditions and Limitation of vSphere vMotion before proceeding with any VM migration options. |
Migration of VMs from specific vSphere Datastore
Follow the procedure below to migrate VMs to new Datastore using UI.
-
With vSphere Web Client, select the Datastore from the storage inventory and click on VMs tab.

-
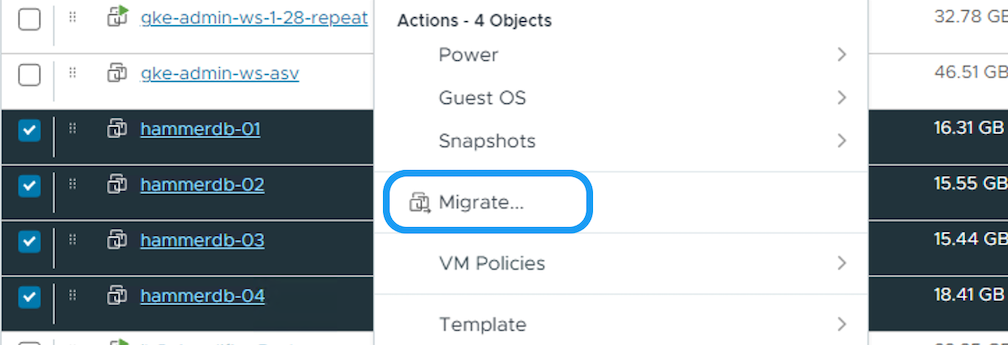
Select the VMs that needs to be migrated and right click to select Migrate option.
-
Choose option to change storage only, Click Next

-
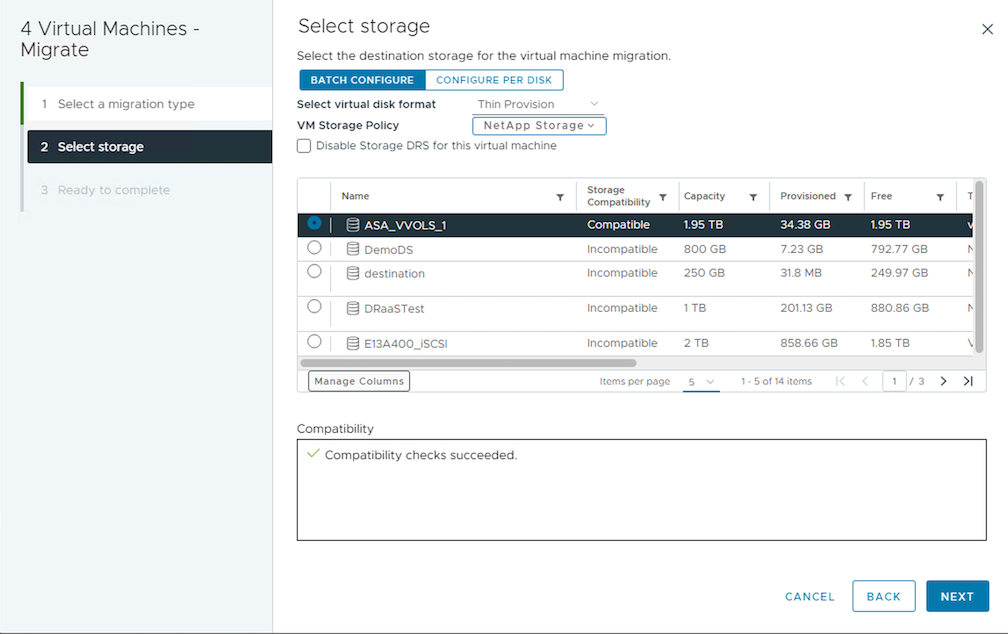
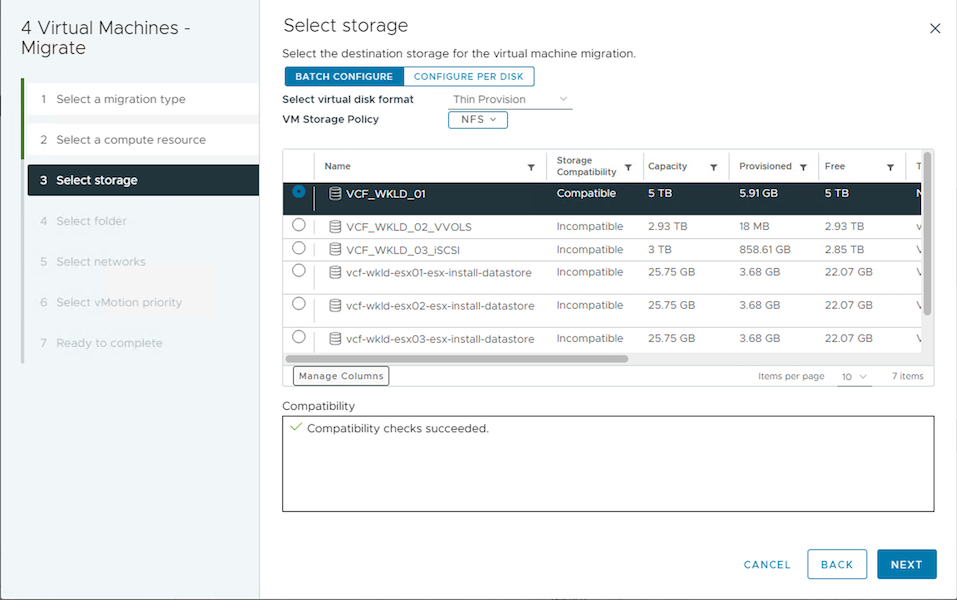
Select the desired VM Storage Policy and pick the datastore that is compatible. Click Next.
-
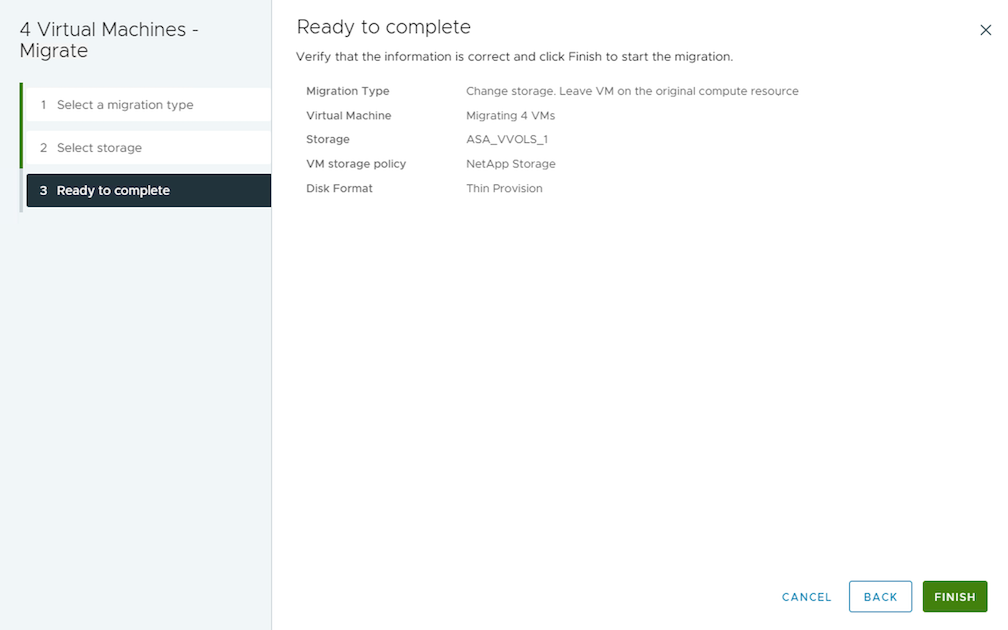
Review and click on Finish.
To migrate VMs using PowerCLI, here is the sample script.
#Authenticate to vCenter
Connect-VIServer -server vcsa.sddc.netapp.local -force

# Get all VMs with filter applied for a specific datastore
$vm = Get-DataStore 'vSanDatastore' | Get-VM Har*

#Gather VM Disk info
$vmdisk = $vm | Get-HardDisk

#Gather the desired Storage Policy to set for the VMs. Policy should be available with valid datastores.
$storagepolicy = Get-SPBMStoragePolicy 'NetApp Storage'

#set VM Storage Policy for VM config and its data disks.
$vm, $vmdisk | Get-SPBMEntityConfiguration | Set-SPBMEntityConfiguration -StoragePolicy $storagepolicy

#Migrate VMs to Datastore specified by Policy
$vm | Move-VM -Datastore (Get-SPBMCompatibleStorage -StoragePolicy $storagepolicy)

#Ensure VM Storage Policy remains compliant.
$vm, $vmdisk | Get-SPBMEntityConfiguration
Migration of VMs in same vSphere cluster
Follow the procedure below to migrate VMs to new Datastore using UI.
-
With vSphere Web Client, select the Cluster from the Host and Cluster inventory and click on VMs tab.

-
Select the VMs that needs to be migrated and right click to select Migrate option.
-
Choose option to change storage only, Click Next
-
Select the desired VM Storage Policy and pick the datastore that is compatible. Click Next.
-
Review and click on Finish.
To migrate VMs using PowerCLI, here is the sample script.
#Authenticate to vCenter
Connect-VIServer -server vcsa.sddc.netapp.local -force

# Get all VMs with filter applied for a specific cluster
$vm = Get-Cluster 'vcf-m01-cl01' | Get-VM Aria*

#Gather VM Disk info
$vmdisk = $vm | Get-HardDisk

#Gather the desired Storage Policy to set for the VMs. Policy should be available with valid datastores.
$storagepolicy = Get-SPBMStoragePolicy 'NetApp Storage'

#set VM Storage Policy for VM config and its data disks.
$vm, $vmdisk | Get-SPBMEntityConfiguration | Set-SPBMEntityConfiguration -StoragePolicy $storagepolicy

#Migrate VMs to Datastore specified by Policy
$vm | Move-VM -Datastore (Get-SPBMCompatibleStorage -StoragePolicy $storagepolicy)

#Ensure VM Storage Policy remains compliant.
$vm, $vmdisk | Get-SPBMEntityConfiguration|
|
When Datastore Cluster is in use with fully automated storage DRS (Dynamic Resource Scheduling) and both (source & target) datastores are of same type (VMFS/NFS/vVol), Keep both datastores in same storage cluster and migrate VMs from source datastore by enabling maintenance mode on the source. Experience will be similar to how compute hosts are handled for maintenance. |
Migration of VMs across multiple vSphere clusters
|
|
Refer CPU Compatibility and vSphere Enhanced vMotion Compatibility when source and target hosts are of different CPU family or model. |
Follow the procedure below to migrate VMs to new Datastore using UI.
-
With vSphere Web Client, select the Cluster from the Host and Cluster inventory and click on VMs tab.
-
Select the VMs that needs to be migrated and right click to select Migrate option.
-
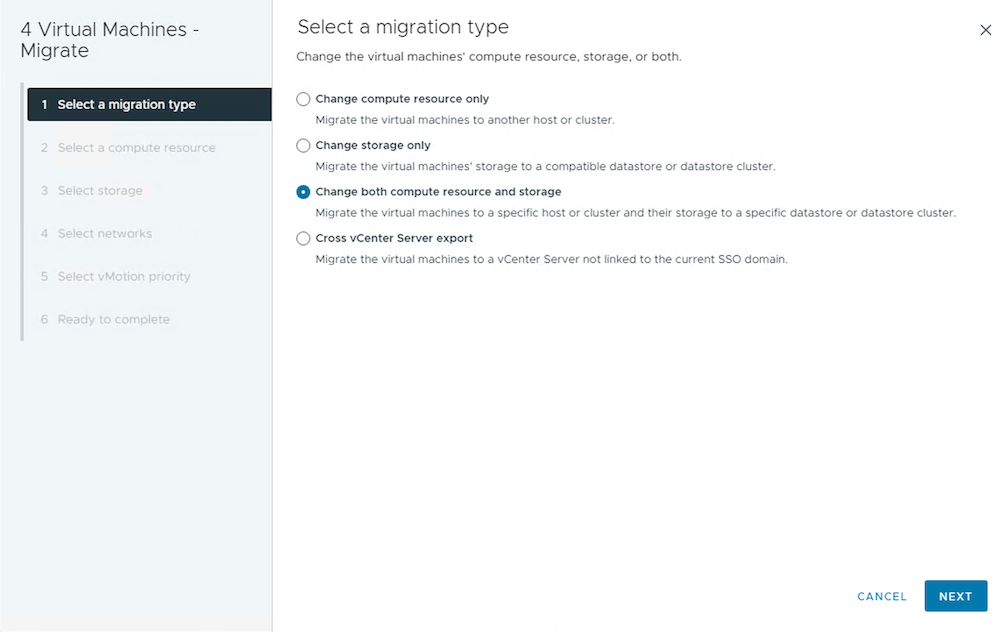
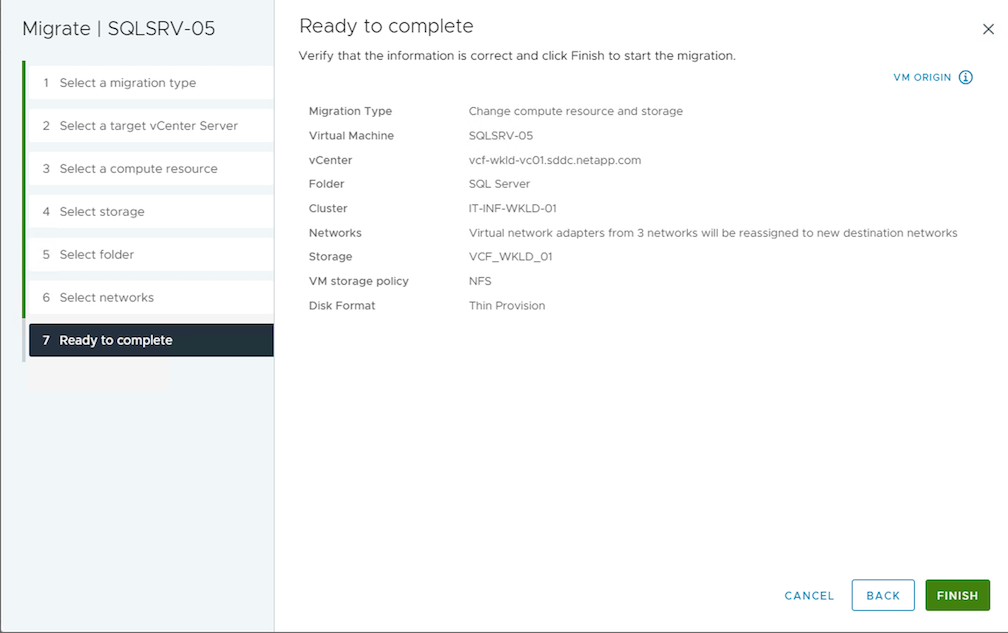
Choose option to change compute resource and storage, Click Next
-
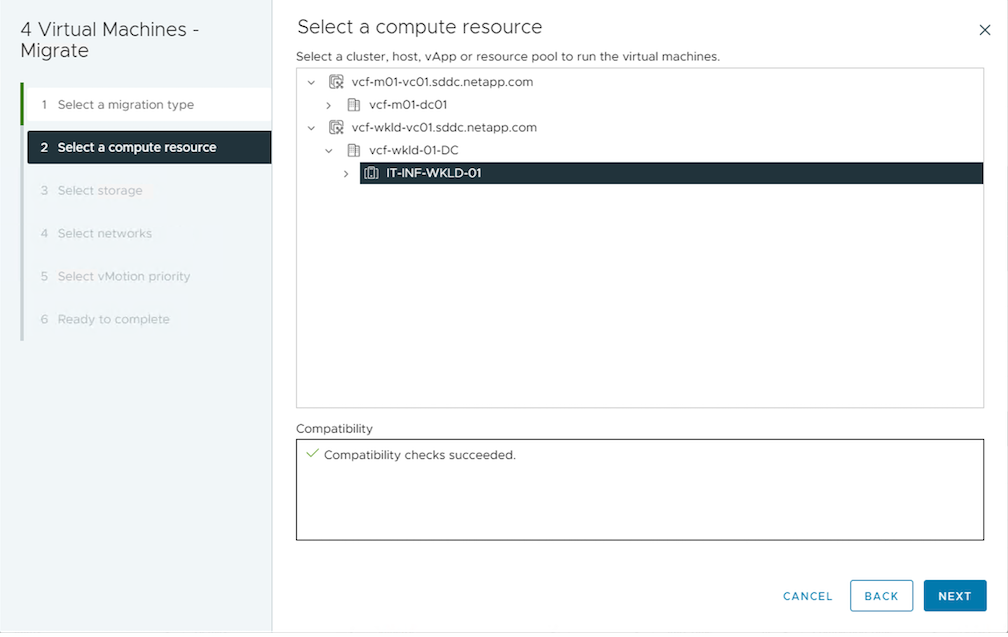
Navigate and pick the right cluster to migrate.
-
Select the desired VM Storage Policy and pick the datastore that is compatible. Click Next.
-
Pick the VM folder to place the target VMs.
-
Select the target port group.
-
Review and click on Finish.
To migrate VMs using PowerCLI, here is the sample script.
#Authenticate to vCenter
Connect-VIServer -server vcsa.sddc.netapp.local -force

# Get all VMs with filter applied for a specific cluster
$vm = Get-Cluster 'vcf-m01-cl01' | Get-VM Aria*

#Gather VM Disk info
$vmdisk = $vm | Get-HardDisk

#Gather the desired Storage Policy to set for the VMs. Policy should be available with valid datastores.
$storagepolicy = Get-SPBMStoragePolicy 'NetApp Storage'

#set VM Storage Policy for VM config and its data disks.
$vm, $vmdisk | Get-SPBMEntityConfiguration | Set-SPBMEntityConfiguration -StoragePolicy $storagepolicy

#Migrate VMs to another cluster and Datastore specified by Policy
$vm | Move-VM -Destination (Get-Cluster 'Target Cluster') -Datastore (Get-SPBMCompatibleStorage -StoragePolicy $storagepolicy)

#When Portgroup is specific to each cluster, replace the above command with
$vm | Move-VM -Destination (Get-Cluster 'Target Cluster') -Datastore (Get-SPBMCompatibleStorage -StoragePolicy $storagepolicy) -PortGroup (Get-VirtualPortGroup 'VLAN 101')

#Ensure VM Storage Policy remains compliant.
$vm, $vmdisk | Get-SPBMEntityConfiguration
Migration of VMs across vCenter servers in same SSO domain
Follow the procedure below to migrate VMs to new vCenter server which is listed on same vSphere Client UI.
|
|
For additional requirements like source and target vCenter versions,etc., check vSphere documentation on requirements for vMotion between vCenter server instances |
-
With vSphere Web Client, select the Cluster from the Host and Cluster inventory and click on VMs tab.
-
Select the VMs that needs to be migrated and right click to select Migrate option.
-
Choose option to change compute resource and storage, Click Next
-
Select the target cluster in target vCenter server.
-
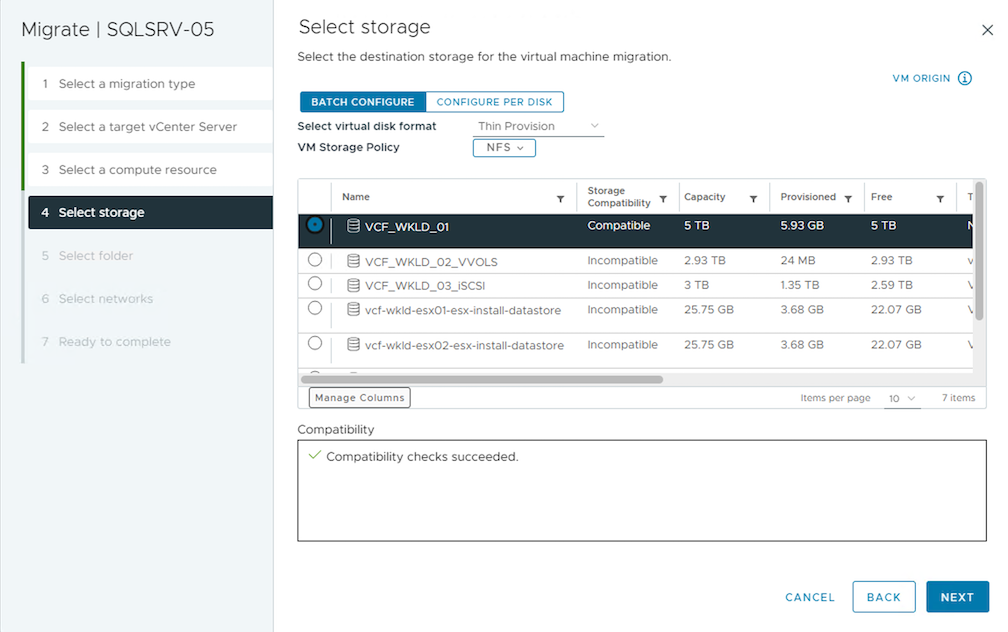
Select the desired VM Storage Policy and pick the datastore that is compatible. Click Next.
-
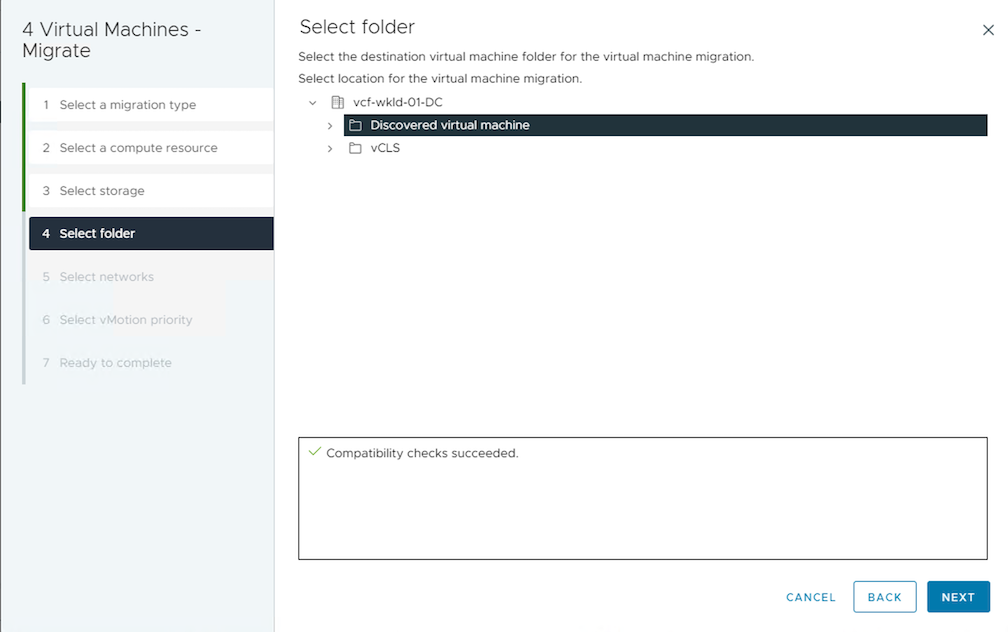
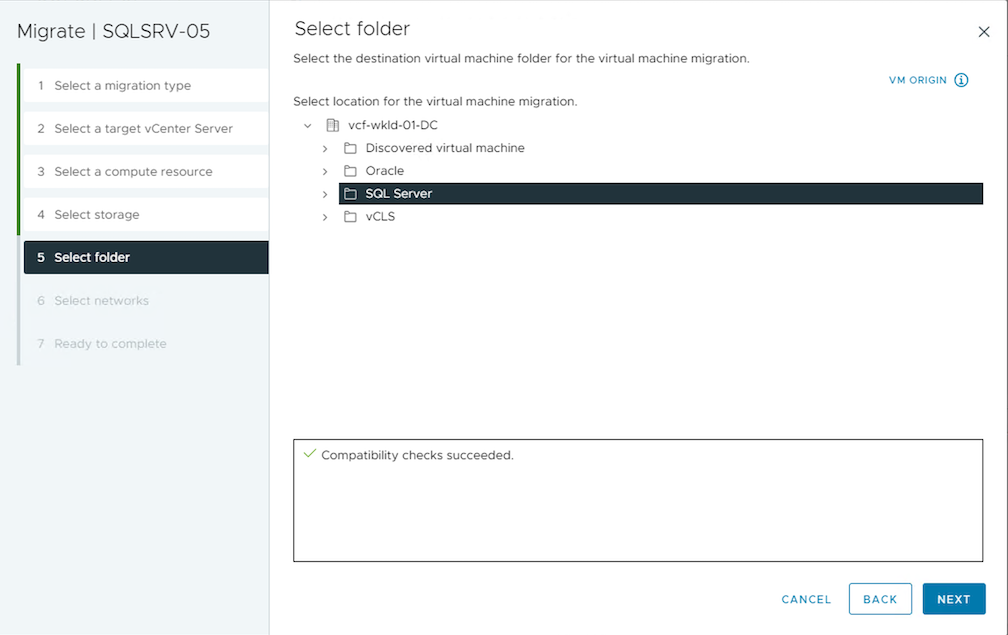
Pick the VM folder to place the target VMs.
-
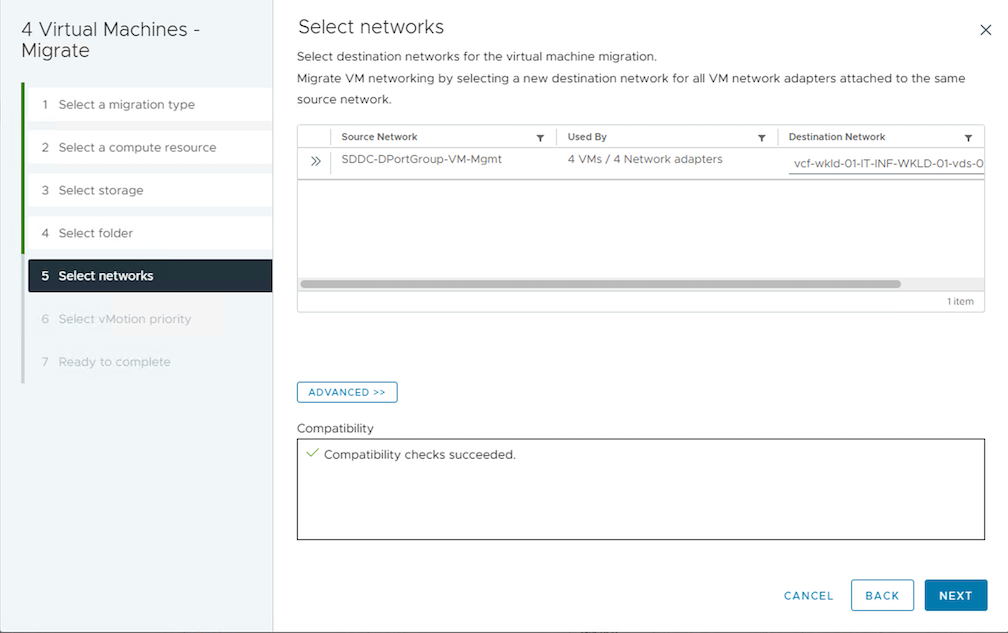
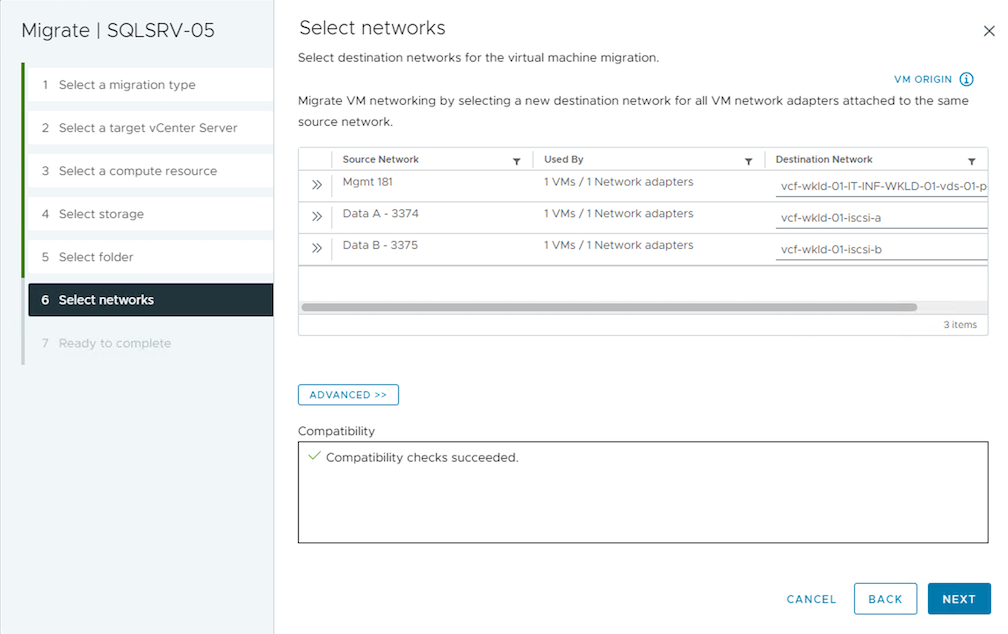
Select the target port group.
-
Review the migration options and click Finish.
To migrate VMs using PowerCLI, here is the sample script.
#Authenticate to Source vCenter
$sourcevc = Connect-VIServer -server vcsa01.sddc.netapp.local -force
$targetvc = Connect-VIServer -server vcsa02.sddc.netapp.local -force

# Get all VMs with filter applied for a specific cluster
$vm = Get-Cluster 'vcf-m01-cl01'  -server $sourcevc| Get-VM Win*

#Gather the desired Storage Policy to set for the VMs. Policy should be available with valid datastores.
$storagepolicy = Get-SPBMStoragePolicy 'iSCSI' -server $targetvc

#Migrate VMs to target vCenter
$vm | Move-VM -Destination (Get-Cluster 'Target Cluster' -server $targetvc) -Datastore (Get-SPBMCompatibleStorage -StoragePolicy $storagepolicy -server $targetvc) -PortGroup (Get-VirtualPortGroup 'VLAN 101' -server $targetvc)

$targetvm = Get-Cluster 'Target Cluster' -server $targetvc | Get-VM Win*

#Gather VM Disk info
$targetvmdisk = $targetvm | Get-HardDisk

#set VM Storage Policy for VM config and its data disks.
$targetvm, $targetvmdisk | Get-SPBMEntityConfiguration | Set-SPBMEntityConfiguration -StoragePolicy $storagepolicy

#Ensure VM Storage Policy remains compliant.
$targetvm, $targetvmdisk | Get-SPBMEntityConfiguration
Migration of VMs across vCenter servers in different SSO domain
|
|
This scenario assumes the communication exists between the vCenter servers. Otherwise check the across datacenter location scenario listed below. For prerequisites, check vSphere documentation on Advanced Cross vCenter vMotion |
Follow the procedure below to migrate VMs to differnt vCenter server using UI.
-
With vSphere Web Client, select the source vCenter server and click on VMs tab.

-
Select the VMs that needs to be migrated and right click to select Migrate option.
-
Choose option Cross vCenter Server export, Click Next
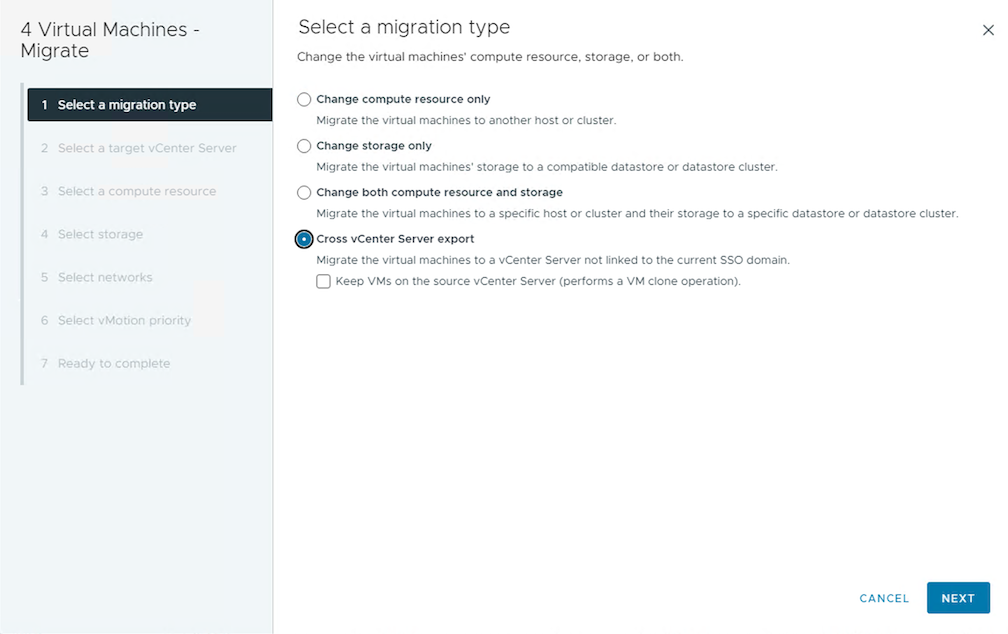
VM can also be imported from the target vCenter server. For that procedure, check Import or Clone a Virtual Machine with Advanced Cross vCenter vMotion -
Provide vCenter credential details and click Login.
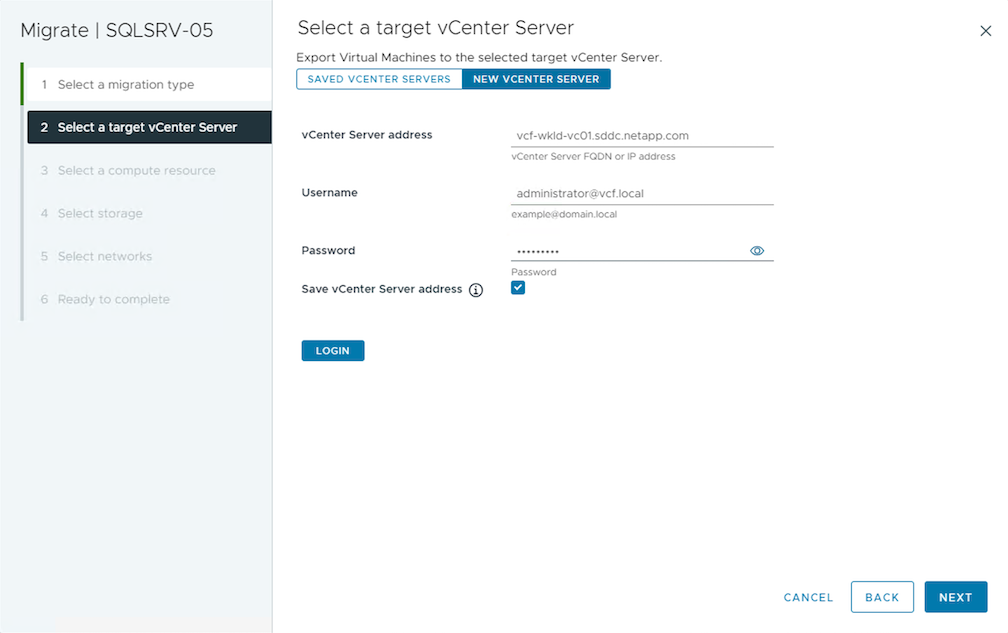
-
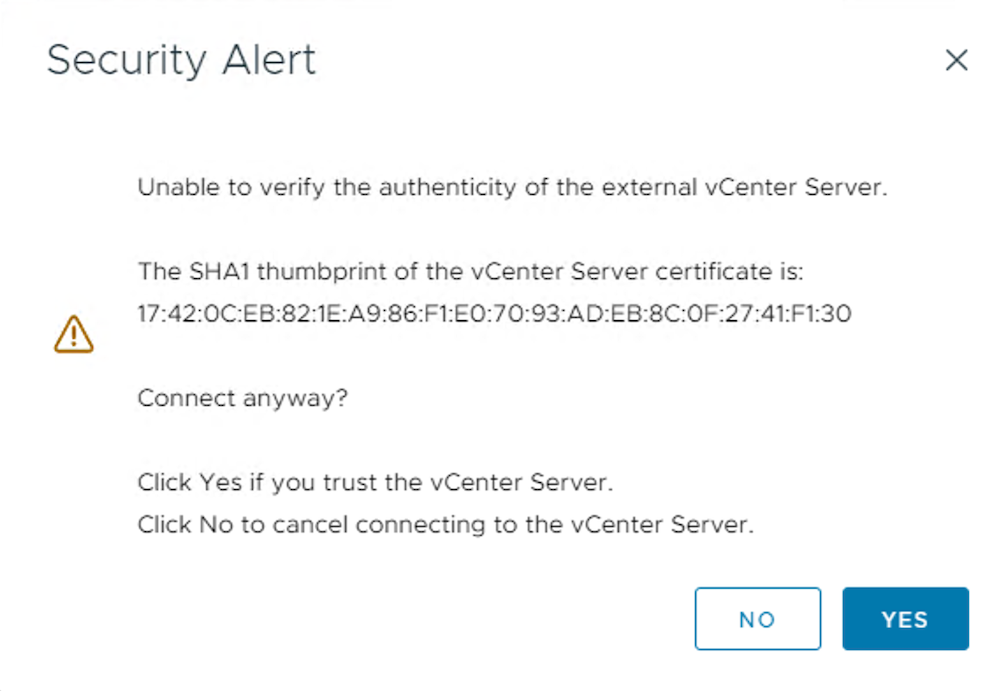
Confirm and Accept the SSL certificate thumbprint of vCenter server
-
Expand target vCenter and select the target compute cluster.

-
Select the target datastore based on the VM Storage Policy.
-
Select the target VM folder.
-
Pick the VM portgroup for each network interface card mapping.
-
Review and click Finish to start the vMotion across the vCenter servers.
To migrate VMs using PowerCLI, here is the sample script.
#Authenticate to Source vCenter
$sourcevc = Connect-VIServer -server vcsa01.sddc.netapp.local -force
$targetvc = Connect-VIServer -server vcsa02.sddc.netapp.local -force

# Get all VMs with filter applied for a specific cluster
$vm = Get-Cluster 'Source Cluster'  -server $sourcevc| Get-VM Win*

#Gather the desired Storage Policy to set for the VMs. Policy should be available with valid datastores.
$storagepolicy = Get-SPBMStoragePolicy 'iSCSI' -server $targetvc

#Migrate VMs to target vCenter
$vm | Move-VM -Destination (Get-Cluster 'Target Cluster' -server $targetvc) -Datastore (Get-SPBMCompatibleStorage -StoragePolicy $storagepolicy -server $targetvc) -PortGroup (Get-VirtualPortGroup 'VLAN 101' -server $targetvc)

$targetvm = Get-Cluster 'Target Cluster' -server $targetvc | Get-VM Win*

#Gather VM Disk info
$targetvmdisk = $targetvm | Get-HardDisk

#set VM Storage Policy for VM config and its data disks.
$targetvm, $targetvmdisk | Get-SPBMEntityConfiguration | Set-SPBMEntityConfiguration -StoragePolicy $storagepolicy

#Ensure VM Storage Policy remains compliant.
$targetvm, $targetvmdisk | Get-SPBMEntityConfiguration
Migration of VMs across datacenter locations
-
When Layer 2 traffic is stretched across datacenters either by using NSX Federation or other options, follow the procedure for migrating VMs across vCenter servers.
-
HCX provides various migration types including Replication Assisted vMotion across the datacenters to move VM without any downtime.
-
Site Recovery Manager (SRM) is typically meant for Disaster Recovery purposes and also often used for planned migration utilizing storage array based replication.
-
Continous Data Protection (CDP) products use vSphere API for IO (VAIO) to intercept the data and send a copy to remote location for near zero RPO solution.
-
Backup and Recovery products can also be utilized. But often results in longer RTO.
-
BlueXP Disaster Recovery as a Service (DRaaS) utilizes storage array based replication and automates certain tasks to recover the VMs at target site.
Migration of VMs in hybrid cloud environment
-
Configure Hybrid Linked Mode and follow the procedure of Migration of VMs across vCenter servers in same SSO domain
-
HCX provides various migration types including Replication Assisted vMotion across the datacenters to move VM while it is powered on.
-
https://docs.netapp.com/us-en/netapp-solutions/ehc/aws-migrate-vmware-hcx.html [TR 4942: Migrate Workloads to FSx ONTAP datastore using VMware HCX]
-
https://docs.netapp.com/us-en/netapp-solutions/ehc/azure-migrate-vmware-hcx.html [TR-4940: Migrate workloads to Azure NetApp Files datastore using VMware HCX - Quickstart guide]
-
https://docs.netapp.com/us-en/netapp-solutions/ehc/gcp-migrate-vmware-hcx.html [Migrate workloads to NetApp Cloud Volume Service datastore on Google Cloud VMware Engine using VMware HCX - Quickstart guide]
-
-
BlueXP Disaster Recovery as a Service (DRaaS) utilizes storage array based replication and automates certain tasks to recover the VMs at target site.
-
With supported Continous Data Protection (CDP) products that use vSphere API for IO (VAIO) to intercept the data and send a copy to remote location for near zero RPO solution.
|
|
When the source VM resides on block vVol datastore, it can be replicated with SnapMirror to Amazon FSx for NetApp ONTAP or Cloud Volumes ONTAP (CVO) at other supported cloud providers and consume as iSCSI volume with cloud native VMs. |
VM Template Migration Scenarios
VM Templates can be managed by vCenter Server or by a content library. Distribution of VM templates, OVF and OVA templates, other types of files are handled by publishing it in local content library and remote content libraries can subscribe to it.
-
VM templates stored on vCenter inventory can be converted to VM and use the VM migration options.
-
OVF and OVA templates, other types of files stored on content library can be cloned to other content libraries.
-
Content library VM Templates can be hosted on any datastore and needs to be added into new content library.
Migration of VM templates hosted on datastore
-
In vSphere Web Client, right click on the VM template under VM and Templates folder view and select option to convert to VM.
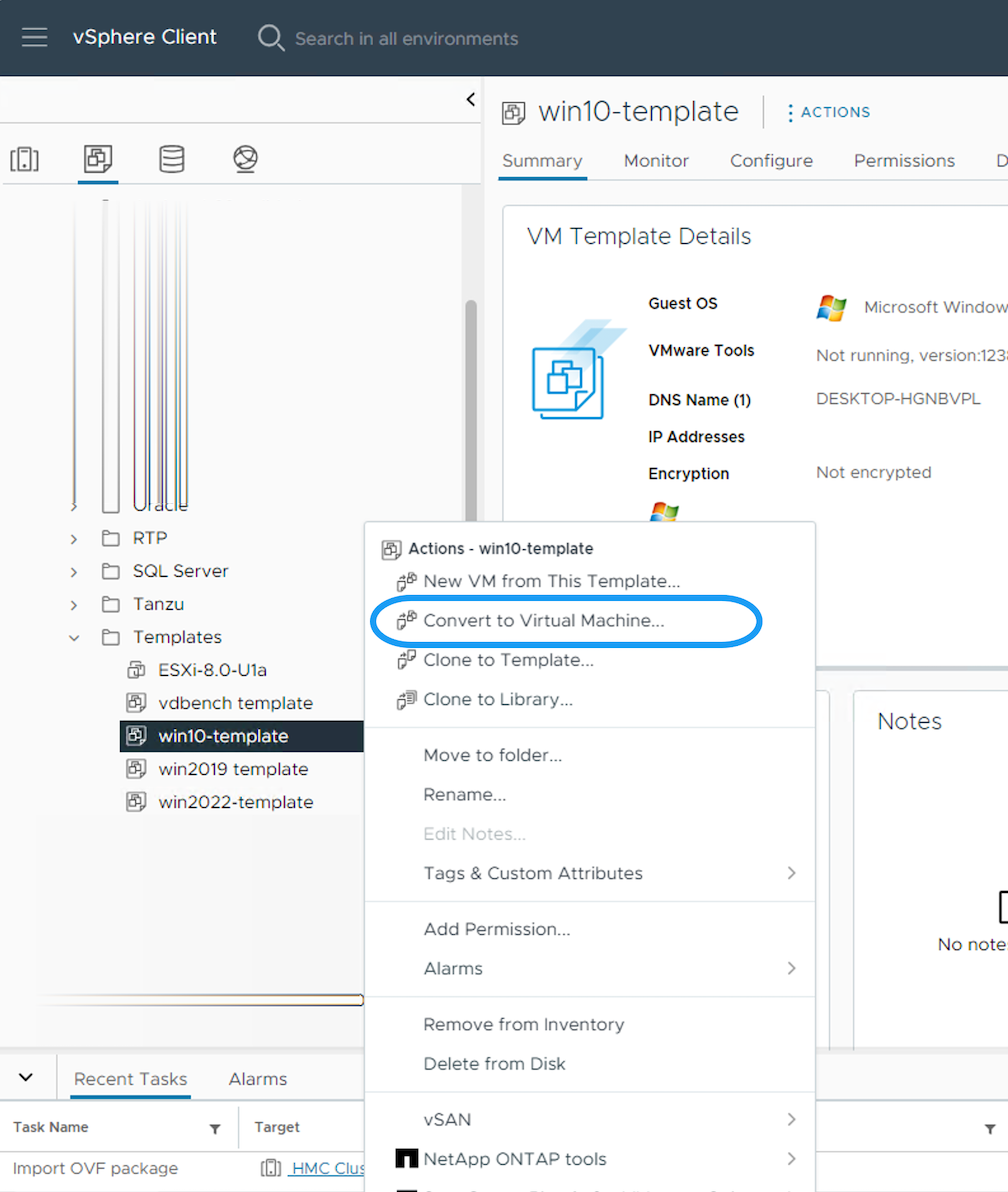
-
Once it is converted as VM, follow the VM migration options.
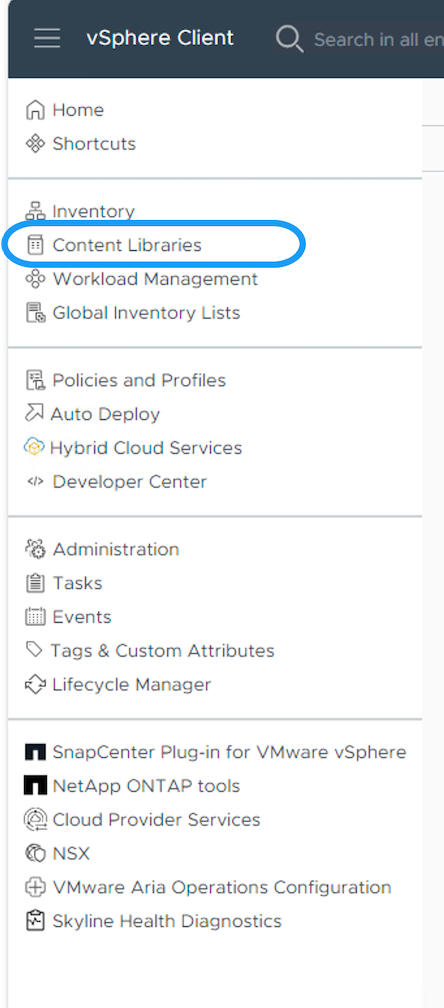
Clone of Content Library items
-
In vSphere Web Client, select Content Libraries
-
Select the content library in which the item you like to clone
-
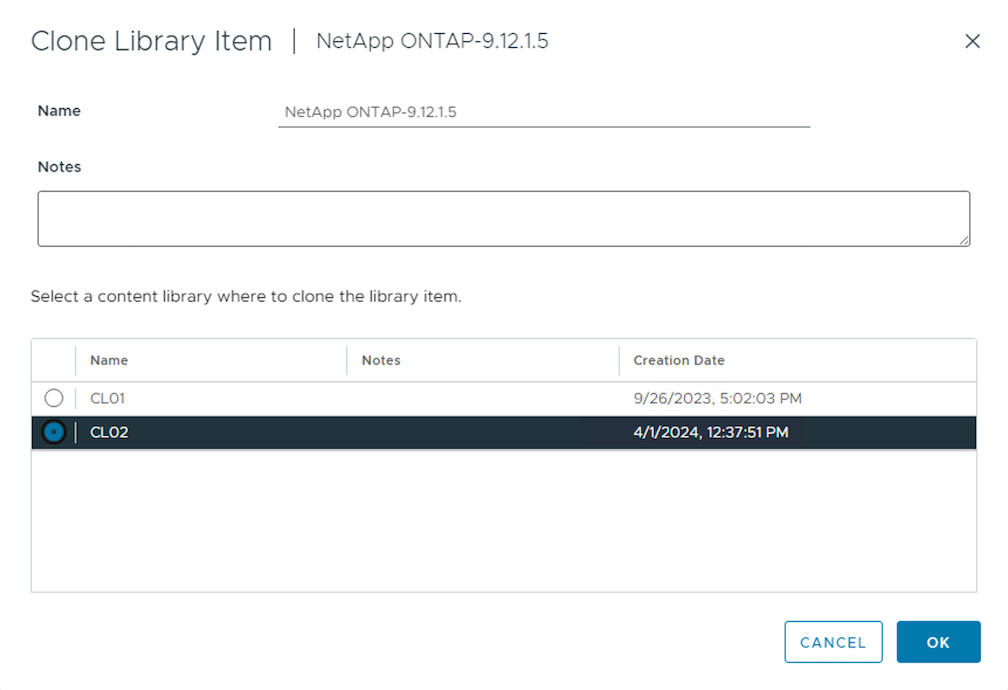
Right click on the item and click on Clone Item ..
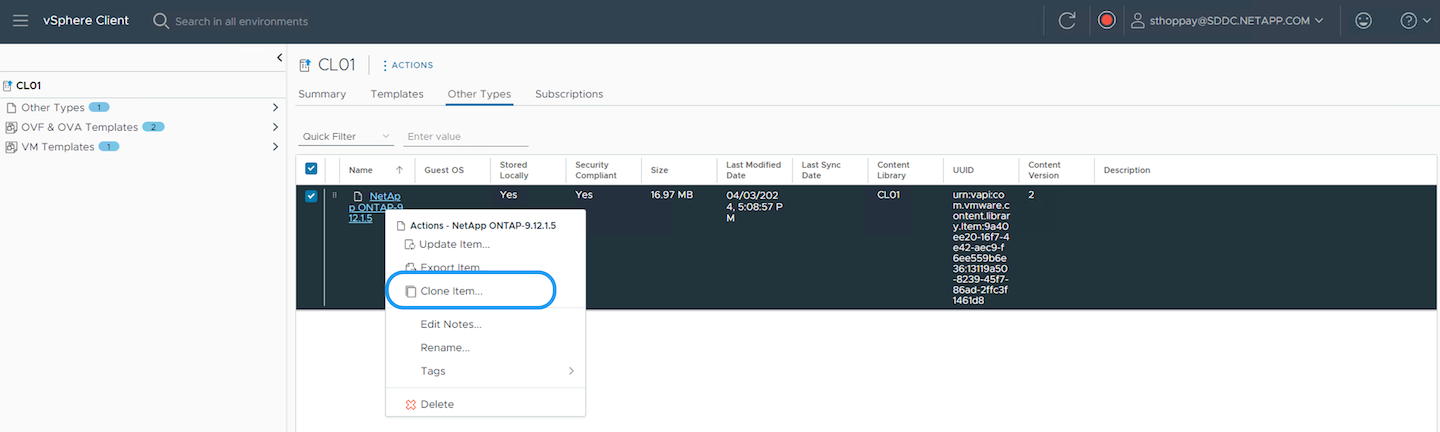

If using action menu, make sure correct target object is listed to perform action. -
Select the target content library and click on OK.
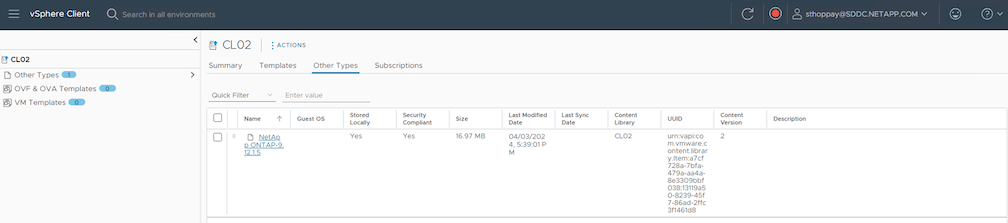
-
Validate the item is available on target content library.
Here is the sample PowerCLI script to copy the content libary items from content library CL01 to CL02.
#Authenticate to vCenter Server(s)
$sourcevc = Connect-VIServer -server 'vcenter01.domain' -force
$targetvc = Connect-VIServer -server 'vcenter02.domain' -force

#Copy content library items from source vCenter content library CL01 to target vCenter content library CL02.
Get-ContentLibaryItem -ContentLibary (Get-ContentLibary 'CL01' -Server $sourcevc) | Where-Object { $_.ItemType -ne 'vm-template' } | Copy-ContentLibaryItem -ContentLibrary (Get-ContentLibary 'CL02' -Server $targetvc)
Adding VM as Templates in Content Library
-
In vSphere Web Client, select the VM and right click to choose Clone as Template in Library
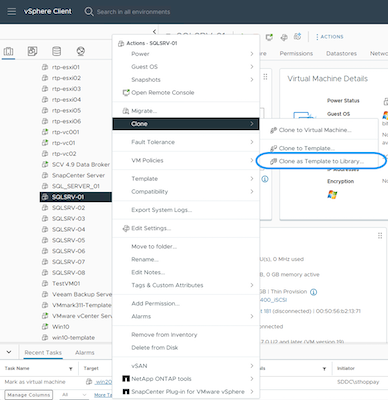
When VM template is selected to clone in libary, it can only store it as OVF & OVA template and not as VM template. -
Confirm Template type is selected as VM Template and follow answering the wizard to complete the operation.
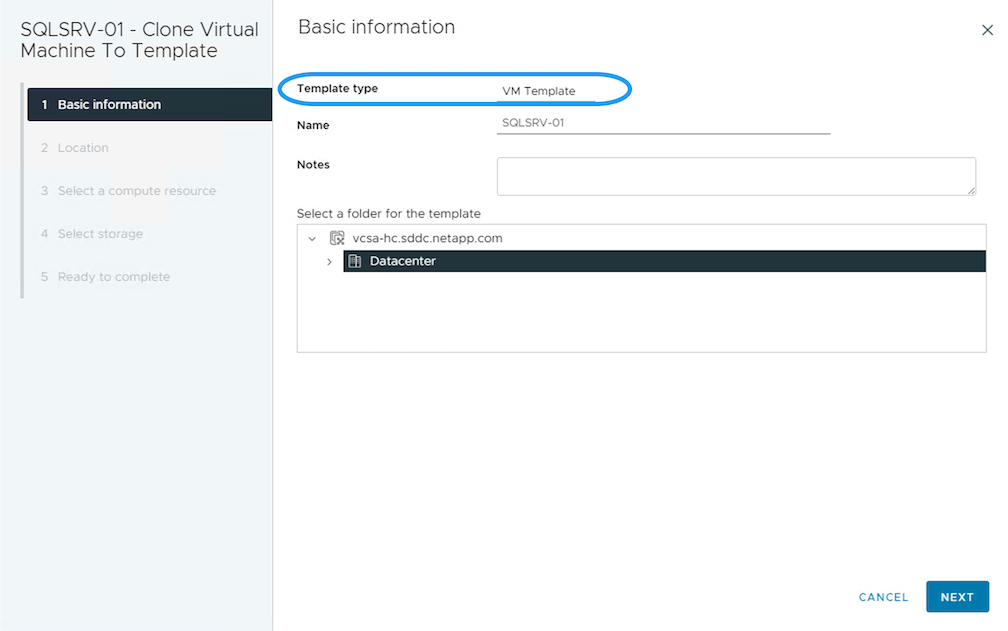
For additional details on VM templates on content library, check vSphere VM administration guide
Use Cases
Migration from third party storage systems (including vSAN) to ONTAP datastores.
-
Based on where the ONTAP datastore is provisioned, pick the VM migration options from above.
Migration from previous version to latest version of vSphere.
-
If in-place upgrade is not possible, can bring up new environment and use the migration options above.
In Cross vCenter migration option, import from target if export option is not available on source. For that procedure, check Import or Clone a Virtual Machine with Advanced Cross vCenter vMotion
Migration to VCF Workload Domain.
-
Migrate VMs from each vSphere Cluster to target workload domain.
To allow network communication with existing VMs on other clusters on source vCenter, either extend NSX segment by adding the source vcenter vSphere hosts to transport zone or use L2 bridge on edge to allow L2 communication in VLAN. Check NSX documentation of Configure an Edge VM for Bridging