

 Artificial Intelligence
Accelerating software development with NetApp FlexClone technology
 Suggest changes
This section outlines how to use NetApp FlexClone technoloty to rapidly deploy the solution.
Overview
Cloning a deployed application in a Kubernetes cluster is a very useful tool for developers that would like to expedite their workflows by sharing environments with partners or by testing new versions of code in a development environment without interfering with the version they are currently working on. The stateful and application-consistent cloning of a Kubernetes application is a major feature included with NetApp Astra Control, alongside the backup and restore of applications. As a bonus, if an application is cloned within the same Kubernetes cluster using the same storage backend, Astra Control defaults to using NetApp FlexClone technology for the duplication of persistent data volumes, speeding up the process significantly. By accelerating this process, the cloned environment is provisioned and available for use in a few moments, allowing developers to resume their work with just a brief pause when compared to redeploying their test or development environment. As an additional convenience, all of the functions available in NetApp Astra Control can be called with an API, which allows for easy integration into automation frameworks like Ansible. Therefore, environments can be staged even more rapidly because only minor changes are needed in a playbook or role to begin the cloning procedure.
What is NetApp FlexClone technology?
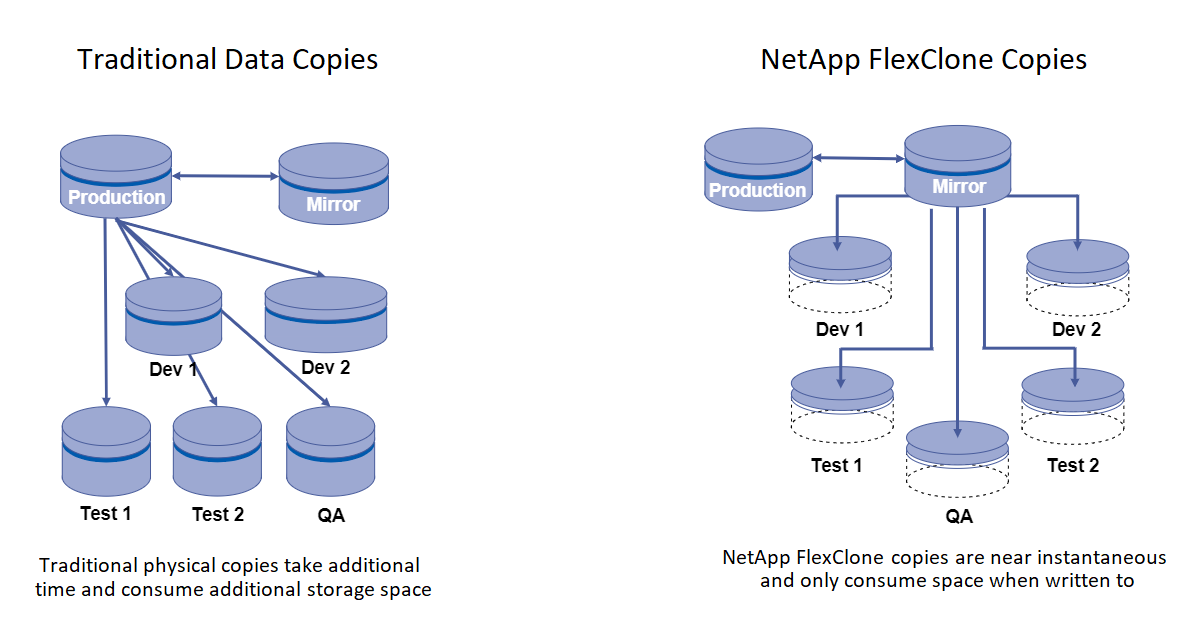
NetApp FlexClone technology is a writeable, point-in-time snapshot-based copy of a NetApp FlexVol. They are provisioned almost instantly, contain all of the data from the source volume, and consume no additional storage space until the data in the new volume begins to diverge from the source. They are often used in development or template-based environments when multiple copies of data are useful for staging purposes and storage systems have limited resources for provisioning these volumes. Compared to a traditional storage system in which data must be copied multiple times resulting in the consumption of significant storage space and time, NetApp FlexClone technology accelerates storage-dependant tasks.
To find out more about NetApp FlexClone technology, visit the page on NetApp Docs.
Prerequisites
-
A supported Kubernetes Distribution, such as Red Hat OpenShift 4.6.8+, Rancher 2.5+, or Kubernetes 1.19+.
-
NetApp Astra Control Center 21.12+.
-
A NetApp ONTAP system with a storage backend configured through NetApp Astra Trident.
-
Ansible 2.9+.
-
Templates for the environments that you'd like to clone as managed applications in NetApp Astra Control.
Use-case introduction
For this use case, we visualize something similar to the following workflow:
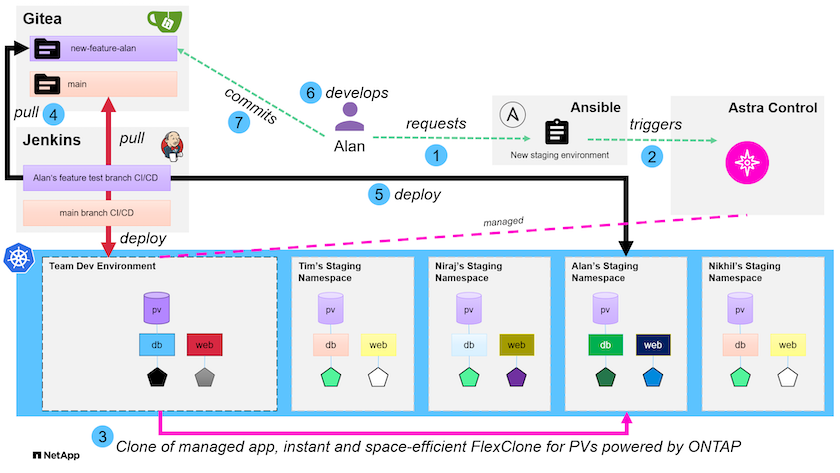
-
A user runs the ansible playbook to create a new staging environment.
-
Ansible uses the URI-API module to call out to Astra Control to execute the cloning operation.
-
Astra Control executes a cloning operation on a preprovisioned template environment, thus creating a new managed application.

This environment can be a single standalone application in development or an entire development environment like a Jenkins CI/CD pipeline. -
The user then pulls a version of their code into the cloned dev environment from an online repository like Gitea.
-
The new version of the application is deployed and managed by NetApp Astra Control.
Both of these processes can be automated. -
The user can develop new code in this cloned environment.
-
When the user is satisfied with their development efforts, they can push the code back to the hosted repository.
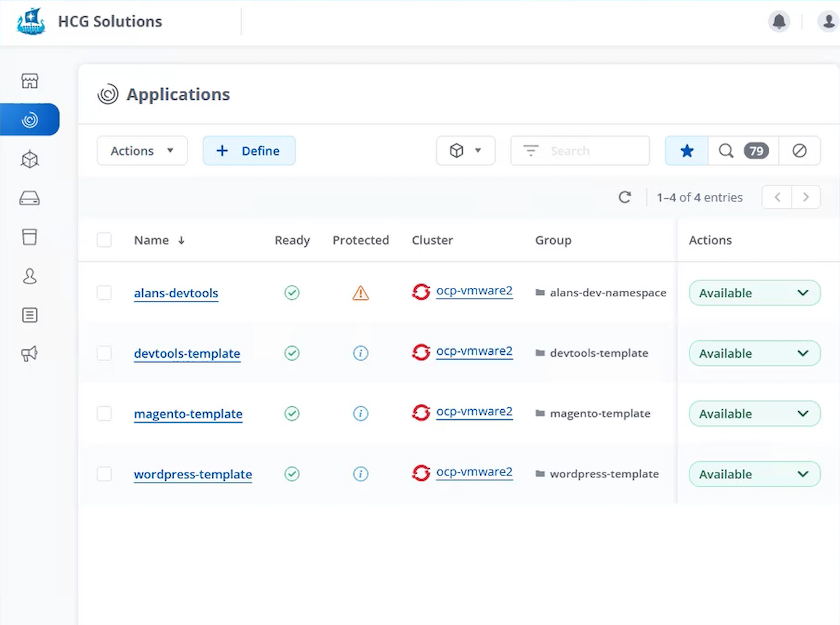
The use case presented here depends on the existence of golden templates for the particular environments or applications you would like to clone. In our environment we have created three such templates, one for a Wordpress deployment, one for a Magento deployment, and one for a Jenkins CI/CD environment with Gitea that we have titled DevTools.

Each of these environments is managed by NetApp Astra control, with persistent volumes currently stored on a NetApp ONTAP storage system with an NFS backend provided by NetApp Astra Trident.
Use-case validation
-
Clone the ansible toolkit provided by the NetApp Solutions Engineering team, which includes the cloning role and the application update playbook.
[netapp-user@rhel7 ~]$ git clone https://github.com/NetApp-Automation/na_astra_control_suite.git
[netapp-user@rhel7 ~]$ cd na_astra_control_suite
-
Edit
vars/clone_vars.ymland fill in the global values that fit your Astra Control environment.astra_control_fqdn: astra-control-center.example.com astra_control_account_id: "xxxx-xxxx-xxxx-xxxx-xxxx" astra_control_api_token: "xxxxx"
The global environment values you need to fill out are available under the user profile icon in NetApp Astra Control under the API Access menu. 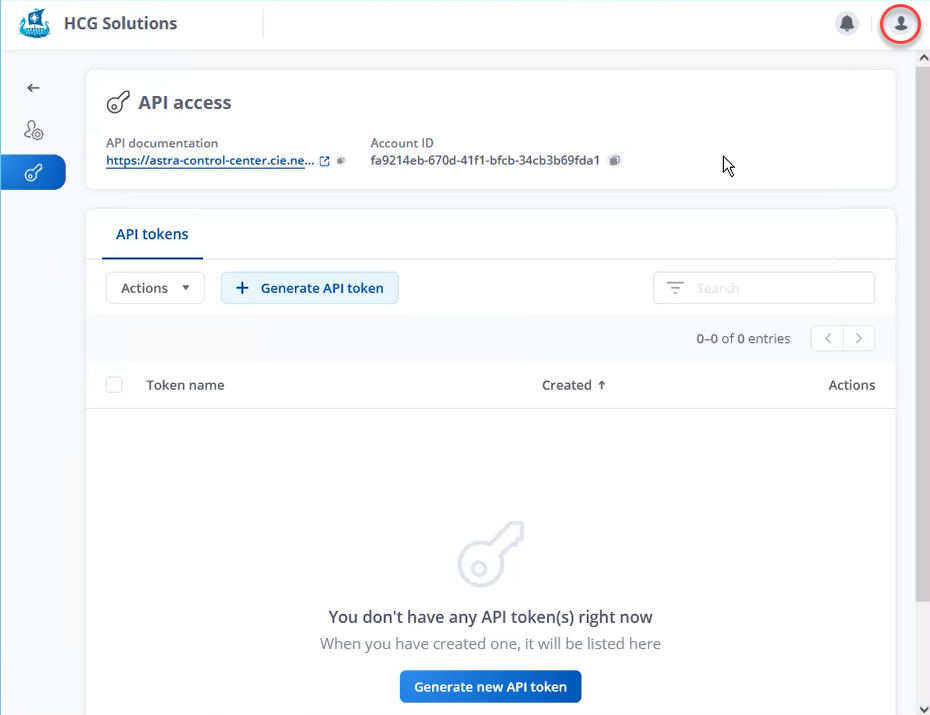
-
With the global variables completed, you can choose the values for the specific application you wish to clone. To clone the devtools environment to a personal environment called
alan-devtools, you would do the following:clone_details: - clone_name: alan-devtools destination_namespace: alan-dev-namespace source_cluster_name: ocp-vmware2 destination_cluster_name: ocp-vmware2 source_application_name: devtools-template
To take advantage of NetApp FlexClone technology in the cloning process, src-clusteranddest-clustermust be the same. -
You can now execute the playbook to clone the application.
[netapp-user@rhel7 na_astra_control_suite]$ ansible-playbook -K clone_app_playbook.yml]
The playbook as written must be run by the root user or someone that can escalate through the sudo process by passing the "-K" argument. -
When the playbook completes its run, the cloned application shows as available in the Astra Control Center console.
-
A user can then log into the Kubernetes environment where the application was deployed, verify that the application is exposed with a new IP address, and start their development work.
For a demonstration of this use case and a example of upgrading an application, watch the video below.