Configure LDAP (Create a new NFS-enabled SVM)
 Suggest changes


If you want the storage virtual machine (SVM) to get user information from Active Directory-based Lightweight Directory Access Protocol (LDAP), you must create an LDAP client, enable it for the SVM, and give LDAP priority over other sources of user information.
-
The LDAP configuration must be using Active Directory (AD).
If you use another type of LDAP, you must use the command-line interface (CLI) and other documentation to configure LDAP. For more information, see Overview of using LDAP.
-
You must know the AD domain and servers, as well as the following binding information: the authentication level, the Bind user and password, the base DN, and the LDAP port.
-
Navigate to the SVMs window.
-
Select the required SVM
-
Click the SVM Settings tab.
-
Set up an LDAP client for the SVM to use:
-
In the Services pane, click LDAP Client.
-
In the LDAP Client Configuration window, click Add.
-
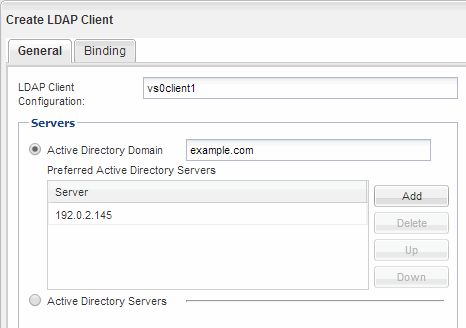
In the General tab of the Create LDAP Client window, type the name of the LDAP client configuration, such as
vs0client1. -
Add either the AD domain or the AD servers.

-
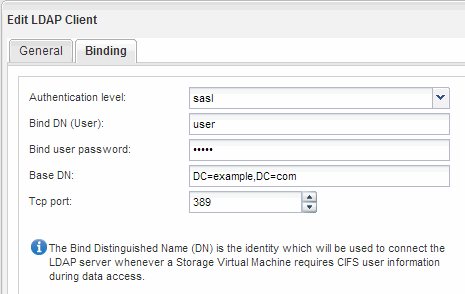
Click Binding, and specify the authentication level, the Bind user and password, the base DN, and the port.

-
Click Save and Close.
A new client is created and available for the SVM to use.
-
-
Enable the new LDAP client for the SVM:
-
In the navigation pane, click LDAP Configuration.
-
Click Edit.
-
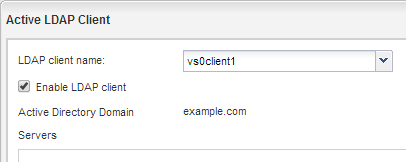
Ensure that the client you just created is selected in LDAP client name.
-
Select Enable LDAP client, and click OK.

The SVM uses the new LDAP client.
-
-
Give LDAP priority over other sources of user information, such as Network Information Service (NIS) and local users and groups:
-
Navigate to the SVMs window.
-
Select the SVM and click Edit.
-
Click the Services tab.
-
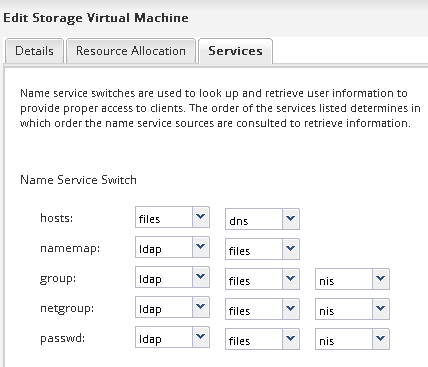
Under Name Service Switch, specify LDAP as the preferred name service switch source for the database types.
-
Click Save and Close.

LDAP is the primary source of user information for name services and name mapping on this SVM.
-


