Dataset-to-model Traceability with NetApp and MLflow
 Suggest changes


The NetApp DataOps Toolkit for Kubernetes can be used in conjunction with MLflow's experiment tracking capabilities in order to implement code-to-dataset, dataset-to-model or workspace-to-model traceability.
The following libraries were used in the example notebook:
Pre-requisites
To implement code-dataset-model or workspace-to-model traceability, simply create a snapshot of your dataset or workspace volume using the DataOps Toolkit as part of your training run, as shown the following example code snippet. This code will save the data volume name and snapshot name as tags associated with the specific training run that you are logging to your MLflow experiment tracking server.
...
from netapp_dataops.k8s import cloneJupyterLab, createJupyterLab, deleteJupyterLab, \
listJupyterLabs, createJupyterLabSnapshot, listJupyterLabSnapshots, restoreJupyterLabSnapshot, \
cloneVolume, createVolume, deleteVolume, listVolumes, createVolumeSnapshot, \
deleteVolumeSnapshot, listVolumeSnapshots, restoreVolumeSnapshot


mlflow.set_tracking_uri("<your_tracking_server_uri>>:<port>>")
    os.environ['MLFLOW_HTTP_REQUEST_TIMEOUT'] = '500'  # Increase to 500 seconds
    mlflow.set_experiment(experiment_id)
    with mlflow.start_run() as run:
        latest_run_id = run.info.run_id
        start_time = datetime.now()

        # Preprocess the data
        preprocess(input_pdf_file_path, to_be_cleaned_input_file_path)

        # Print out sensitive data (passwords, SECRET_TOKEN, API_KEY found)
        check_pretrain(to_be_cleaned_input_file_path)

        # Tokenize the input file
        pretrain_tokenization(to_be_cleaned_input_file_path, model_name, tokenized_output_file_path)

        # Load the tokenizer and model
        tokenizer = GPT2Tokenizer.from_pretrained(model_name)
        model = GPT2LMHeadModel.from_pretrained(model_name)

        # Set the pad token
        tokenizer.pad_token = tokenizer.eos_token
        tokenizer.add_special_tokens({'pad_token': '[PAD]'})

        # Encode, generate, and decode the text
        with open(tokenized_output_file_path, 'r', encoding='utf-8') as file:
            content = file.read()
        encode_generate_decode(content, decoded_output_file_path, tokenizer=tokenizer, model=model)

        # Save the model
        model.save_pretrained(model_save_path)
        tokenizer.save_pretrained(model_save_path)

        # Finetuning here
        with open(decoded_output_file_path, 'r', encoding='utf-8') as file:
            content = file.read()
        model.finetune(content, tokenizer=tokenizer, model=model)

        # Evaluate the model using NLTK
        output_set = Dataset.from_dict({"text": [content]})
        test_set = Dataset.from_dict({"text": [content]})
        scores = nltk_evaluation_gpt(output_set, test_set, model=model, tokenizer=tokenizer)
        print(f"Scores: {scores}")

        # End time and elapsed time
        end_time = datetime.now()
        elapsed_time = end_time - start_time
        elapsed_minutes = elapsed_time.total_seconds() // 60
        elapsed_seconds = elapsed_time.total_seconds() % 60

        # Create DOTK snapshots for code, dataset, and model
        snapshot = createVolumeSnapshot(pvcName="model-pvc", namespace="default", printOutput=True)

        #Log snapshot IDs to MLflow
        mlflow.log_param("code_snapshot_id", snapshot)
        mlflow.log_param("dataset_snapshot_id", snapshot)
        mlflow.log_param("model_snapshot_id", snapshot)

        # Log parameters and metrics to MLflow
        mlflow.log_param("wf_start_time", start_time)
        mlflow.log_param("wf_end_time", end_time)
        mlflow.log_param("wf_elapsed_time_minutes", elapsed_minutes)
        mlflow.log_param("wf_elapsed_time_seconds", elapsed_seconds)

        mlflow.log_artifact(decoded_output_file_path.rsplit('/', 1)[0])  # Remove the filename to log the directory
        mlflow.log_artifact(model_save_path) # log the model save path

        print(f"Experiment ID: {experiment_id}")
        print(f"Run ID: {latest_run_id}")
        print(f"Elapsed time: {elapsed_minutes} minutes and {elapsed_seconds} seconds")
The above code snippet logs the snapshot IDs to the MLflow experiment tracking server, which can be used to trace back to the specific dataset and model that were used to train the model. This will allow you to trace back to the specific dataset and model that were used to train the model, as well as the specific code that was used to preprocess the data, tokenize the input file, load the tokenizer and model, encode, generate, and decode the text, save the model, finetune the model, evaluate the model using NLTK perplexity scores, and log the hyperparameters and metrics to MLflow. For example, the following figure shows the mean-squared error (MSE) of a scikit-learn model for different experiment runs:

It is straightforward for data analysis, line-of-business owners, and executives to understand and infer which model performs the best under your particular constraints, settings, time period, and other circumstances. For more details on how to preprocess, tokenize, load, encode, generate, decode, save, finetune, and evaluate the model, refer to the dotk-mlflow packaged Python example in the netapp_dataops.k8s repository.
For more details on how to create snapshots of your dataset or JupyterLab workspace, refer to the NetApp DataOps Toolkit page.
Regarding the models that were trained, the following models were used in the dotk-mlflow notebook:
Models
-
GPT2LMHeadModel: The GPT2 Model transformer with a language modeling head on top (linear layer with weights tied to the input embeddings). It is a transformer model that has been pre-trained on a large corpus of text data and finetuned on a specific dataset. We used the default GPT2 model attention mask to batching input sequences with corresponding tokenizer for your model of choice.
-
Phi-2: Phi-2 is a Transformer with 2.7 billion parameters. It was trained using the same data sources as Phi-1.5, augmented with a new data source that consists of various NLP synthetic texts and filtered websites (for safety and educational value).
-
XLNet (based-sized model): XLNet model pre-trained on English language. It was introduced in the paper XLNet: Generalized Autoregressive Pretraining for Language Understanding by Yang et al. and first released in this repository.
The resulting Model Registry in MLflow will contain the following random forest models, versions, and tags:
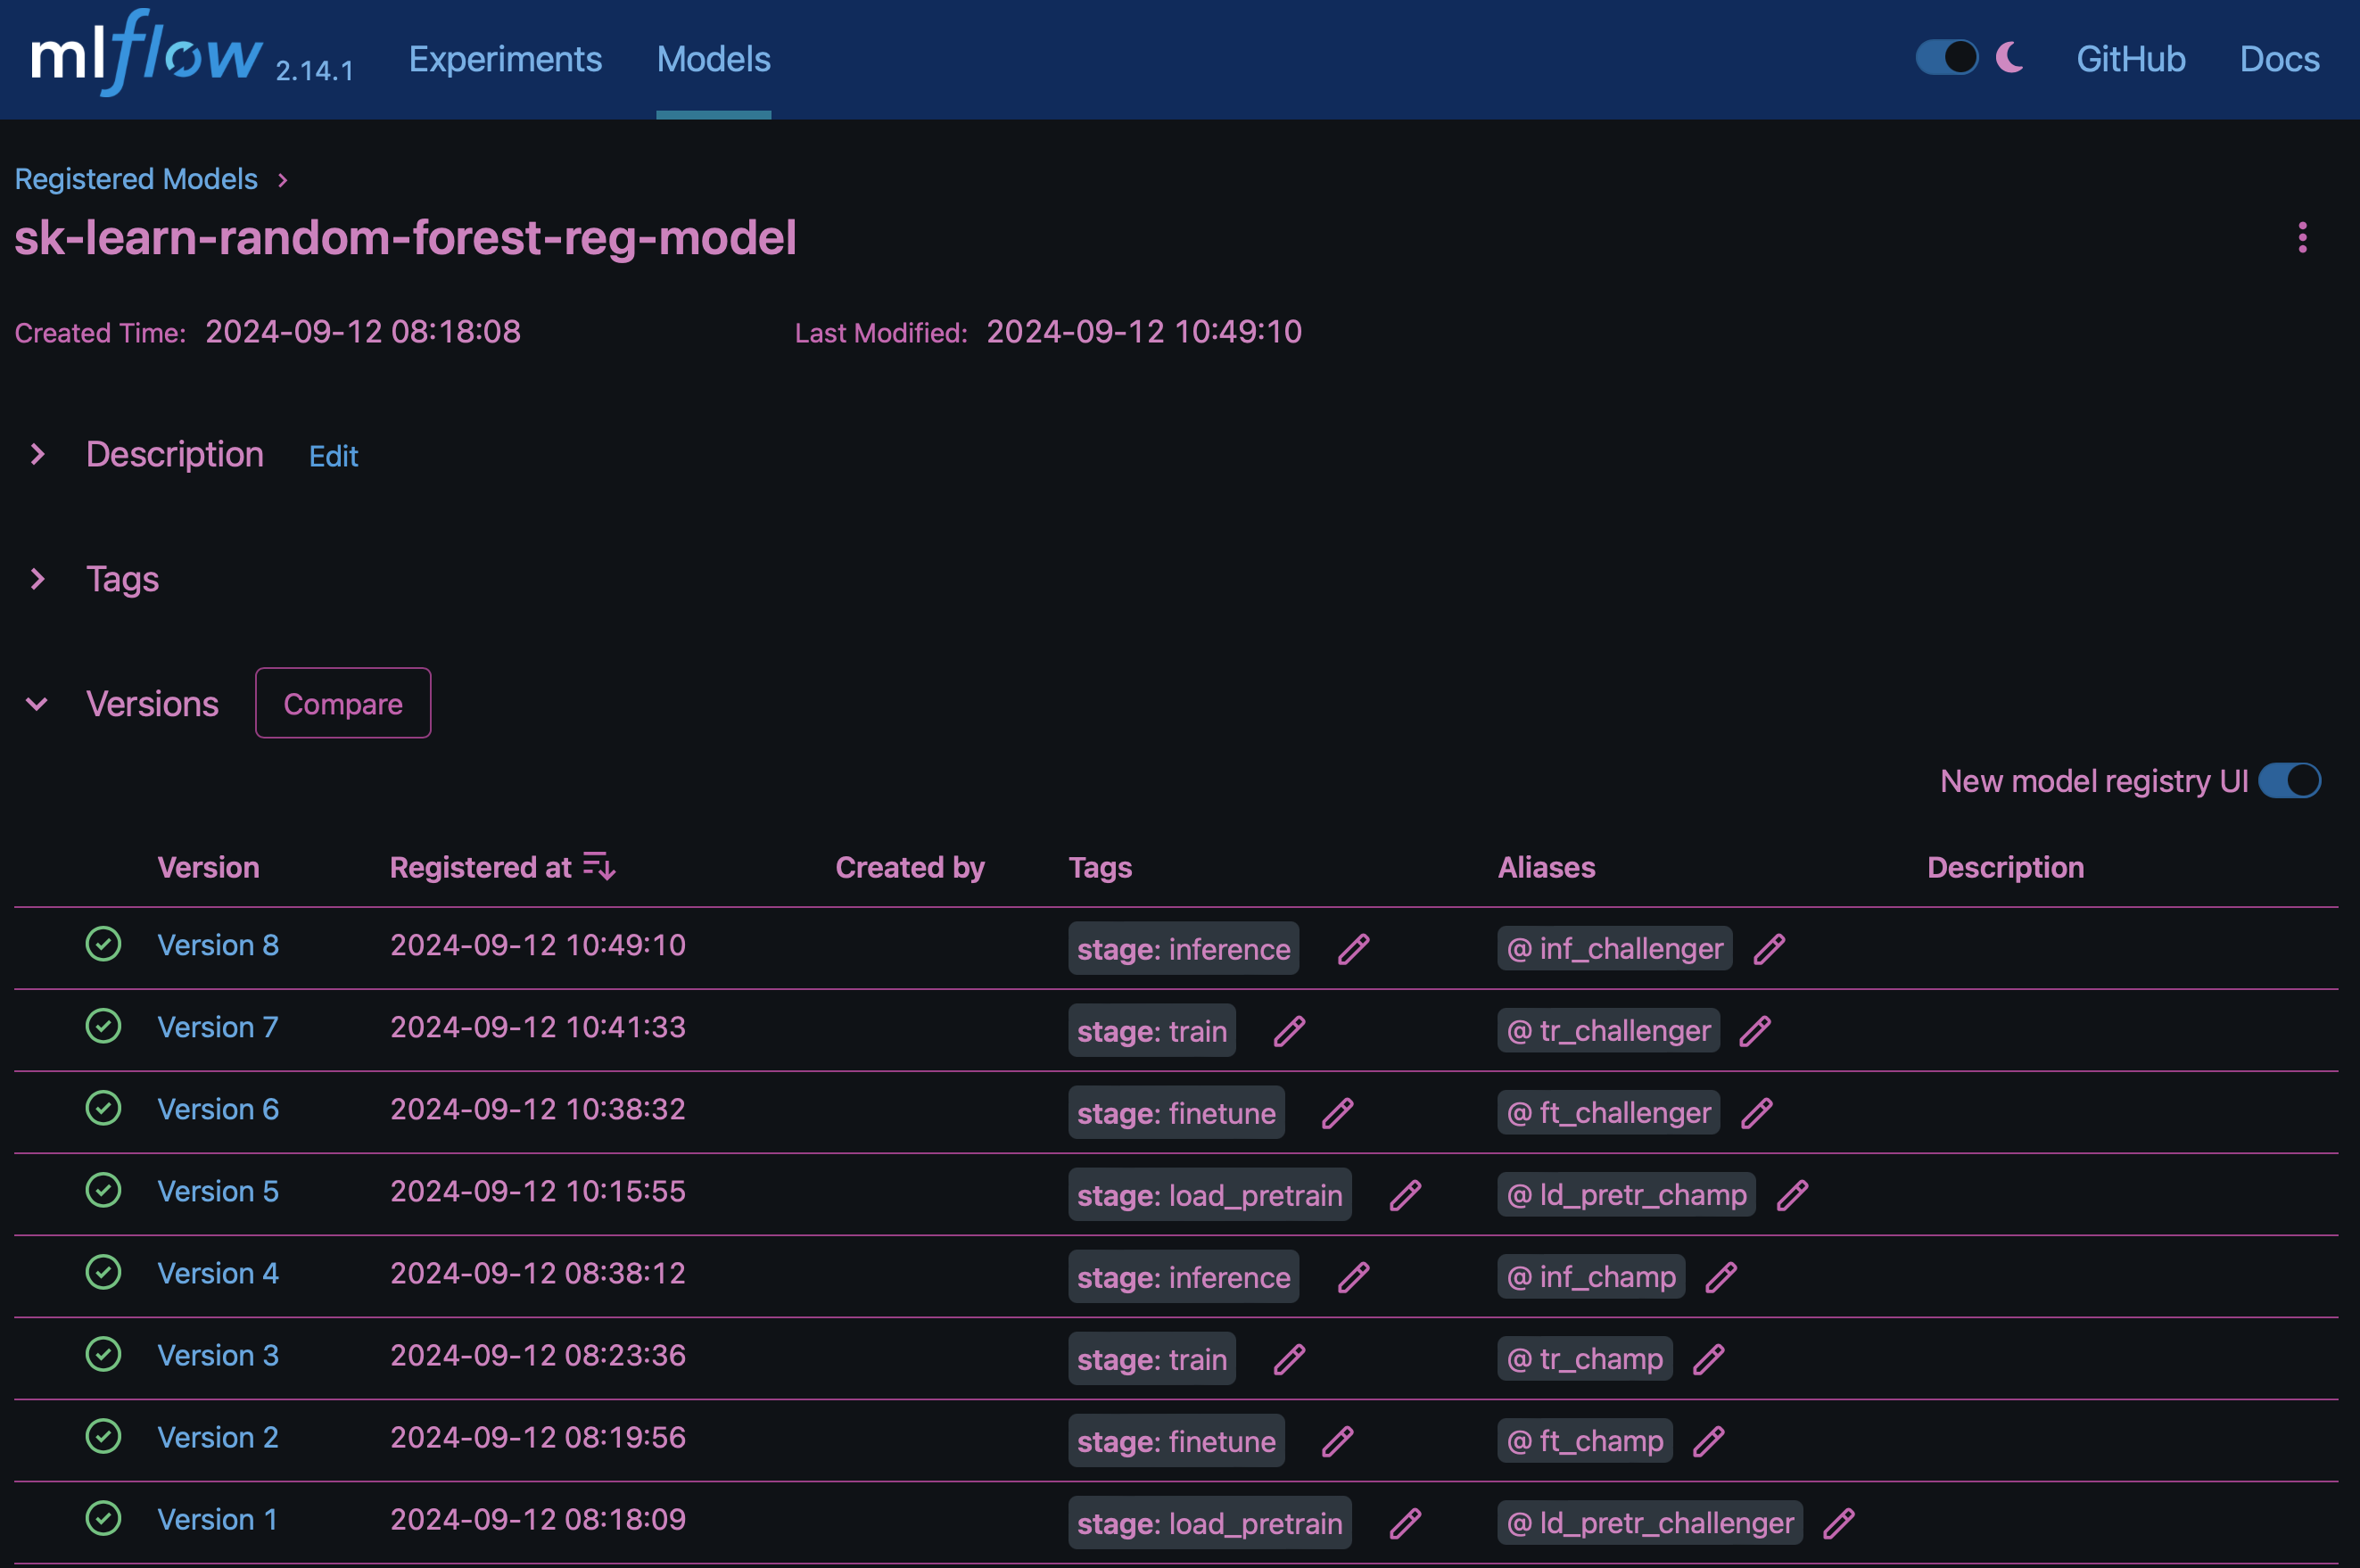
To deploy the model to an inference server via Kubernetes, simply run the following Jupyter Notebook. Note that in this example instead of using the dotk-mlflow package, we are modifying the random forest regression model architecture to minimize the mean-squared error (MSE) in the initial model, and therefore creating multiple versions of such model in our Model Registry.
from mlflow.models import Model
mlflow.set_tracking_uri("http://<tracking_server_URI_with_port>")
experiment_id='<your_specified_exp_id>'

# Alternatively, you can load the Model object from a local MLmodel file
# model1 = Model.load("~/path/to/my/MLmodel")

from sklearn.datasets import make_regression
from sklearn.ensemble import RandomForestRegressor
from sklearn.metrics import mean_squared_error
from sklearn.model_selection import train_test_split

import mlflow
import mlflow.sklearn
from mlflow.models import infer_signature

# Create a new experiment and get its ID
experiment_id = mlflow.create_experiment(experiment_id)

# Or fetch the ID of the existing experiment
# experiment_id = mlflow.get_experiment_by_name("<your_specified_exp_id>").experiment_id

with mlflow.start_run(experiment_id=experiment_id) as run:
    X, y = make_regression(n_features=4, n_informative=2, random_state=0, shuffle=False)
    X_train, X_test, y_train, y_test = train_test_split(
        X, y, test_size=0.2, random_state=42
    )
    params = {"max_depth": 2, "random_state": 42}
    model = RandomForestRegressor(**params)
    model.fit(X_train, y_train)

    # Infer the model signature
    y_pred = model.predict(X_test)
    signature = infer_signature(X_test, y_pred)

    # Log parameters and metrics using the MLflow APIs
    mlflow.log_params(params)
    mlflow.log_metrics({"mse": mean_squared_error(y_test, y_pred)})

    # Log the sklearn model and register as version 1
    mlflow.sklearn.log_model(
        sk_model=model,
        artifact_path="sklearn-model",
        signature=signature,
        registered_model_name="sk-learn-random-forest-reg-model",
    )
The execution result of your Jupyter Notebook cell should be similar to the following, with the model being registered as version 3 in the Model Registry:
Registered model 'sk-learn-random-forest-reg-model' already exists. Creating a new version of this model...
2024/09/12 15:23:36 INFO mlflow.store.model_registry.abstract_store: Waiting up to 300 seconds for model version to finish creation. Model name: sk-learn-random-forest-reg-model, version 3
Created version '3' of model 'sk-learn-random-forest-reg-model'.
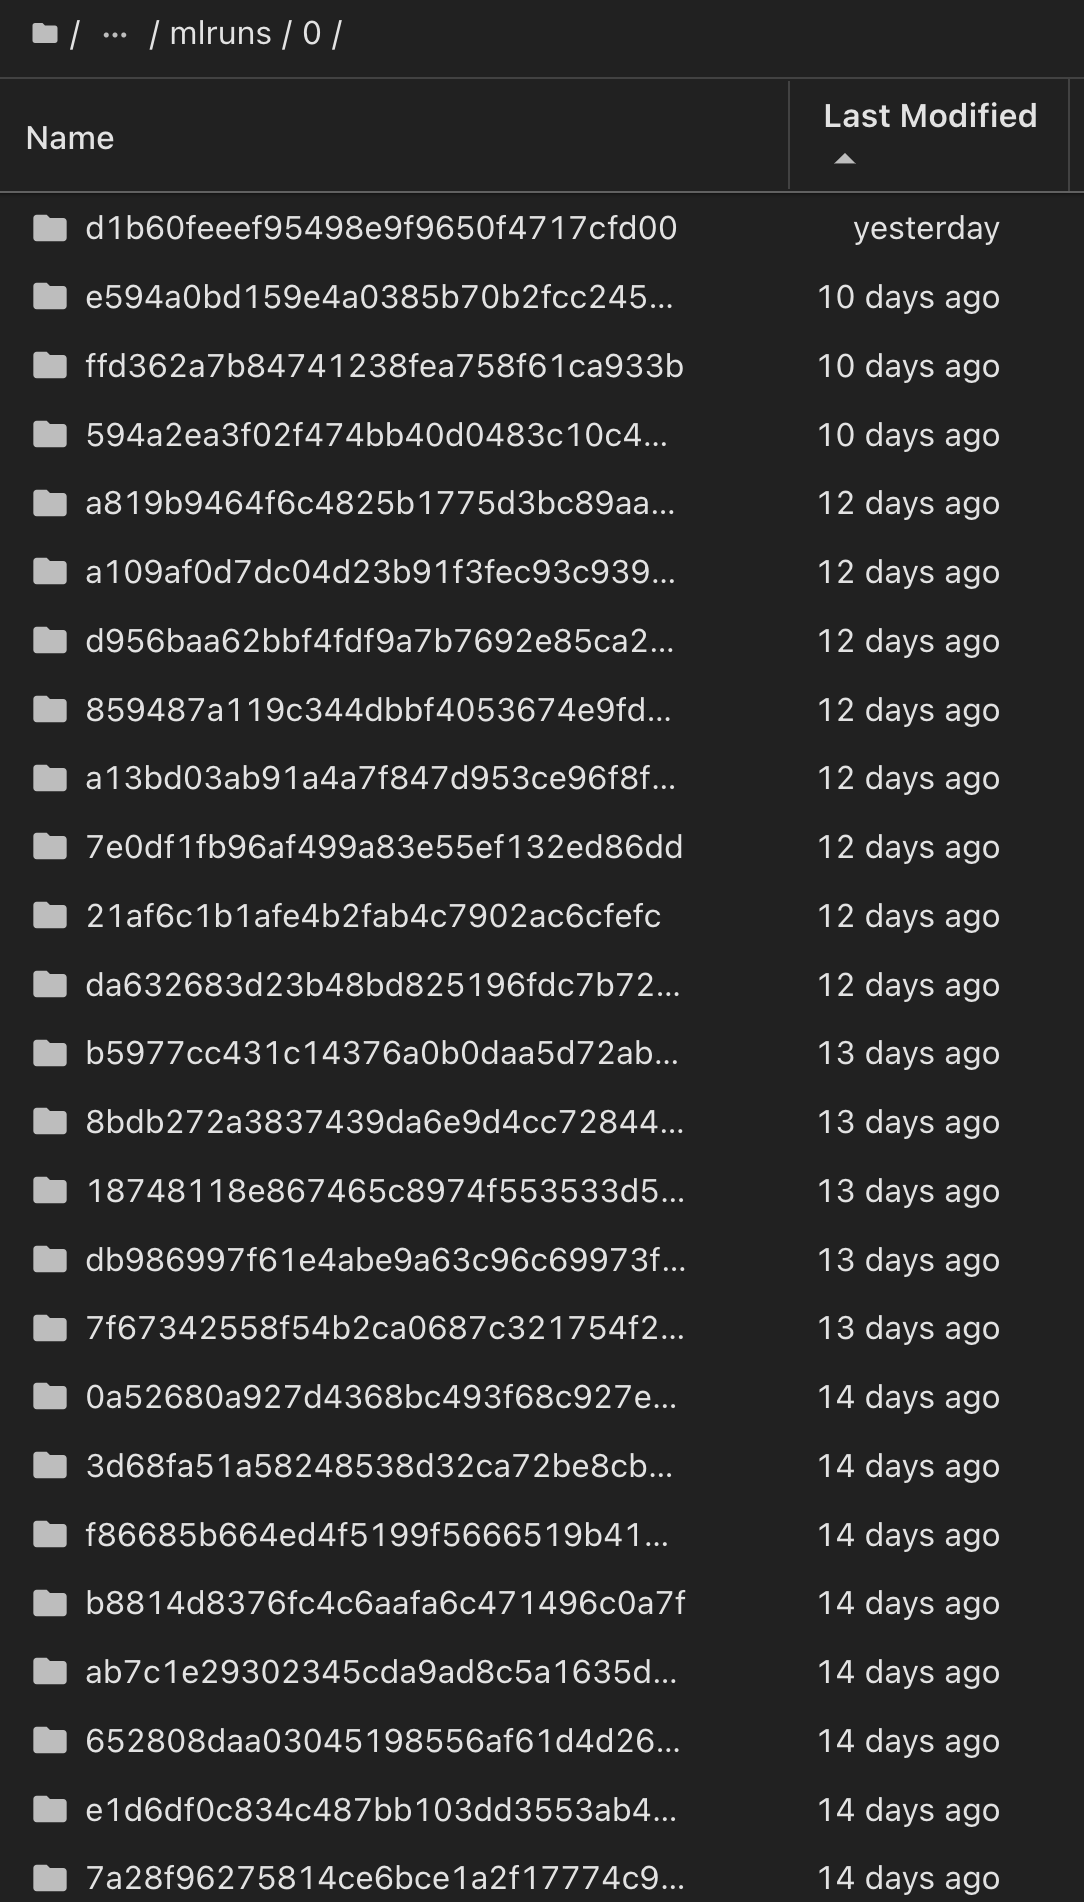
In the Model Registry, after saving your desired models, versions, and tags, it is possible to trace back to the specific dataset, model, and code that were used to train the model, as well as the specific code that was used to process the data, load the tokenizer and model, encode, generate, and decode the text, save the model, finetune the model, evaluate the model using NLTK perplexity scores or other suitable metrics, and log the hyperparameters, snapshot_id's and your chosen metrics to MLflow by choosing the corerct experiment under `mlrun folder from the JupyterHub current active tabs dropdown menu:
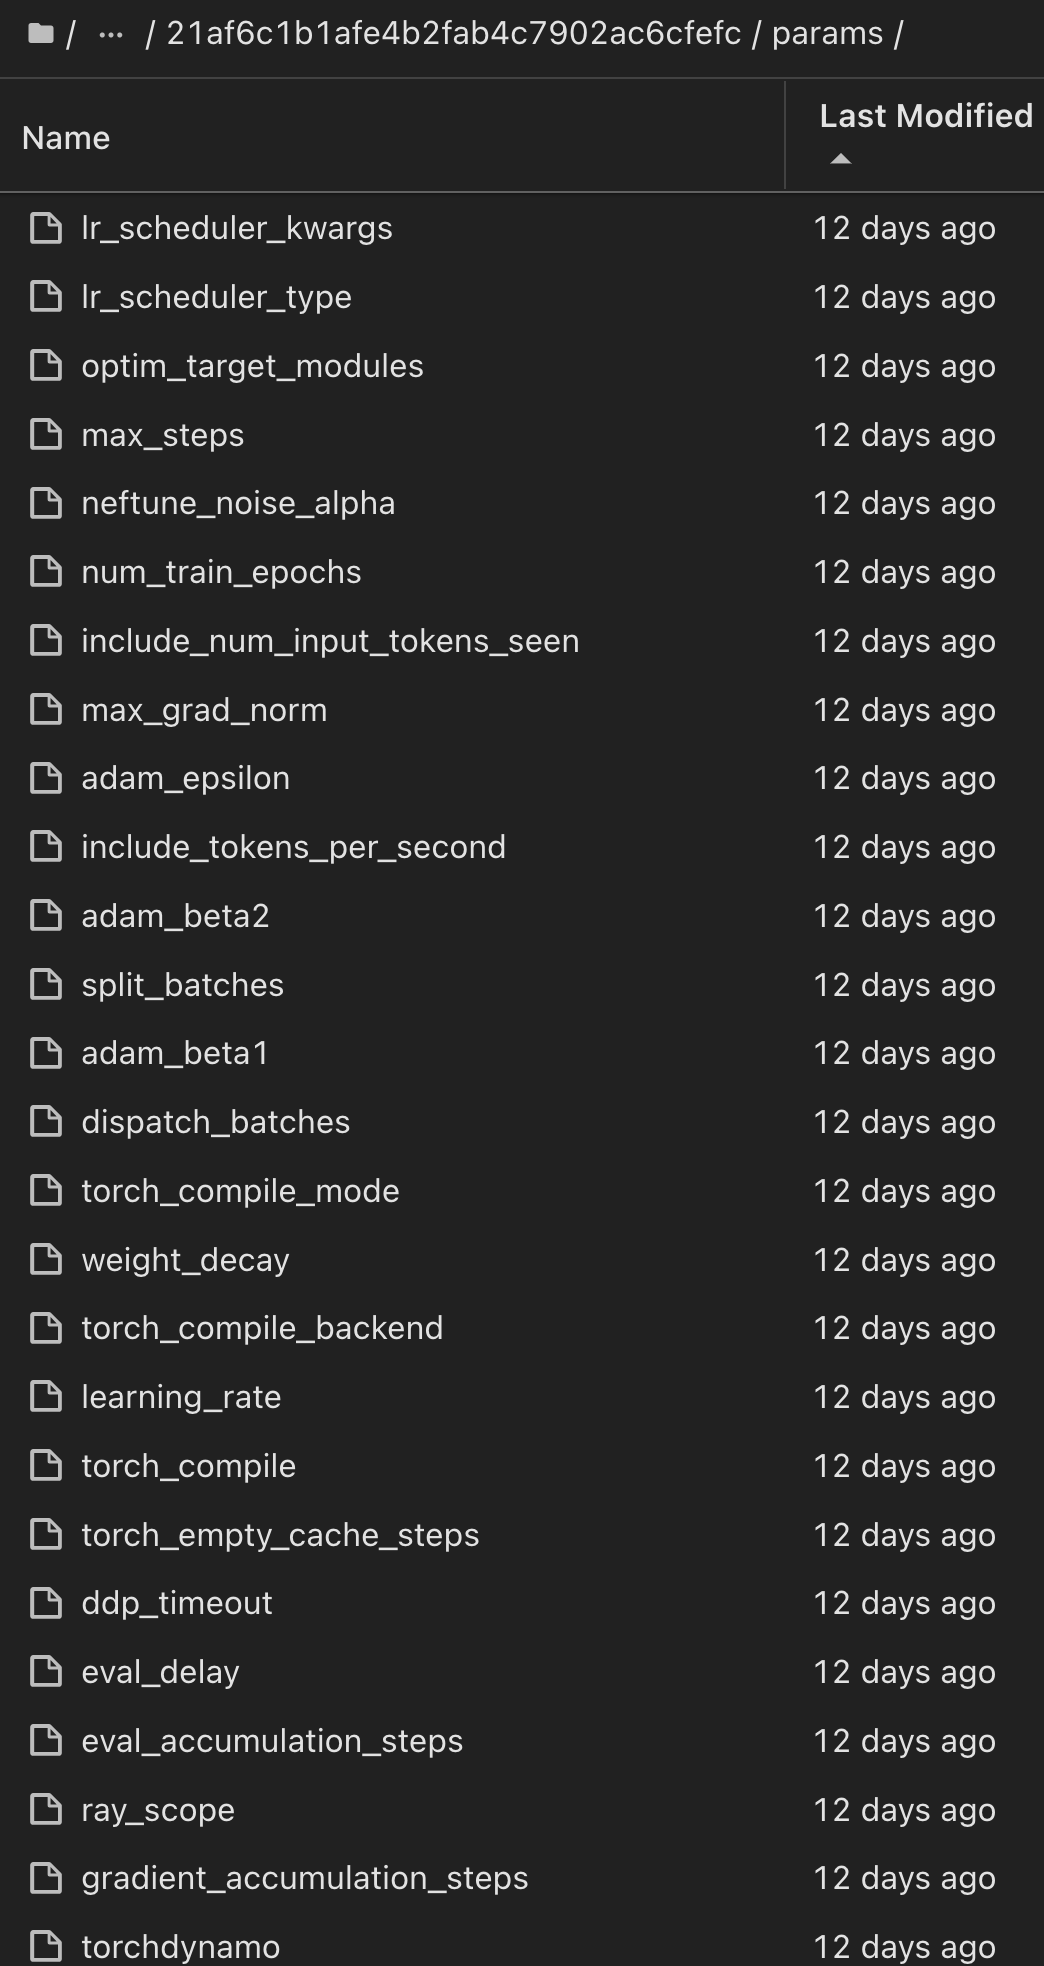
Similarly, for our phi-2_finetuned_model whose quantized weights were calculated via GPU or vGPU using the torch library, we can inspect the following intermediate artifacts, which would enable the performance optimization, scalability (throughput/SLA gaurantee) and cost reduction of the entire workflow:
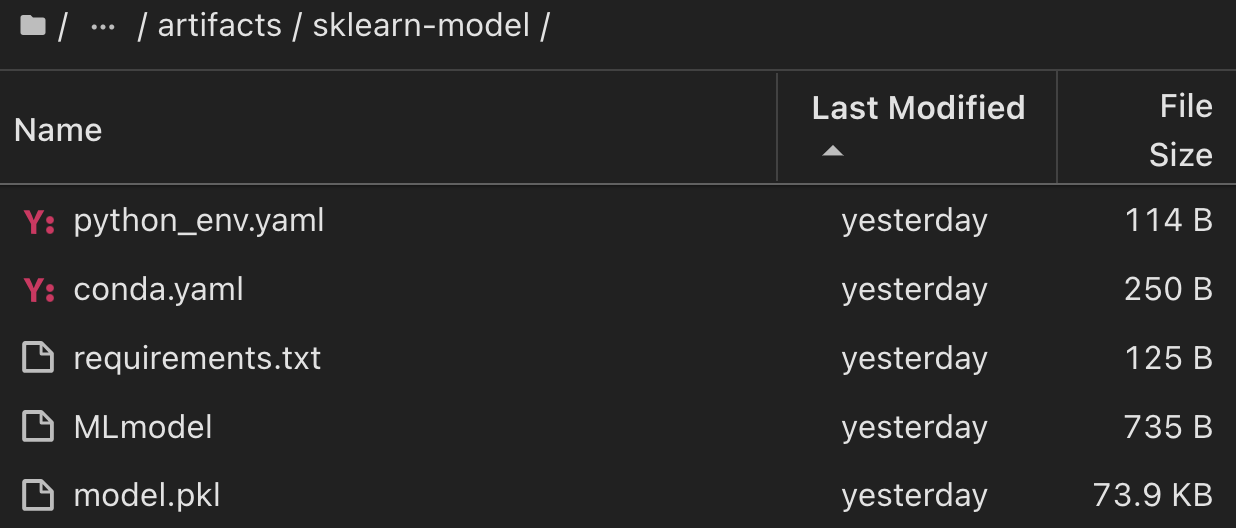
For a single experiment run using Scikit-learn and MLflow, the following figure displays the artifacts generated, conda environment, MLmodel file, and MLmodel directory:
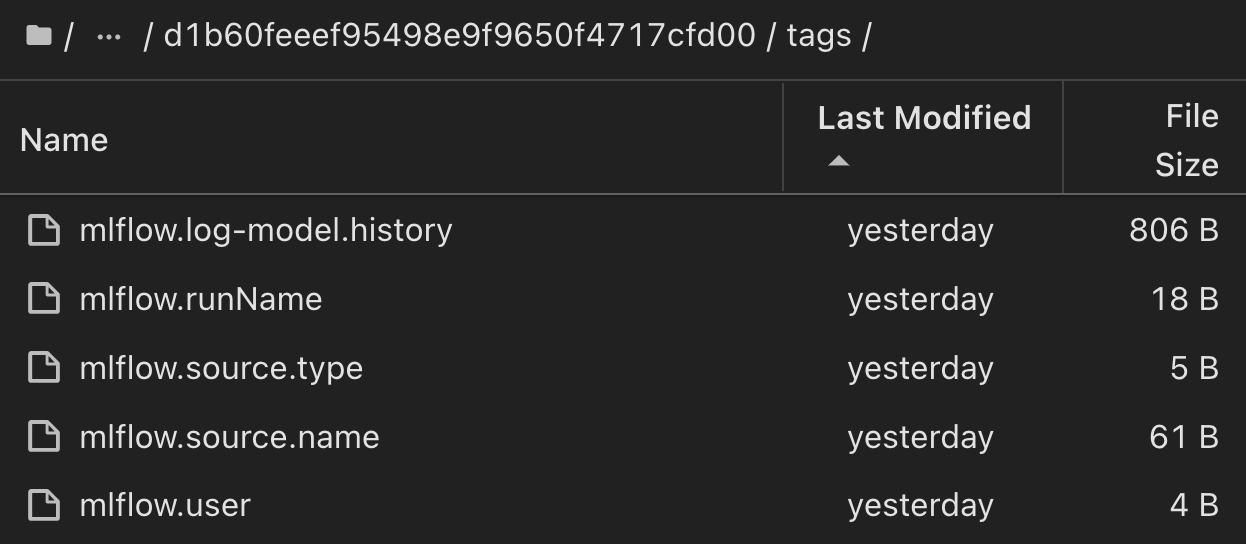
Customers may specify tags, e.g., "default", "stage", "process", "bottleneck" to organize different charateristics of their AI workflow runs, note their latest results, or set contributors to track the data science team developer progress. If For the default tag " ", your saved mlflow.log-model.history, mlflow.runName, mlflow.source.type, mlflow.source.name, and mlflow.user under JupyterHub currently active file navigator tab:
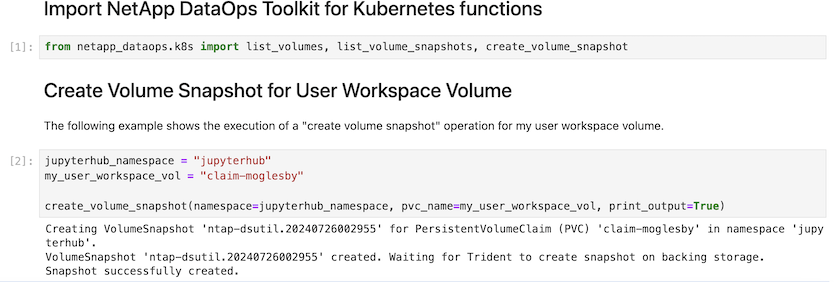
Finally, users have their own specified Jupyter Workspace, which is versioned and stored in a persistent volume claim (PVC) in the Kubernetes cluster. The following figure displays the Jupyter Workspace, which contains the netapp_dataops.k8s Python package, and the results of a succesfully created VolumeSnapshot:
Our industry-proven Snapshot® and other technologies were used to ensure enterprise-level data protection, movement, and efficient compression. For other AI use cases, refer to the NetApp AIPod documentation.


 Artificial Intelligence