

 Release notes
Remove the controller module - AFF A700s
 Suggest changes
-
 PDF of this doc site
Collection of separate PDF docs
Creating your file...
You must remove the controller module from the chassis when you replace the controller module or replace a component inside the controller module.
-
If you are not already grounded, properly ground yourself.
-
Loosen the hook and loop strap binding the cables to the cable management device, and then unplug the system cables and SFPs (if needed) from the controller module, keeping track of where the cables were connected.
Leave the cables in the cable management device so that when you reinstall the cable management device, the cables are organized.
-
Unplug the controller module power supply from the source, and then unplug the cable from the power supply.
-
Remove the cable management device from the controller module and set it aside.
-
Press down on both of the locking latches, and then rotate both latches downward at the same time.
The controller module moves slightly out of the chassis.
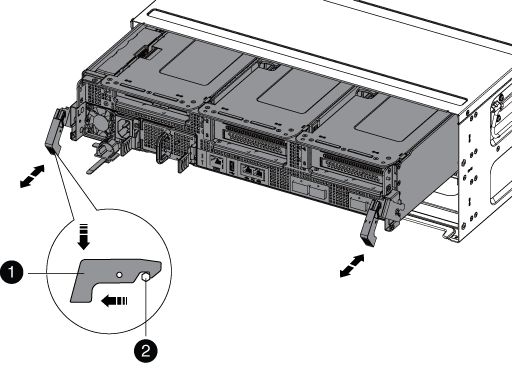

Locking latch

Locking pin
-
Slide the controller module out of the chassis.
Make sure that you support the bottom of the controller module as you slide it out of the chassis.
-
Place the controller module on a stable, flat surface, and then open the air duct:
-
Press in the locking tabs on the sides of the air duct toward the middle of the controller module.
-
Slide the air duct toward the fan modules, and then rotate it upward to its completely open position.
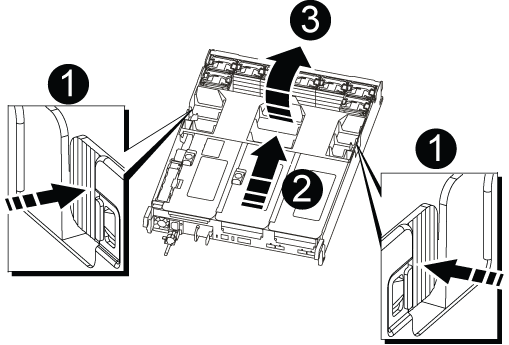
Air duct locking tabs
Risers

Air duct
-