

Editing a traffic classification policy
 Suggest changes
You can edit a traffic classification policy to change its name or description, or to create, edit, or delete any rules or limits for the policy.
-
You must be signed in to the Grid Manager using a supported browser.
-
You must have the Root Access permission.
-
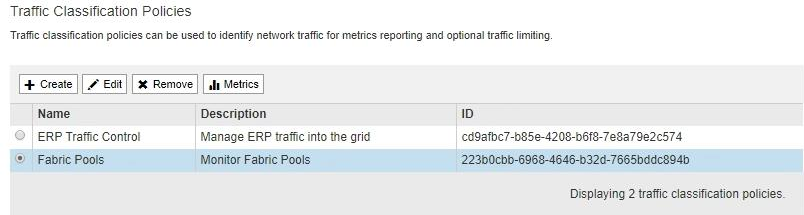
Select Configuration > Network Settings > Traffic Classification.
The Traffic Classification Policies page appears, and the existing policies are listed in the table.
-
Select the radio button to the left of the policy you want to edit.
-
Click Edit.
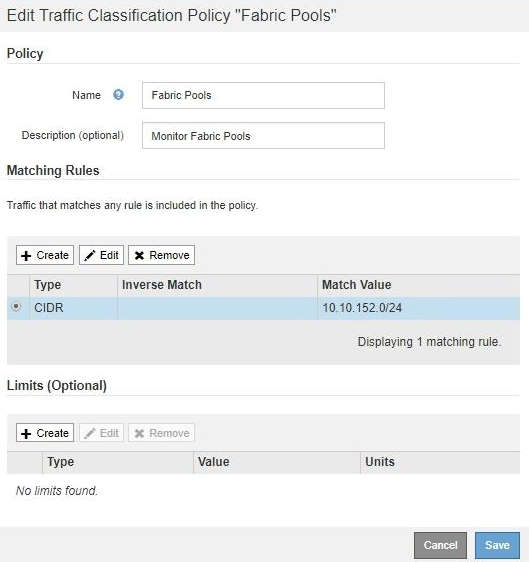
The Edit Traffic Classification Policy dialog box appears.
-
Create, edit, or remove matching rules and limits as needed.
-
To create a matching rule or limit, click Create, and follow the instructions for creating a rule or creating a limit.
-
To edit a matching rule or limit, select the radio button for the rule or limit, click Edit in the Matching Rules section or the Limits section, and follow the instructions for creating a rule or creating a limit.
-
To remove a matching rule or limit, select the radio button for the rule or limit, and click Remove. Then, click OK to confirm that you want to remove the rule or limit.
-
-
When you are finished creating or editing a rule or a limit, click Apply.
-
When you are finished editing the policy, click Save.
The changes you made to the policy are saved, and network traffic is now handled according to the traffic classification policies. You can view traffic charts and verify that the polices are enforcing the traffic limits you expect.