Viewing and editing group details
 Suggest changes


When you view the details for a group, you can change the group's display name, permissions, policies, and the users that belong to the group.
-
You must be signed in to the Tenant Manager using a supported browser.
-
You must belong to a user group that has the Root Access permission.
-
Select ACCESS MANAGEMENT > Groups.
-
Select the name of the group whose details you want to view or edit.
Alternatively, you can select Actions > View group details.
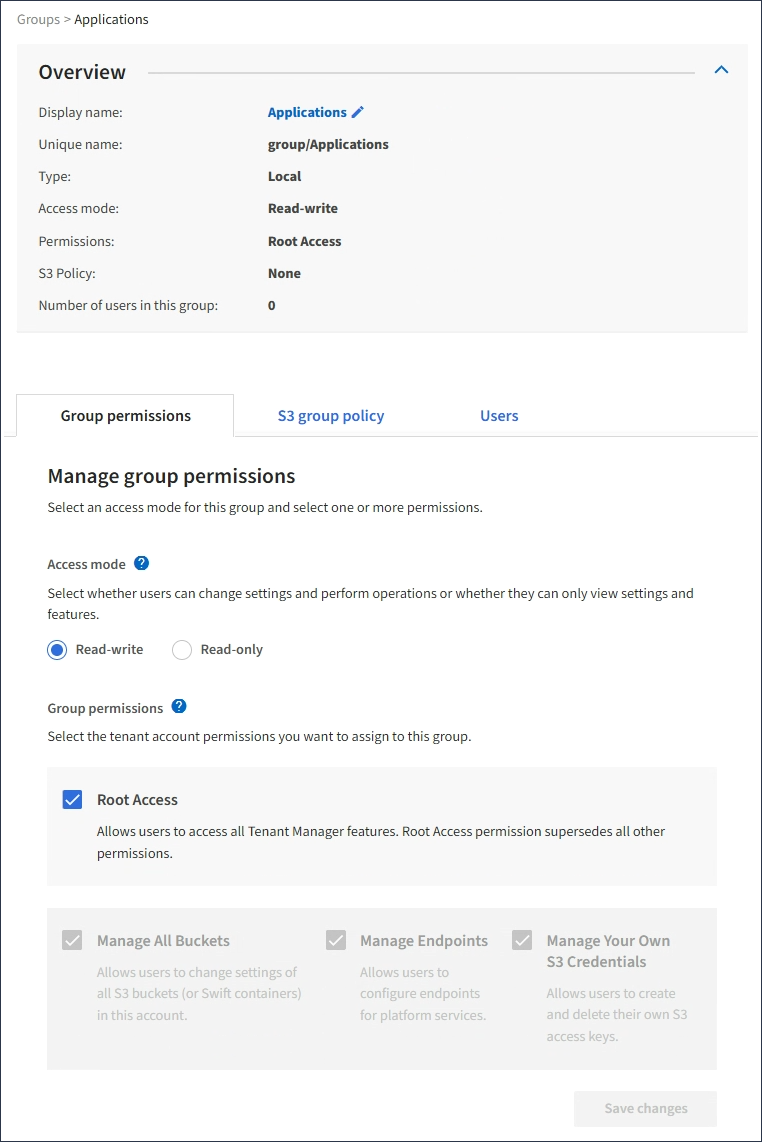
The group details page appears. The following example shows the S3 group details page.

-
Make changes to the group settings as needed.
To ensure your changes are saved, select Save changes after you make changes in each section. When your changes are saved, a confirmation message appears in the upper right corner of the page. -
Optionally, select the display name or edit icon
 to update the display name.
You cannot change a group's unique name. You cannot edit the display name for a federated group.
-
Optionally, update the permissions.
-
For group policy, make the appropriate changes for your S3 or Swift tenant.
-
If you are editing a group for an S3 tenant, optionally select a different S3 group policy. If you select a custom S3 policy, update the JSON string as required.
-
If you are editing a group for a Swift tenant, optionally select or unselect the Swift Administrator check box.
For more information about the Swift Administrator permission, see the instructions for creating groups for a Swift tenant.
-
-
Optionally, add or remove users.
-
-
Confirm that you have selected Save changes for each section you changed.
Changes might take up to 15 minutes to take effect because of caching.


