

Deploy services appliance as Gateway or non-primary Admin Node
 Suggest changes
When you deploy a services appliance as a Gateway Node or non-primary Admin Node, you use the StorageGRID Appliance Installer included on the appliance.
-
The appliance has been installed in a rack or cabinet, connected to your networks, and powered on.
-
Network links, IP addresses, and port remapping (if necessary) have been configured for the appliance using the StorageGRID Appliance Installer.

If you have remapped any ports, you cannot use the same ports to configure load balancer endpoints. You can create endpoints using remapped ports, but those endpoints will be remapped to the original CLB ports and service, not the Load Balancer service. Follow the steps in Remove port remaps. 
The CLB service is deprecated. -
The primary Admin Node for the StorageGRID system has been deployed.
-
All Grid Network subnets listed on the IP Configuration page of the StorageGRID Appliance Installer have been defined in the Grid Network Subnet List on the primary Admin Node.
-
You have a service laptop with a supported web browser.
-
You know the IP address assigned to the appliance. You can use the IP address for any attached StorageGRID network.
To install StorageGRID on a services appliance node:
-
You specify or confirm the IP address of the primary Admin Node and the name of the appliance node.
-
You start the installation and wait as the software is installed.
Partway through the appliance Gateway Node installation tasks, the installation pauses. To resume the installation, you sign into the Grid Manager, approve all grid nodes, and complete the StorageGRID installation process. The installation of a non-primary Admin Node does not require your approval.
|
|
Do not deploy the SG100 and SG1000 service appliances in the same site. Unpredictable performance might result. |
|
|
If you need to deploy multiple appliance nodes at one time, you can automate the installation process by using the configure-sga.py Appliance Installation script. You can also use the Appliance Installer to upload a JSON file that contains configuration information. See Automate appliance installation and configuration (SG100 and SG1000) for more information on automating the installation.
|
-
Open a browser, and enter the IP address for the appliance.
https://Controller_IP:8443The StorageGRID Appliance Installer Home page appears.
-
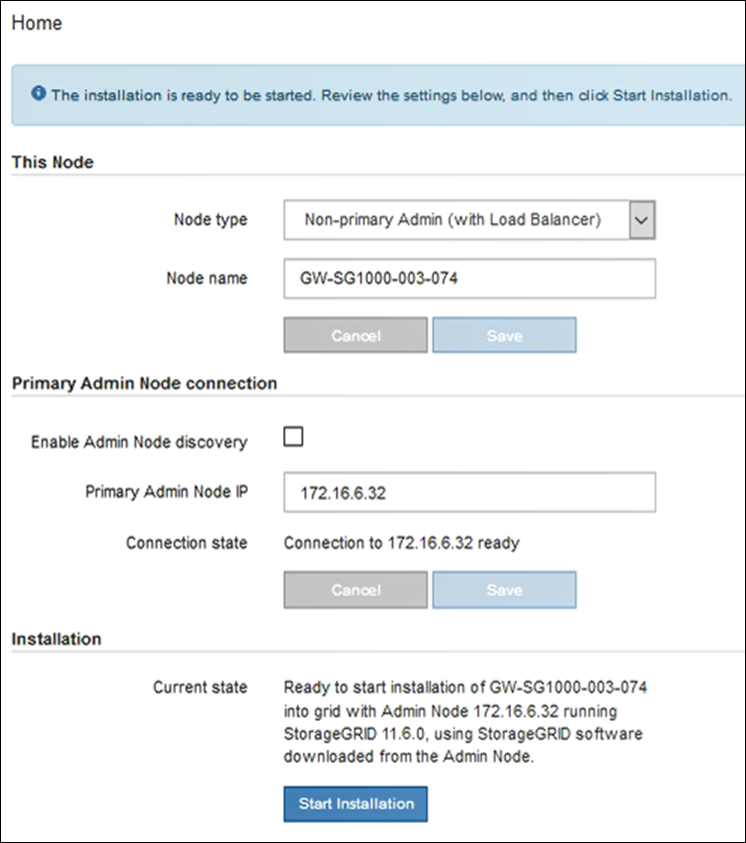
In the Primary Admin Node connection section, determine whether you need to specify the IP address for the primary Admin Node.
If you have previously installed other nodes in this data center, the StorageGRID Appliance Installer can discover this IP address automatically, assuming the primary Admin Node, or at least one other grid node with ADMIN_IP configured, is present on the same subnet.
-
If this IP address is not shown or you need to change it, specify the address:
Option Description Manual IP entry
-
Unselect the Enable Admin Node discovery check box.
-
Enter the IP address manually.
-
Click Save.
-
Wait for the connection state for the new IP address to become ready.
Automatic discovery of all connected primary Admin Nodes
-
Select the Enable Admin Node discovery check box.
-
Wait for the list of discovered IP addresses to be displayed.
-
Select the primary Admin Node for the grid where this appliance Storage Node will be deployed.
-
Click Save.
-
Wait for the connection state for the new IP address to become ready.
-
-
In the Node name field, enter the name you want to use for this appliance node, and click Save.
The node name is assigned to this appliance node in the StorageGRID system. It is shown on the Nodes page (Overview tab) in the Grid Manager. If required, you can change the name when you approve the node.
-
Optionally, to install a different version of the StorageGRID software, follow these steps:
-
Download the installation archive: NetApp Downloads: StorageGRID Appliance.
-
Extract the archive.
-
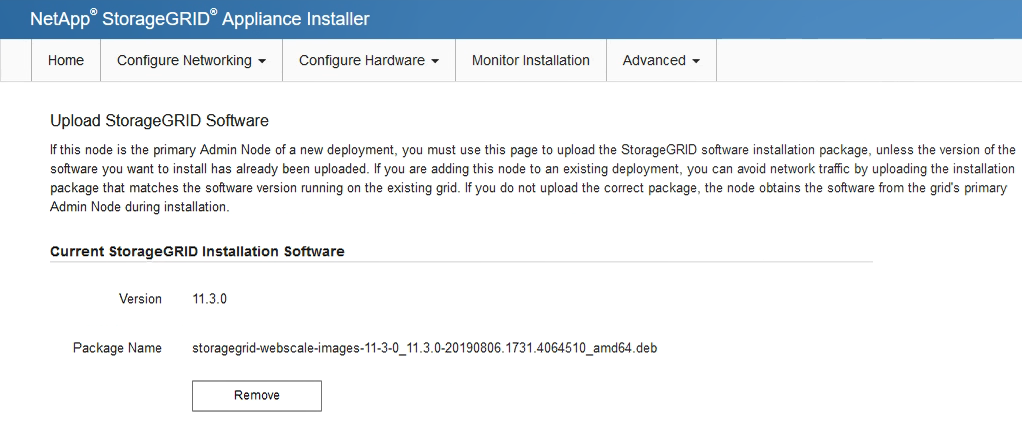
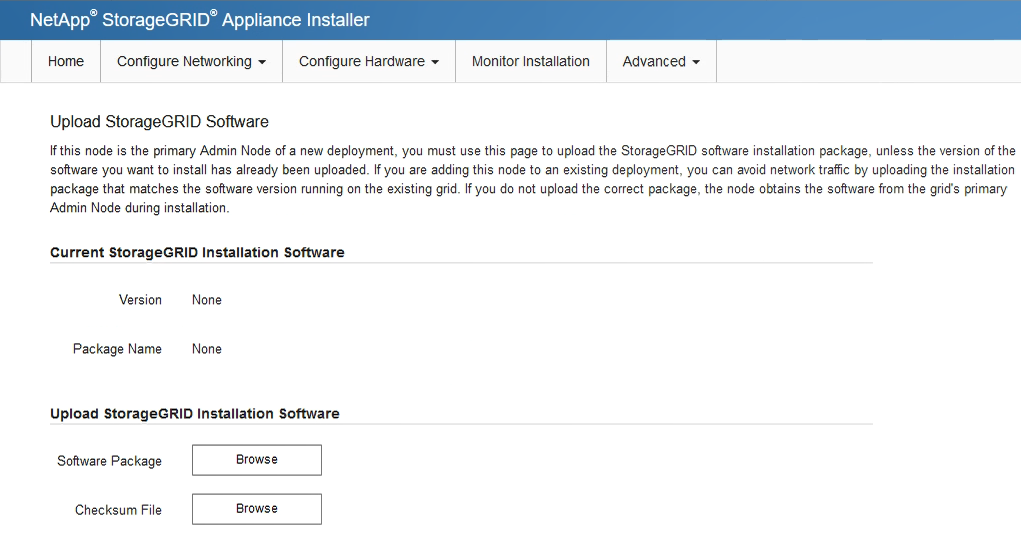
From the StorageGRID Appliance Installer, select Advanced > Upload StorageGRID Software.
-
Click Remove to remove the current software package.
-
Click Browse for the software package you downloaded and extracted, and then click Browse for the checksum file.
-
Select Home to return to the Home page.
-
-
In the Installation section, confirm that the current state is "Ready to start installation of
node nameinto grid with primary Admin Nodeadmin_ip" and that the Start Installation button is enabled.If the Start Installation button is not enabled, you might need to change the network configuration or port settings. For instructions, see the installation and maintenance instructions for your appliance.
-
From the StorageGRID Appliance Installer home page, click Start Installation.
The Current state changes to “Installation is in progress,” and the Monitor Installation page is displayed.
If you need to access the Monitor Installation page manually, click Monitor Installation from the menu bar. -
If your grid includes multiple appliance nodes, repeat the previous steps for each appliance.