Upgrade drive firmware using SANtricity System Manager
 Suggest changes


You upgrade your drive firmware to make sure you have all the latest features and bug fixes.
-
The storage appliance has an Optimal status.
-
All drives have an Optimal status.
-
You have the latest version of SANtricity System Manager installed that is compatible with your StorageGRID version.
-
You have placed the StorageGRID appliance in maintenance mode.
Maintenance mode interrupts the connection to the storage controller, stopping all I/O activity and placing all drives offline. Do not upgrade the drive firmware on more than one StorageGRID appliance at a time. Doing so might cause data unavailability, depending on your deployment model and ILM policies.
-
Confirm that the appliance is in maintenance mode.
-
Access SANtricity System Manager using one of these methods:
-
Use the StorageGRID Appliance Installer and select Advanced > SANtricity System Manager
-
Use SANtricity System Manager by browsing to the storage controller IP:
https://Storage_Controller_IP
-
-
Enter the SANtricity System Manager administrator username and password, if required.
-
Verify the drive firmware version currently installed in the storage appliance:
-
From SANtricity System Manager, select SUPPORT > Upgrade Center.
-
Under Drive Firmware upgrade, select Begin Upgrade.
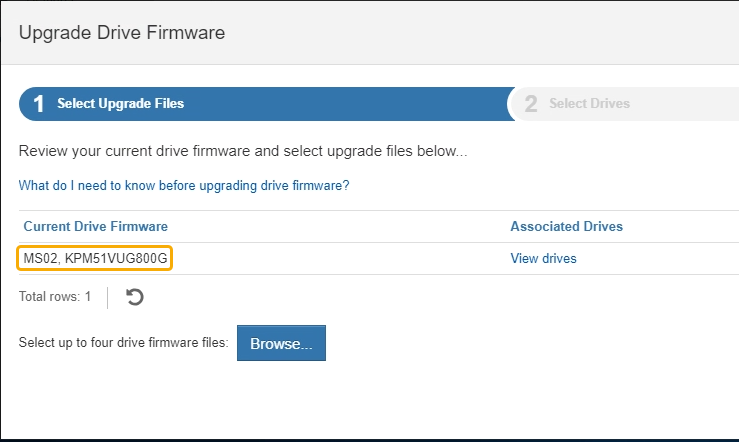
The Upgrade Drive Firmware displays the drive firmware files currently installed.
-
Note the current drive firmware revisions and drive identifiers in the Current Drive Firmware column.

In this example:
-
The drive firmware revision is MS02.
-
The drive identifier is KPM51VUG800G.
Select View drives in the Associated Drives column to display where these drives are installed in your storage appliance.
-
-
Close the Upgrade Drive Firmware window.
-
-
Download and prepare the available drive firmware upgrade:
-
Under Drive Firmware upgrade, select NetApp Support.
-
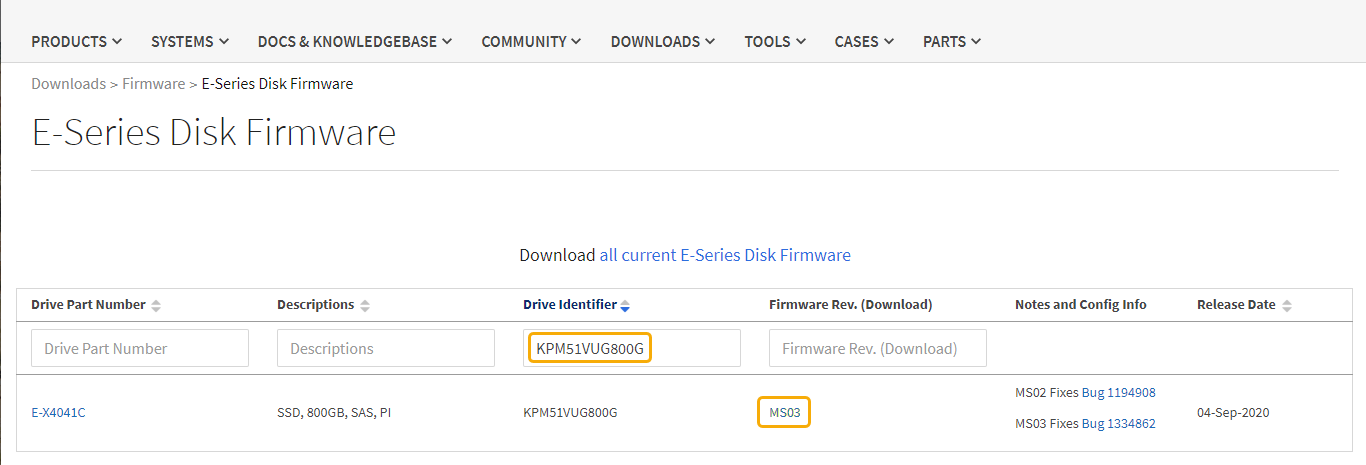
On the NetApp Support web site, select the Downloads tab, and then select E-Series Disk Drive Firmware.
The E-Series Disk Firmware page displays.
-
Search for each Drive Identifier installed in your storage appliance and verify that each drive identifier has the latest firmware revision.
-
If the firmware revision is not a link, this drive identifier has the latest firmware revision.
-
If one or more drive part numbers are listed for a drive identifier, a firmware upgrade is available for these drives. You can select any link to download the firmware file.

-
-
If a later firmware revision is listed, select the link in the Firmware Rev. (Download) column to download a
.ziparchive containing the firmware file. -
Extract (unzip) the drive firmware archive files you downloaded from the Support site.
-
-
Install the drive firmware upgrade:
-
From SANtricity System Manager, under Drive Firmware upgrade, select Begin Upgrade.
-
Select Browse, and select the new drive firmware files that you downloaded from the Support site.
Drive firmware files have a filename similar to +
D_HUC101212CSS600_30602291_MS01_2800_0002.dlpYou can select up to four drive firmware files, one at a time. If more than one drive firmware file is compatible with the same drive, you get a file conflict error. Decide which drive firmware file you want to use for the upgrade and remove the other one.
-
Select Next.
Select Drives lists the drives that you can upgrade with the selected firmware files.
Only drives that are compatible appear.
The selected firmware for the drive appears in Proposed Firmware. If you must change this firmware, select Back.
-
Select Offline (parallel) upgrade.
You can use the offline upgrade method because the appliance is in maintenance mode, where I/O activity is stopped for all drives and all volumes.
Do not proceed unless you are certain that the appliance is in maintenance mode. Failure to place the appliance into maintenance mode prior to initiating an offline drive firmware update might cause data loss. -
In the first column of the table, select the drive or drives you want to upgrade.
The best practice is to upgrade all drives of the same model to the same firmware revision.
-
Select Start, and confirm that you want to perform the upgrade.
If you need to stop the upgrade, select Stop. Any firmware downloads currently in progress complete. Any firmware downloads that have not started are canceled.
Stopping the drive firmware upgrade might result in data loss or unavailable drives. -
(Optional) To see a list of what was upgraded, select Save Log.
The log file is saved in the downloads folder for your browser with the name
latest-upgrade-log-timestamp.txt.If any of the following errors occur during the upgrade procedure, take the appropriate recommended action.
-
Failed assigned drives
One reason for the failure might be that the drive does not have the appropriate signature. Make sure that the affected drive is an authorized drive. Contact technical support for more information.
When replacing a drive, make sure that the replacement drive has a capacity equal to or greater than the failed drive you are replacing.
You can replace the failed drive while the storage array is receiving I/O.
-
Check storage array
-
Make sure that an IP address has been assigned to each controller.
-
Make sure that all cables connected to the controller are not damaged.
-
Make sure that all cables are tightly connected.
-
-
Integrated hot spare drives
This error condition must be corrected before you can upgrade the firmware.
-
Incomplete volume groups
If one or more volume groups or disk pools are incomplete, you must correct this error condition before you can upgrade the firmware.
-
Exclusive operations (other than background media/parity scan) currently running on any volume groups
If one or more exclusive operations are in progress, the operations must complete before the firmware can be upgraded. Use System Manager to monitor the progress of the operations.
-
Missing volumes
You must correct the missing volume condition before the firmware can be upgraded.
-
Either controller in a state other than Optimal
One of the storage array controllers needs attention. This condition must be corrected before the firmware can be upgraded.
-
Mismatched Storage Partition information between Controller Object Graphs
An error occurred while validating the data on the controllers. Contact technical support to resolve this issue.
-
SPM Verify Database Controller check fails
A storage partitions mapping database error occurred on a controller. Contact technical support to resolve this issue.
-
Configuration Database Validation (If supported by the storage array's controller version)
A configuration database error occurred on a controller. Contact technical support to resolve this issue.
-
MEL Related Checks
Contact technical support to resolve this issue.
-
More than 10 DDE Informational or Critical MEL events were reported in the last 7 days
Contact technical support to resolve this issue.
-
More than 2 Page 2C Critical MEL Events were reported in the last 7 days
Contact technical support to resolve this issue.
-
More than 2 Degraded Drive Channel Critical MEL events were reported in the last 7 days
Contact technical support to resolve this issue.
-
More than 4 critical MEL entries in the last 7 days
Contact technical support to resolve this issue.
-
-
-
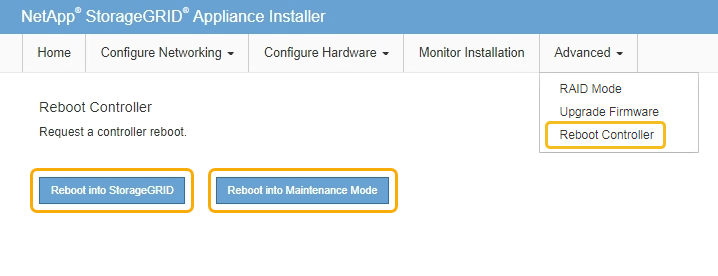
. If this procedure completed successfully and you have additional procedures to perform while the node is in maintenance mode, perform them now. When you are done, or if you experienced any failures and want to start over, select Advanced > Reboot Controller, and then select one of these options:
-
Select Reboot into StorageGRID
-
Select Reboot into Maintenance Mode to reboot the controller with the node remaining in maintenance mode. Select this option if you experienced any failures during the procedure and want to start over. After the node finishes rebooting into maintenance mode, restart from the appropriate step in the procedure that failed.

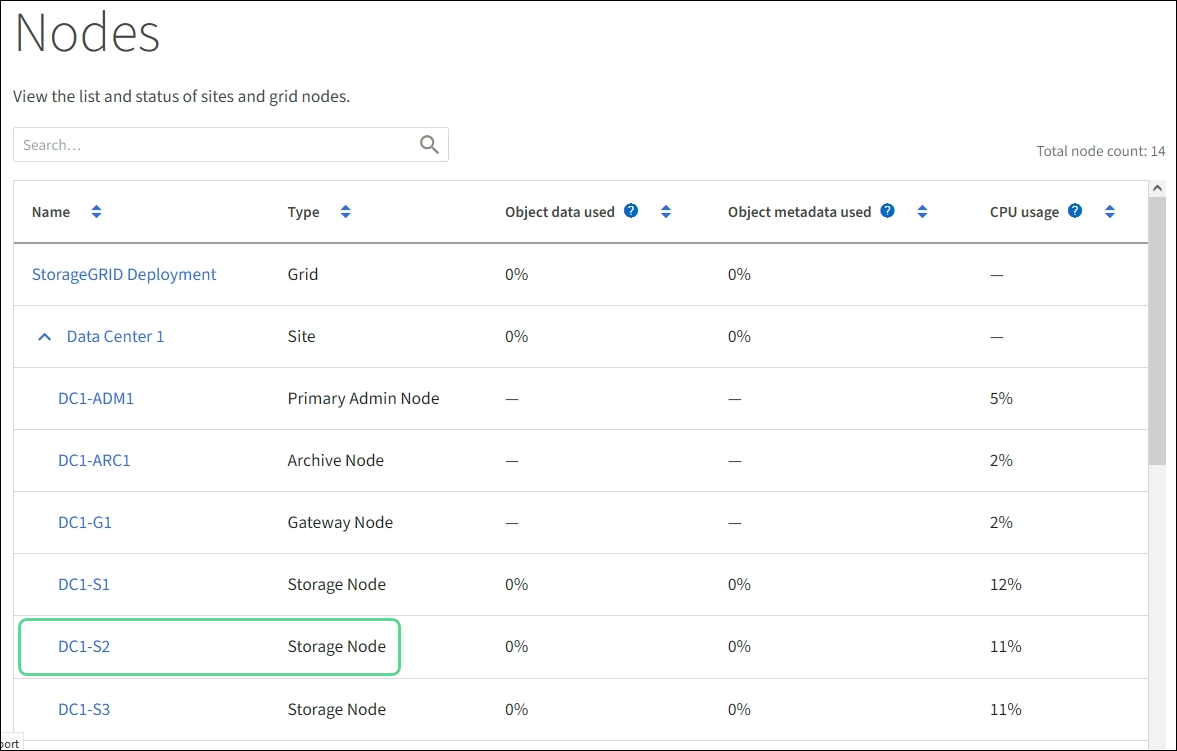
It can take up to 20 minutes for the appliance to reboot and rejoin the grid. To confirm that the reboot is complete and that the node has rejoined the grid, go back to the Grid Manager. The Nodes page should display a normal status (no icons to the left of the node name) for the appliance node, indicating that no alerts are active and the node is connected to the grid.

-


