

Access and complete the S3 setup wizard
 Suggest changes
You can use the S3 setup wizard to configure StorageGRID for use with an S3 application. The setup wizard provides the values the application needs to access a StorageGRID bucket and to save objects.
-
You have the Root access permission.
-
You have reviewed the considerations and requirements for using the wizard.
Access the wizard
-
Sign in to the Grid Manager using a supported web browser.
-
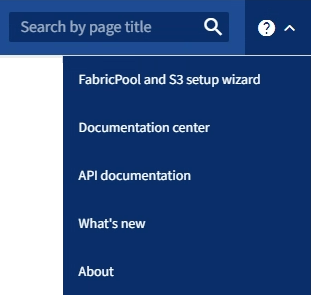
If the FabricPool and S3 setup wizard banner appears on the dashboard, select the link in the banner. If the banner no longer appears, select the help icon from the header bar in the Grid Manager and select FabricPool and S3 setup wizard.
-
In the S3 application section of the FabricPool and S3 setup wizard page, select Configure now.
Step 1 of 6: Configure HA group
An HA group is a collection of nodes that each contain the StorageGRID Load Balancer service. An HA group can contain Gateway Nodes, Admin Nodes, or both.
You can use an HA group to help keep the S3 data connections available. If the active interface in the HA group fails, a backup interface can manage the workload with little impact to S3 operations.
For details about this task, see Manage high availability groups.
-
If you plan to use an external load balancer, you don't need to create an HA group. Select Skip this step and go to Step 2 of 6: Configure load balancer endpoint.
-
To use the StorageGRID load balancer, you can create a new HA group or use an existing HA group.
Create HA group-
To create a new HA group, select Create HA group.
-
For the Enter details step, complete the following fields.
Field Description HA group name
A unique display name for this HA group.
Description (optional)
The description of this HA group.
-
For the Add interfaces step, select the node interfaces you want to use in this HA group.
Use the column headers to sort the rows, or enter a search term to locate interfaces more quickly.
You can select one or more nodes, but you can select only one interface for each node.
-
For the Prioritize interfaces step, determine the Primary interface and any backup interfaces for this HA group.
Drag rows to change the values in the Priority order column.
The first interface in the list is the Primary interface. The Primary interface is the active interface unless a failure occurs.
If the HA group includes more than one interface and the active interface fails, the virtual IP (VIP) addresses move to the first backup interface in the priority order. If that interface fails, the VIP addresses move to the next backup interface, and so on. When failures are resolved, the VIP addresses move back to the highest priority interface available.
-
For the Enter IP addresses step, complete the following fields.
Field Description Subnet CIDR
The address of the VIP subnet in CIDR notation — an IPv4 address followed by a slash and the subnet length (0-32).
The network address must not have any host bits set. For example,
192.16.0.0/22.Gateway IP address (optional)
If the S3 IP addresses used to access StorageGRID aren't on the same subnet as the StorageGRID VIP addresses, enter the StorageGRID VIP local gateway IP address. The local gateway IP address must be within the VIP subnet.
Virtual IP address
Enter at least one and no more than ten VIP addresses for the active interface in the HA group. All VIP addresses must be within the VIP subnet.
At least one address must be IPv4. Optionally, you can specify additional IPv4 and IPv6 addresses.
-
Select Create HA group and then select Finish to return to the S3 setup wizard.
-
Select Continue to go to the load balancer step.
Use existing HA group-
To use an existing HA group, select the HA group name from the Select an HA group.
-
Select Continue to go to the load balancer step.
-
Step 2 of 6: Configure load balancer endpoint
StorageGRID uses a load balancer to manage the workload from client applications. Load balancing maximizes speed and connection capacity across multiple Storage Nodes.
You can use the StorageGRID Load Balancer service, which exists on all Gateway and Admin Nodes, or you can connect to an external (third-party) load balancer. Using the StorageGRID load balancer is recommended.
For details about this task, see Considerations for load balancing.
To use the StorageGRID Load Balancer service, select the StorageGRID load balancer tab and then create or select the load balancer endpoint you want to use. To use an external load balancer, select the External load balancer tab and provide details about the system you have already configured.
-
To create a load balancer endpoint, select Create endpoint.
-
For the Enter endpoint details step, complete the following fields.
Field Description Name
A descriptive name for the endpoint.
Port
The StorageGRID port you want to use for load balancing. This field defaults to 10433 for the first endpoint you create, but you can enter any unused external port. If you enter 80 or 443, the endpoint is configured only on Gateway Nodes, because these ports are reserved on Admin Nodes.
Note: Ports used by other grid services aren't permitted. See the Network port reference.
Client type
Must be S3.
Network protocol
Select HTTPS.
Note: Communicating with StorageGRID without TLS encryption is supported but not recommended.
-
For the Select binding mode step, specify the binding mode. The binding mode controls how the endpoint is accessed—using any IP address or using specific IP addresses and network interfaces.
Option Description Global (default)
Clients can access the endpoint using the IP address of any Gateway Node or Admin Node, the virtual IP (VIP) address of any HA group on any network, or a corresponding FQDN.
Use the Global setting (default) unless you need to restrict the accessibility of this endpoint.
Virtual IPs of HA groups
Clients must use a virtual IP address (or corresponding FQDN) of an HA group to access this endpoint.
Endpoints with this binding mode can all use the same port number, as long as the HA groups you select for the endpoints don't overlap.
Node interfaces
Clients must use the IP addresses (or corresponding FQDNs) of selected node interfaces to access this endpoint.
Node type
Based on the type of node you select, clients must use either the IP address (or corresponding FQDN) of any Admin Node or the IP address (or corresponding FQDN) of any Gateway Node to access this endpoint.
-
For the Tenant access step, select one of the following:
Field Description Allow all tenants (default)
All tenant accounts can use this endpoint to access their buckets.
Allow selected tenants
Only the selected tenant accounts can use this endpoint to access their buckets.
Block selected tenants
The selected tenant accounts can't use this endpoint to access their buckets. All other tenants can use this endpoint.
-
For the Attach certificate step, select one of the following:
Field Description Upload certificate (recommended)
Use this option to upload a CA-signed server certificate, certificate private key, and optional CA bundle.
Generate certificate
Use this option to generate a self-signed certificate. See Configure load balancer endpoints for details of what to enter.
Use StorageGRID S3 and Swift certificate
Use this option only if you have already uploaded or generated a custom version of the StorageGRID global certificate. See Configure S3 and Swift API certificates for details.
-
Select Finish to return to the S3 setup wizard.
-
Select Continue to go to the tenant and bucket step.

|
Changes to an endpoint certificate can take up to 15 minutes to be applied to all nodes. |
-
To use an existing endpoint, select its name from the Select a load balancer endpoint.
-
Select Continue to go to the tenant and bucket step.
-
To use an external load balancer, complete the following fields.
Field Description FQDN
The fully qualified domain name (FQDN) of the external load balancer.
Port
The port number that the S3 application will use to connect to the external load balancer.
Certificate
Copy the server certificate for the external load balancer and paste it into this field.
-
Select Continue to go to the tenant and bucket step.
Step 3 of 6: Create tenant and bucket
A tenant is an entity that can use S3 applications to store and retrieve objects in StorageGRID. Each tenant has its own users, access keys, buckets, objects, and a specific set of capabilities. You must create the tenant before you can create the bucket that the S3 application will use to store its objects.
A bucket is a container used to store a tenant's objects and object metadata. Although some tenants might have many buckets, the wizard helps you to create a tenant and a bucket in the quickest and easiest way. You can use the Tenant Manager later to add any additional buckets you need.
You can create a new tenant for this S3 application to use. Optionally, you can also create a bucket for the new tenant. Finally, you can allow the wizard to create the S3 access keys for the tenant's root user.
For details about this task, see Create tenant account and Create S3 bucket.
-
Select Create tenant.
-
For the Enter details steps, enter the following information.
Field Description Name
A name for the tenant account. Tenant names don't need to be unique. When the tenant account is created, it receives a unique, numeric account ID.
Description (optional)
A description to help identify the tenant.
Client type
The type of client protocol this tenant will use. For the S3 setup wizard, S3 is selected and the field is disabled.
Storage quota (optional)
If you want this tenant to have a storage quota, a numerical value for the quota and the units.
-
Select Continue.
-
Optionally, select any permissions you want this tenant to have.
Some of these permissions have additional requirements. For details, select the help icon for each permission. Permission If selected… Allow platform services
The tenant can use S3 platform services such as CloudMirror. See Manage platform services for S3 tenant accounts.
Use own identity source
The tenant can configure and manage its own identity source for federated groups and users. This option is disabled if you have configured SSO for your StorageGRID system.
Allow S3 Select
The tenant can issue S3 SelectObjectContent API requests to filter and retrieve object data. See Manage S3 Select for tenant accounts.
Important: SelectObjectContent requests can decrease load-balancer performance for all S3 clients and all tenants. Enable this feature only when required and only for trusted tenants.
Use grid federation connection
The tenant can use a grid federation connection.
Selecting this option:
-
Causes this tenant and all tenant groups and users added to the account to be cloned from this grid (the source grid) to the other grid in the selected connection (the destination grid).
-
Allows this tenant to configure cross-grid replication between corresponding buckets on each grid.
Note: You can only select Use grid federation connection when you are creating a new S3 tenant; you can't select this permission for an existing tenant.
-
-
If you selected Use grid federation connection, select one of the available grid federation connections.
-
Define root access for the tenant account, based on whether your StorageGRID system uses identity federation, single sign-on (SSO), or both.
Option Do this If identity federation is not enabled
Specify the password to use when signing into the tenant as the local root user.
If identity federation is enabled
-
Select an existing federated group to have Root access permission for the tenant.
-
Optionally, specify the password to use when signing in to the tenant as the local root user.
If both identity federation and single sign-on (SSO) are enabled
Select an existing federated group to have Root access permission for the tenant. No local users can sign in.
-
-
If you want the wizard to create the access key ID and secret access key for the root user, select Create root user S3 access key automatically.

Select this option if the only user for the tenant will be the root user. If other users will use this tenant, use Tenant Manager to configure keys and permissions. -
Select Continue.
-
For the Create bucket step, optionally create a bucket for the tenant's objects. Otherwise, select Create tenant without bucket to go to the download data step.
If S3 Object Lock is enabled for the grid, the bucket created in this step doesn't have S3 Object Lock enabled. If you need to use an S3 Object Lock bucket for this S3 application, select Create tenant without bucket. Then, use Tenant Manager to create the bucket instead. -
Enter the name of the bucket that the S3 application will use. For example,
S3-bucket.
You can't change the bucket name after creating the bucket. -
Select the Region for this bucket.
Use the default region (us-east-1) unless you expect to use ILM in the future to filter objects based on the bucket's region.
-
Select Enable object versioning if you want to store each version of each object in this bucket.
-
Select Create tenant and bucket and go to the download data step.
-
Step 4 of 6: Download data
In the download data step, you can download one or two files to save the details of what you just configured.
-
If you selected Create root user S3 access key automatically, do one or both of the following:
-
Select Download access keys to download a
.csvfile containing the tenant account name, access key ID, and secret access key. -
Select the copy icon (
 ) to copy the access key ID and secret access key to the clipboard.
-
-
Select Download configuration values to download a
.txtfile containing the settings for the load balancer endpoint, tenant, bucket, and the root user. -
Save this information to a secure location.

Don't close this page until you have copied both access keys. The keys will not be available after you close this page. Make sure to save this information in a secure location because it can be used to obtain data from your StorageGRID system. -
If prompted, select the checkbox to confirm that you have downloaded or copied the keys.
-
Select Continue to go to the ILM rule and policy step.
Step 5 of 6: Review ILM rule and ILM policy for S3
Information lifecycle management (ILM) rules control the placement, duration, and ingest behavior of all objects in your StorageGRID system. The ILM policy included with StorageGRID makes two replicated copies of all objects. This policy is in effect until you create a new proposed policy and activate it.
-
Review the information provided on the page.
-
If you want to add specific instructions for the objects belonging to the new tenant or bucket, create a new rule and a new policy. See Create ILM rule and Create ILM policy: Overview.
-
Select I have reviewed these steps and understand what I need to do.
-
Select the checkbox to indicate that you understand what to do next.
-
Select Continue to go to Summary.
Step 6 of 6: Review summary
-
Review the summary.
-
Make note of the details in the next steps, which describe the additional configuration that might be needed before you connect to the S3 client. For example, selecting Sign in as root takes you to the Tenant Manager, where you can add tenant users, create additional buckets, and update bucket settings.
-
Select Finish.
-
Configure the application using the file you downloaded from StorageGRID or the values you obtained manually.